
You're about to create a space bowling game — presumably your first game in canvas, and perhaps your first game ever. The concept is to tie together the skills that you've picked up from previous chapters to create something that is simple to play, yet fun and addictive at the same time.
I must stress that the focus of this book, particularly within this chapter and the next, is to teach you the fundamental skills required to produce animations and interactive games with canvas. This means that the games this book have been deliberately made to look simplistic. The reason for this is to prevent things from getting overly complicated; there's no reason to spend ages designing an object when you've come to learn how to animate and code it. The beauty of canvas, and the game that you're about to create, is that it's very easy to change things. For example, there is nothing to stop you coming up with a much prettier way of drawing asteroids, and replacing the code in the book with your own. In fact, I would love it if you did that!
You can find all of the code for this chapter available for download on this book's page on the friends of ED website (www.friendsofed.com). You will also find downloads for all the code from the other chapters. It's usefull for checking against your own code to make sure that you're doing things right. Although I recommend typing all the code out by hand, rather than copying and pasting from the downloaded code. You'll learn it better that way.
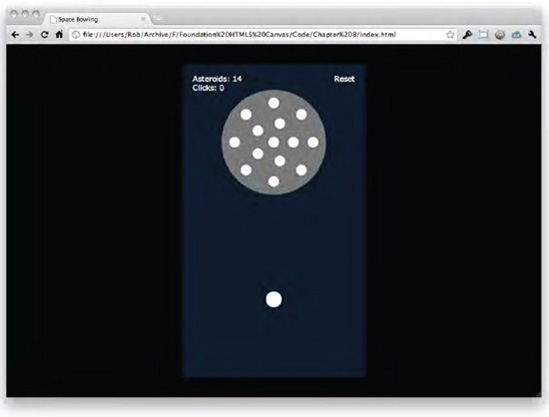
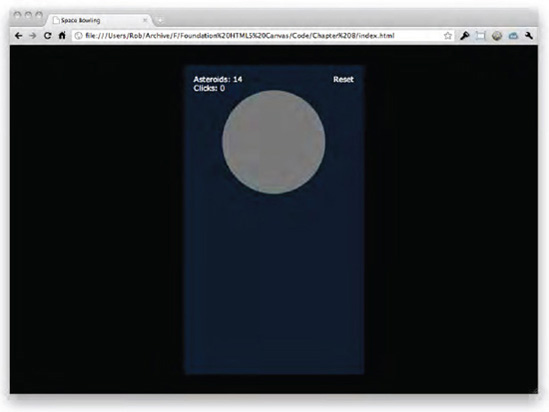
The space bowling game consists of a set of stationary asteroids positioned on top of a circular platform, with another bigger asteroid placed further away, acting as a ball that the player can throw (see Figure 8-1). The idea of the game is to throw this bigger asteroid toward the other asteroids, and to knock as many of them off of the platform as possible. You win the game by knocking every asteroid off of the platform, with the score being based on how many attempts (clicks) it took you to knock the asteroids off. It's deviously simple and addictive, probably because it's based on games that have been around for years — ten pin bowling, and marbles.
Creating this game will require many of the skills you've picked up throughout the book. You'll be using everything you learned about JavaScript, drawing in canvas, animation, and physics. You'll even use a few techniques that haven't been touched on in detail, like constructing a user interface, and using mouse input to control objects drawn on the canvas. This is where you'll really start to see the power that results from combining everything that you've studied up to this point.
I';m sure that you're itching to get started, so let's crack on!
Before you can get on to the cool stuff, the foundations need to be laid down. In the case of the space bowling game, this is the basic HTML, CSS, and JavaScript code that underpins the more advanced code that you'll add later.
The beauty of creating games in the browser is that you're using technologies that are commonly used for making web sites. This means that the user interface (UI) for the game can be created using HTML. It won't look pretty at the moment, as there is no CSS to style it, but it's the raw structure of the content that matters right now.
Create a new directory on your computer for the game, and insert the following code into a file called index.html:
<!DOCTYPE html>

<html>
        <head>
                <title>Space Bowling</title>
                <meta charset="utf-8">

                <link href="game.css" rel="stylesheet" type="text/css">

                <script type="text/javascript"
src="http://ajax.googleapis.com/ajax/libs/
jquery/1/jquery.min.js"></script>
                <script type="text/javascript" src="game.js"></script>
        </head>

        <body>
                <div id="game">
                        <div id="gameUI">
                                <div id="gameIntro">
                                        <h1>Space bowling</h1>
                                        <p>This is an awesome game.</p>
                                        <p><a id="gamePlay" class="button" href="">
Play</a></p>
                                </div>
                                <div id="gameStats">
                                        <p>Asteroids: <span id="gameRemaining"></span></p>
                                        <p>Clicks: <span class="gameScore"></span></p>
                                        <p><a class="gameReset" href="">Reset</a></p>
                                </div>
                                <div id="gameComplete">
                                        <h1>You win!</h1>
                                        <p>Congratulations, you completed the game in <span
 class="gameScore"></span> clicks.</p>
                                        <p><a class="gameReset button" href="">Play
 again</a></p>
                                </div>
                        </div>
                        <canvas id="gameCanvas" width="350" height="600">
                                <!-- Insert fallback content here -->
jquery/1/jquery.min.js"></script>
<script type="text/javascript" src="game.js"></script>
</head>
<body>
<div id="game">
<div id="gameUI">
<div id="gameIntro">
<h1>Space bowling</h1>
<p>This is an awesome game.</p>
<p><a id="gamePlay" class="button" href="">
Play</a></p>
</div>
<div id="gameStats">
<p>Asteroids: <span id="gameRemaining"></span></p>
<p>Clicks: <span class="gameScore"></span></p>
<p><a class="gameReset" href="">Reset</a></p>
</div>
<div id="gameComplete">
<h1>You win!</h1>
<p>Congratulations, you completed the game in <span
class="gameScore"></span> clicks.</p>
<p><a class="gameReset button" href="">Play
again</a></p>
</div>
</div>
<canvas id="gameCanvas" width="350" height="600">
<!-- Insert fallback content here --></canvas>
</div>
</body>
</html>I';m not going to spend much time explaining all this, as it's relatively simple HTML, but the general idea is that this is everything you need to mark up your game.
Within the head element, you have the code that imports the CSS and JavaScript for the game. And within the body element, you have all the code that describes the game UI and the canvas.
The game UI has been split into separate elements to make it easier to interact with and toggle the visibility of certain areas by using JavaScript. For example, the three main areas of the UI are the introduction screen, the statistics screen, and the game complete screen. In the final game, only one of these areas will be displayed at a single point in time; the intro screen at the beginning, the statistics screen during the gameplay, and the complete screen when the game is finished.
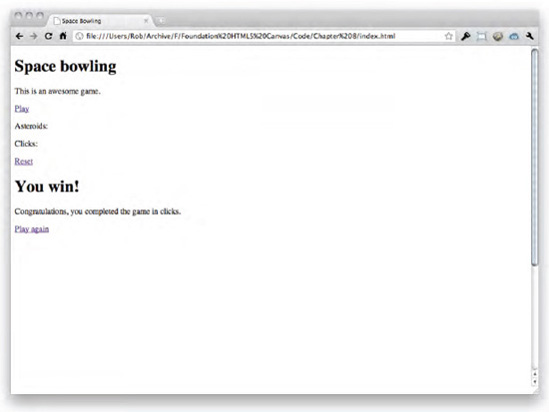
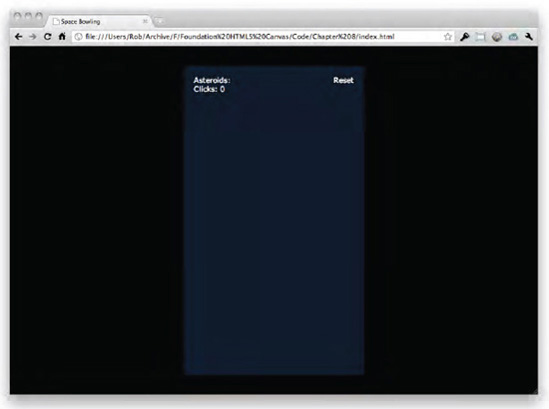
As it stands, the game looks incredibly unexciting, as you can see in Figure 8-2. All you can see at the moment is the raw content for the UI, including the links that we're going to turn into beautiful buttons, and the placeholder text for statistics about the game while it's being played. The canvas element is actually on the page, but it's seemingly invisible at the moment. If you look closely, you'll notice the scroll bar on the right, which indicates that the canvas element is actually there.
Now that the HTML is sorted out, it's time to put together some CSS to get everything to look more game-like. The CSS that you're going to use is straightforward, but I'll run through it briefly to explain what's happening.
Create a new document called game.css and place it in the same directory as the HTML file. Insert the following code into the CSS file:
* { margin: 0; padding: 0; }
html, body { height: 100%; width: 100%; }
canvas { display: block; }

body {
        background: #000;
        color: #fff;
        font-family: Verdana, Arial, sans-serif;
        font-size: 18px;
}

h1 {
        font-size: 30px;
}

p {
        margin: 0 20px;
}

a {
        color: #fff;
        text-decoration: none;
}

a:hover {
        text-decoration: underline;
}

a.button {
        background: #185da8;
        border-radius: 5px;
        display: block;
        font-size: 30px;
margin: 40px 0 0 45px;
padding: 10px;
width: 200px;
}
a.button:hover {
background: #2488f5;
color: #fff;
text-decoration: none;
}
#game {
height: 600px;
left: 50%;
margin: −300px 0 0 −175px;
position: relative;
top: 50%;
width: 350px;
}
#gameCanvas {
background: #001022;
}
#gameUI {
height: 600px;
position: absolute; /* Places UI on top of the canvas */
width: 350px;
}
#gameIntro, #gameComplete {
background: rgba(0, 0, 0, 0.5);
margin-top: 100px;
padding: 40px 0;
text-align: center;
}
#gameStats {
font-size: 14px;
margin: 20px 0;
}
#gameStats .gameReset {
margin: 20px 20px 0 0;
position: absolute;
right: 0;
top: 0;
}The first three lines of CSS reset the styling, and set up the HTML document to fit the dimensions of the browser window. Following that are five rules (body, h1, p, a, and a:hover) that are being used to define the background color of the document, as well as the default styling for text and links within the game. The next two rules (a.button and a.button:hover) are used to style the buttons within the game, which you'll see in a moment. You'll notice from the HTML document that you're using classes to define links that are buttons, as it's more economical to use the same style for all the buttons.
All the game HTML code is contained within a single div element. The #game CSS rule is used to give this container specific dimensions, and to center everything within the browser window by using some nifty CSS position and margin tactics. Styling the canvas element is done via the #gameCanvas rule, but it's only changing the background color to a deep blue.
The UI is styled through a variety of CSS rules; #gameUI, #gameIntro, #gameComplete, #gameStats, and #gameStats .gameReset. Each one of these rules affects the styling of the individual UI elements in the HTML. For example, #gameUI uses an absolute position value to effectively move the UI over the top of the canvas element. The rest of the rules are effectively changing text styling, and performing minor positioning changes.
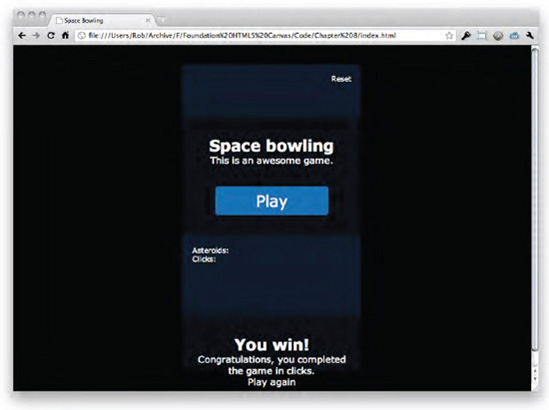
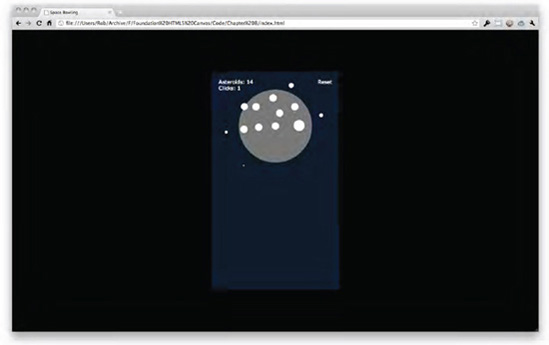
Together, the CSS allows the game to look a little prettier, although it's still not perfect (see Figure 8-3). Everything else will be sorted out within the JavaScript code.
Before you can crack on with the juicy game logic, you need to set up the core functionality of the JavaScript.
Create a new document called game.js and place it within the same directory as the HTML and CSS files. Insert the following code within it:
$(document).ready(function() {
        var canvas = $("#gameCanvas");
        var context = canvas.get(0).getContext("2d");

        // Canvas dimensions
        var canvasWidth = canvas.width();
        var canvasHeight = canvas.height();

        // Game settings
        var playGame;

        // Reset and start the game
        function startGame() {
                // Set up initial game settings
                playGame = false;

                // Start the animation loop
                animate();
        };

        // Initialize the game environment
        function init() {

        };

        // Animation loop that does all the fun stuff
        function animate() {
                // Clear
                context.clearRect(0, 0, canvasWidth, canvasHeight);

                if (playGame) {
                        // Run the animation loop again in 33 milliseconds
                        setTimeout(animate, 33);
                };
        };

        init();
});
None of this should be new to you, apart from the fact that you're using a few extra functions. The first four variables hold the canvas element for the game, access the 2d rendering context, and assign the dimensions of the canvas. The fifth variable, playGame, is declared, but won't have a value assigned to it until later on; it is used to decide whether to run the animation code.
The startGame function is a placeholder that is going to be used to reset and start the game when the player clicks on the "Play," "Reset," or "Play again" links in the UI. As it stands, the function simply sets the playGame variable to false, to prevent the animation from running for now. The function also calls the animate function, which runs a very basic 30 fps timeout, but nothing else yet. The last function is init, which is going to be used to do the entire initial set up of the game when it is loaded for the first time. Right now the function is empty, but it is being called right at the end of the JavaScript in preparation.
Now the core functionality is out of the way, let's move on to the juicy stuff!
As it stands, the game is pretty ugly, and the UI doesn't even do anything. Fortunately, fixing this and activating the UI is easy!
Insert the following code above the startGame function:
var ui = $("#gameUI");
var uiIntro = $("#gameIntro");
var uiStats = $("#gameStats");
var uiComplete = $("#gameComplete");
var uiPlay = $("#gamePlay");
var uiReset = $(".gameReset");
var uiRemaining = $("#gameRemaining");
var uiScore = $(".gameScore");
These are a whole bunch of variables related to the various UI HTML elements; you'll be using them for easy access further on. Right now, they're just shortcuts to the DOM elements for each part of the UI.
To tidy up the initial screen that you see at the moment (see Figure 8-3), you'll want to hide all the unnecessary UI elements and activate the buttons so that you can actually start the game and change screens. Insert the following code inside of the init function:
uiStats.hide();
uiComplete.hide();
uiPlay.click(function(e) {
e.preventDefault();
uiIntro.hide();
startGame();
});
uiReset.click(function(e) {
e.preventDefault();
uiComplete.hide();
startGame();
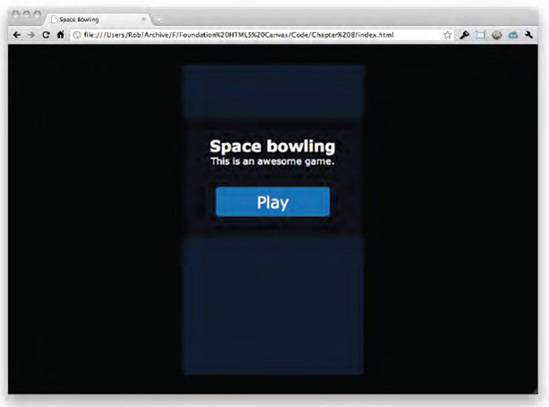
});The first two lines hide the statistics and complete screens of the UI, which instantly makes the game look prettier (see Figure 8-4). Following that are two click event listeners: one for the play button on the first screen and one for the reset buttons that are on the game screen and the screen when the game is finished. Both event listeners hide the relevant screen of the UI, and run the startGame function to kick-start the game.
You're going to want to show the statistics screen when the game is started, so insert the following code at the top of the startGame function:
uiScore.html("0");
uiStats.show();
The first line effectively resets the score display by setting it to the string "0". The second line makes sure that the statistics screen is displaying when the game is played (see Figure 8-5). You'll get on to setting the values of and changing other aspects of the UI as you get to them in the game.
Many games are defined by the objects that give them purpose; whether they are the blocks in Tetris, the pieces in chess, or even Mario in Super Mario. There aren't many computer games around that don't have objects of some sort. In the case of your space bowling game, there are two main objects: you have the asteroids (including the bigger player asteroid) and the platform that the asteroids sit on. It's quite amazing how simple a game can seem when you break it down into its core objects and components.
Particularly when you're going to have multiple objects within a game, it's a good idea to define them as JavaScript classes. This makes sure that they're all based on the same code, and that you can rely on them all to contain the same properties and methods. For your game, you're going to create a class for the asteroids, but not for the platform. This is because the platform is a completely unique object, which will only occur once in the game, so it's not necessary to use a class, which would allow you to create multiple platforms.
Before you can create the asteroids, you'll need to set up the round platform that they're going to sit on (refer to Figure 8-1). The platform is a circle, and is defined by a few specific variables, which you'll want to place below the playGame variable at the top:
var platformX;
var platformY;
var platformOuterRadius;
var platformInnerRadius;
These variables will hold the (x, y) origin of the platform, as well as the outer radius (the area of the platform as a whole), and the inner radius (the area the asteroids are actually placed within). As it stands, the platform variables don't have any values, so add the following code under the playGame variable in the startGame function:
platformX = canvasWidth/2;
platformY = 150;
platformOuterRadius = 100;
platformInnerRadius = 75;
This places the origin of the platform dead centre on the x axis, and 150 pixels from the top of the canvas on the y axis. The outer radius is set to 100 pixels (remember: radius is half the width of a circle), and the inner radius is set slightly smaller so there is some padding between the platform edge and where the asteroids are.
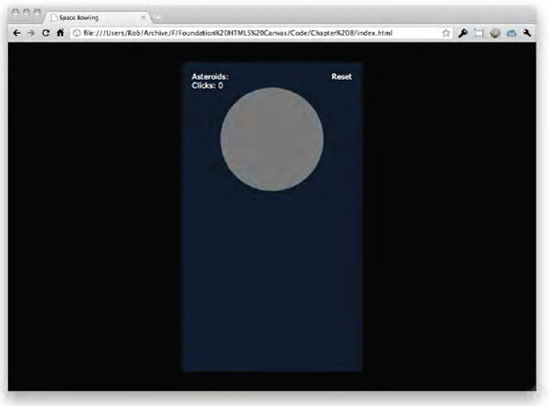
Finally, you want to draw the platform on the canvas, so add the following code underneath the call to clearRect in the animate function:
context.fillStyle = "rgb(100, 100, 100)";
context.beginPath();
context.arc(platformX, platformY, platformOuterRadius, 0, Math.PI*2, true);
context.closePath();
context.fill();
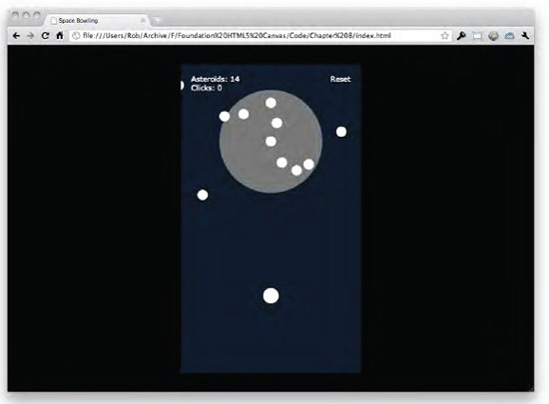
You can see the platform if you click on the play button on the game UI (see Figure 8-6). It's all very exciting.
The next thing to do is to set up the asteroids code and get them ready to be animated. The majority of the code you need is exactly the same as what you covered in the previous chapter, so I won't spend too much time on it.
You want to be able to remember all of the asteroids for animating and checking for collisions, so declare an asteroids variable under the platform variables at the top of the JavaScript:
var asteroids;
You'll be using this variable to store an array of all the asteroids within the game environment.
Having an array of asteroids is useless without asteroids, so the next step is to declare the asteroid class, which is based on the same class from the previous chapter. Add the following code above the startGame function:
var Asteroid = function(x, y, radius, mass, friction) {
        this.x = x;
        this.y = y;
        this.radius = radius;
        this.mass = mass;
        this.friction = friction;
this.vX = 0;
this.vY = 0;
this.player = false;
};It's important to note that there are a few differences to this class when compared to the one in the previous chapter. The most notable is the addition of the friction and player properties, which define the amount of friction that each asteroid experiences, and whether the asteroid is a larger player asteroid. As the majority of the asteroids won't be a larger player asteroid, the default value for player is false. You'll also notice that there are no acceleration properties; this is because you'll be using very simple motion within the game, and there is no need to accelerate anything. It will all make sense soon enough.
Before you create all the asteroids and place them on the platform, you'll need to set up the empty asteroids array, so add the following code below the platform variables in the startGame function:
asteroids = new Array();
You're using startGame to assign values to these variables because you want them to be fresh and overwritten each time the game is restarted by the player (through winning and playing again, or clicking on the reset link).
Creating all the asteroids in a nice neat set of rings (refer to Figure 8-1) takes a little bit of thinking about to get right. Add the following code below the asteroids variable in the startGame function:
var outerRing = 8; // Asteroids around outer ring
var ringCount = 3; // Number of rings
var ringSpacing = (platformInnerRadius/(ringCount-1)); // Distance between each ring

for (var r = 0; r < ringCount; r++) {
        var currentRing = 0; // Asteroids around current ring
        var angle = 0; // Angle between each asteroid
        var ringRadius = 0;

        // Is this the innermost ring?
        if (r == ringCount-1) {
                currentRing = 1;
        } else {
                currentRing = outerRing-(r*3);
                angle = 360/currentRing;
                ringRadius = platformInnerRadius-(ringSpacing*r);
        };
};
I've left in some of the comments, but let me run you through what's going on.
The first three variables declare the amount of asteroids that you want around the outer-most ring, the number of rings that you want, and the distance between each ring, respectively. You'll use these variables when calculating how many asteroids to draw on each ring.
Following those variables is the first loop, which cycles through each ring of asteroids that you want on the platform. Within each loop you set the currentRing variable to a default value of 0. This variable is used in the following conditional statement to store the number of asteroids that are to be placed on the current ring. You also set the angle and ringRadius variables to a default value of 0.
The conditional statement first checks to see whether you're on the last ring of asteroids (the central point) and, if so, sets the number of asteroids to 1. If you're not on the innermost ring, the number of asteroids is calculated by subtracting the number of asteroids around the outer ring by 3 multiplied by the loop number that you're on. It's a fairly arbitrary way of doing things, but it seems to work pretty well. Feel free to change this code if you can come up with a better way. The general concept is that you want the number of asteroids per ring to decrease as you get closer to the central point, otherwise you'll run out of space to put all the asteroids.
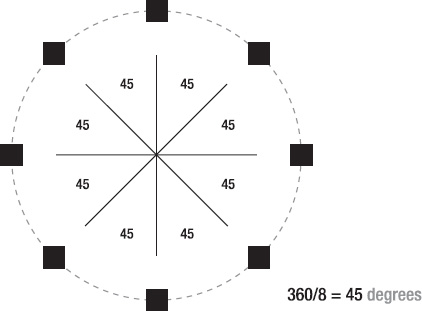
Once you have the number of asteroids in the current ring, you want to work out the angle that needs to be between each of them so they are equally spaced around the ring. This is done by dividing the total angle of a circle (360 degrees) by the amount of asteroids that are around the ring (see Figure 8-7). You're using degrees here to make it easy to understand in code, but you could quite easily (and probably should) use radians instead.
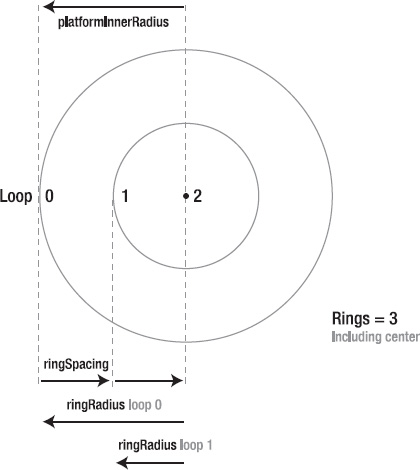
It's also important to calculate the radius of each ring, as you want them to be equally spaced. You can calculate the radius by using the platformInnerRadius variable that you defined earlier, and then subtracting from it the distance between each ring multiplied by the loop number that you're on. This results in each ring getting smaller and smaller, while keeping them equally spaced apart (see Figure 8-8).
You now have everything that you need to create all the asteroids, so the next step involves a second loop that goes through each asteroid in turn. Add the following code below the conditional statement; within the ring loop:
for (var a = 0; a < currentRing; a++) {
        var x = 0;
        var y = 0;

        // Is this the innermost ring?
        if (r == ringCount-1) {
                x = platformX;
                y = platformY;
        } else {
                x = platformX+(ringRadius*Math.cos((angle*a)*(Math.PI/180)));
                y = platformY+(ringRadius*Math.sin((angle*a)*(Math.PI/180)));
        };

        var radius = 10;
        var mass = 5;
        var friction = 0.95;
asteroids.push(new Asteroid(x, y, radius, mass, friction)); };
For each asteroid on the current ring, the loop calculates the position of that asteroid with a simple conditional statement. If you're on the innermost ring, then the asteroid needs to be in the centre of the platform, so you can set its (x, y) origin to that of the platform. Otherwise, the asteroid position is calculated by working out its position around the circumference of the current ring. It sounds crazy, but you've already used this code in the animating along a circle section in Chapter 6. The only difference is that instead of increasing the angle by 5, like you did in Chapter 6, you're basing the angle on the one you calculated just a moment ago; the angle needed between each asteroid to make them equally spaced around the ring.
Finally, the radius, mass, and friction of the asteroid is declared, and the asteroid is then added to the asteroids array that you created earlier. Sorted! You'll tackle how to display the asteroids when you animate them in the following section.
For now, there is one last object to create, and that is the player asteroid that is used to fling at the other asteroids. It's actually very similar to the other asteroids, but you need to create it separately because it needs to be treated slightly differently. The first thing to do is to set up the variables at the top of the JavaScript, so add the following below the declaration of the asteroids variable:
var player;
var playerOriginalX;
var playerOriginalY;
You want to use this player variable so you can access the player asteroid separately to the other asteroids within the game. The purpose of playerOriginalX and playerOriginalY will become clear shortly, but for now it's useful to know that these variables will hold the original starting position of the player asteroid.
The next step is to actually create the player asteroid, so add the following code below the asteroids variable in the startGame function:
var pRadius = 15;
var pMass = 10;
var pFriction = 0.97;
playerOriginalX = canvasWidth/2;
playerOriginalY = canvasHeight-150;
player = new Asteroid(playerOriginalX, playerOriginalY, pRadius, pMass, pFriction);
player.player = true;
asteroids.push(player);
It's all very simple really; you declare the radius (which is larger than the other asteroids), mass (again, larger than the others), friction, and original player position (bottom of the screen), then use that to create a new asteroid object. The difference here is that you assign the new asteroid object to the player variable, so you can access it again at a later stage. You use the player variable straight away to change the player property of the asteroid, as this is the player asteroid (as if it wasn't obvious enough already). Finally, you add the player asteroid to the asteroids array so you can use it in animation and collision detection in the next section.
The player asteroid will be drawn along with the others in the animate function, which you'll get on to shortly.
Now that you've set up all of the asteroids, you should probably update the UI to show the amount of asteroids remaining on the platform. Fortunately, this is as easy as adding one line of code, so insert the following after the loops that you just created:
uiRemaining.html(asteroids.length-1);
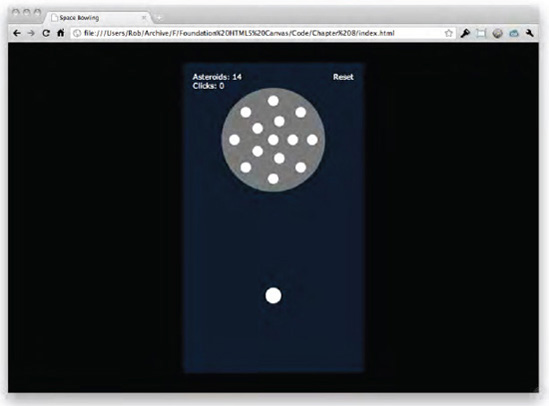
This updates the HTML element assigned to the uiRemaining variable with the number of asteroids in the asteroids array, minus one because you don't want to include the player asteroid (see Figure 8-9). It's dead simple, although I should probably point out that the asteroids aren't actually visible yet.
So far, you've set up all the core functionality for the game, but there are no asteroids or animation yet. It's hardly a game, so let's change that. What's really good is that you already know about everything that you're going to do in this section — it's old hat!
The first step is to set up the two loops that you used in the previous chapter for animation and collision detection of the asteroids. These loops will let the asteroids move and bounce off of each other, which is exactly how you're going to get them to fall off of the platform (by flinging the player asteroid at them).
Insert the following below the code that draws out the platform in the animate function:
context.fillStyle = "rgb(255, 255, 255)";

var asteroidsLength = asteroids.length;
for (var i = 0; i < asteroidsLength; i++) {
        var tmpAsteroid = asteroids[i];

        for (var j = i+1; j < asteroidsLength; j++) {
                var tmpAsteroidB = asteroids[j];

        };

        context.beginPath();
        context.arc(tmpAsteroid.x, tmpAsteroid.y, tmpAsteroid.radius, 0, Math.PI*2, true);
        context.closePath();
        context.fill();
};
There's nothing new here apart from setting the fillStyle property to white, as fillStyle was previously set to gray for the platform. If you check out the game in the browser and click play, you'll notice that the asteroids are now showing up (see Figure 8-10). It's starting to look ever so slightly like a game.
As it stands, there's no movement or animation going on. The first step toward achieving that is to add in the collision detection code from the previous chapter, so add the following below the tmpAsteroidB variable:
var dX = tmpAsteroidB.x - tmpAsteroid.x;
var dY = tmpAsteroidB.y - tmpAsteroid.y;
var distance = Math.sqrt((dX*dX)+(dY*dY));

if (distance < tmpAsteroid.radius + tmpAsteroidB.radius) {
        var angle = Math.atan2(dY, dX);
        var sine = Math.sin(angle);
        var cosine = Math.cos(angle);

        // Rotate asteroid position
        var x = 0;
        var y = 0;

        // Rotate asteroidB position
        var xB = dX * cosine + dY * sine;
        var yB = dY * cosine - dX * sine;

        // Rotate asteroid velocity
var vX = tmpAsteroid.vX * cosine + tmpAsteroid.vY * sine;
var vY = tmpAsteroid.vY * cosine - tmpAsteroid.vX * sine;
// Rotate asteroidB velocity
var vXb = tmpAsteroidB.vX * cosine + tmpAsteroidB.vY * sine;
var vYb = tmpAsteroidB.vY * cosine - tmpAsteroidB.vX * sine;
// Conserve momentum
var vTotal = vX - vXb;
vX = ((tmpAsteroid.mass - tmpAsteroidB.mass) * vX + 2 * tmpAsteroidB.mass *
vXb) /
(tmpAsteroid.mass + tmpAsteroidB.mass);
vXb = vTotal + vX;
// Move asteroids apart
xB = x + (tmpAsteroid.radius + tmpAsteroidB.radius);
// Rotate asteroid positions back
tmpAsteroid.x = tmpAsteroid.x + (x * cosine - y * sine);
tmpAsteroid.y = tmpAsteroid.y + (y * cosine + x * sine);
tmpAsteroidB.x = tmpAsteroid.x + (xB * cosine - yB * sine);
tmpAsteroidB.y = tmpAsteroid.y + (yB * cosine + xB * sine);
// Rotate asteroid velocities back
tmpAsteroid.vX = vX * cosine - vY * sine;
tmpAsteroid.vY = vY * cosine + vX * sine;
tmpAsteroidB.vX = vXb * cosine - vYb * sine;
tmpAsteroidB.vY = vYb * cosine + vXb * sine;
};It looks mental, but it's identical to the code from the previous chapter. A quick recap: what it's doing is checking each asteroid to see whether it is overlapping with (colliding with) another asteroid and, if so, changing the velocity of each asteroid so that they bounce apart realistically.
Even if the animation loop was running (which it isn't yet), nothing will move yet, as you haven't updated the position of each asteroid. To do that you'll want to add the position and friction code just before the code that draws each asteroid to the canvas:
// Calculate new position
tmpAsteroid.x += tmpAsteroid.vX;
tmpAsteroid.y += tmpAsteroid.vY;

// Friction
if (Math.abs(tmpAsteroid.vX) > 0.1) {
        tmpAsteroid.vX *= tmpAsteroid.friction;
} else {
        tmpAsteroid.vX = 0;
};
if (Math.abs(tmpAsteroid.vY) > 0.1) {
tmpAsteroid.vY *= tmpAsteroid.friction;
} else {
tmpAsteroid.vY = 0;
};Again, this is nothing new. What's happening here is that you're updating the position of each asteroid based on its velocity, and then applying a friction force that is taken into consideration on the next loop of the animation. If the velocity of the asteroid is below 0.1, then you automatically set the velocity to 0 to stop the asteroid from moving any further. This just stops the friction code from running forever.
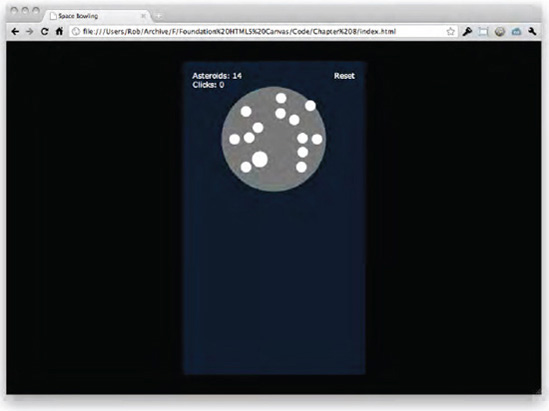
If you want to see this code at work, you could give the player asteroid a negative y velocity when you create it (perhaps something like −25), and also change the playGame value to true in the startGame function. What will happen is the player asteroid will fly toward the platform and knock the other asteroids into each other (see Figure 8-11). Cool! Just remember to remove the manually set velocity for the player asteroid, and to change playGame back to false once you're done; otherwise you'll run into problems later.
That's honestly all there is to it for the animation and collision detection side of things. You still can't win anything, and there is no scoring system, but you'll sort that out in a moment. For now, let's look at how to implement user interaction by detecting mouse input.
As I mentioned previously, the purpose of the game is to throw the player asteroid at the others, with the aim of knocking them off of the platform. In this section, you're going to look at how to detect mouse input and then work out how to use that mouse input to throw the player asteroid around in the game.
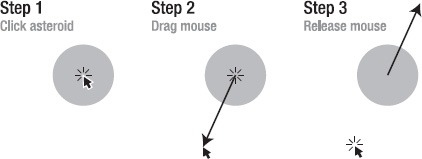
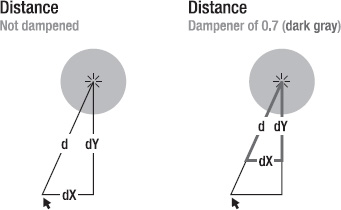
The player asteroid is thrown by pressing the left mouse button on it, and then dragging the mouse back behind the asteroid while still holding the mouse button down. When the mouse button is released, the resulting position of the mouse is used to calculate a velocity (further away from the player asteroid equals a bigger velocity) and angle for the player asteroid, making it fly off and hopefully knocking lots of asteroids off of the platform. Figure 8-12 should hopefully clear up the process a little bit.
Before you can start calculating mouse positions and velocities, you need to set up the event listeners for the mouse, and also all of the variables that you're going to need.
Add the following variable declarations underneath playerOriginalY at the top of the JavaScript file:
var playerSelected;
var playerMaxAbsVelocity;
var playerVelocityDampener;
var powerX;
var powerY;
Each variable has a specific purpose that will become clear shortly, but here is a quick description of them. The playerSelected variable will be used to hold a Boolean true or false value that lets you know whether the player asteroid is currently clicked on. Velocity settings for the player asteroid are held in playerMaxAbsVelocity (to limit how fast the player asteroid can travel) and playerVelocityDampener (to fine tune the velocity calculations). The (x, y) position kept in powerX and powerY is used for determining the velocity of the asteroid, and drawing a line on the canvas to visualize that velocity.
You'll want to set some default values for these variables, so set them up underneath the asteroids variable in the startGame function:
playerSelected = false;
playerMaxAbsVelocity = 30;
playerVelocityDampener = 0.3;
powerX = −1;
powerY = −1;
The velocity values are pretty arbitrary, while powerX, and powerY are set to specific values to effectively reset them (in case the player has already played the game). The two power position variables are set to −1 because it's a value that will never occur with mouse movement; you can't detect mouse movement outside of the element that you're tracking it on. You can't set them to 0 because it's possible that the player could move their mouse to the position (0, 0).
To set up the event listeners, add the following above the call to animate in the startGame function:
$(window).mousedown(function(e) {

});

$(window).mousemove(function(e) {

});

$(window).mouseup(function(e) {

});
There's quite obviously not much happening here, but these are the three main event listeners that you need to detect when the left mouse button is pressed down (mousedown), moved (mousemove), and when the mouse is released (mouseup).
Note
You're using the window object for the mouse even listeners and not the canvas element simply because you want to be able to detect movement outside of the visible canvas. If you only detected mouse input on the canvas, and the player moved the mouse outside of the canvas, the game would stop updating the position of the mouse, which can be very annoying for the player.
Most of the code that you're going to use to calculate the velocity based on the mouse input is taken from what you've already used when accessing pixel values in Chapter 5. The only difference is that there is some extra logic sprinkled on top.
Add the following code within the mousedown event listener, and I'll explain what it does:
if (!playerSelected && player.x == playerOriginalX && player.y == playerOriginalY) {
        var canvasOffset = canvas.offset();
        var canvasX = Math.floor(e.pageX-canvasOffset.left);
        var canvasY = Math.floor(e.pageY-canvasOffset.top);

        if (!playGame) {
                playGame = true;
                animate();
        };

        var dX = player.x-canvasX;
        var dY = player.y-canvasY;
        var distance = Math.sqrt((dX*dX)+(dY*dY));
        var padding = 5;

        if (distance < player.radius+padding) {
                powerX = player.x;
                powerY = player.y;
                playerSelected = true;
        };
};
The conditional statement is used to only allow the code to run when the player asteroid isn't already selected, and the player asteroid is in its original starting position. This prevents the player from throwing the asteroid a second time, while it's still moving from the first throw.
Working out the relative position of the player's mouse on the canvas is calculated using the same code from the section on accessing pixel values in Chapter 5; you can see how it works in Figure 5-15.
Within the first conditional statement, there is another conditional statement that checks to see whether the game is currently playing (and animating) and, if not, starts the game and sets the animation loop running. This means that you won't be wasting precious resources animating the game when nothing is moving on the screen.
The last set of code works out the distance between the player asteroid and the mouse. If the distance is less than the radius of the player asteroid, then it's safe to assume that the player has clicked on it — practically the same method as used for collision detection. The padding is used to make it harder to miss the asteroid, and can be increased if you want to make it even easier to click on. When it's known that the player has clicked on the asteroid, you then set powerX and powerY to that of the origin of the player asteroid (to zero the velocity, which you'll calculate later), and set the playerSelected variable to true, to let other areas of the game know that the asteroid has been selected.
The player can change the power and angle of the asteroid's velocity by moving the mouse after clicking on it. The majority of the code to achieve this is very similar to that of the mousedown event listener that you just created.
Add the following code within the mousemove event listener:
if (playerSelected) {
        var canvasOffset = canvas.offset();
        var canvasX = Math.floor(e.pageX-canvasOffset.left);
        var canvasY = Math.floor(e.pageY-canvasOffset.top);

        var dX = canvasX-player.x;
        var dY = canvasY-player.y;
        var distance = Math.sqrt((dX*dX)+(dY*dY));

        if (distance*playerVelocityDampener < playerMaxAbsVelocity) {
                powerX = canvasX;
                powerY = canvasY;
        } else {
                var ratio = playerMaxAbsVelocity/(distance*playerVelocityDampener);
                powerX = player.x+(dX*ratio);
                powerY = player.y+(dY*ratio);
        };
};
The first thing that you'll notice is the conditional statement that checks for playerSelected to be true. This means that the following code will only run when you know that the player has clicked on the asteroid and is currently in the process of dragging the mouse afterward.
Within the conditional statement are three lines of code that work out the relative position of the mouse on the canvas.
Like with the mousedown event listener, you then work out the distance that the mouse is away from the origin of the player asteroid. In this case, you want to use it to work out how powerful to make the velocity (its magnitude). To do that you first need to dampen the distance value by using the playerVelocityDampener variable from earlier (see Figure 8-13). This allows the player to drag quite far (to visually see the power line that you'll be drawing later), but reduces the resulting velocity to something more realistic.
If the resulting dampened value is lower than the maximum velocity magnitude set in playerMaxAbsVelocity, then it's safe to set the powerX and powerY values to the (x, y) position of the mouse on the canvas. Otherwise, the velocity magnitude is beyond the maximum allowed, so you need to reduce it to the maximum, while still keeping the correct angle. You can achieve this by calculating the ratio between the maximum velocity magnitude, and the current velocity magnitude (distance), then using that to shrink the dX and dY values (the distance on each axis between the mouse and the player asteroid), and adding that to the (x, y) origin of the asteroid.
You now have all the pieces needed to complete the velocity puzzle. All that's left now is to use the powerX and powerY values to calculate the final velocity and apply it to the player asteroid. Simple.
Add the following code to the mouseup event listener:
if (playerSelected) {
        var dX = powerX-player.x;
        var dY = powerY-player.y;

        player.vX = -(dX*playerVelocityDampener);
        player.vY = -(dY*playerVelocityDampener);
};

playerSelected = false;
powerX = −1;
powerY = −1;
This is much simpler than the code in the other mouse event listeners. All you're doing here is working out the distance between the power position and the player asteroid (to convert from a coordinate position to a velocity), then using that to apply a negative velocity on the player asteroid, affected by the velocity dampener. You want to use a negative velocity because you want the asteroid to go in the opposite direction to where you're dragging, like how a catapult works (see Figure 8-12).
The last thing to do is to set playerSelected as false, because the asteroid is not selected any longer, and reset the powerX and powerY coordinate values.
Everything up to this point will now work, but it's not very user-friendly. In fact, the player will have no idea about how much velocity they're giving the asteroid and at what angle it's going to travel. To do that you want to indicate the velocity using a simple line.
Add the following code after drawing the platform in the animate function:
if (playerSelected) {
        context.strokeStyle = "rgb(255, 255, 255)";
        context.lineWidth = 3;
        context.beginPath();
        context.moveTo(player.x, player.y);
context.lineTo(powerX, powerY);
context.closePath();
context.stroke();
};This effectively draws a line from the player asteroid to the position of the velocity (or at least the visual representation of the velocity). The line is only drawn when the player asteroid is selected because of the conditional statement checking for playerSelected to be true. You can see how communication between various functions and areas of the game code allows for some pretty cool stuff to happen.
Refresh the game in the browser and you'll now have a fully interactive game that lets you fling the player asteroid wherever you want. You won't be able to rack up a score yet, but give it a go and knock the asteroids off of the platform. It's fun!
As it stands, you can only fling the player asteroid once, and the asteroid can disappear off of the edge of the canvas. That's not fun, so let's sort that out by resetting the state of play after each throw and implementing some boundary detection on the player asteroid.
To reset the state of play after each throw you need to move the player asteroid back to the start position, and reset it's velocity to 0, so that it doesn't move until the player clicks on it again. You'll be resetting the player in a few places, so it's useful to wrap it all up in one function.
Add the following code before the startGame function:
function resetPlayer() {
        player.x = playerOriginalX;
        player.y = playerOriginalY;
        player.vX = 0;
        player.vY = 0;
};
There's not much to explain here really, it's just the code version of what I described previously — you reset the position, and set the velocity to 0.
The only time you want to reset the player asteroid is when it leaves the visible canvas, or when it stops moving after being thrown. Fortunately, now that you have the reset code tucked away within a function, you can achieve this by adding the following code above where each asteroid is drawn in the animate function:
if (player.x != playerOriginalX && player.y != playerOriginalY) {
        if (player.vX == 0 && player.vY == 0) {
                resetPlayer();
        } else if (player.x+player.radius < 0) {
                       resetPlayer();
        } else if (player.x-player.radius > canvasWidth) {
                       resetPlayer();
        } else if (player.y+player.radius < 0) {
resetPlayer();
} else if (player.y-player.radius > canvasHeight) {
resetPlayer();
};
};This set of conditional statements first checks to see whether the player asteroid has actually moved from its original position, by checking to see whether the original position and current position are different. If the asteroid has moved, then a further set of conditional statements is used to perform a variety of checks. The first checks to see whether the asteroid velocity has reduced to 0, and therefore the asteroid has stopped moving. The others check to see whether the asteroid has moved beyond the boundaries of the canvas. If any of the checks turn up true, then the player asteroid is reset so the player can take another throw.
Note
You could probably combine the conditional statements for the player reset into one giant one, but I'll leave that decision up to you. I wouldn't want to confuse matters.
Give it a go. You'll notice that once you've taken your first throw, the player asteroid will reset and move back to its original position (see Figure 8-14).
Right now, the game is pretty pointless because you simply can't win; to fix that, you need to implement a scoring system of some description. In the case of this game, the scoring system is based on the amount of attempts (clicks) it takes the player to knock all of the asteroids out of the platform. This requires you to know how many asteroids have been knocked out of the platform, and how many clicks have been made (the score). After every click you then update the UI to show the player the current score. Once all of the asteroids have been knocked out, you end the game and show the player their final score — they win.
The first step is to set up the variable that will hold the score, so add the following declaration underneath the powerY variable at the top of the JavaScript:
var score;
And set the default score to 0 by adding the following code underneath the powerY variable at the top of the startGame function:
score = 0;
You want to update and display the score every time the player clicks, so add the following under player.vY in the mouseup event listener:
uiScore.html(++score);
This increases the score by one and updates the score UI element, all at the same time. You'll see this by trying the game and keeping an eye on the score ("Clicks") at the top left of the canvas (see Figure 8-15).
To win the game you have to knock all of the asteroids off of the platform, so you need a method of actually working out whether all the asteroids have left the platform. There are two steps to this, the first being a simple check that looks at each asteroid to see whether it's still on the platform, and the second being a routine that keeps track of the number of asteroids still on the platform. When the second step returns a value of 0 (no asteroids left), then you know the game is over and you can move on to the next screen of the game.
There are probably a few ways that you could track the number of asteroids that are still on the platform. The way that you're going to use involves removing any asteroid from the asteroids array if it falls off of the platform. That way you will always know how many asteroids are left by just checking the length of the asteroids array.
However, there is a problem: you can't just remove an asteroid from the array straight away because it will screw up the asteroid loops within the animate function. This is because the loop is running for a set number of times (the amount of asteroids), so if you remove one mid-loop, then there will become a point where you're looping more times than there are asteroids. Not good.
To overcome this you need to create a new temporary array that holds all of the asteroids that have fallen off of the platform in one animation loop, and then use that array at the very end of the animation loop to remove the asteroids from the original asteroids array. This will make more sense when illustrated with code.
Add the following code above the asteroidsLength variable in the animate function:
var deadAsteroids = new Array();
This is the temporary array that is going to hold all of the asteroids that have fallen off of the platform and died. Morbid, but useful. The next step is to actually check to see whether the current asteroid in the loop has fallen off of the platform.
Add the following beneath the friction code in the animate function:
if (!tmpAsteroid.player) {
        var dXp = tmpAsteroid.x - platformX;
        var dYp = tmpAsteroid.y - platformY;
        var distanceP = Math.sqrt((dXp*dXp)+(dYp*dYp));
        if (distanceP > platformOuterRadius) {
                if (tmpAsteroid.radius > 0) {
                        tmpAsteroid.radius -= 2;
                } else {
                        deadAsteroids.push(tmpAsteroid);
                };
        };
};
There are a few key steps in this bit of code. The first is the initial check to make sure that the current asteroid isn't actually the player asteroid (that's being thrown); you don't want to remove that one. Second are the calculations that work out the distance between the asteroid and the centre of the platform. Third is the check to see whether the centre of the asteroid is outside of the platform edge.
Within the third check is another set of code that deals with the asteroid now that you know that it's not on the platform. It would be a shame to just make the asteroid disappear out of the blue, so why not make it shrink and look like it's falling off of a real platform? You do this with a simple check. If the asteroid has a radius above 0, then it's obviously still visible, so reduce the radius by two pixels. This will happen on each loop of the animation and ultimately cause the effect of shrinking the asteroid quite quickly. Once the asteroid radius is at or below 0 (after a few loops), you can then safely assume that it's dead and add it to the deadAsteroids array.
Give the game a go and you'll see that the asteroids now shrink and seems to disappear when they fall off of the platform (see Figure 8-16).
The next task is to remove the dead asteroids from the original asteroids array, and let the player know that the game is over when there are no asteroids left.
Add the following code at the end of the animate function, but above the conditional statement with the call to setTimeout in:
var deadAsteroidsLength = deadAsteroids.length;
if (deadAsteroidsLength > 0) {
        for (var di = 0; di < deadAsteroidsLength; di++) {
                var tmpDeadAsteroid = deadAsteroids[di];
                asteroids.splice(asteroids.indexOf(tmpDeadAsteroid), 1);
        };
};
This section of code runs outside of the asteroid loops, so it runs after every asteroid has been updated, collision detected, and moved. The first thing it does is check to see whether there are any dead asteroids to deal with. If so, you're free to start doing the fun stuff and letting the player get one step closer to winning the game.
If there are dead asteroids to deal with, you loop through them all and assign each one to the temporary tmpDeadAsteroid variable. Because the asteroid object in the deadAsteroids array is the same one that's in the asteroidsArray, you can use a special array method called indexOf to work out the index of the dead asteroid in the original asteroids array, which ultimately allows you to remove it. This is a little confusing, so it's important to get your head around. In the previous code listing, you added the asteroid held in the tmpAsteroid variable to the deadAsteroids array. The asteroid in deadAsteroids is not a copy, it's actually pointing to the asteroid in the original asteroids array. I honestly don't expect this to make complete sense; it's a bit of a mind bender. It's just important to bear in mind.
To remove the asteroid from the asteroids array, you need to use the splice method of the Array object. This allows you to remove one or more elements from an array, starting at the index defined in the first argument, and continuing for as many elements as defined in the second argument.
You need the start index to be the index of the asteroid that you want to remove; so to do that you need to use the indexOf method of the Array object. This effectively searches through an array for a particular item, and returns its index position within the array if it can find it. In this case, you want to find the asteroid, so you pass in the tmpDeadAsteroid variable as the argument in indexOf. You know you only want to remove one asteroid, so the second argument of the call to splice can be left as 1.
Together, this gives you enough information to remove the correct dead asteroid from the original asteroids array.
The very last thing to do is update the UI with the number of asteroids left, and to actually let the player win the game when there are no asteroids left on the platform.
Add the following after the for loop in the previous section of code:
var remaining = asteroids.length-1; // Remove player from asteroid count
uiRemaining.html(remaining);

if (remaining == 0) {
        // Winner!
        playGame = false;
        uiStats.hide();
        uiComplete.show();

        $(window).unbind("mousedown");
$(window).unbind("mouseup");
$(window).unbind("mousemove");
};The first line declares a variable that holds the number of asteroids remaining on the platform. Notice how you need to reduce the number by 1, because you don't count the player asteroid. You then use that variable to update the game UI with the remaining asteroids in the game.
To see whether the player has won or not, you simply perform a conditional statement that checks for the number of remaining asteroids to be 0. If so, you stop the game, hide the game statistics UI, and show the game complete screen. The final three lines just remove the mouse event listeners, as you won't need them again unless the player wants to play again.
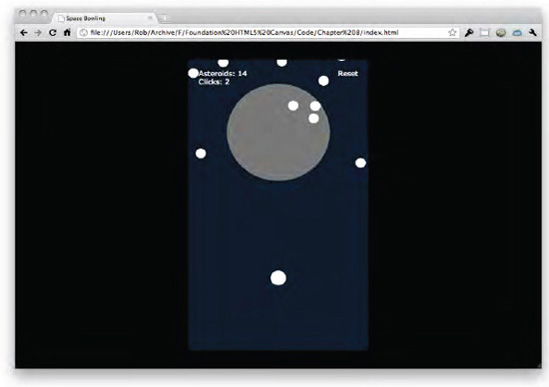
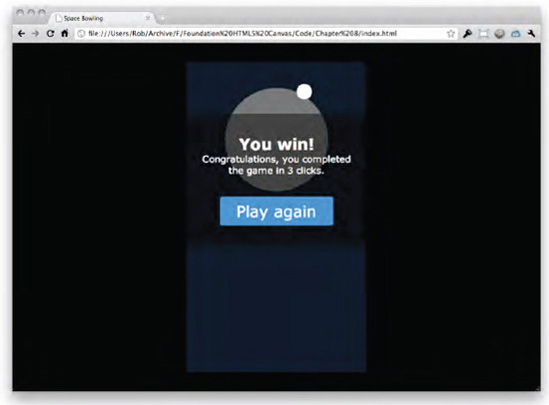
Refresh the game and give it a go (see Figure 8-17). My best score is two clicks, although that took me ages!
So you actually just finished your first game in canvas. Pretty awesome, isn't it? I'd definitely be proud if I were you. In fact, I';m proud for you. It wasn't the easiest chapter in the world, but my hope is that you now know enough about putting together various parts of a game to produce something interactive and exciting to play. If you didn't already, I bet you appreciate the effort that goes into games programming.
The key aspects that you learned in this chapter are detecting user input with a mouse, creating and manipulating a user interface, and constructing a scenario in which a player can win the game. You'll be using these aspects and more when you construct the next game, except this time the player will be controlling a rocket with their keyboard. Cool!