
This time around you're going to create an asteroid avoidance game; a game that's going to build from the lessons learnt in previous chapters, while also teaching you a few new skills at the same time. The game is also going to be very different in gameplay from the previous game, with much more control from the player.
The two most important lessons that you'll take from this chapter are how to detect keyboard input with JavaScript, and also how to use and control HTML5 audio for sound within a game. Enjoy!
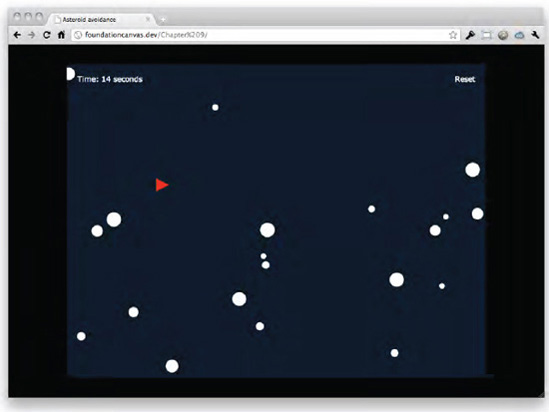
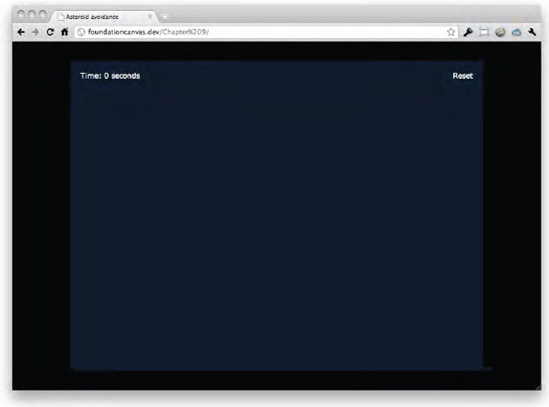
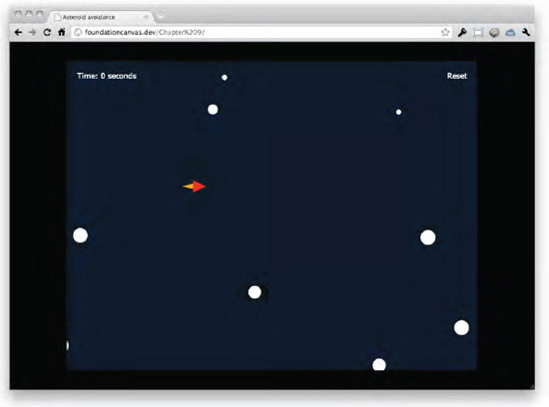
The goal of the asteroid avoidance game should be fairly obvious, I hope (it's kind of in the name). For those who are still unsure, the aim of the game is to fly a rocket around and survive for as long as possible while asteroids hurtle towards you (see Figure 9-1). If you hit an asteroid then it's game over, with the score being based on how many seconds you managed to survive for. It may not be a blockbuster, but it leads to some surprisingly addictive gameplay, just like the bowling game.
The asteroid avoidance game will differ wildly from the space bowling game that you made in the previous chapter. The main difference is that this will be a side-scrolling game, or at least it will feel like one. Whereas the previous game was very much static, this new game will have a prominent feeling of movement.
Another major difference between the two games is that of player input. In the bowling game the player input came from the mouse; in this game the player input will be achieved through various keys on the keyboard. It's possible that this game could also be controlled with the mouse, but I feel that it's important for you to explore other ways to interact with a game.
Most of the core logic from the previous game will be reused within this game; things like the animation loop, some game objects, and the main functions. The HTML and UI will also be fairly similar to the previous game, apart from obvious changes specific to the asteroid avoidance game.
New skills that you'll learn through this chapter include the detection of keyboard input, and the use of HTML5 audio for sound effects within the game. You'll be tying in these new skills with most of the others that you've learnt within this book, like drawing in canvas, animation, physics, and game logic.
As I mentioned previously, most of the core logic within this game will be based on the bowling game logic. This may seem lazy, but it's this kind of code reuse that speeds up development, and allows you ultimately to create a robust engine that you can use as a foundation for future games. You'd be hard pushed to find a game that requires entirely unique functionality that's never been attempted before. Why reinvent the wheel?
Nearly all the HTML is the same for this game, so let's jump right in. Create a new directory on your computer for the game, and insert the following code into a document called index.html:
<!DOCTYPE html>
<html>
<head>
<title>Asteroid avoidance</title>
<meta charset="utf-8">
<link href="game.css" rel="stylesheet" type="text/css">
<script type="text/javascript"
src="http://ajax.googleapis.com/ajax/libs/jquery/1/jquery.min.js"></script>
<script type="text/javascript" src="game.js"></script>
</head>
<body>
<div id="game">
<div id="gameUI">
<div id="gameIntro">
<h1>Asteroid avoidance</h1>
<p>Click play and then press any key to start.</p>
<p><a id="gamePlay" class="button" href="">Play</a></p>
</div>
<div id="gameStats">
<p>Time: <span class="gameScore"></span> seconds</p>
<p><a class="gameReset" href="">Reset</a></p>
</div>
<div id="gameComplete">
<h1>Game over!</h1>
<p>You survived for <span class="gameScore"></span> seconds.</p>
<p><a class="gameReset button" href="">Play again</a></p>
</div>
</div>
<canvas id="gameCanvas" width="800" height="600">
<!-- Insert fallback content here -->
</canvas>
</div>
</body>
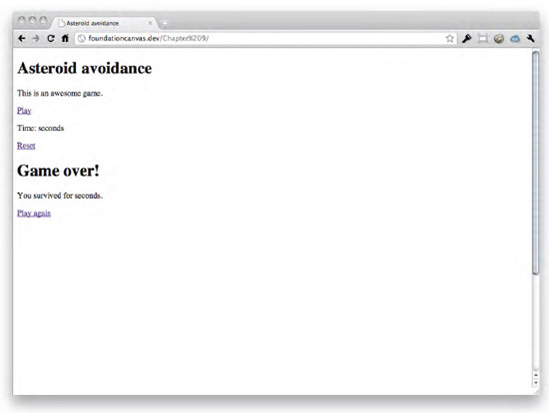
</html>Nothing scary here. The only things that have changed are the title of the page, some wording of the content, and the dimensions of the canvas. Apart from that it's very much similar to what you had before (see Figure 9-2).
Create a new document called game.css and place it in the same directory as the HTML file. Insert the following code into the CSS file:
* { margin: 0; padding: 0; }
html, body { height: 100%; width: 100%; }
canvas { display: block; }

body {
        background: #000;
        color: #fff;
        font-family: Verdana, Arial, sans-serif;
        font-size: 18px;
}

h1 {
        font-size: 30px;
}

p {
        margin: 0 20px;
}
a {
color: #fff;
text-decoration: none;
}
a:hover {
text-decoration: underline;
}
a.button {
background: #185da8;
border-radius: 5px;
display: block;
font-size: 30px;
margin: 40px 0 0 270px;
padding: 10px;
width: 200px;
}
a.button:hover {
background: #2488f5;
color: #fff;
text-decoration: none;
}
#game {
height: 600px;
left: 50%;
margin: −300px 0 0 −400px;
position: relative;
top: 50%;
width: 800px;
}
#gameCanvas {
background: #001022;
}
#gameUI {
height: 600px;
position: absolute; /* Places UI on top of the canvas */
width: 800px;
}
#gameIntro, #gameComplete {
background: rgba(0, 0, 0, 0.5);
margin-top: 100px;
padding: 40px 0;
text-align: center;
}
#gameStats {font-size: 14px;
margin: 20px 0;
}
#gameStats .gameReset {
margin: 20px 20px 0 0;
position: absolute;
right: 0;
top: 0;
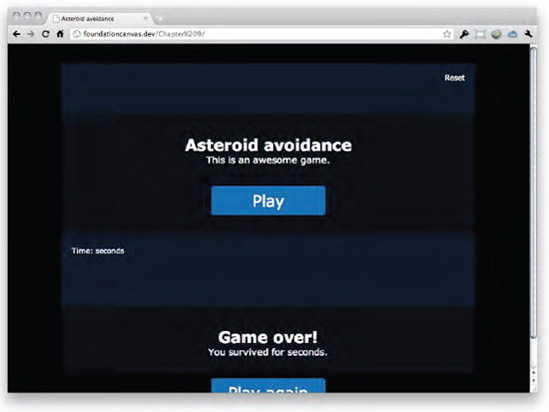
}Much the same as the HTML, the CSS has barely changed; the only differences are a change in dimensions for the CSS rules #game and #gameUI. These changes tweak the visual styling of the UI to be positioned correctly within the bigger canvas (see Figure 9-3).
The last stage in the set up is to add in the JavaScript, just as you did with the bowling game. Create a new document called game.js and place it within the same directory as the HTML and CSS files. Insert the following code within it:
$(document).ready(function() {
        var canvas = $("#gameCanvas");
var context = canvas.get(0).getContext("2d");
// Canvas dimensions
var canvasWidth = canvas.width();
var canvasHeight = canvas.height();
// Game settings
var playGame;
// Game UI
var ui = $("#gameUI");
var uiIntro = $("#gameIntro");
var uiStats = $("#gameStats");
var uiComplete = $("#gameComplete");
var uiPlay = $("#gamePlay");
var uiReset = $(".gameReset");
var uiScore = $(".gameScore");
// Reset and start the game
function startGame() {
// Reset game stats
uiScore.html("0");
uiStats.show();
// Set up initial game settings
playGame = false;
// Start the animation loop
animate();
};
// Inititialize the game environment
function init() {
uiStats.hide();
uiComplete.hide();
uiPlay.click(function(e) {
e.preventDefault();
uiIntro.hide();
startGame();
});
uiReset.click(function(e) {
e.preventDefault();
uiComplete.hide();
startGame();
});
};
// Animation loop that does all the fun stuff
function animate() {
// Clear
context.clearRect(0, 0, canvasWidth, canvasHeight);
if (playGame) {// Run the animation loop again in 33 milliseconds
setTimeout(animate, 33);
};
};
init();
});Although slightly scary looking, this is practically the same as the core logic from last chapter. The only difference is that the core UI logic has been included now, rather than adding it all in a separate chapter later on. Regardless, the UI code is the same as before, so it should all make sense to you.
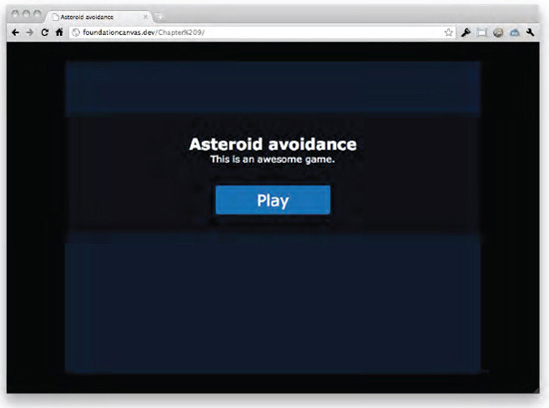
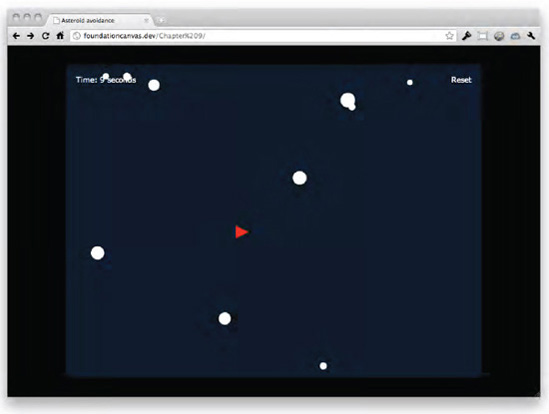
Give the game a whirl in your favorite browser and you should have a much tidier UI (see Figure 9-4). You should also be able to click on the play button to reach the main game screen, although it looks mighty boring at the moment (see Figure 9-5).
The asteroid avoidance game is going to have two main objects: the asteroids and the player rocket. Each of these objects are going to be created as JavaScript classes. You might be wondering why you're going to use a class for the player when there is only one of them. The short answer is that it's possible that you might want to add multiple players into your game, in which case it's going to make things much easier if the player is created with a class.
Using classes for your game objects means it's dead easy to reuse and repurpose them in another game. For example, in the asteroid avoidance game you're going to use the same asteroid class as the bowling game, with just a few changes.
The first step is to declare the main variable that will be used to store all the asteroids within, as well as another variable which you're going to use to work out how many asteroids should be in the game. Add the following code underneath the playGame variable at the top of the JavaScript:
var asteroids;
var numAsteroids;
You'll add values to these variables shortly, but for now let's set up the asteroid class. Add the following code above the startGame function:
var Asteroid = function(x, y, radius, vX) {
        this.x = x;
        this.y = y;
        this.radius = radius;
        this.vX = vX;
};
You'll recognize this from the previous game, although it should look a lot shorter. The reason for this is that you won't be using as much physics to animate the asteroids this time, so you don't need any properties for mass or friction. You'll also notice that there is only one velocity property; this is because the asteroids will only be moving from right to left, which is the x velocity. There is no need to have a y velocity, so it has been left out.
Now, before you can start creating all the asteroids, you need to set up the array to store them in and declare the amount of asteroids to actually use. Add the following code below the playGame variable within the startGame function:
asteroids = new Array();
numAsteroids = 10;
You might think ten asteroids is a small number, but you'll be recycling them when they move off of the screen, so it will actually seem like there is an unlimited number of them. Try to think of the number of asteroids as the total amount that can possibly exist on the screen at a single time.
Setting up the asteroids is simply a case of creating a loop that cycles for the number of asteroids that you've just declared. Add the following code beneath the numAsteroids variable that you just assigned a value to:
for (var i = 0; i < numAsteroids; i++) {
        var radius = 5+(Math.random()*10);
        var x = canvasWidth+radius+Math.floor(Math.random()*canvasWidth);
        var y = Math.floor(Math.random()*canvasHeight);
        var vX = −5-(Math.random()*5);

        asteroids.push(new Asteroid(x, y, radius, vX));
};
In an effort to make each asteroid slightly different and to make the game look a little more interesting, you're setting the radius to a random value between 5 and 15 pixels (5 plus a random number between 0 and 10). The same can also be said about the x velocity, although this value is being set between −5 and −10 (-5 minus a number between 0 and 5). You're using a negative velocity because you want the asteroids to travel from right to left, meaning that their x position decreases over time.
The calculation for the x position for each asteroid looks a bit complex, but it's actually very simple. It looks a little weird to have all of the asteroids suddenly appearing on the screen when you start the game, so it's much better to have them positioned off to the right of the screen, and then letting them move across as the game progresses.
To do this you first set the x position as the width of the canvas element, and then add the radius of the asteroid. This means that if you drew the asteroid now it would be positioned just off the right hand edge of the screen. If you left it like this then all the asteroids would appear in a line, so the next step is to add a random value onto the x position that is between 0 and the canvas width (see Figure 9-6). In comparison, the y position is simple; it's just a random value between 0 and the height of the canvas.
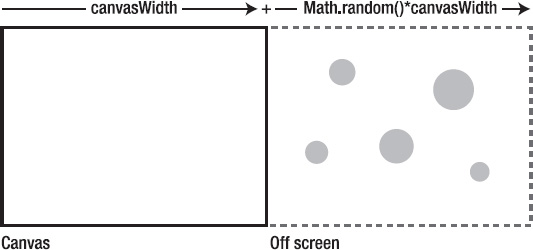
What this achieves is effectively a box the same size as the canvas which is full of randomly positioned asteroids that will move across the visible canvas when the game starts. Trust me, it's not as complicated as it sounds.
The last thing to do is to push a new asteroid into the array of asteroids, ready to animate and draw.
In the last game the player was just a simple asteroid. That's boring. In this game the player is going to control a freaking rocket ship; that's much cooler!
Let's jump right in and declare the initial variables that will be used to set up the player. Add the following code below the numAsteroids variable at the top of the JavaScript:
var player;
This variable is going to hold a reference to the player object, which hasn't actually been defined yet; let's change that. Add the following code beneath the Asteroid class:
var Player = function(x, y) {
        this.x = x;
        this.y = y;
        this.width = 24;
        this.height = 24;
        this.halfWidth = this.width/2;
        this.halfHeight = this.height/2;

        this.vX = 0;
        this.vY = 0;
};
You'll recognize some of this from the Asteroid class, namely the position and velocity properties. The rest of the properties describe the dimensions of the player rocket, both in full and at half size. You'll be using these dimensions when drawing out the rocket and performing collision detection.
The last step is to create a new player object, so add the following code below the numAsteroids variable within the startGame function:
player = new Player(150, canvasHeight/2);
This will place the player at an x and y position vertically centered, and 150 pixels away from the left edge of the canvas.
You won't be able to see anything yet, but you'll sort that out later on when you move onto animating all of the game objects.
In the bowling game you used mouse input to control the player; in this game you're going to use the keyboard. Specifically you're going to use the arrow keys to move the player rocket around. How do you achieve this? Is it harder than dealing with mouse input? No, it's easy. Let me show you.
The first thing to understand when dealing with keyboard input is how to work out which key is being used. In JavaScript, every single button on a regular keyboard has been assigned a specific key code. It's this code that lets you know the exact key that has been pressed down, or released. You'll see exactly how to use this key code shortly, but for now it's just important to know that each key has a number attached to it.
For example, the keys a to z (regardless of case) have key codes of 65 to 90, respectively. The arrow keys have the key codes 37 to 40; left 37, up 38, right 39, and down 40. Space bar has a key code of 32.
Note
I'd advise you to check out this article on the QuirksMode website for more information about key codes [www.quirksmode.org/js/keys.html].
It's the arrow keys that you're most interested in for the asteroid avoidance game, so add the following code beneath the player variable at the top of the JavaScript:
var arrowUp = 38;
var arrowRight = 39;
var arrowDown = 40;
What you're doing here is assigning the key code for each arrow to a variable that describes it. This is called enumeration, which is the process of giving a value a name. It basically makes things a lot easier later on, as you'll be able to easily work out which arrow key you're referring to.
Notice how you've not declared a variable for the left arrow. This is because you're not going to let the player move backwards manually; instead you're going to move the player backwards whenever they aren't pressing a key. This will make more sense later on.
Before you can get to the juicy part of adding keyboard interaction to the game, you need to work out when the player has pressed and released a key. To do this you'll need to utilize the keydown and keyup event listeners, which are very similar to the mousedown and mouseup event listeners you used in the previous game.
Add the following code above the call to the animate function within the startGame function (below the loop in which you're creating all the asteroids):
$(window).keydown(function(e) {

});

$(window).keyup(function(e) {

});
Looks similar to the mouse event listeners you used last chapter, doesn't it? The first listener triggers when a key is pressed down, and the second triggers when a key is released. Simple.
You'll fill those event listeners with useful code in a moment, but first let's make sure that the listeners are removed when the game is reset, which will prevent the game from being inadvertently started by pressing a key. Add the following code above the call to startGame in the uiReset.click event listener:
$(window).unbind("keyup");
$(window).unbind("keydown");
Next up, you need to add some properties to help when animating the player. Add the following code at the bottom of the Player class:
this.moveRight = false;
this.moveUp = false;
this.moveDown = false;
These properties will let you know which direction to move the player, and they will be set depending on which key has been pressed. Is it all starting to make sense now?
Now it's time to add some logic into the keyboard event listeners. Firstly, add the following code within the keydown event listener:
var keyCode = e.keyCode;

if (!playGame) {
        playGame = true;
        animate();
};

if (keyCode == arrowRight) {
        player.moveRight = true;
} else if (keyCode == arrowUp) {
        player.moveUp = true;
} else if (keyCode == arrowDown) {
        player.moveDown = true;
};
And the following within the keyup event listener:
var keyCode = e.keyCode;

if (keyCode == arrowRight) {
        player.moveRight = false;
} else if (keyCode == arrowUp) {
        player.moveUp = false;
} else if (keyCode == arrowDown) {
        player.moveDown = false;
};
It should be fairly obvious as to what's going on here, but let me clarify it for you. The first line in both listeners assigns the key code of the key to a variable. You then use this key code within a set of conditional statements to work out if an arrow key has been pressed and, if so, exactly which one. From there it's a case of enabling (if the key is being pressed down), or disabling (if the key is being released) the respective property on the player object.
For example, if you press the right arrow key then the moveRight property of the player object will be set to true. If you release the right arrow key then the moveRight property will be set to false.
Note
You should be aware that if the player holds down a key then multiple keydown events will be fired. It's important to make sure that your code can handle keydown events being fired multiple times; there won't always be a keyup event after each keydown event.
Also, notice how in the keydown event listener that you've got a conditional statement that checks to see whether the game is currently playing. This is to stop the game running without the player being ready; it will only start once they press down a key on the keyboard. Simple, but effective.
That's pretty much it for keyboard input for the game; in the next section you'll be using this input to animate the player in the right direction.
You've now got absolutely everything prepared to start animating the game objects. This is the fun bit, when you actually get to see stuff. Hooray!
The first step is to update the position of all the game objects. Let's start with the asteroid objects, so add the following code beneath the call to the canvas clearRect method in the animate function:
var asteroidsLength = asteroids.length;
for (var i = 0; i < asteroidsLength; i++) {
        var tmpAsteroid = asteroids[i];

        tmpAsteroid.x += tmpAsteroid.vX;

        context.fillStyle = "rgb(255, 255, 255)";
        context.beginPath();
        context.arc(tmpAsteroid.x, tmpAsteroid.y, tmpAsteroid.radius, 0, Math.PI*2, true);
        context.closePath();
        context.fill();
};
This is all straightforward, and is nothing new from what you did in the last chapter. Basically what's happening is that you're looping through each asteroid, updating its position based on the velocity, and then drawing it to the canvas.
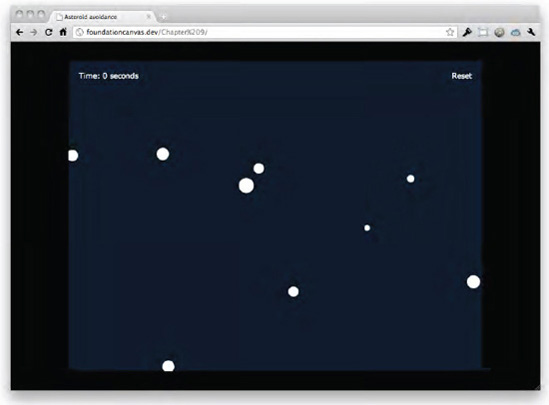
Refresh the browser and have a look (remember to press a key to start the game). You should be able to see an asteroid field float past the screen (see Figure 9-7). Notice how they disappear off the left hand side of the screen; you'll learn how to stop that in the following section on side-scrolling.
For now, let's imagine that those asteroids are doing everything that you want them to do. It's time to update and visualize the player!
Add the following code beneath the asteroid code that you just added in the animate function:
player.vX = 0;
player.vY = 0;

if (player.moveRight) {
        player.vX = 3;
};

if (player.moveUp) {
        player.vY = −3;
};
if (player.moveDown) {
player.vY = 3;
};
player.x += player.vX;
player.y += player.vY;This updates the velocity of the player and sets it to a specific value that is dependent on the direction that it needs to move. If the player is meant to move right, then the velocity is 3 pixels on the x axis. If the player is meant to move up, then the velocity is −3 pixels on the y axis. And, if the player is meant to move down, then the velocity is 3 pixels on the y axis. Simple stuff so far. Also, notice how you're resetting the velocity values at the beginning; this causes the player to stop if no arrow keys are being pressed down.
Finally, you update the x and y position of the player, based on the velocity. You won't be able to see anything yet, but you now have everything that you need to draw the rocket on the screen.
Add the following code directly beneath the code you just added:
context.fillStyle = "rgb(255, 0, 0)";
context.beginPath();
context.moveTo(player.x+player.halfWidth, player.y);
context.lineTo(player.x-player.halfWidth, player.y-player.halfHeight);
context.lineTo(player.x-player.halfWidth, player.y+player.halfHeight);
context.closePath();
context.fill();
Can you work out what's going on here? It's obvious that you're drawing a filled path, but can you tell what shape it is from the way that you're drawing it? You could just cheat and have a look at Figure 9-8, but that wouldn't be much fun! Okay, okay. It's a triangle. Happy now?

If you take a proper look at Figure 9-8 then you'll be able to see how the dimensional properties from the player object come into play. By knowing the half width and height of the player object, you're able to construct a dynamic triangle that could grow and shrink if the dimension values ever changed. Simple, but cool.
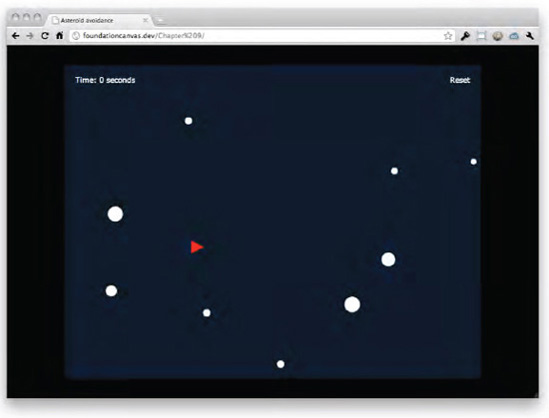
Check out the game in the browser now and you should be able to see the player rocket (see Figure 9-9). Try pressing the arrow keys. See the rocket moving? Now that's pretty awesome.
You could just leave the movement logic there, but that wouldn't be any fun. Let's add an animated flame to the rocket! Add the following code at the end of the Player class:
this.flameLength = 20;
You'll be using this to decide how long the flame is, but more on that later. For now, add the following code just before you draw the rocket in the animate function:
if (player.moveRight) {
        context.save();
        context.translate(player.x-player.halfWidth, player.y);

        if (player.flameLength == 20) {
                player.flameLength = 15;
        } else {
                player.flameLength = 20;
        };

        context.fillStyle = "orange";
        context.beginPath();
        context.moveTo(0, −5);
        context.lineTo(-player.flameLength, 0);
        context.lineTo(0, 5);
        context.closePath();
        context.fill();

        context.restore();
};
The conditional statement just makes sure that the flame is only drawn when the player is moving right; it would just look weird if the flame was visible at any other time.
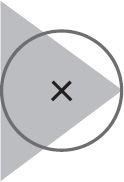
You're going to utilize the canvas translate method to draw the flame, so to save some time later you're saving the canvas drawing state with a call to save. Now you have the original state stored, you can call the translate method and move the origin of the 2D rendering context to the left edge of the player rocket (the translated origin is marked with an x in Figure 9-10).

Now that the origin of the canvas has been moved, the rest is easy. All you're doing is cycling the value stored in the flameLength property of the player object (making it seem to flicker), changing the fill color to orange, then beginning a path and drawing out a triangle that is the same length as the flameLength property (see the right side of Figure 9-10). The last thing that you want to do is call restore, to push the original drawing state back onto the canvas.
Refresh the browser and take a look at your handy work; the rocket should now have a flickering flame whenever you press down the right arrow key (see Figure 9-11).
That's pretty much it for movement. You're not doing any advanced physics in this game (it doesn't always make a game more awesome), so you're now ready to move onto making this game a true side-scroller.
Did I say faking? So I did! Yes, although this game will look like a side-scroller, you're not actually traveling through the game world. Instead, you're going to recycle all the objects that fall off of the screen and make them reappear on the other side. This gives the effect that you're travelling through an endless game world. A bit of a trick, but it's still a side-scroller.
Making the game look like your flying through a field of endless asteroids is actually not all that hard. In fact, it's easy! Jump into the animate function and add the following code just above where you draw out each asteroid:
if (tmpAsteroid.x+tmpAsteroid.radius < 0) {
        tmpAsteroid.radius = 5+(Math.random()*10);
        tmpAsteroid.x = canvasWidth+tmpAsteroid.radius;
        tmpAsteroid.y = Math.floor(Math.random()*canvasHeight);
        tmpAsteroid.vX = −5-(Math.random()*5);
};
That's literally all you need to do. What's happening here is that you're checking to see whether the asteroid has moved outside the left edge of the canvas and, if so, resetting it and moving it back over to the right hand side. You've recycled the asteroid, yet it looks and feels like a completely new one.
At the moment the player can quite happily fly out of the game and potentially get stuck (try flying off the right hand side). To fix this you need to put some boundaries in place. Add the following code above where you draw out the player flame (just below when you set the new player position):
if (player.x-player.halfWidth < 20) {
        player.x = 20+player.halfWidth;
} else if (player.x+player.halfWidth > canvasWidth-20) {
        player.x = canvasWidth-20-player.halfWidth;
}

if (player.y-player.halfHeight < 20) {
        player.y = 20+player.halfHeight;
} else if (player.y+player.halfHeight > canvasHeight-20) {
        player.y = canvasHeight-20-player.halfHeight;
};
You can probably guess what's going on here. Basically you're performing some standard boundary checks, just like you did in the previous game. These checks look to see whether the player is within twenty pixels of the edge of the canvas and, if so, stops them from moving any further in that direction. The twenty pixel padding is there because I felt that it looked a little better, but feel free to change it so the player can move right up to the very edge.
As it stands, if the player isn't pressing down any keys then the rocket stops moving. This looks a little bit weird with all the asteroids floating by, so to add a bit of extra movement to the game let's try moving the player backwards when they aren't moving forward.
Change the piece of code that changes the player vX property in the animate function to the following:
if (player.moveRight) {
        player.vX = 3;
} else {
        player.vX = −3;
};
What you've done here is simply add an extra part to the conditional statement that sets the player vX property to −3 if the player isn't meant to be moving right. As with most game logic when you boil it down; it's simple.
Give it a go in your browser. It's really starting to look like a proper game now!
This is probably the coolest part of the game, as it's something that we didn't cover in the bowling game. It's amazing how much some simple sound can add to a game; it just feels more immersive and interesting. You'd think adding audio to a game would be hard, but with HTML5 audio it's a breeze! Let me show you.
The first thing you need to do is declare all the HTML5 audio elements in the game HTML. Jump into the index.html file and add the following beneath the canvas element:
<audio id="gameSoundBackground" loop>
        <source src="sounds/background.ogg">
        <source src="sounds/background.mp3">
</audio>
<audio id="gameSoundThrust" loop>
        <source src="sounds/thrust.ogg">
        <source src="sounds/thrust.mp3">
</audio>
<audio id="gameSoundDeath">
        <source src="sounds/death.ogg">
        <source src="sounds/death.mp3">
</audio>
If you understood the section on HTML5 audio in Chapter 1, then this should all make sense to you. If not, then don't worry; it's easy. All your doing is declaring three separate HTML5 audio elements, and giving each a unique id attribute that you'll be using later. For the sounds that you want to loop, you also give them a loop attribute.
Note
Note that at the time of writing, the loop attribute does not work in all browsers. It is part of the spec, so should eventually be included across the board. If you need a workaround, you can add an event listener for when the end of the track is reached and play the track again at that point.
The three sounds are the background music, a thruster sound for when the rocket is moving, and finally a deep booming sound for when the player dies. Each sound requires two versions of the file to be compatible with the most amount of browsers, so two source elements are included; one for an mp3 version, and the other for an ogg version.
Note
Remember that you can download all the code and assets for this book from the Friends of ED website. This includes the sound files for the asteroid avoidance game.
That's all you need to do for the HTML side of things, so jump back into the JavaScript file and add the following beneath the uiScore variable at the top of the file:
var soundBackground = $("#gameSoundBackground").get(0);
var soundThrust = $("#gameSoundThrust").get(0);
var soundDeath = $("#gameSoundDeath").get(0);
These variables are using the id attributes that you declared in the HTML to grab each audio element, just like how to grab the canvas element for the game. You'll be using these variables to access the HTML5 audio API and control the sounds.
There's no point hanging around, so jump into the keydown event listener and add the following code after setting playGame to true:
soundBackground.currentTime = 0;
soundBackground.play();
You've just added and successfully controlled HTML5 audio in your game. Cool, huh? What's going on here is that you're accessing the HTML5 audio element associated with the background sound, and then directly controlling it through the HTML5 audio API. This allows you to reset the playhead of the audio to the beginning, by changing the currentTime property, and also to play the audio, by calling the play method. Did you think it was going to be hard?
Load up the game and give it a go, you should now have some lovely background music playing once you start moving the rocket.
Note
All the audio used within this game is from FreeSound. The background music is by the user asdftekno [www.freesound.org/samplesViewSingle.php?id=48546], the thrust sound is by the user nathanshadow [www.freesound.org/samplesViewSingle.php?id=22455], and the death sound is by the user HerbertBoland [www.freesound.org/samplesViewSingle.php?id=33637]. Creative Commons initiatives for the win!
The next step is to control the thrust sound for when the player is moving the rocket. As I hope you've already guessed, this is just as easy as implementing the background sound.
Add the following code beneath setting the moveRight property of the player object in the keydown event listener:
if (soundThrust.paused) {
        soundThrust.currentTime = 0;
        soundThrust.play();
};
The first line basically checks to see whether the thrust sound is actually playing and, if so, stops the game from playing it a second time. This prevents the sound from being cut out mid-flow, as the key down event is fired many times a second, and you don't want the thrust sound to play absolutely every time that it occurs (that would be a nightmare).
You probably don't want the thrust sound to continue playing when the player stops moving, so add the following code beneath setting the moveRight property of the player object in the keyup event listener:
soundThrust.pause();
That's really it; the API is a joy to use because it allows you to access and manipulate audio in such a simple way.
Before we move on (you'll add in the death sound in the next section), it's a good idea to make sure that the sounds are stopped if the player resets the game. Add the following code above the call to startGame in the uiReset.click event handler in the init function (that was a bit of a mouth full):
soundThrust.pause();
soundBackground.pause();
Those two lines will make sure that both the thrust and background sound are stopped when the game is reset. You don't need to worry about the death sound because it doesn't loop and you want it to play over the game over screen.
The game is starting to really shape up now. In fact, it's practically finished; the only thing left to do is implement some kind of scoring system and a method that causes the game to end. Let's tackle the scoring first, I'll show you how to end the game in a moment.
As the gameplay is entirely different to the last game, you need to come up with a different metric to base the scoring on. Seeing as you're trying to survive for as long as possible, then surely the amount of time that you've survived for is a good metric. Right? Good, I';m glad that you agree with me on that.
What you need is a method that lets you work out the number of seconds that have passed since the game was started. This is the perfect job for a JavaScript timeout, but before we set that up you'll want to declare a couple of variables. Add the following code beneath the player variable at the top of the JavaScript:
var score;
var scoreTimeout;
These variables will store the score (the number of seconds that have passed), and a reference to the timeout operation so you can access it and stop it when needed.
It's also going to be a good idea to reset the score whenever the game is started or reset, so add the following code beneath the numAsteroids variable near the top of the startGame function:
score = 0;
To manage the score timeout, let's create a dedicated function called timer. Place the following code above the animate function:
function timer() {
        if (playGame) {
                scoreTimeout = setTimeout(function() {
                        uiScore.html(++score);
                        timer();
                }, 1000);
        };
};
This won't run yet, but what it's doing is checking to see whether the game is playing and, if so, setting a timeout for 1 second and assigning it to the scoreTimeout variable. Within the timeout you're increasing the score variable and updating the score UI at the same time, just like how you updated the score in the bowling game. The timeout then calls the timeout function itself to repeat the entire process, which means that the timeout will stop when the game has stopped playing.
The timer function is useless right now as it's not being called yet. You want it to start when the game starts, so add the following code beneath the call to animate in the keydown event listener:
timer();
This will cause the timer to kick into action as soon as the player starts the game. Check it out in your browser now and watch the score increase in the top left corner (see Figure 9-12).
But alas, there is a problem; if you reset the game then the score sometimes changes to show 1 second. This is because the score timeout is still running when the game is reset, but it doesn't actually run until after the reset happens (changing the reset score of 0 to 1). To fix this you need to clear the timeout when the game is reset, and fortunately there is a specific function in JavaScript to help you do this.
Add the following code above the call to startGame in the uiReset.click event listener in the init function:
clearTimeout(scoreTimeout);
It's pretty self-explanatory really, but this lonely little function takes the score timeout that you assigned to the scoreTimeout variable and stops it from running. Try out the game now and watch how the annoying bug has been successfully squashed with a single line of JavaScript.
There's no point avoiding asteroids if they can't harm you, so let's add in some functionality to kill the player if they touch an asteroid. You're going to base the logic for the asteroid collision on the logic that you've used over the over in the previous chapters; circle collision detection.
Noticed the glaring issue here? How can you perform circle collision detection when the rocket is a triangle? Well, the short answer is you can't, at least not easily. You're going to cheat a little bit here, which means that there will be small areas of the player rocket that will register as a collision (see Figure 9-13), when in reality, and with a little bit of luck, you might have been able to avoid it.
I think that this is a fair sacrifice for much simpler code. After all, you're not aiming for super realism here, just an enjoyable and easy to play game.
With that disclaimer out of the way, add the following code just above where you draw each asteroid in the animate function:
var dX = player.x - tmpAsteroid.x;
var dY = player.y - tmpAsteroid.y;
var distance = Math.sqrt((dX*dX)+(dY*dY));

if (distance < player.halfWidth+tmpAsteroid.radius) {
        soundThrust.pause();

        soundDeath.currentTime = 0;
        soundDeath.play();
// Game over
playGame = false;
clearTimeout(scoreTimeout);
uiStats.hide();
uiComplete.show();
soundBackground.pause();
$(window).unbind("keyup");
$(window).unbind("keydown");
};You'll recognize the distance calculations straight away; they're exactly the same as the ones that you've used time and time again in the previous chapters. You're using them to work out the pixel distance between the player rocket and the current asteroid in the loop.
The next step is to work out whether the rocket and the asteroid have collided, which you can do by checking to see whether the distance is less than the radius of the asteroid plus the radius of the arbitrary collision circle for the rocket. At the moment the rocket collision circle has a radius that is half the width of the rocket, but you can change it to anything you want.
If the two are colliding then it's time to kill the player. Killing the player and ending the game is a fairly simple process, but let's walk through it line by line.
The first three lines stop the thrust sound and reset and play the death sound. Once the death sound is started you then stop the entire game by setting playGame to false, and stop the score timeout by using the same clearTimeout function call that you used previously.
At this point all the game logic has stopped, so you can hide the statistics UI, and bring up the game completed UI. This is exactly the same as with the bowling game.
Once the game completed UI is displaying, you then stop the background sound, and finally unbind the keyboard event handlers to prevent the game from being inadvertently started by pressing a key.
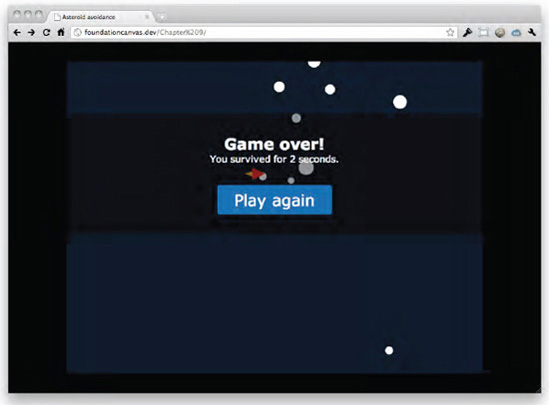
Still with me? Try it out in the browser and deliberately fly into an asteroid. I believe you've just finished your second game; well done (see Figure 9-14)!
Okay, so I lied about finishing the game. Let's add one more feature into the game; one that makes the game more difficult to play the longer you survive for. That sounds like fun.
Jumping straight in again, add the following code beneath uiScore.html in the timer function:
if (score % 5 == 0) {
        numAsteroids += 5;
};
Looks like a normal conditional statement right? Wrong. Check out that random percentage symbol. For the initiated, that's the modulus sign, for the uninitiated, that's the modulus sign.
Modulus allows you to calculate whether one number is fully divisible by another number, it returns the remainder from dividing the two numbers. For example, 2 % 2 is 0 (2 divided by 2 is 1, no remainder), and 4 % 2 is 0 (4 divided by 2 is 2, no remainder). On the other hand, 5 % 2 is 1 (5 divided by 2 is 2, with a remainder of 1).
You can use modulus in this way to make things happen at a regular interval, like every 5 seconds. You can do this because you can apply modulus 5 to a number and if it returns 0, then it must be divisible by 5. It might sound complicated, but it's really straightforward once you get your head round it.
In the case of the game you're using modulus to make sure that a piece of code is run only every 5 seconds. The piece of code in question adds 5 more asteroids to the game, every 5 seconds. Actually, it doesn't add them yet, it just increases the number of asteroids that should be in the game.
Getting those new asteroids added to the game is simple. Add the following code beneath where you draw the player rocket in the animate function:
while (asteroids.length < numAsteroids) {
        var radius = 5+(Math.random()*10);
        var x = Math.floor(Math.random()*canvasWidth)+canvasWidth+radius;
        var y = Math.floor(Math.random()*canvasHeight);
        var vX = −5-(Math.random()*5);

        asteroids.push(new Asteroid(x, y, radius, vX));
};
This code checks the number of asteroids on every loop and, if the number is wrong, it adds the required number of new asteroids to the game until the numbers match up. You're using a while loop here, which is a different JavaScript loop that continues going until the condition between the brackets is false. In your case the while loop will continue until the length of the asteroids array is equal to or greater than the numAsteroids variable.
Kick up the game in the browser again and give it a go. Notice how more and more asteroids appear the longer that you survive (see Figure 9-15)? Now you're definitely finished. I promise!

This game may not have been as complicated as the previous one, but it certainly taught you some valuable skills for making games in JavaScript and HTML5. The most valuable of these have been learning how to detect keyboard input, and also how to use and manipulate HTML5 audio for sound within the game.
You've finished two games now, both of which are incredibly different in gameplay. I hope that they've shown you how fun and addictive games can be created by building up simple code and splitting it into logical sections. I also hope that the asteroid avoidance game has shown that you don't always have to use complex physics to make a game interesting.
Well done for getting this far. Let's take things down a level and have a look at the future of canvas.