
2. First Things First
ISO 400 • 1/320 sec. • f/2 • 23mm lens
What to know before you begin taking pictures
Looking at the Fujifilm X100S, you may find it a little intimidating with all its dials, buttons, viewfinders, and controls. But regardless of how complex the camera seems, there are only a few key features that you really need to understand to get a lot out of the camera. The important thing is to use the X100S as often as possible, get used to it, and, most important, enjoy shooting with it. It’s a wonderful camera that really comes into its own if you understand the fundamentals of photography and how to operate and maintain the camera.
In this chapter, I’ll guide you through the essential elements of photography and also get you up to speed with important aspects of the X100S, such as performing firmware updates and memory card selection. Of course, other features of the camera and photography are also important. But by focusing on and mastering its core features and functions, you’ll be able to get the absolute best out of your X100S and quickly move from “snapshots” to “great shots.”
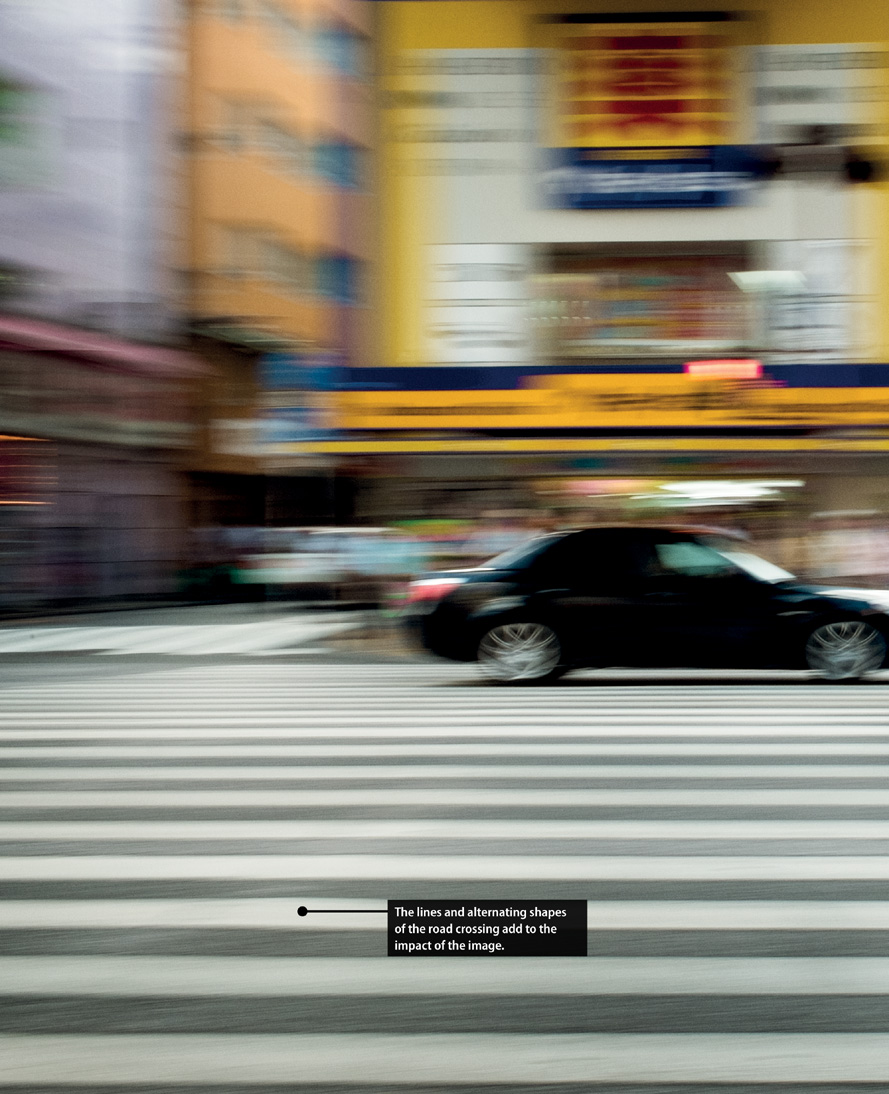
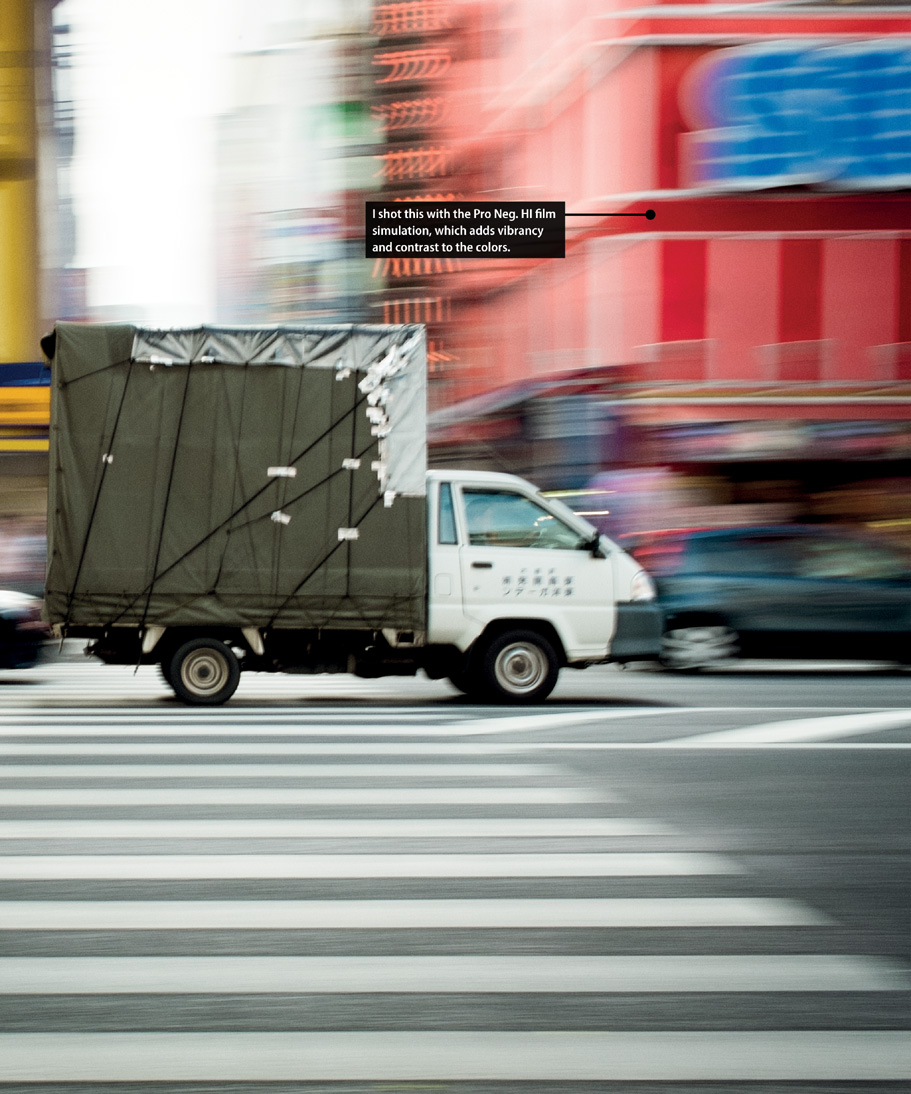
Poring Over the Picture
The Fuji X100S is the perfect size to handhold yet still allows you to be creative with exposure. In this image, I chose a very low shutter speed and “tracked” the van as it crossed through the frame. By locking focus on the van as it approached and rotating my upper body as the van moved, I was able to capture this image, highlighting the movement and speed of the traffic.
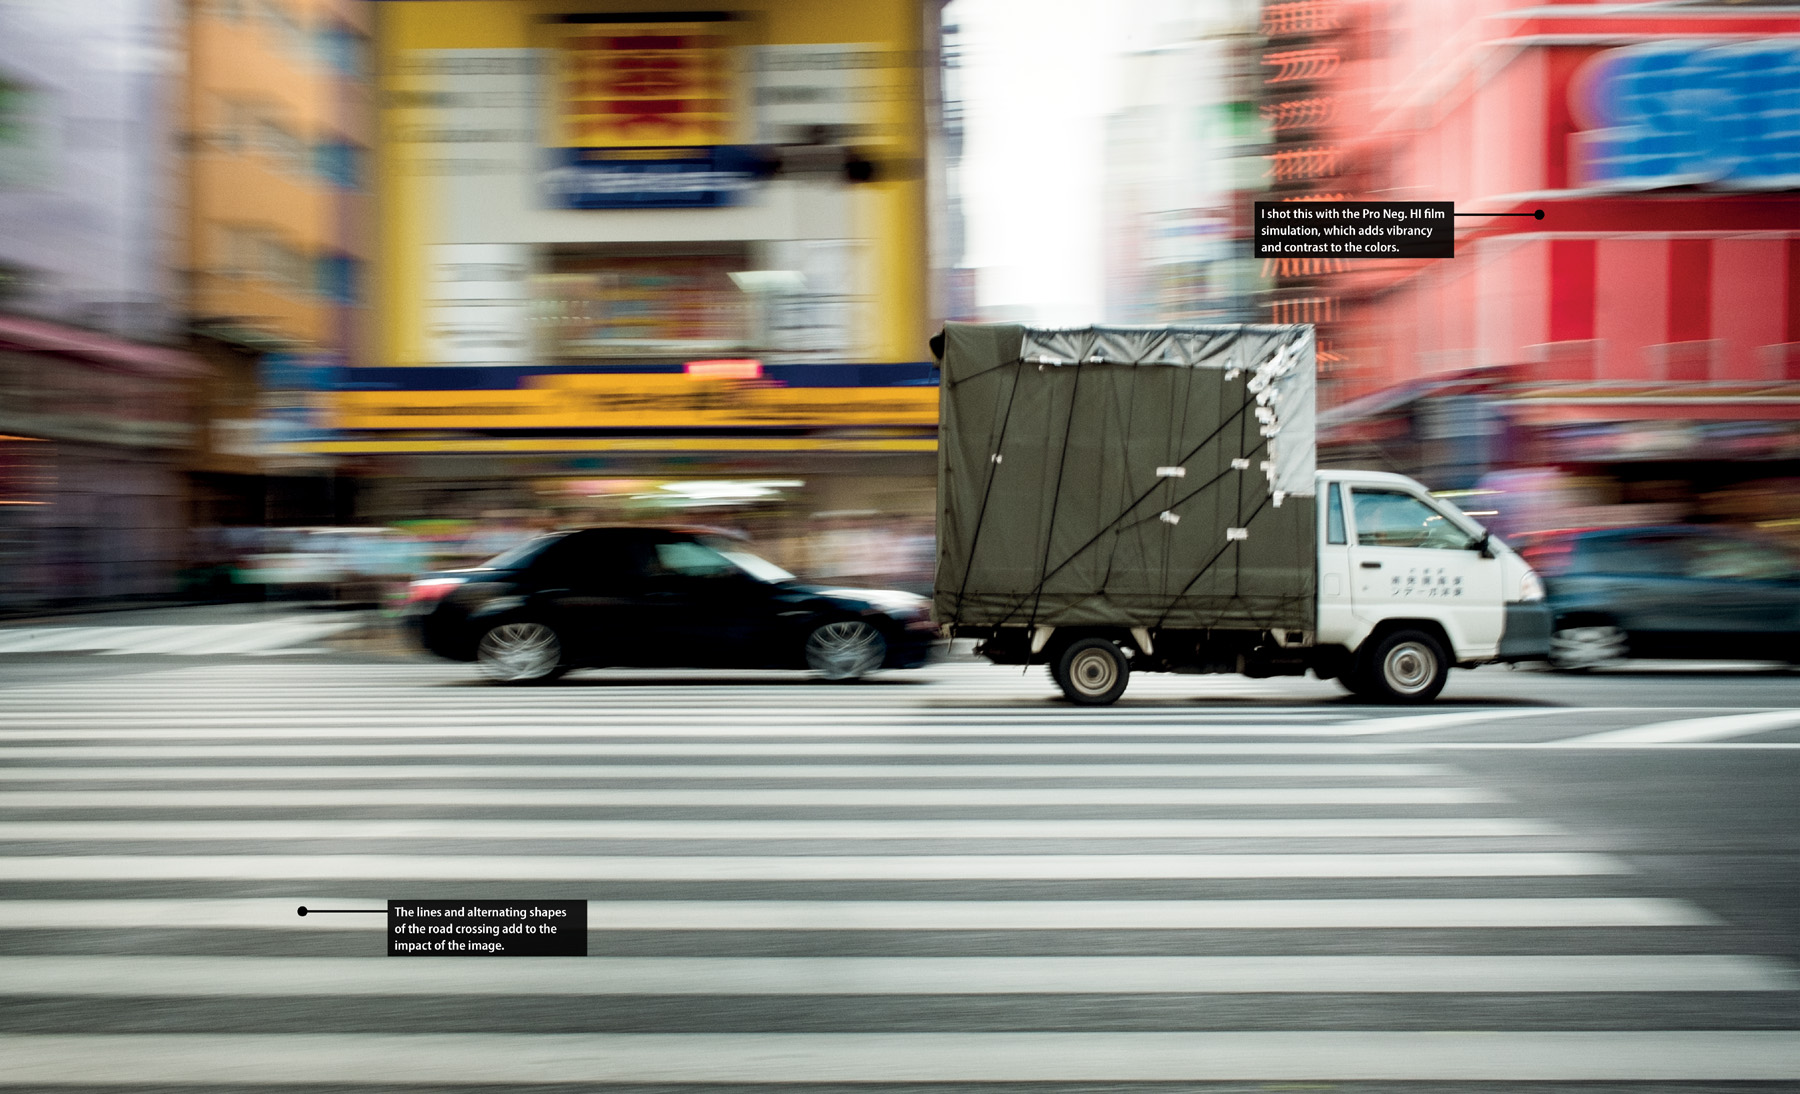
ISO 200 • 1/15 sec. • f/16 • 23mm lens
Poring Over the Picture
The near silent operation of the Fuji X100S allowed me to get extremely close to this couple without attracting their attention. The small form factor and ability to handhold in many shooting situations, coupled with the silence of the leaf shutter, makes the X100S a perfect companion for anyone shooting street photography.

ISO 500 • 1/125 sec. • f/8 • 23mm lens
The X100 vs. the X100S
I think it’s important to outline the differences between the X100 and the X100S, because although the models are similar, a number of features have changed in the X100S. Although the addition of an “S” doesn’t really suggest significant changes, Fuji has made some big feature improvements and functionality updates that you should be aware of. In all, there are nearly 70 feature differences between the X100 and the X100S. This section discusses the key changes, allowing you to begin shooting quicker with the new model (Figure 2.1).
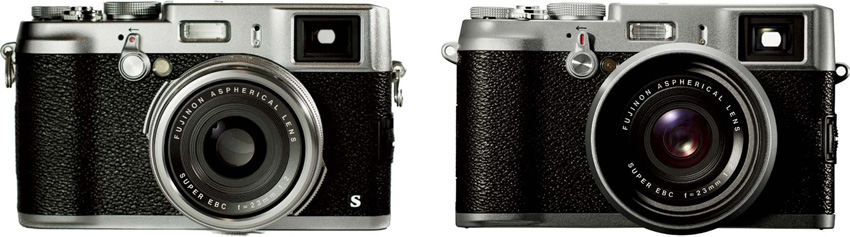
Figure 2.1 Aesthetically, there is little difference between the X100S (left) and the X100 (right). However, in many areas the X100S is a distinct improvement over its predecessor.
The X100S’s core feature upgrades are the following:
• Higher resolution: 16 megapixels (MP) versus 12.2 MP
• Higher-resolution movies: 1080p 60 frames per second (fps) versus 720p 30 fps
• Better, expanded ISO: 25,600 versus 12,800
• Faster burst mode: 6 fps versus 5 fps
Additionally, the X100S offers the following improvements:
• Better XTRANS CMOS II sensor and autofocus processor. Close-up focusing without resorting to macro means no noticeable shutter lag with the X100S, compared to a much more noticeable one with the X100.
• Autofocus (AF), thanks to the phase-detection system in the X100S, allows for nearly instant focusing, whereas the original X100 suffered a little with AF speeds.
• Focus Peak Highlight and Digital Split Image options allow you to check the focal plane when focusing manually.
Choosing and Formatting Your Memory Card
Digital memory cards are essentially the media that replace the need for film. Every shot you take will be stored on the memory card at the moment of capture. The cards are available in many sizes and forms. The X100S uses Secure Digital (SD), Secure Digital High Capacity (SDHC), or Secure Digital Extended Capacity (SDXC) cards (Figure 2.2).
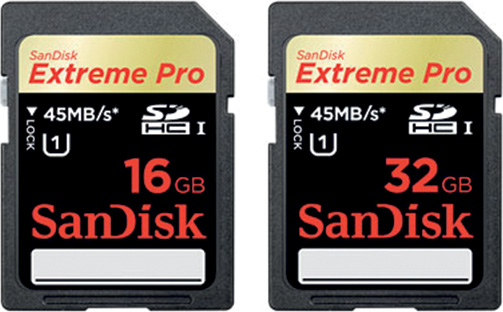
Figure 2.2 Make sure you select a card with enough capacity and speed to handle your shoot requirements.
Some people prefer to use smaller capacity cards and change them more often. This is because, in the unlikely event that the card is damaged or lost, you lose only the images on that card; images on different cards will be saved. However, I prefer to shoot with large-capacity cards, almost always 32GB. This means I can concentrate on shooting for longer periods without worrying about changing cards. It also mitigates the risk of losing the card during the process of changing it. However, it’s true that if I damage or lose the card, I’ll lose a lot more images.
Here are some tips for selecting and using memory cards:
• Always be careful with your cards! It’s extremely important to take care when inserting and handling them. On commercial shoots, I keep all my cards in a secure pouch that is attached to my belt. I don’t remove that pouch until I’m at home or back in the studio where I can download and back up the images.
• I use SDHC cards, which enable images to be written to them much faster—thereby allowing you to shoot more quickly. They are generally faster at downloading to your computer, too. If you are shooting movies (see Chapter 11, “Making Movies”) or using continuous shooting mode (see Chapter 9, “Hitting the Streets”), you should use an SDHC card with a minimum rating of 6. The higher the class number, the faster the card operates.
• The X100S is also SDXC-compliant, so you can use extremely fast cards with very large capacities. While widely available, SDXC cards are not supported by all card readers and other equipment, so be sure you check your other hardware for feature compatibility before using SDXC cards.
• Always make sure you have spare cards with you. You never know when you will need the additional space. Missing a great shot because you don’t have the capacity on your cards is not a great feeling!
• Format the memory card in the camera itself, rather than on a computer. Whenever I put a new card in the camera, I press the Play button to review any images that are on the card. It’s a safety procedure in case I haven’t downloaded the images previously recorded to the card. If images appear, I can verify that I have already downloaded the images or, if not, choose to use a different card. If you put a card in your camera without formatting it, chances are it will work; however, to ensure that the images are stored correctly, the card needs to be initialized, minimizing the risk of card failure further down the line.
If there are images on the card that were taken with a different camera, you will see the “gift” icon during the image review (Figure 2.3). This is important to bear in mind, as it means that in order to continue using the card safely, you really should format it again (in the X100S). To be safe, it’s always best to format the card in the camera it is going to be used in.

Figure 2.3 A “gift” icon during image review indicates a picture taken on a camera other than an X100S.
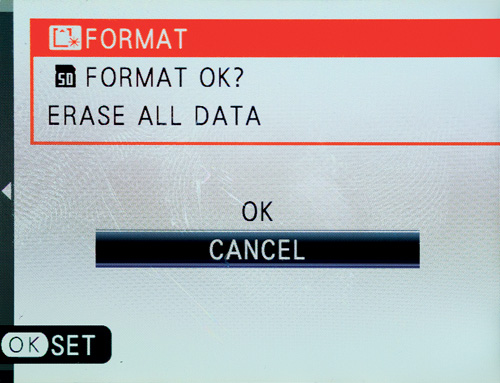
1. Press the Menu Button and, using the command dial, navigate to Setup Menu.
2. Using the command dial, select Format.
3. Using the command dial, select OK.
4. Press Menu/OK to confirm the format.
Updating the X100S’s Firmware
Firmware is the software inside the camera that operates all of its functions and features. Fujifilm has rolled out some amazing features via firmware, such as focus peaking in the original X100, and often the later firmware versions improve functions such as focus speed and image buffer lag.
Fuji often updates firmware, and at the time of this writing, the X100S firmware is at version 1.10. All new purchases of the X100S will come with the latest firmware available at the time it was manufactured. However, the manufacture date may have been some time ago, so check the firmware and update to the very latest version. (Also do this if you have purchased a secondhand camera.)
Updating the firmware is a two-step process. But before you do it, make sure you have a fully charged battery and a completely empty (formatted) memory card at hand. Once you have those in place, head over to the Fujifilm global site: www.fujifilm.com/support/digital_cameras/software/firmware/x/x100s.
First things first: Verify which version of the firmware you already have installed. If the version installed on your camera is the same as the one on the website, then an update is not required. To do so, turn on the camera while holding down the Disp/Back button. The firmware version will be displayed in the LCD monitor.

If your firmware version is different from the one available on the website, you should upgrade.
Updating the camera’s firmware:
1. Download the firmware from the Fujifilm website to your computer’s desktop.
2. Copy the firmware file (usually a .DAT file) to the root of your memory card. The root is the top-level folder on your memory card, which you can access via Finder on a Mac or Windows Explorer on a PC.
3. Turn on the camera while holding down the Disp/Back button.
4. Press the Left button to select OK (A).
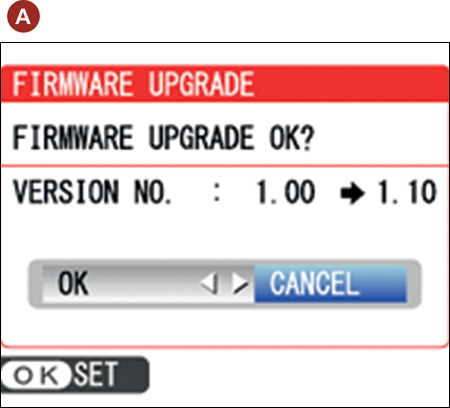
5. Press the Menu/OK button.
6. Once the warning appears telling you not to switch off the camera, press the Menu/OK button. The upgrade will begin. While the upgrade is being performed, do not turn off the camera or operate it in any way.
7. When the upgrade is finished, turn off the camera.
Understanding the Lens and Focal Length
If you ask most photographers what they believe to be the most critical piece of their photography arsenal, they will likely tell you it’s the lens. The technology and engineering that goes into your camera is a marvel, but it’s not worth anything if the light from outside can’t reach the sensor. The X100S includes one built-in lens capable of a multitude of tasks, including focusing on the subject, metering the scene, and delivering and focusing the light onto the sensor.
The lens on the X100S is fixed, meaning it is not a zoom lens, and the focal length on the X100S is 23.6mm (usually rounded down to 23mm). With the exception of the addition of a conversion lens (see Chapter 12, “Pimp My Ride”), this means your images will always be shot at the fixed focal range of 23mm.
For many, the lack of a zoom feature could be seen as a detriment. When you consider other cameras that offer a zooming lens, such as the Canon PowerShot G range of cameras, it might seem odd to choose a camera with only one focal length. However, for me, the fixed focal length is one of the things that appeals most about the X100S. It adds a consistency to my images, and really makes me think more about composition and image structure. It also means that I’m less lazy when shooting and I have to move around more, rather than resort to a zoom feature to get the images I want.
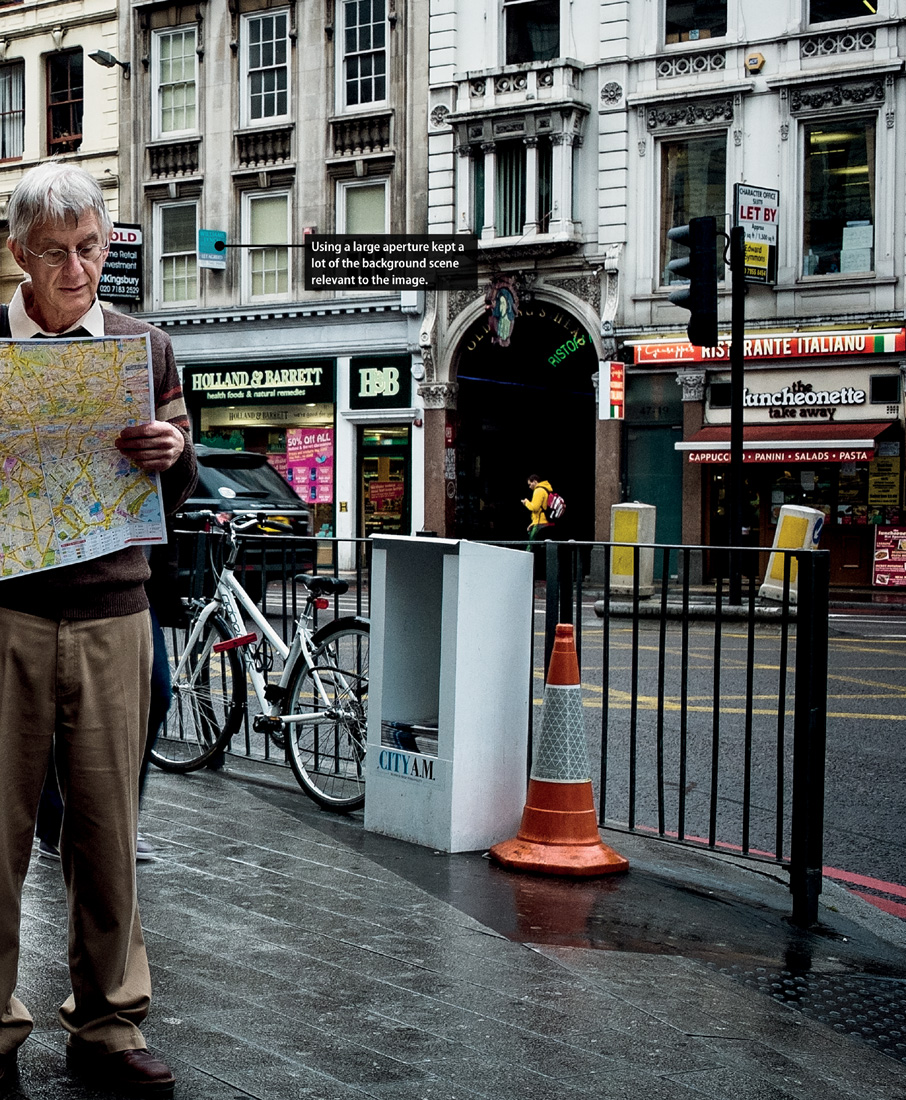
The X100S’s 23mm lens is perfect for many situations and lets you include a large scene in the frame (Figure 2.4). Using a large depth of field, it allows you to keep the foreground and background sharp, making the X100S perfect for landscape photography. The lens also works very well in tight spaces where there is very little elbow room to maneuver (Figure 2.5). Using the X100S’s full aperture range to its maximum potential can be helpful when you want to keep only a certain amount of the image in focus (Figure 2.6).
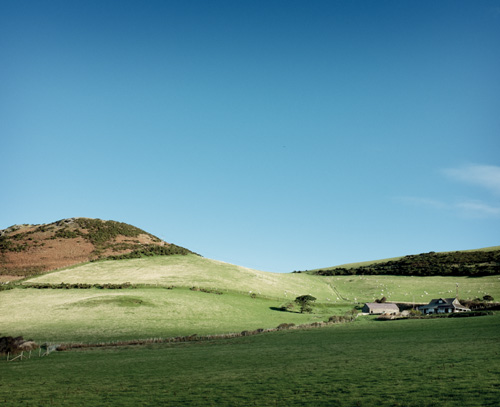
ISO 200 • 1/210 sec. • f/16 • 23mm lens
Figure 2.4 A 23mm range on the X100S is an excellent choice for wide landscape images. A large depth of field allows you to keep a lot of the foreground and background in focus throughout the frame.

ISO 3200 • 1/35 sec. • f/2 • 23mm lens
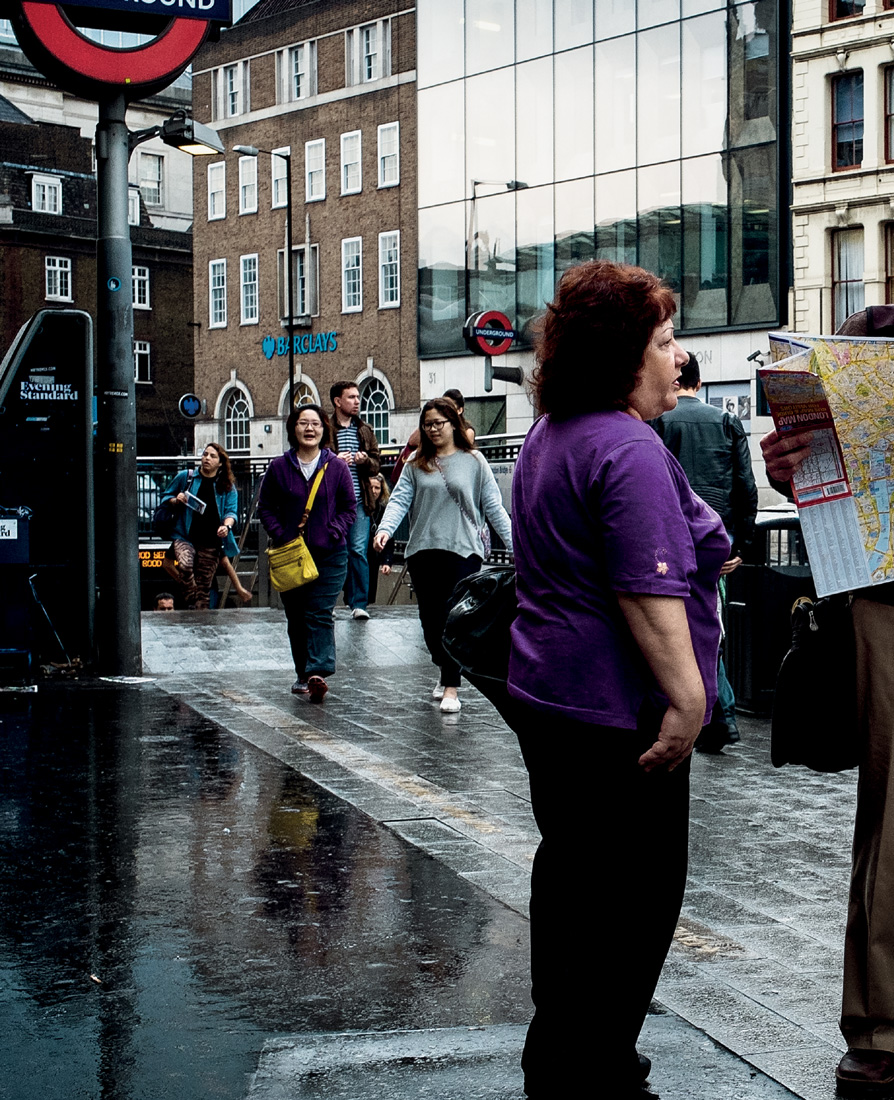
Figure 2.5 At close quarters, the X100S 23mm lens allows you to get very near to the subjects, and it is especially good for capturing candid scenes.
ISO 200 • 1/1000 sec. • f/5.6 • 23mm lens
Figure 2.6 A medium aperture of f/5.6 ensures the foreground subjects were kept in focus while the less interesting elements were deemphasized.
Because the lens is fixed in terms of focal length at 23mm, there is very little lens barrel distortion, when the lens appears to barrel or distort toward the edges. Barrel distortion is often experienced at the wide end of zoom lenses and some very wide fixed lenses. The f/2 23mm lens in the X100S is free of this phenomenon and can be used comfortably across a wide range of shooting subjects.
Understanding Exposure
To get the most from your X100S now, you need to understand the principles of exposure. Without this basic understanding, it may be difficult to move forward and improve your photography. It’s easier to go from “snapshots” to “great shots” with a clear understanding of the core photographic principles.
Exposure is the process whereby the light reflecting off a subject passes through the opening in the camera lens onto the sensor within the camera, for a certain period of time. Technically, this combination of the lens opening, the shutter speed selected, and the sensitivity of the sensor is known as the exposure value (EV), the sum of these components needed to properly expose a scene.
This relationship is often referred to as the “exposure triangle” and is made up of the following elements:
• ISO: This is the measurement that determines the camera sensor’s sensitivity level. ISO stands for International Standards Organization, but the acronym itself is used to describe the level of sensitivity of the camera’s sensor to light. The higher the ISO, the less light is required to obtain a good exposure. Or, in reverse, the lower the light levels, the higher the ISO that is needed.
• To achieve a proper exposure, the lens needs to adjust the aperture diaphragm to control the volume of light entering the camera. Then the shutter is opened for a relatively short period of time to allow the light to hit the sensor long enough for it to record the image.
• Standard ISO numbers for the X100S start at 200 and then double in sensitivity as you double the number. So ISO 400 is twice as sensitive as 200.
• Aperture: Essentially, aperture is the size of the lens opening when a photograph is taken. The size of the hole has a direct correlation to the amount of light that can get into the sensor. The larger the aperture size, the more light will fall on the sensor; the smaller the aperture size, the less light will fall on the sensor. The X100S’s aperture range is f/2 through f/16. Generally speaking, a lower f-stop number will allow you to shoot in lower light, and will usually offer more depth of field and bokeh depending on the subject and the framing.
• Shutter speed: The speed to which you set the shutter on the camera controls the amount of time the shutter remains open, which in turn determines how much light can hit the sensor. The shutter speeds available on the X100S range from 30 seconds to 1/4000 of a second. Normal shooting will see you working within a range of around 1/30 to 1/2000 of a second, but obviously this may change depending on the circumstances of the shot you are taking at the time.
A change in any of these factors (ISO, aperture, or shutter speed) will require a reciprocal adjustment in one or both of the others. For example, if you let more light into the lens by choosing a larger aperture, you will need to shorten the time the shutter is open. Conversely, if you increase the shutter opening time to allow more light, then you’ll need to decrease the aperture.
When you point your camera at a scene, the light reflecting off your subject enters the lens and is allowed to pass through the sensor for a period of time dictated by the shutter speed. The amount and duration of the light needed for a proper exposure depends on how much light is being reflected and how sensitive the sensor is. To work it out, your camera utilizes a built-in light meter that looks through the lens and measures the amount of light. That level is then calculated against the sensitivity of the ISO setting and an EV is established.
There are many ways to achieve a perfect exposure, because the f-stop and the shutter speed can be combined in different ways to allow the same amount of exposure. The following table shows a list of reciprocal settings that would all produce the same exposure. This means that any of these settings would each result in the same amount of light hitting the camera’s sensor to make the exposure.

Note that each time we cut the f-stop in half, we reciprocate by doubling the shutter speed.
Now we can start using this newfound knowledge and information to make educated choices with respect to shutter speed and f-stop. Let’s bring the third element into this by changing our ISO by one stop (doubling it) from 100 to 200.

You can see that as we have doubled the sensitivity of the sensor (ISO), we now need half as much exposure as before to achieve the same result.
You may be asking, why not just use the exposure setting of f/16 at 1/100 second? Why bother with all the reciprocal values when this setting clearly gives us an established and accurate exposure? The answer is that the f-stop and shutter speed also control two other important aspects of the image: motion and depth of field.
Understanding Motion and Depth of Field
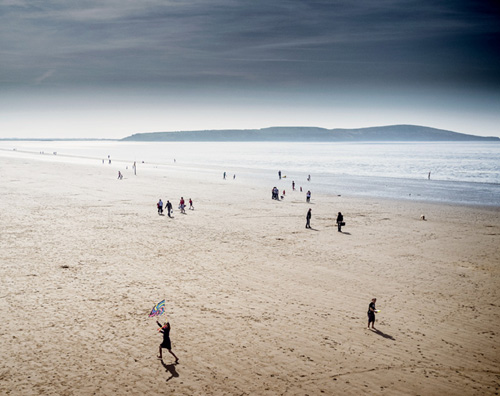
Various factors are related to changes in aperture and shutter speed. Because shutter speed controls the length of time the light strikes the sensor, consequently it controls blurriness of the image. As you can imagine, the less time the light has to hit the sensor, the less time your subjects have to move around and become blurry. While many will see blur as an affliction to exposure, it can actually be used creatively, and you can impose some control like freezing the motion of a fast-moving subject (Figure 2.7) or even blurring the subject to give an intentional feel of movement (Figure 2.8).

ISO 200 • 1/1000 sec. • f/2 • 23mm lens
Figure 2.7 A fast shutter speed allowed me to freeze the action mid-jump.
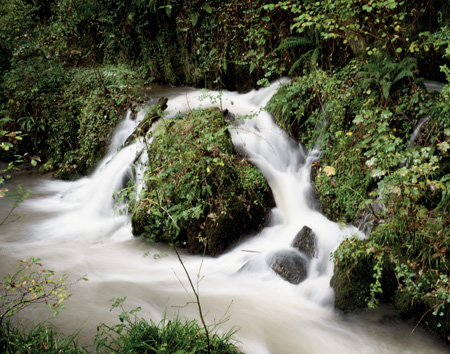
ISO 200 • 2.1 sec. • f/13 • 23mm lens
Figure 2.8 A slower shutter speed (combined with the X100S’s built-in neutral density filter) allowed me to illustrate the motion of the water in this shot.
The aperture controls the amount of light that comes through the lens, and it also determines the bokeh (or lack of bokeh) of the image. Bokeh is the blur of the out-of-focus area of an image. Technically controlled by the depth of field, bokeh is perhaps one of the most powerful of the creative features available through standard exposure.
It is, of course, possible to use both aperture and shutter speed together creatively (Figure 2.9). As a rule of thumb, think of a smaller aperture (a larger f-stop) as resulting in greater overall sharpness from front to back in an image (Figure 2.10). A larger aperture (a smaller f-stop) means less sharpness, or greater blurring of objects at distances other than your subject (Figure 2.11). In cases where you want to keep a moving subject sharp (Figure 2.12) but still give an indication of motion, you may need to keep your shutter speed lower and rely on ISO and aperture to ensure a good exposure.

ISO 6400 • 1/30 sec. • f/16 • 23mm lens
Figure 2.9 I wanted to get the station name in focus while illustrating the motion of the train. To achieve this, I needed to use a small aperture of f/16 (to get the station sign in focus) and slow shutter speed (to illustrate the motion of the train).

ISO 400 • 1/400 sec. • f/16 • 23mm lens
Figure 2.10 Using a small aperture of f/16 allowed me to get everything in this cityscape in focus from front to back.

ISO 400 • 1/150 sec. • f/2 • 23mm lens
Figure 2.11 Isolating elements of an image can be accomplished by using a larger aperture, which produces a narrow area of sharp focus.

ISO 250 • 1/60 sec. • f/2 • 23mm lens
Figure 2.12 I wanted to keep the porters in sharp focus, and without increasing ISO I resorted to a slow shutter speed, which also allowed me to portray motion in the image.
As we further explore the features of the X100S, you will learn not only how to utilize the elements of exposure to capture properly exposed photographs, but also how you can adjust exposure to emphasize your subject or make creative enhancements to the image. Being creative with motion, speed, and focus or bokeh will allow you to move from snapshots to great shots in no time at all.
Chapter 2 Assignments
Now that we have reviewed some of the more important features of the X100S and photography techniques to get you started, it’s time to put that knowledge to the test. These assignments will run you through configuring your camera so it’s up to date and understanding the lens that the X100S has on board.
Format your memory card
Even though you may already have started using your camera, ensure you are familiar with formatting the SD card. If you haven’t done so already, follow the directions in the “Choosing and Formatting Your Memory Card” section, earlier in the chapter, and format as described. Make sure you save any images on the card that may already be on it!
Check and update the firmware
Charge your camera, set aside a memory card, and go ahead and check the firmware version your camera already has installed. If it’s not the latest version, download the latest one and install it on your camera.
Explore the lens
The X100S has a wonderfully simple yet complex lens on board. Spend a little time shooting with all the different focal apertures and shutter speeds. Adjust your ISO and shutter speed to try to obtain creative imagery emulating motion, or stopping a moving subject in a freeze frame.
Take several shots of the same frame using different apertures. What do you notice occurring with the depth of field?
Try and achieve the same exposure using a combination of f-stops and shutter speeds. Notice how it is possible to achieve the same exposure with different combinations.
Try shooting in a restricted light environment using a low ISO and a high shutter speed. See how adjusting the ISO affects the exposure and brightens the overall image.
Share your results with the book’s Flickr group!
Join the group here: flickr.com/groups/fujiX100S_fromsnapshotstogreatshots