
Lesson 7. Capstone: Creating your first web application
When I first got into web development, I really wanted to build a website where people could go to view interesting recipes. Luckily for me, a local cooking school, Confetti Cuisine, wants me to build them a site with a landing page to reflect their course offerings, a page of recipes, and a place where prospective students can sign up.
As a cooking enthusiast, I thought this project would be a good one that I could use daily. What’s more, this site is going to be fun to build in Node.js. Piecing together all the preceding lessons into a complete multipage application, these steps should sufficiently prepare me to build a static site for Confetti Cuisine.
I’ll start a new application from scratch and add three views, routes for the views and assets, and a public client folder. To start, I’ll build out the application logic with the goal of clean, nonrepetitive code. Then I’ll add some of the public-facing views and custom styling. At the end of this lesson, I’ll have a web server to handle requests to specific files and assets in the project. The final product is one that I can gradually build on and connect to a database at my client’s request.
To create this application, I use the following steps:
- Initialize the application package.json.
- Set up the project directory structure.
- Create application logic in main.js.
- Create three views, each of which should have a clickable image that can be served independently:
- Index (home)
- Courses
- Contact
- Thanks
- Error
- Add custom assets.
- Build the application’s router.
- Handle application errors.
- Run the application.
I’m ready to get cracking.
7.1. Initializing the application
To start, I use npm to create a package.json file with a summary of the application I’m developing. I navigate to a directory on my computer where I’d like to save this project and then create a new project folder, using the following commands in terminal: mkdir confetti_cuisine && cd confetti_cuisine and npm init.
I follow the command-line instructions and accept all default values except the following:
- Use main.js as the entry point.
- Change the description to “A site for booking classes for cooking.”
- Add my name as the author.
Next, I install the http-status-codes package by running npm install http-status-codes --save in the project’s terminal window. Within my confetti_cuisine folder, my package .json file should resemble the example in the next listing.
Listing 7.1. Project package.json file contents
{
  "name": "confetti_cuisine",
  "version": "1.0.0",
  "description": "A site for booking classes for cooking.",
  "main": "main.js",
  "scripts": {
    "test": "echo "Error: no test specified" && exit 1",
  },
  "author": "Jon Wexler",
  "license": "ISC",
    "dependencies": {
        "http-status-codes": "^1.3.0"
    }
}             1
From this point forward, I’ll be able to refer to this file as a summary of my application’s configurations.
7.2. Understanding application directory structure
Before I continue with more code, I want to review the application’s directory structure. In the project structure, I want my main.js, package.json, and router.js files to live at the root level of my directory. Any HTML content will be represented as individual .html files, which will live in a views folder within my project folder. My complete application project directory will look like the structure in the following listing.
Listing 7.2. Project directory structure for confetti_cuisine
.                            1
|____main.js
|____router.js
|____public
| |____css
| | |____confetti_cuisine.css
| | |____bootstrap.css
| |____images
| | |____product.jpg
| | |____graph.png
| | |____cat.jpg
| | |____people.jpg
| |____js
| | |____confettiCuisine.js
|____package-lock.json
|____package.json
|____contentTypes.js
|____utils.js
|____views
| |____index.html
| |____contact.html
| |____courses.html
| |____thanks.html
| |____error.html
My application server will respond with HTML files in my views folder. The assets on which those files rely will live in a folder called public.
Note
HTML files will be viewed by the client, but they’re not considered to be assets and don’t go in the public folder.
The public folder contains an images, js, and css folder to hold the application’s client-facing assets. These files define the styles and JavaScript interactions between my application and its user. To add some quick styling to my application, I download bootstrap .css from http://getbootstrap.com/docs/4.0/getting-started/download/ and add it to my css folder in public. I also create a confetti_cuisine.css file for any custom styling rules that I want to apply to this project.
Next, I set up the application logic.
7.3. Creating main.js and router.js
Now that I’ve set up my folder structure and initialized the project, I need to add the main application logic to the site to get it serving files on port 3000. I’m going to keep the routes in a separate file, so I’ll need to require that file along with the fs module so that I can serve static files.
I create a new file called main.js. Within that file, I assign my application’s port number, require the http and http-status-codes modules and the soon-to-be-built custom modules router, contentTypes, and utils, as shown in listing 7.3.
Note
The contentTypes and utils modules simply help me organize my variables within main.js.
Listing 7.3. Contents of main.js with required modules
const port = 3000,                              1
  http = require("http"),
  httpStatus = require("http-status-codes"),
  router = require("./router"),
  contentTypes = require("./contentTypes"),
  utils = require("./utils");
The application won’t start until I create my local modules, so I’ll start by creating contentTypes.js, using the code in the following listing. In this file, I’m exporting an object that maps file types to their header values for use in my responses. Later, I’ll access the HTML content type in main.js by using contentTypes.html.
Listing 7.4. Object mapping in contentTypes.js
module.exports = {                  1
  html: {
    "Content-Type": "text/html"
  },
  text: {
    "Content-Type": "text/plain"
  },
  js: {
    "Content-Type": "text/js"
  },
  jpg: {
    "Content-Type": "image/jpg"
  },
  png: {
    "Content-Type": "image/png"
  },
  css: {
    "Content-Type": "text/css"
  }
};
- 1 Export content type mapping object.
Next, I set up the function that I’ll use to read file contents in a new utils module. Within utils.js, I add the code in the next listing. In this module, I export an object containing a getFile function. This function looks for a file at the provided path. If a file doesn’t exist, I immediately return an error page.
Listing 7.5. Utility functions in utils.js
const fs = require("fs"),
  httpStatus = require("http-status-codes"),
  contentTypes = require("./contentTypes");         1

module.exports = {                                  2
  getFile: (file, res) => {
    fs.readFile(`./${file}`, (error, data) => {
      if (error) {
        res.writeHead(httpStatus.INTERNAL_SERVER_ERROR,
          contentTypes.html);
        res.end("There was an error serving content!");
      }
      res.end(data);
    });
  }
};
Last, in a new file, I add the code in listing 7.6. This router.js file requires the http-status-codes and my two custom modules: contentTypes and utils.
The router module includes a routes object that holds key-value pairs mapped to GET requests through my get function and POST requests through my post function. The handle function is the one referred to as the callback function to createServer in main.js. The get and post functions take a URL and callback function and then map them to each other in the routes object. If no route is found, I use my custom getFile function in the utils module to respond with an error page.
Listing 7.6. Handling routes in router.js
const httpStatus = require("http-status-codes"),
  contentTypes = require("./contentTypes"),
  utils = require("./utils");

const routes = {                             1
  "GET": {},
  "POST": {}
};

exports.handle = (req, res) => {             2
  try {
    routes[req.method][req.url](req, res);
  } catch (e) {
    res.writeHead(httpStatus.OK, contentTypes.html);
    utils.getFile("views/error.html", res);
  }
};

exports.get = (url, action) => {             3
  routes["GET"][url] = action;
};

exports.post = (url, action) => {
  routes["POST"][url] = action;
};
- 1 Create a routes object to hold route functions.
- 2 Create the handle function to handle requests.
- 3 Create the get and post functions to map route functions.
To get my application server to run, I need to set up the application’s routes and views.
7.4. Creating views
The views are client-facing and could make or break my user’s experience with the application. I’ll use a similar template for each page to reduce complexity in this application. The top of each HTML page should have some HTML layout, a head, a link to my soon-to-be-built custom stylesheet, and navigation. The home page for the Confetti Cuisine site will look like figure 7.1, with links to my three views in the top-left corner.
Figure 7.1. Example home page for Confetti Cuisine
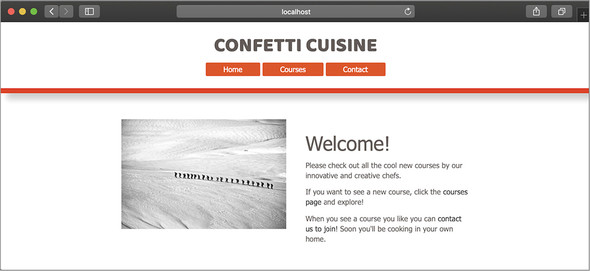
For the home page, I’ll create a new view called index.html in my views folder and add the content specific to the index page. Because I’m using bootstrap.css, I need to link to that file from my HTML pages by adding <link rel="stylesheet" href="/bootstrap.css"> to my HTML head tag. I’ll do the same for my custom stylesheet, confetti_cuisine.css.
Next, I create a courses.html file to show off a list of available cooking classes and a contact.html file with the following form. This form submits contact information via POST to the / route. The form’s code should resemble the code in the next listing.
Listing 7.7. Example form that posts to the home-page route in contact.html
<form class="contact-form" action="/" method="post">         1
  <input type="email" name="email" required>
  <input class="button" type="submit" value="submit">
</form>
- 1 Build a form to submit a name to the the home page.
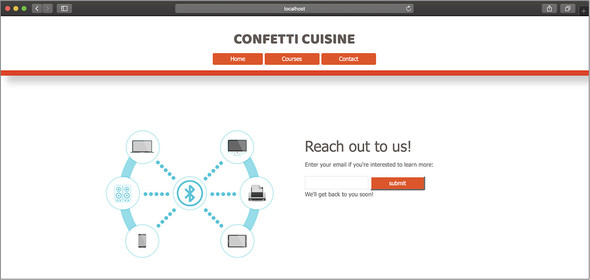
My site’s contact page will look like figure 7.2.
Figure 7.2. Example contact page for Confetti Cuisine
Each page links to the others through a navigation bar. I need to make sure that all the assets I’m using in these files are accounted for when I create my routes. If any assets are missing, my application could crash when it tries to look for their corresponding files.
I’ll add these assets so that my pages will have resources for richer content.
7.5. Adding assets
For this application, I’ve created some custom styles to be used by each of the views. Any color, dimension, or placement changes I want to make in elements of my site will go in confetti_cuisine.css, which lives in public/css alongside bootstrap.css.
When this file is saved, my views will have colors and structure when loaded. If I decide to use any client-side JavaScript, I’ll need to create a .js file, add it to my public/js folder, and link to it within each file by using <script> tags. Last, I’ll add my images to public/ images. The names of these images should match the names I use within my HTML views.
The only step left is registering and handling my routes for each view and asset in my project.
7.6. Creating routes
The last piece of the puzzle is an important one: routes. The routes of my application will determine which URLs are accessible to the client and which files I’ll serve.
I’ve specifically created a router.js file to handle my routes, but I still need to register them. Registering my routes essentially means passing a URL and callback function to my router.get or router.post function, depending on which HTTP method I’m handling. Those functions add my routes to router.routes, a JavaScript object that maps my URLs to the callback functions to be invoked when that URL is accessed.
To recap, to register a route, I need to state the following:
- Whether the request is a GET or a POST request
- The URL’s path
- The name of the file to return
- An HTTP status code
- The type of the file being returned (as the content type)
In each callback function, I need to indicate the content type that will go in the response and use the fs module to read the contents of my views and assets into the response. I add the routes and code in the next listing below the require lines in main.js.
Listing 7.8. Registering individual routes with the router module in main.js
router.get("/", (req, res) => { 1 res.writeHead(httpStatus.OK, contentTypes.htm); utils.getFile("views/index.html", res); }); router.get("/courses.html", (req, res) => { res.writeHead(httpStatus.OK, contentTypes.html); utils.getFile("views/courses.html", res); }); router.get("/contact.html", (req, res) => { res.writeHead(httpStatus.OK, contentTypes.html); utils.getFile("views/contact.html", res); }); router.post("/", (req, res) => { res.writeHead(httpStatus.OK, contentTypes.html); utils.getFile("views/thanks.html", res); }); router.get("/graph.png", (req, res) => { res.writeHead(httpStatus.OK, contentTypes.png); utils.getFile("public/images/graph.png", res); }); router.get("/people.jpg", (req, res) => { res.writeHead(httpStatus.OK, contentTypes.jpg); utils.getFile("public/images/people.jpg", res); }); router.get("/product.jpg", (req, res) => { res.writeHead(httpStatus.OK, contentTypes.jpg); utils.getFile("public/images/product.jpg", res); }); router.get("/confetti_cuisine.css", (req, res) => { res.writeHead(httpStatus.OK, contentTypes.css); utils.getFile("public/css/confetti_cuisine.css", res); }); router.get("/bootstrap.css", (req, res) => { res.writeHead(httpStatus.OK, contentTypes.css); utils.getFile("public/css/bootstrap.css", res); }); router.get("/confetti_cuisine.js", (req, res) => { res.writeHead(httpStatus.OK, contentTypes.js); utils.getFile("public/js/confetti_cuisine.js", res); }); http.createServer(router.handle).listen(port); 2 console.log(`The server is listening onport number: ${port}`);
- 1 Add a series of routes for web pages and assets.
- 2 Start the server.
Note
Notice the POST route, which will handle form submissions on the contact.html page. Instead of responding with another HTML page, this route responds with an HTML “thank you for supporting the product” page.
I should now be able to start my application with node main and navigate to http://localhost: 3000 to see my web application’s home page.
Note
I only create routes for the assets (images, js, and css) that I have represented as files within my project.
Summary
In this capstone exercise, I built a complete web application serving static web pages for Confetti Cuisine. To accomplish this task, I required my own router module into the main application file. Then I created a custom system for routing user requests to serve specific content. After building custom functions to register routes in an organized and systematic way, I created views and assets to be served from their respective directories.
A lot of code logic is going on here, and the code logic is on its way to a professional structure used by Node.js applications around the world.
In unit 3, I explore web frameworks and show you how they use this application structure and some scaffolding (prebuilt folders and structure) to accomplish the same application in fewer steps and with fewer headaches.