
It is now time to put our newfound knowledge into action. Grunt can be used in a wide variety of ways; however, the most common use case is a static website. Static websites are growing in popularity, as the web development industry requires ever-increasing levels of scalability. Although using a Content Management System (CMS) is a common method of managing a website, it is not the most efficient method of serving a website. This is because the majority of CMSs, such as WordPress, require PHP and an accompanying database. Static files on the other hand, can be hosted very cheaply on a cloud service such as Amazon's S3. Even if our website requires a server component to provide authentication, we may, for example, reduce the load on the server by moving as much logic as possible into the frontend. This provides us with a greater ability to scale, while reducing costs at the same time. We can take this idea of scalability even further with the concept of single-page applications. Traditionally, each page we view requires the server to answer requests for the same set of assets over and over, while also providing dynamic HTML for that given page. In a single-page application, as the name suggests, the website is made up of only one page. This single page intelligently responds to user interaction, hence its description as an application instead of a website. In this chapter, we start from scratch and carefully go through the process of using Grunt to create the build for an optimized single-page application.
Let's look at the various steps involved in using Grunt to create the build for a single-page application.
We begin our project by creating a root directory, project. Within this directory, we create an src directory to house our source files. Then, we initialize the project's package.json file, install the local grunt module, and finally, create an empty Gruntfile.js file. We can do this on the command line with:
$ mkdir project
$ cd project/
$ mkdir src
$ npm init
$ npm install --save-dev grunt
$ echo "module.exports = function(grunt) {};" > Gruntfile.js
As we might expect, the echo command echoes the provided string back to the command line (which is known as standard out or "stdout"). The arrow (>), however, redirects standard out to a file. So, this last line is just a short way of creating and initializing a file. It is not necessary to create these files and directories on the command line, as long as we end up with the following directory structure:
//Code example 01-project
project/
├── Gruntfile.js
├── node_modules
│   └── grunt
├── package.json
└── src
At this point, we can now execute grunt, since we have no tasks; however, we should see the following command:
$ grunt
Warning: Task "default" not found. Use --force to continue.

Aborted due to warnings.
With many websites, including single-page applications, we can end up with an increasing amount of JavaScript, CSS, and HTML as they grow in complexity. We can improve code manageability by simply concatenating any number of individual files spread out across an organized set of folders. As well as splitting up our code into many files, we can also improve the code itself.
This is achieved through use of transcompile languages. In this step, we are using CoffeeScript, Stylus, and Jade, as each provides a minimalist syntax for its corresponding language. This minimalism improves readability by making our code cleaner and more succinct. For instance, a halving of the code required to produce the same result is often achieved. In addition to the cleaner syntax, there are added language features that can further increase productivity. For more information and examples of each, visit the following links:
- CoffeeScript (http://gswg.io#coffeescript)
- Stylus (http://gswg.io#stylus)
- Jade (http://gswg.io#jade)
However, we should keep in mind that there are alternatives to these three transcompile languages. We can easily swap out CoffeeScript for TypeScript or Dart, swap out Stylus for Sass or LESS, and swap out Jade for Haml or EJS. This replacement is easy because each of these defines a source code transformation, and since transcompiling Grunt plugins are mostly similar, our configuration should also look similar, regardless of which language we choose.
The programs that perform transcompilation are known as preprocessors. Therefore, Grunt plugins that perform transcompilation may be seen as thin wrappers around a given preprocessor. Now, we will install a Grunt plugin for each of our chosen languages and their corresponding preprocessors:
$ npm install --save-dev grunt-contrib-coffee grunt-contrib-jade grunt-contrib-stylus
Tip
Both Stylus and Sass are very similar, however, Stylus is my CSS preprocessor of choice because the Stylus preprocessor is written in JavaScript, so it runs in Node.js; whereas the Sass preprocessor (http://gswg.io#grunt-contrib-sass) requires Ruby, and the Ruby Sass library, to be installed.
It should be noted that we also have the option of not using a preprocessor at all. In the next sections we will cover assets optimization, which can also be seen as a transform. So, even when using Vanilla JavaScript, CSS, and HTML, we find we still need Grunt to perform our optimizations.
Before we configure these plugins, let's first create and compile some source files. We will segregate our source files into three subdirectories: scripts, styles, and views. Note that these directory names are chosen because they are language agnostic. Once we have created each of these subdirectories inside our src directory, we then need to create an initial file in each, as below:
//Code example 02-project
// src/scripts/app.coffee
alert 'hello world'

// src/styles/app.styl
html, body
  margin 0
  padding 0

// src/views/app.jade
!!!5
html
  head
    link(rel="stylesheet", href="css/app.css")
  body
    h5 Hello World
    script(src="js/app.js")
Tip
When placing our link tags (stylesheets) and script tags inside our HTML, it is best to place all of our link tags at the top, inside the head element, and to place all of our scripts at the very bottom, at the end of the body element. This causes browsers to load the stylesheets first, letting the user see a correctly styled version of the page while it is loading.
Now, inside our Gruntfile.js file, we will load the tasks provided by these plugins, then configure each to compile the corresponding app file from our src directory into our build directory:
//Code example 02-project
// Gruntfile.js
module.exports = function(grunt) {

  // Load tasks provided by each plugin
  grunt.loadNpmTasks("grunt-contrib-coffee");
  grunt.loadNpmTasks("grunt-contrib-stylus");
  grunt.loadNpmTasks("grunt-contrib-jade");

  // Project configuration
  grunt.initConfig({
    coffee: {
      build: {
        src: "src/scripts/app.coffee",
        dest: "build/js/app.js"
      }
    },
    stylus: {
      build: {
        src: "src/styles/app.styl",
        dest: "build/css/app.css"
      }
    },
    jade: {
      build: {
        options: {
          pretty: true
        },
        src: "src/views/app.jade",
        dest: "build/app.html"
      }
    }
  });

  // Define the default task
  grunt.registerTask('default', ['coffee','stylus','jade']);
};
At this point, our project directory should look like:
//Code example 02-project
project/
├── Gruntfile.js
├── node_modules
│   ├── grunt
│   ├── grunt-contrib-coffee
│   ├── grunt-contrib-jade
│   └── grunt-contrib-stylus
├── package.json
└── src
    ├── scripts
    │   └── app.coffee
    ├── styles
    │   └── app.styl
    └── views
        └── app.jade
Now we are ready to transpile our source files. Since we have aliased our default task to our coffee, stylus, and jade tasks, we can simply execute grunt, yielding:
$ grunt
Running "coffee:build" (coffee) task
File build/js/app.js created.

Running "stylus:build" (stylus) task
File build/css/app.css created.

Running "jade:build" (jade) task
File "build/app.html" created.

Done, without errors.
We should now have a new build directory that looks like:
build/
├── app.html
├── css
│   └── app.css
└── js
    └── app.js
This separation between our src and build directories is important, as the contents of build will be overwritten without warning. Therefore, it is clear that the source files are intended to be modified, whereas the build files are temporary. To further emphasize the latter, we should add our build directory to our version control system's ignore list. This will force the developer to run Grunt in order to generate the build directory and help new developers get used to the Grunt workflow. It also helps discover any bugs with the build.
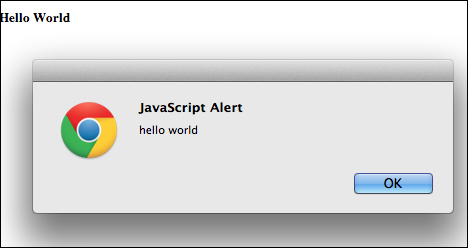
Upon opening our newly generated app.html file, we should be greeted with the following window:
In the previous step, we configured a one-to-one mapping for each task. In practice, however, we will want a more robust solution.
Let's start with our CoffeeScript files, as mentioned in Chapter 1, Introducing Grunt, in the subsection on Concatenation. While it is important to separate functionality into individual files, it is also important to reduce the number of scripts included on the page. Both goals can be achieved through file concatenation. Let's now modify our coffee task's configuration to compile and concatenate all files within our scripts directory. Luckily, our coffee task allows us to select multiple source files, providing us with the ability to concatenate them into one file:
//Code example 03-project
coffee: {
  build: {
    options: {
      join: true
    },
    src: "src/scripts/**/*.coffee",
    dest: "build/js/app.js"
  }
}
Tip
The join option tells the coffee task to concatenate before compiling; this is favorable, as we shall soon see. We can view examples, and a complete list of coffee task options, on http://gswg.io#grunt-contrib-coffee plugin's GitHub repository at http://gswg.io#grunt-contrib-coffee.
Instead of listing out individual files, the glob string src/scripts/**/*.coffee is used to match all CoffeeScript files within
scripts and its subdirectories. To see this in action, we will add two utility functions, each in its own file:
//Code example 03-project
//src/scripts/util/add.coffee
add = (a, b) -> a + b

//src/scripts/util/subtract.coffee
subtract = (a, b) -> a – b
And we will also modify our app.coffee to make use of these functions:
//src/scripts/app.coffee
alert add 7, subtract 4, 1
Now, when we run our coffee task:
$ grunt coffee
Running "coffee:build" (coffee) task
File build/js/app.js created.

Done, without errors.
Then, display the resulting build/js/app.js file, we should see:
$ cat build/js/app.js
(function() {
  var add, subtract;

  alert(add(7, subtract(4, 1)));

  add = function(a, b) {
    return a + b;
  };

  subtract = function(a, b) {
    return a - b;
  };
}).call(this);
Note
The function wrapper around compiled code is known as an Immediately-Invoked Function Expression (IIFE). By default, compiled CoffeeScript code is wrapped in an IIFE, which essentially makes our code private. This helps to separate our JavaScript from the rest of the JavaScript on the page, and is considered best practice. We can read more about this concept on Ben Alman's blog at http://gswg.io#iife. The join option, described previously, causes one IIFE to be placed around all of our files instead of wrapping each individual file.
In the above file, we notice our usage of add and subtract appears before they are defined. This will result in an error. We fix this by using an array in the coffee task's src property, and by explicitly placing app.coffee after the glob string to match all CoffeeScript files:
    coffee: {
      build: {
        options: {
          join: true
        },
        src: [
          "src/scripts/**/*.coffee",
          "!src/scripts/app.coffee",
          "src/scripts/app.coffee"
        ],
        dest: "build/js/app.js"
      }
    }
To achieve this in Grunt version 0.4.x, we must first exclude app.coffee from the file set (by prefixing the file path with an exclamation mark !), then re-include it. Running grunt coffee and displaying the result should now correctly yield:
$ grunt coffee
...
$ cat build/js/app.js
(function() {
var add, subtract;
add = function(a, b) {
return a + b;
};
subtract = function(a, b) {
return a - b;
};
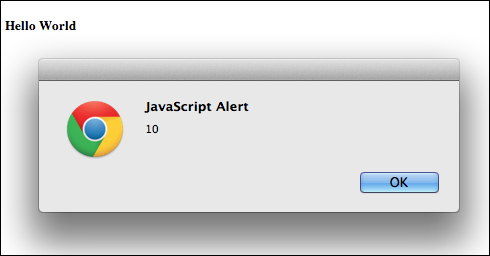
alert(add(7, subtract(4, 1)));
}).call(this);Now when we open our app.html file again, we should see the following window:
Even if we choose not to use CoffeeScript and just use JavaScript, there is still value in separating our files into individual pieces of functionality, then concatenating them together. This can be done using the grunt-contrib-concat plugin in a similar fashion. That is, in place of the coffee task configuration, we would insert this concat task configuration:
    concat: {
      build: {
        src: [
          "src/scripts/**/*.js",
          "!src/scripts/app.js",
          "src/scripts/app.js"
        ],
        dest: "build/js/app.js"
      }
    }
This technique allows us to freely create as many CoffeeScript (or JavaScript) files and subdirectories as we like. Then when we run grunt, all script files inside src/scripts will be merged into one file, build/js/app.js, which represents all of our application's JavaScript.
Tip
For building cohesive single-page applications, I recommend using AngularJS (http://gswg.io#angular). A useful set of AngularJS tutorials (in screencast form) can be found at http://gswg.io#angular-screencasts. Next, I would recommend Ember.js (http://gswg.io#ember). Opposed to simply using jQuery, these frameworks provide a convention for structuring your JavaScript. This layout normalization of each project becomes a strong advantage, as each developer on the team knows where each portion of code should be.
Next, we will give our views some structure. Here we use the term "view" as a language agnostic name for Jade code. As mentioned previously, in place of Jade we could also use Haml or EJS. Since we are building a single-page application, our app.html file is all we need, so our one-to-one compilation will suffice. However, we still want to avoid placing our entire application inside one file. In order to split our Jade code across multiple files, we will use the include directive. The Jade documentation on include (http://gswg.io#jade-include) describes how to statically include chunks of Jade, or other content such as CSS or HTML, which live in separate files. Below we shall make use of include by creating a logical separation of our single page. The structure of a single-page application can vary widely; however, in this example, we assume we have a header section, a content section, and a footer section. Instead of writing the code for each section inside our app.jade file, we will create a new app directory to house three new Jade files. Once complete, we should have the following views folder:
src/views
├── app
│   ├── content.jade
│   ├── footer.jade
│   └── header.jade
└── app.jade
Now we can make use of our new files inside our app.jade with the include directive:
!!!5
html
  head
    link(rel="stylesheet", href="css/app.css")
  body

    include app/header
    include app/content
    include app/footer

    script(src="js/app.js")
Running our jade task with grunt jade should leave us with the following build/app.html file:
<!DOCTYPE html>
<html>
<head>
<link rel="stylesheet" href="css/app.css">
</head>
<body>
<section class="header">this is the <b>amazing</b> header section</section>
<section class="content">
<div class="top">some content with this on top</div>
<div class="middle">and this in the middle</div>
<div class="bottom">and this on the bottom</div>
</section>
<section class="footer">
and this is the footer, with an awesome copyright
symbol with the year next to it - © 2013
</section>
<script src="js/app.js"></script>
</body>
</html>Instead of placing our new Jade files alongside app.jade, we have put them inside a new app directory. This is to prevent our views folder from becoming a large flat structure. By just looking at the file hierarchy we can see that app.jade contains head.jade, content.jade, and footer.jade.
Note: we could apply this idea again to our content.jade, inside our new app folder by making a content folder with more Jade files, each representing views inside content.jade. This small convention will assist us greatly when our application becomes a 20,000-line monster.
When our application begins to display the signs of monstrosity, we might wish to add more one-to-one compilations and then use XMLHTTPRequest (XHR) to asynchronously load the extra HTML as required. For example, Gmail might load the "mail" view initially, and then dynamically load the "contacts" view when the user navigates to the Gmail Contacts section. So, if we are writing a Gmail clone, our app.html file would become mail.html and then we'd also add a contacts.html file.
Now, let's move onto our styles. We could organize our styles in the same way as our scripts, by concatenating them all together using a "match all Stylus files" glob string, or we could use the Stylus directive: @import, which is similar to Jade's include directive. In this example, we will use the latter method. Though it may be less time consuming to simply match all Stylus files in one fell swoop, by explicitly defining which files are included, we can also choose where to include them. Using the @import directive nested within our style definitions, we can reset our file's indentation and avoid copious nesting. For example, we can do the following modifications:
//src/styles/app.styl
html, body
  margin 0
  padding 0

.content
  @import "app/content"

@media (max-width: 768px)
  .content
    @import "app/m-content"

//src/styles/app/content.styl
.middle
  //desktop font size
  font-size 16pt

//src/styles/app/m-content.styl
.middle
  //mobile font size
  font-size 8pt
Our src/styles/app/content.styl and src/styles/app/m-content.styl files contain our desktop and mobile overrides for our content section. Now, when we build our styles with grunt stylus, our build/css/app.css file should contain the following code:
html,
body {
  margin: 0;
  padding: 0;
}
.content .middle {
  font-size: 16pt;
}
@media (max-width: 768px) {
  .content .middle {
    font-size: 8pt;
  }
}
Also, using @import, we can include third party CSS frameworks such as Bootstrap or Foundation. We can inline CSS files wherever we desire by setting the include css option to true and by @importing a CSS file instead of a Stylus file. For example at the top of our app.styl we could do @import "vendor/bootstrap.css".
At this point, we should have a structured set of source files and can now perform additional transformations on the result. Let's start by downloading the plugins from npm and saving them in our package.json file:
$ npm install --save-dev grunt-contrib-uglify grunt-contrib-cssmin grunt-contrib-htmlmin
Then, at the top of our Gruntfile.js file, where we have loaded our other Grunt plugins, we will load our new additions with:
grunt.loadNpmTasks("grunt-contrib-uglify");
grunt.loadNpmTasks("grunt-contrib-cssmin");
grunt.loadNpmTasks("grunt-contrib-htmlmin");We will start by compressing our scripts. In this example, we use the grunt-contrib-uglify plugin (http://gswg.io#grunt-contrib-uglify), which is a wrapper around the popular UglifyJS library (http://gswg.io#uglifyjs). Now we have loaded the plugin, which provides the uglify task, we just need to configure it:
uglify: {
  compress: {
    src: "<%= coffee.build.dest %>",
    dest: "<%= coffee.build.dest %>"
  }
}
Here, inside the uglify property, we have made a compress target, which has src and dest set to the same file. Instead of entering the actual filename, we are making use of Grunt templates to retrieve the value at the given configuration path (coffee.build.dest), which in this case, resolves to build/js/app.js. Grunt templates make it easy to have a single source of truth within our configuration. Therefore, if we ever want to change the file path of our JavaScript, we only need to change one configuration entry.
Since we have set the source and destination to the same file path, in effect, we are overwriting our JavaScript with the compressed version of itself. However, if we were writing a JavaScript library instead of a web application, we'd most likely want to compress our app.js file into an app.min.js file, so its users could download an uncompressed and a compressed version.
Tip
Review the Grunt templates in Chapter 2, Setting Up Grunt, or visit the Grunt website at http://gswg.io#grunt-templates.
Running this uglify task with this basic configuration should result in the following app.js file:
(function(){var a,b;a=function(a,b){return a+b},b=function(a,b){return a-b},alert(a(7,b(4,1)))}).call(this);Generally, this will suffice, however, UglifyJS also offers advanced features. For example, in some cases, we might have portions of code that are only used during development. We could remove this unnecessary code with the following technique. By defining a DEBUG variable and place our debug-related code inside an if block as follows:
   if(DEBUG) {
     //do things here
   }
Then, if we used the following options object inside our uglify configuration as follows:
options: {
  compress: {
    global_defs: {
      "DEBUG": false
    },
    dead_code: true
  }
}
This would result in UglifyJS locking the value of DEBUG to false and also to remove the inaccessible code (dead code). Therefore, in addition to compressing code, we also have the ability to completely remove code from our builds. The documentation for this feature can be found at http://gswg.io#grunt-contrib-uglify-conditional-compilation.
To compress our styles, we use the grunt-contrib-cssmin plugin (http://gswg.io#grunt-contrib-cssmin), which is a wrapper around the clean-css library (http://gswg.io#clean-css). Since we have installed this plugin, we just need to include the cssmin task configuration:
cssmin: {
  compress: {
    src: "<%= stylus.build.dest %>",
    dest: "<%= stylus.build.dest %>"
  }
}
Similar to our scripts configuration, we can see that the only real difference is that we point to the stylus task's output instead of pointing to the coffee task's output. When we run grunt cssmin, our css/app.css file should be modified to the following one:
html,body{margin:0;padding:0}.content .middle{font-size:16pt}@media (max-width:768px){.content .middle{font-size:8pt}}Finally, to compress our views, we will use the grunt-contrib-htmlmin plugin (http://gswg.io#grunt-contrib-htmlmin), which is a wrapper around the html-minifier library (http://gswg.io#html-minifier). The htmlmin configuration has a little more to it: since its compression options are disabled by default, we need to enable the rules we wish to use:
htmlmin: {
  options: {
    removeComments: true,
    collapseWhitespace: true,
    collapseBooleanAttributes: true,
    removeAttributeQuotes: true,
    removeRedundantAttributes: true,
    removeOptionalTags: true
  },
  compress: {
    src: "<%= jade.build.dest %>",
    dest: "<%= jade.build.dest %>"
  }
}
Now our htmlmin task is configured, we can run it with grunt htmlmin, which should modify our build/app.html to the following:
<!DOCTYPE html><html><head><link rel=stylesheet href=css/app.css><body><section class=header>this is the <b>amazing</b> header section</section><section class=content><div class=top>some content with this on top</div><div class=middle>and this in the middle</div><div class=bottom>and this on the bottom</div></section><section class=footer>and this is the footer, with an awesome copyright symbol with the year next to it - © 2013</section><script src=js/app.js></script>
Tip
In addition to the GitHub repository, we can read more about html-minifier on Juriy "Kangax" Zaytsev's blog at http://gswg.io#experimenting-with-html-minifier.
Currently, we have the tasks our plugins have provided and our default task, which runs our coffee, stylus, and jade tasks. We could extend our default task to include our optimizer tasks, but this would make debugging harder as our source code would always be minified. We can solve this programmatic creation of task aliases as follows:
// Initialize environment
var env = grunt.option('env') || 'dev';

// Environment specific tasks
if(env === 'prod') {
  grunt.registerTask('scripts', ['coffee', 'uglify']);
  grunt.registerTask('styles',  ['stylus', 'cssmin']);
  grunt.registerTask('views',   ['jade',   'htmlmin']);
} else {
  grunt.registerTask('scripts', ['coffee']);
  grunt.registerTask('styles',  ['stylus']);
  grunt.registerTask('views',   ['jade']);
}

// Define the default task
grunt.registerTask('default', ['scripts','styles','views']);
Here, we are initializing our current environment with a default value of development (dev), and then we are grouping our existing tasks into our three groups: scripts, styles, and views. If the value of our environment option (env) is set to production (prod), we will include our optimizer tasks for each group; otherwise it will run only the build tasks.
Instead of defining different sets of aliases, we could achieve the same result by defining custom tasks for scripts, styles, and views, and then within the task function, we could perform our environment check and programmatically run the tasks we desire. For example, we could write the task function for our scripts like:
grunt.registerTask('scripts', function() {
  grunt.task.run ('coffee'),
  if(env === 'prod') {
    grunt.task.run('uglify'),
  }
});
As our build grows, it may become beneficial to use a custom task function. Nevertheless, in this instance, we will use the former method for simplicity.
Also, we are using the concept of environments. For example, while debugging our single-page application on our local machine, we will want to include the complete source and also want our debug code enabled. Then, when we are ready to test, we most likely will want to optimize our source to simulate production, but keep our debug code enabled, so our testers can report bugs with ease.
Finally, when the time comes to deploy our single-page application to production, we will still want to optimize our code, but also disable our debug code so our users don't see cryptic error messages. Therefore, instead of using options such as --optimize and --enable-debug and including them or not including them for various builds, we will simply use an --env option and modify our build based on the value of the environment.
Let's give our new, environment-driven build a try:
$ grunt
Running "coffee:build" (coffee) task
File build/js/app.js created.

Running "stylus:build" (stylus) task
File build/css/app.css created.

Running "jade:build" (jade) task
File "build/app.html" created.

Done, without errors.
Here, we can see that our build is the same by default, however, when we set our environment to production by including the command-line argument --env=prod, we should see the following result:
$ grunt --env=prod
Running "coffee:build" (coffee) task
File build/js/app.js created.

Running "uglify:compress" (uglify) task
File "build/js/app.js" created.

Running "stylus:build" (stylus) task
File build/css/app.css created.

Running "cssmin:compress" (cssmin) task
File build/css/app.css created.

Running "jade:build" (jade) task
File "build/app.html" created.

Running "htmlmin:compress" (htmlmin) task
File build/app.html created.

Done, without errors.
As developers, in order to stay productive during the day, it's important to be "in the zone". In psychology, this concept is known as flow (http://gswg.io#flow); many people write about it (http://gswg.io#blog-on-flow) and many people talk about it (http://gswg.io#talk-on-flow). For instance, instead of editing our code and going back to the command line and running the appropriate tasks, we can make use of the watch task provided by the grunt-contrib-watch plugin (http://gswg.io#grunt-contrib-watch). The watch task allows us to specify a set of files to "watch" and a set of tasks to run when they change. Let's get started by installing the grunt-contrib-watch plugin:
$ npm install --save-dev grunt-contrib-watch
Once that's completed, we will register the watch task by loading the grunt-contrib-watch plugin with the following code:
grunt.loadNpmTasks("grunt-contrib-watch");We will add this line below our other calls to grunt.loadNpmTasks. Next, we configure the watch task to run our scripts task whenever we change one of our script files (a CoffeeScript file in this instance), and then the equivalent for styles (Stylus files) and views (Jade files):
watch: {
  scripts: {
    files: "src/scripts/**/*.coffee",
    tasks: "scripts"
  },
  styles: {
    files: "src/styles/**/*.styl",
    tasks: "styles"
  },
  views: {
    files: "src/views/**/*.jade",
    tasks: "views"
  }
}
In addition to this, we extend our default task to include the watch task:
grunt.registerTask('build', ['scripts','styles','views']);
// Define the default task
grunt.registerTask('default', ['build','watch']);
Notice that we moved the original three tasks into their own build task. Although this does change the build's behavior, it makes it more comprehensible. By default, we will build then watch. Our build is now ready; let's give it a try:
$ grunt
Running "coffee:build" (coffee) task
File build/js/app.js created.

Running "stylus:build" (stylus) task
File build/css/app.css created.

Running "jade:build" (jade) task
File "build/app.html" created.
Running "watch" task
Waiting...
OK
>> File "src/views/app/footer.jade" changed.

Running "jade:build" (jade) task
File "build/app.html" created.

Done, without errors.
Completed in 1.074s
Waiting...
OK
>> File "src/scripts/app.coffee" changed.

Running "coffee:build" (coffee) task
File build/js/app.js created.

Done, without errors.
Completed in 0.782s
Waiting...
First, we ran grunt. This ran our usual build followed by our new watch task. This caused build to wait for file changes. Then, we saved our src/views/app/footer.jade file and our watch task detected this change and ran the views task. Finally, we edited src/scripts/app.coffee file and our watch task similarly ran the scripts task in response.
So, instead of returning to the command line every few minutes, we can stay inside our code editor and preview it with a browser window alongside.
Tip
We can take this even further by automating browser refreshes on file changes with LiveReload. The grunt-contrib-watch plugin provides this functionality via the livereload option (http://gswg.io#watch-livereload), then instead of adding the LiveReload script to all of our pages, we can simply use the LiveReload Chrome extension (http://gswg.io#chrome-livereload).
At this point, we are able to build and optionally optimize our source files into three files build/js/app.js, build/css/app.css, and build/index.html. Now we are ready to deploy our single-page application. In this example, we deploy to Amazon's Simple Storage Service (S3) using the grunt-aws Grunt plugin (http://gswg.io#grunt-aws). First, we install the plugin as follows:
$ npm install --save-dev grunt-aws
We now load the plugin, which will provide the s3 task:
grunt.loadNpmTasks("grunt-aws");Next, similar to a previous example in Chapter 1, Introducing Grunt, on deployment, we configure the s3 task to deploy the entire contents of our build to a jpillora-app-<env> bucket, where env is set to the current environment:
aws: grunt.file.readJSON("aws.json"),
s3: {
  options: {
    accessKeyId: "<%= aws.accessKeyId %>",
    secretAccessKey: "<%= aws.secretAccessKey %>",
    bucket: "jpillora-app-"+env
  },
  build: {
    cwd: "build/",
    src: "**"
  }
}
Before defining our s3 property, we define an aws property and initialize it with our Amazon Web Services (AWS) credentials, which are loaded from an external JSON file: aws.json. Inside our s3 configuration, we are setting the bucket option based on the environment (env) variable set in the previous section. Next, we are creating a target called build, which represents the deployment of our build. Our build target is defining a set of source (src) files to upload; however, we are using the build/ directory as our current working directory (cwd). In effect, we are uploading the contents of the build/ directory into the root directory of our bucket. Finally, we create a deploy task that aliases build and then s3; this way we can always be sure we are deploying the current build:
grunt.registerTask('deploy',['build', 's3']);In practice, we will most likely want to deploy our application to a staging (or testing) environment to allow our
Quality assurance (QA) team to verify that our latest deployment functions as expected. Therefore, once we create our bucket, we can use grunt deploy --env=test to deploy our single-page application to our jpillora-app-test bucket:
$ grunt deploy --env=test
Running "coffee:build" (coffee) task…
Running "stylus:build" (stylus) task…
Running "jade:build" (jade) task…

Running "s3:build" (s3) task
Retrieving list of existing objects...
>> Put 'app.html'
>> Put 'css/app.css'
>> Put 'js/app.js'
>> Put 3 files
Currently, setting our environment (env) to test has no effect except for the destination bucket, so when we visit this recent deployment at http://gswg.io#jpillora-app-test, we should see our default build. However, we could vary our build steps for test. For example, we could enable error reporting or add a testing console into the page for the QA team. Once we are given the green light to deploy to production, we will simply use grunt deploy --env=prod, which should yield the following result:
$ grunt deploy --env=prod
Running "coffee:build" (coffee) task…
Running "uglify:compress" (uglify) task…
Running "stylus:build" (stylus) task…
Running "cssmin:compress" (cssmin) task…
Running "jade:build" (jade) task…
Running "htmlmin:compress" (htmlmin) task…

Running "s3:build" (s3) task
Retrieving list of existing objects...
>> Put 'app.html'
>> Put 'js/app.js'
>> Put 'css/app.css'
>> Put 3 files
This time, we built and optimized our source code, and then most importantly, uploaded the result into the production bucket, which can be viewed at http://gswg.io#jpillora-app-prod. We can verify this by visiting both pages and ensuring test is just our usual build, whereas prod should also be optimized.
The grunt-aws plugin provides gzip compression before each upload and caches the hash of each file so bandwidth is not wasted uploading the same file multiple times. Also, grunt-aws allows us to change the region, set custom headers, and much more.