
Chapter 8. Google+ Mobile
WHAT DO YOU WANT TO SHARE ON GOOGLE+? Chances are, you want to relate things that happen to you, post photos and videos of neat things you see, and link to stuff you find on the Web. A lot of these things come up while you’re away from your desktop or laptop computer, but you may have an all-in-one camera, computer, screen, and web connection with you nearly all the time: your web-connected cellphone, or smartphone. If you have an Android phone, an iPhone, or most any web-connected device with a decent browser, you can get to your Google+ account from almost anywhere to see what’s happening in your streams, add your own two cents (or two pictures), and even add your location to your posts so people nearby can stop in and say hello.
Google+ looks and feels different on a phone or tablet than on a computer, but it should still feel familiar if you’re used to working with circles, streams, and sharing tools on your desktop or laptop. In some ways, using Google+ on the go can be a bit more fun—more instant gratification, less thinking through which adjective is just perfect for this phrase. You still have tight control over who you share with and how you get notified of new stuff, but everything gets pared down to the essentials. This chapter explains how to Google+ running on our device and how to make the most of it on smaller screens.
Getting Google+ onto Your Phone
NEARLY ANY CELLPHONE OR device with a good web browser can access Google+ whenever there’s an Internet connection available, but Google+ works a good bit better if you install a special program (a.k.a. “app”) designed specifically for interacting with Google+ on an Android or Apple device. The following sections explain how to install and configure those apps for the best mobile Google+ experience.
Android Devices
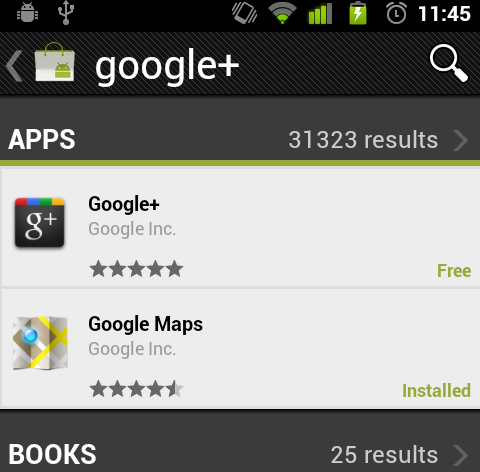
Installing Google+ on most any Android phone is a quick process. Open the Market app on your phone, and then tap the magnifying-glass icon in the upper-right corner. Search for “Google+” or “Google Plus,” then choose the app that sports the Google+ icon (probably the top-most option).
Note
As of this writing, the Google+ app runs perfectly fine on Android-based tablets, too. The tablet app has a few small tweaks to make it a bit more tablet-friendly, it’s still basically the same as the phone app, just with more space to work in. The instructions in this chapter are based on the Google+ Android phone app, but they work on Android tablets, too.
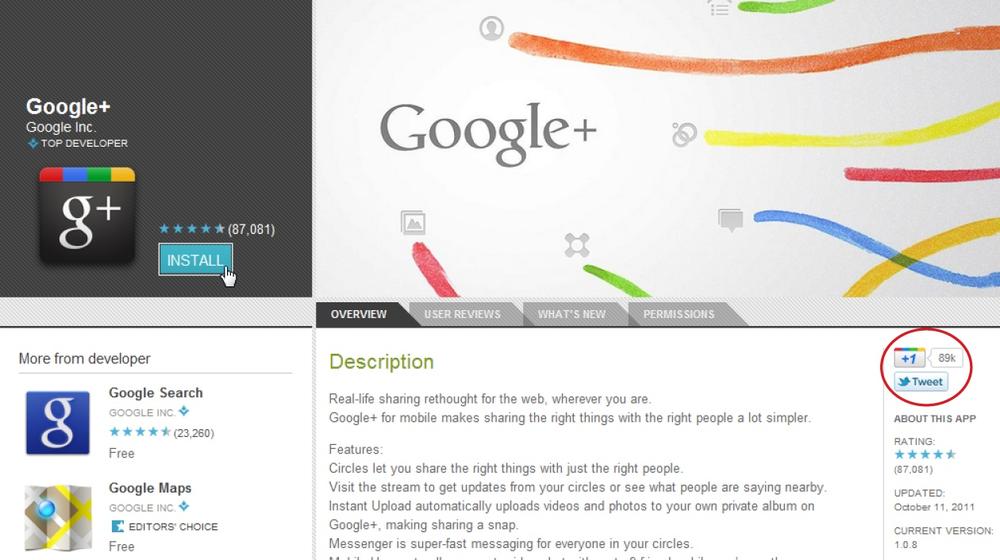
A potentially easier way to search find and install the Google+ app is to open a browser on your laptop or desktop computer and head to the Android Market (www.android.com/market), search for “Google+,” and then click the Install button to send the Google+ app over to your phone wirelessly. You’ll need to sign into the same Google account your phone is set up to use, but once that’s done, you’ll have the app on your phone, and have saved yourself some tiny-screen typing.
Note
On the right side of that Android Market page shown here, there’s a small +1 button. If you’re logged into your Google account (and you probably are, if you’re in the Android Market), you can click this button to give the app a +1 if you’ve tried it out and have a positive opinion of it. When friends in your circles visit this page, they’ll see that you gave this app a +1, so you can serve as a kind of endorsement. The privacy details of these global +1 buttons—ones that appear on sites other than Google+—are covered on Signing In and Joining Up; you’ll start seeing +1 buttons in more places as Google+ gains popularity.
If you have more than one Google account syncing with your Android device, Google+ will ask you to choose the account you want to use with Google+ when you first launch the app. After that, you’ll be asked if and when you want to have photos you take on your phone sent to Google+ automatically via Instant Upload (covered in detail on Uploading photos automatically from an Android phone or tablet). After you make your choice, you should arrive at the Google+ Home page.
Tip
Want a little more help with your Android device? Check out The Complete Android Guide, a front-to-back how-to guide on Android phones and tablets, written by your humble author. You can order printed and ebook versions from www.completeandroidguide.com.
iPhone/iPod Touch
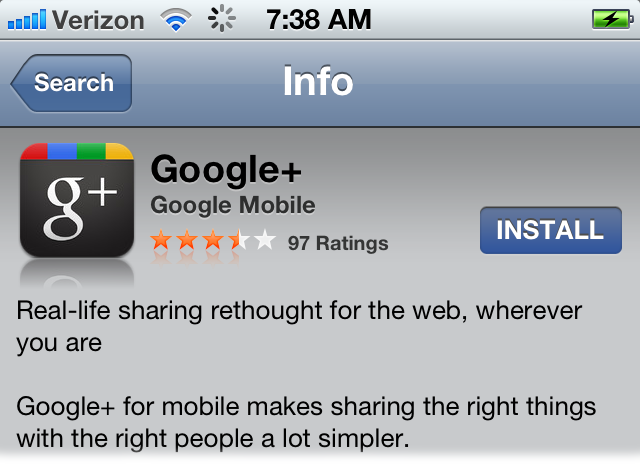
Open up the App Store on your iPhone or iPod Touch and search for either “Google+” or “Google Plus.” Then tap Free, and then tap Install to, well, install the app.
Alternatively, you can find the app by using iTunes on your Windows or Mac computer. On the left side of the iTunes window, choose the iTunes Store category. Then, type google+ or google plus into the Search Store box in the upper-right corner of iTunes. Look for the result that has the official icon with the “g+” in the middle.
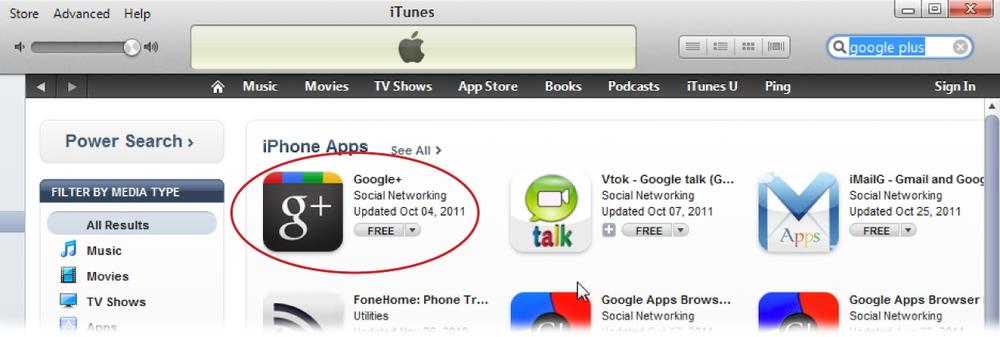
Click the Free button next to the icon, and you’ll start downloading the app (you may have to enter your iTunes/App Store password first). With the app installed in iTunes, Google+ should now install itself on your iPhone or iPod Touch if you’re running the latest version of the iPhone/iPod operating system (iOS5). If you’re running an older version, the app will be installed on your device the next time you plug it into your computer for syncing.
Tip
Need a primer on how to grab apps for your iPhone in iTunes or through the App Store? Check out iPhone: The Missing Manual, Fifth Edition, by David Pogue (O’Reilly).
After you tap the Google+ icon on your phone or iPod for the first time, you’ll be asked to sign into your Google account. Enter the email address connected to your Google account and your password, allow or disallow Google+ to display push notifications (pop-up messages) on your device when you have new notifications (an option you can change at any time in your iPhone or iPod’s settings, under Notifications), and you should arrive at the Google+ Home page.
Mobile Web Browser
If your smartphone isn’t from Apple and isn’t running Android, you’re not left out in the cold. On a Windows Phone, a Palm phone running webOS, some newer BlackBerry devices, and most other portable gadgets with a web browser, you can still get into Google+. Simply head to plus.google.com in your phone or device’s browser.
Tip
You can access Google+ via a browser even if you’re using an iPhone or Android phone—it works really well in those devices’ browsers, in fact. So if you don’t want to keep an app installed on your device, or if you want to access Google+ by using a separate Google account from the one the app is tied to, the mobile-browser version is a great option.
At the bottom, you’ll see either the email address linked to your Google account or a “Sign in” link. If you need to sign in, tap the link, enter your Google account email address and password, and you’ll arrive back at the Google home page.
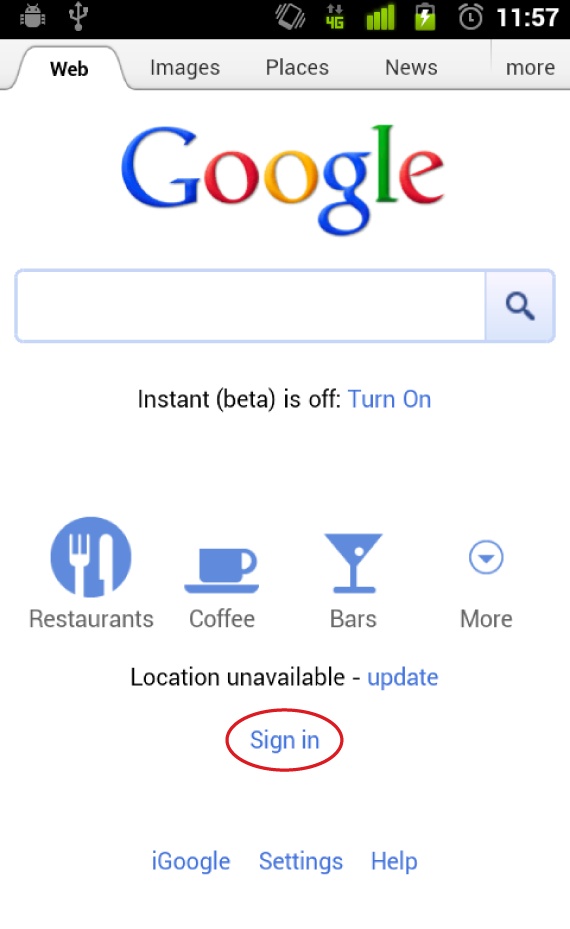
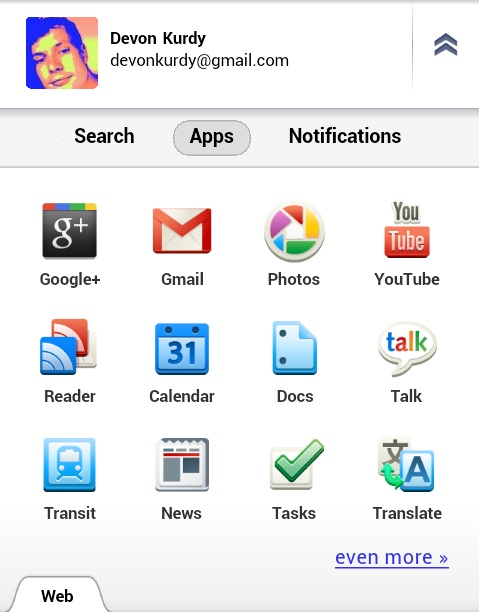
If you happen to be viewing any other Google web page in your mobile browser, there’s another easy way to get to Google+: Tap the “more” link in the upper-right corner of the page, and you’ll see a whole bunch of shiny icons appear. At the very top is your profile picture, and below that are a few categories. Tap Apps, and then tap the Google+ logo (it’s first in line). You may then be asked to give Google permission to access your location and use some storage space on your phone. You should definitely grant it permission to do both so Google+ can work its best. (Google+ will still work if you don’t let it use your location, but it won’t if you don’t grant it permission to use some space.)
Streams, Posts, and Circles
EACH MOBILE VERSION OF Google+ looks and feels a little different, but they’re all fairly similar in how you use them. In fact, the Android and iPhone apps are almost exactly alike, except for a few aesthetic differences and some minor details.
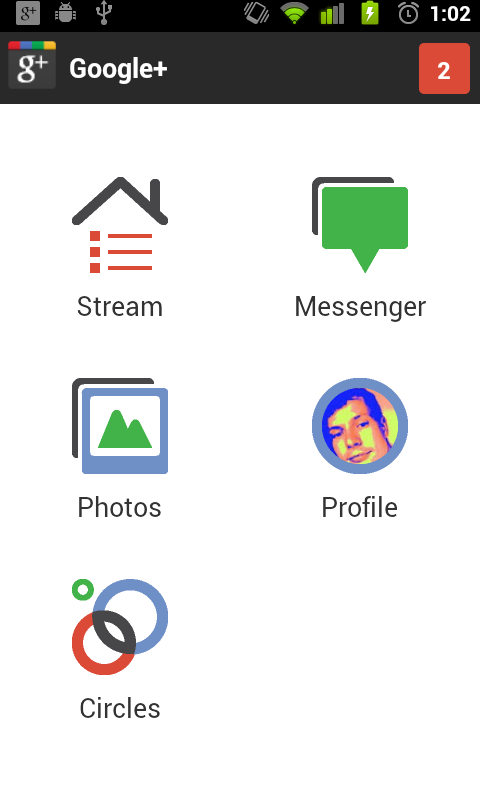
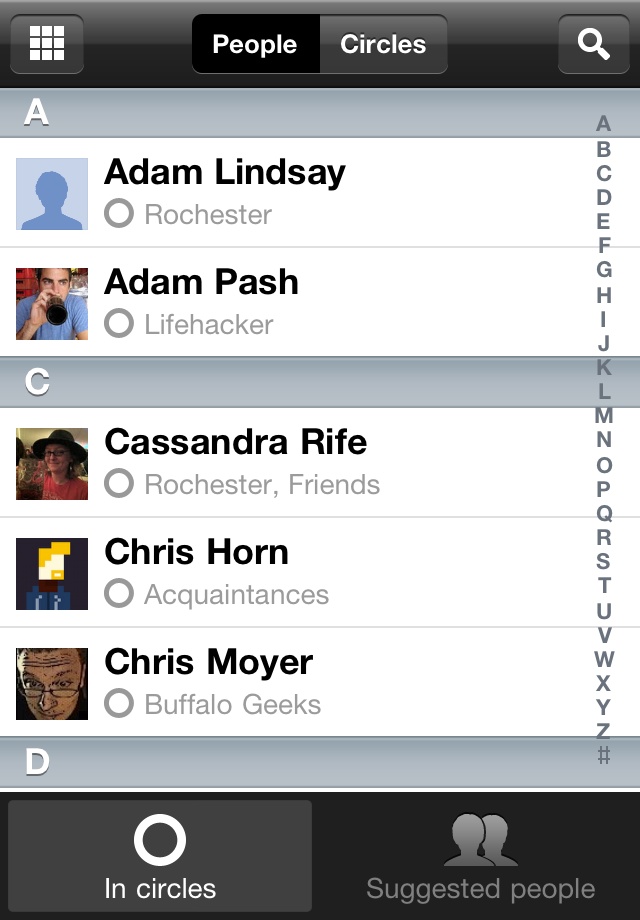
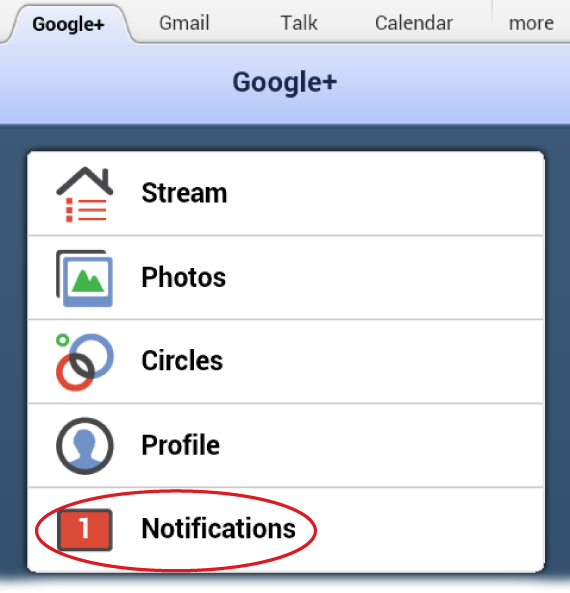
If you’re using the Android or iPhone app, opening Google+ for the first time brings up a straightforward home page. On Android, it looks like the image to the left of this paragraph.
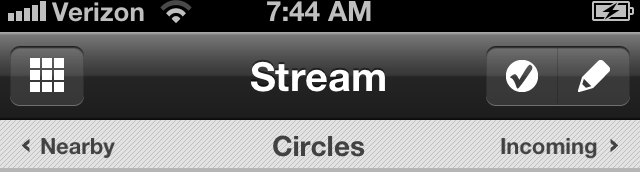
The home page looks almost identical on an iPhone. All the main sections of Google+ that you see in your computer’s web browser—Stream, Photos, Circles, and Profile—get their own icons, and there’s also a new Messenger option you’ll learn about starting on Starting a Messenger Session (Apps Only).
Streams
Tap the Stream icon to check out what’s going on with the people in our circles. (On an iPhone, you may see a message asking you to let Google+ use your location, if you haven’t already granted that permission. You don’t have to allow this, but doing so lets you view the “Nearby” circle described in just a bit.)
Pretty familiar, no? You see posts from people in your streams, with notes about their visibility, links, images, comments, +1s, and so on.
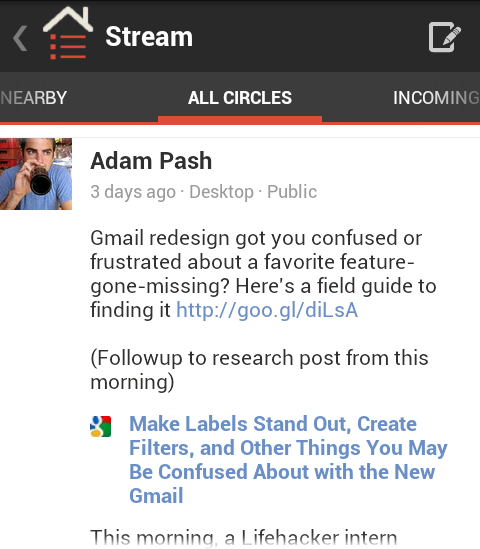
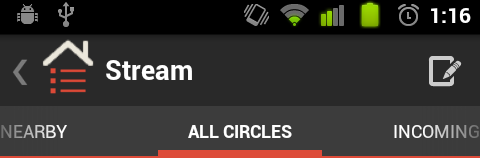
Near the top of the screen are three headings, which represent streams: Nearby, All Circles (or just Circles), and Incoming. Simply swipe left or right to change streams.
As you’d guess, the All Circles (or Circles) stream shows posts by everyone in all your circles. Nearby is an interesting stream. It includes posts by friends who happen to be geographically close to you, as well as Google+ members you don’t know who’ve written Public posts and shared their locations. (To view this stream, you have to allow the app or your browser to use your location information.) Incoming is the same stream you met back in Chapter 3 (Other posting tips)—it shows posts by folks who’ve added you to their circles, but you haven’t added them back.
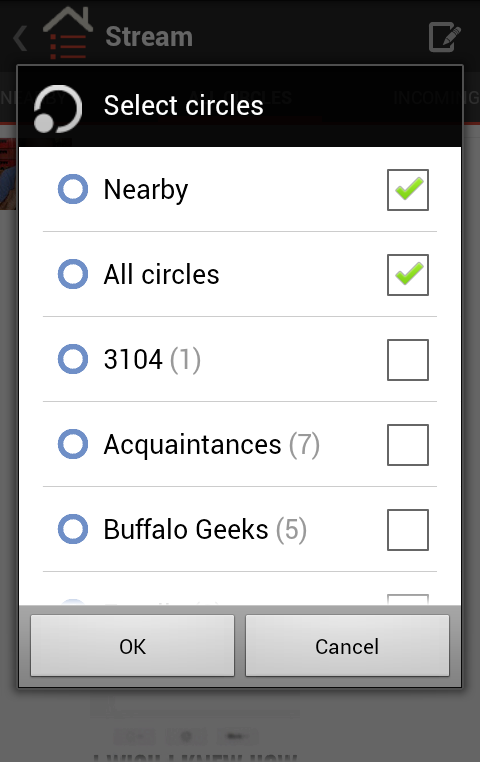
How do you view the stream for one of your circles? On an Android phone, press the Menu button, and then choose “Select circles” from the menu that comes up. You’ll see a list of your circles with checkboxes that you can turn on to include them in the streams you can thumb through with left and right swipes.
If you’re using the iPhone app or accessing Google+ via your phone’s browser, you don’t have that handy option. Instead, you have to head into the Circles section, tap the Circles tab at the top of the screen, and then tap a circle. Then tap Posts at the bottom of the screen, and you’re looking at the stream from that circle.
What about all that stuff in the toolbar at the top of the stream page? Exactly what you see there depends on which app you’re using.
On an Android phone, the button in the upper-left corner changes to show which section you’re in, with a left-pointing arrow at the very edge. Tap the section’s icon or the arrow to head back one level—just like tapping your phone’s Back button. The pencil-and-pad icon in the upper-right corner is how you create a new post.
The iPhone toolbar is similar. To get back to the home page, tap the square that’s divided into smaller squares (the visual cue being, “Here’s how you get back to all the other parts of the app”). Just like on an Android phone, the checkmark lets you check in to places (Including your location (a.k.a. “checking in”)) and the pencil creates a new post. You don’t get a camera icon, but you can snap or choose a photo by either going to the Photos section of the app, or by tapping the pencil icon to start a new post and then tapping the camera icon (to take a picture) or the stack-of-photos icon (to share a saved photo). Uploading from Your Phone in Chapter 5 has the details.
The mobile-browser version of Google+ is almost identical to the iPhone app version, except that you see a Home button instead of the divided square, and you can pull the stream down (drag downwards with your finger) and then let go of it to refresh it.
Writing a Post
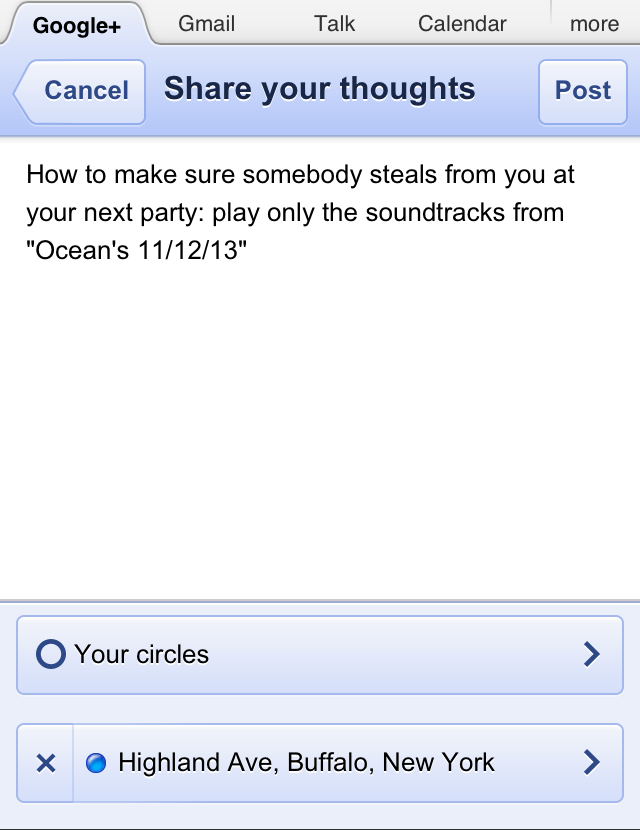
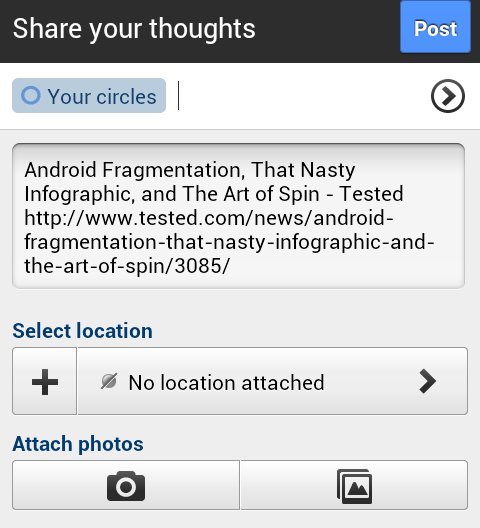
To start a post, on the Stream screen, tap the pencil icon. You’ll see a blank canvas where you can type your thoughts, add a photo, or share your location.
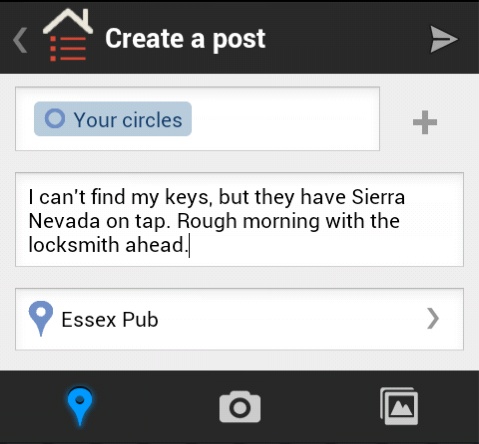
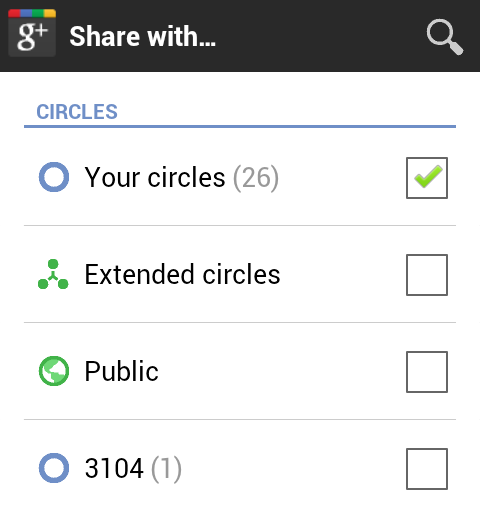
The Android and iPhone post-writing screens differ a bit, but they’re both easy to use. Tap the main blank box to bring up a keyboard so you can type what you want to share, and then type what you want to say. (You might then need to dismiss the keyboard to navigate further—do that by tapping the Back button on an Android phone or the keyboard icon just above the keyboard itself on an iPhone.) Next, tap the + button next to the field that lists the circles you’re posting to (on an Android phone) or the text “Your circles” (on an iPhone) to choose who to share with. Tap Done when you have the right circles and people selected. If you’d like to find a specific person to share this post with, tap the magnifying glass icon, start typing his name, and then tap his name when it shows up.
At the bottom of the Android screen where you write posts (shown above) are three icons: a marker (or “pin”) that represents your location, a camera, and a stack of photos. If the marker is blue, rather than gray, that means your location is attached to this post; it’s listed in the box just below your post text. (You’ll learn more about including locations in posts on Including your location (a.k.a. “checking in”).) If you’re looking to illustrate your post, tap the camera to shoot a photo of something and post it. Tap the stack of photos to choose an image that’s already stored on your phone. (See Chapter 5 for more about photos.)
The iPhone app’s post-writing screen is similar, just with the photo-adding and location-choosing buttons in different places.

When your post is ready to share, tap the paper-airplane button in the upper-right corner on an Android phone, or the Post button on an iPhone.
Tip
If you get cold feet and decide not to post anything after all: On an Android phone, either tap the Back button or press the Menu button and then choose Discard. On an iPhone, tap Cancel in the upper-left corner.
You can do all the same things via the browser version that you can with the dedicated Android or iPhone app, except for shoot or attach a picture.
Note
In all mobile versions of Google+ apps, links don’t get attached to posts the same way they are when you add them to posts in the full browser version of Google+. In the mobile versions, you simply include links in the text of your post, and they’ll appear like a normal link in other people’s streams.
Including your location (a.k.a. “checking in”)
As you learned back in Chapter 3, you can include your location in your posts when you write them on a computer, and the same is true when you write posts from your phone. Google+ refers to this as “checking in,” but it’s nothing more than adding your location to a post.
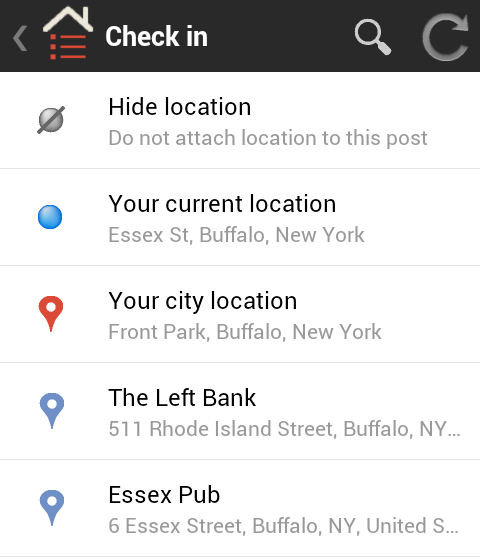
If you’ve tapped the pencil icon to write a regular post, somewhere on the post-writing screen, you’ll see a section that either lists your current location or says “No location attached.” If you’ve given Google+ permission to use your location, your location may appear automatically, in which case you don’t have to do anything to include it in your post. (If you don’t want to include your location, you can wipe it out by tapping the X next to it.) To add or change your location, tap the location field on the post-writing screen—a pin-like icon on an Android phone, or the field showing either a location or “Not location attached” on an iPhone or in your mobile browser.
Google+ pulls your location from your phone, compares it to locations it knows on Google Maps, and displays a list of options. The top three choices are your general options:
Your current location is a street-specific description, like Main St, Anytown, Florida.
Your city location lists a more general area, like the name of a town or, if you’re in a big city, the name of a district.
Hide location (or “Do not include location”) is what you can pick if you change your mind and don’t want to include a location. (Selecting this option does the same thing as tapping the X next to the location field on the post-writing screen.)
Below those three options are specific businesses and landmarks that Google found near you. If you’re at one of them, tap to select it; if not, use the search box at the top of the screen to try to find the location you want.
Circles and Profiles
On an Android device, the Circles section is a handy way to view and edit your circles. On an iPhone, or if you’re using the mobile-browser version of Google+, the Circles section is the only way to check out an individual circle’s stream.
Whichever version you’re using, head to the home screen and tap Circles to get started. What you see next depends on how you’re accessing Google+, as the following sections explain.
Android phones
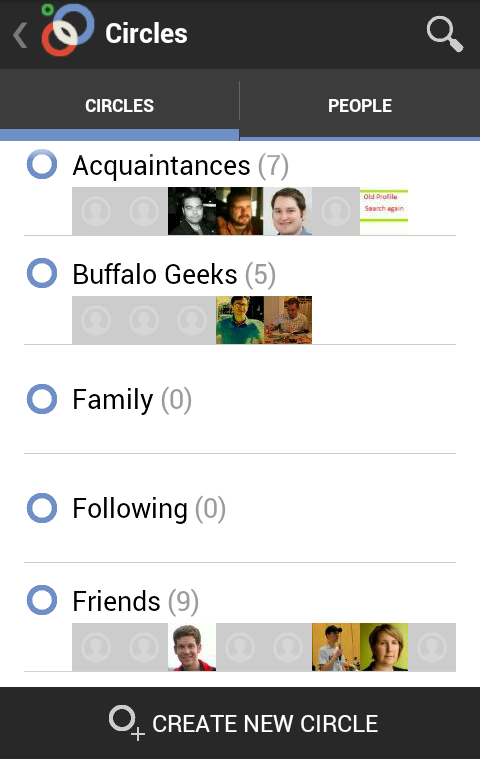
The Google+ Android app divides your circles section into two parts, Circles and People. The Circles list shows all the circles you’ve created, along with the faces of the people in them (if they’ve signed up for Google+ and uploaded a profile photo). There’s a search button in the upper-right corner, which you can tap to search through your contacts, or all of Google+, to find a person. You can tap a circle to see who’s in it, press and hold a circle to bring up a “Delete circle” option, or tap the button at bottom to create a new circle.
If you tap the People tab at the top of the Circles page, you see an alphabetical list of everybody in all of your circles. Tap some-one’s name to jump to their profile page. (At the top of the page, the “Find and invite people” link brings up to the same list of people Google thinks you might know as you’d see in the browser version; see Adding People to Circles.)

On a profile page, tap the speech-balloon icon in the upper-right corner to start a new conversation with the person whose profile you’re looking at—basically just a post that’s shared only with that person. The tabs at the top of their profile are pretty straightforward: Posts shows you their most recent posts, About shows their profile info, and Photos displays the person’s photos that you have permission to see. On the About page, the gray button to the right of the person’s name shows which circles you have them in, and you can tap it to check and add them to (or remove them from) circles.
iPhones and mobile browsers
If you’re on an iPhone or using a browser, when you tap the Circles icon on the home page, you may see a list of people’s names instead of circles.
Tap the Circles tab at the top to switch to a list of circles. Then tap the name of a circle, and you’ll see a list of all the people in it. Tap anyone in that circle to scoot over to the mobile version of their profile page.
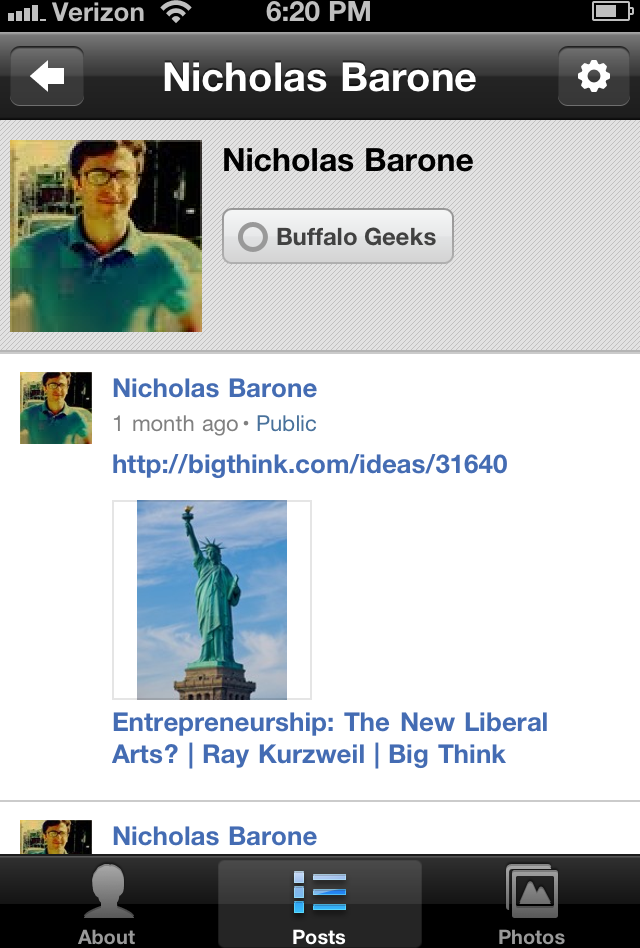
Mobile profile pages are full of stuff you can click:
The person’s profile picture to display his other profile photos.
The box under the person’s name (which contains the name of one of your circles) to add or change which circles you have him in. (You won’t see this button in the mobile-browser version).
About to switch to a view of the person’s full profile.
Posts (the default view) to see this person’s recent posts
Photos to see pictures this person has posted that you have permission to see.
Viewing Photos
YOU LEARNED HOW TO upload photos to Google+ through a mobile app in Chapter 5 (starting on Uploading from Your Phone). Now it’s time to learn how to view, share, and manage your Google+ photos on your phone.
Tip
As of this writing, viewing photos using the mobile-browser version of Google+ is, shall we say, less than optimal. While some of the basic features work (like swiping to view different images), the controls can be a bit awkward. This version will work, but for a more satisfying photo-viewing experience while on the go, use the Android or iPhone app instead.
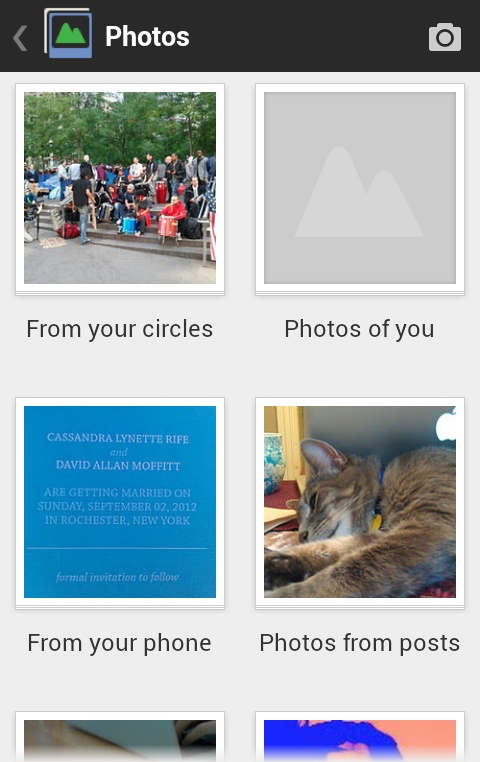
Head to the Google+ home page, and then tap the Photos icon. You’ll arrive at a screen with basically the same options Google+ offers in a full web browser. The Android and iPhone versions of this screen are quite similar, and the browser version is fairly close. The images in this section all show the Android screen, but you should be able to follow along regardless of which version you’re using.
The “From your circles” category includes photos posted by people in your circles—in other words, every photo that’s been in your stream lately, whether you saw it there or not. “Photos of you” includes all the photos where you’ve been tagged (Tagging Photos), either by yourself or by others. “Your albums” is the personal stash of photos you’ve uploaded to Google+ (covered in detail in Chapter 5 starting on Sharing Photos). And “From your phone” (which you see only in the app versions, not in the browser version) is a handy way of looking at photos stored on your phone, so that you can easily send them to Google+ for sharing.
Tap “From your circles” to check out photos by other people, and tap any photo to view a larger version of it. Tap the photo again to see it alone, without any Google+ buttons around it, on a black background; tilt your phone to rotate the photo for a wider landscape view. Tap the photo again to return to the standard view, with all the buttons and comments. You can tap the tiny “View tags” bar below the photo to see any tags that have been added to it (Tagging Photos), and at the bottom of the screen, you can comment on the photo, or scroll down to view others’ comments.
To view part of a photo more closely, use the standard pinch and spread gestures to zoom out and in on the photo, respectively. Swipe left and right to see the next photo in this particular group (other photos in this album, from this circle, or whatever).
Uploading Photos
As noted in Chapter 5 (Uploading from Your Phone), sharing photos on Google+ from your smart-phone is relatively easy—unless you’re accessing Google+ via your phone’s browser, in which case you should probably hold off on uploading images until you get home to your computer.
To recap Chapter 5 very briefly, here are a few ways to send photos to Google+ for posting and sharing:
Use Instant Upload (Android only) so that the photos automatically show up in your “From your phone” gallery.
On an Android phone, tap the Share option on any photo in your photo Gallery or in any other app on your phone that includes photos, and then choose Google+ from the list of sharing options.
In the Android or iPhone app, tap the camera icon in the upper-right corner while you’re in the Photos section of the app, and then shoot, approve, and post a photo.
Head to the “From your phone” album of the Android or iPhone app, select one or more photos, and then tap the Share button and fill out a post to share with your circles.
Starting a Messenger Session (Apps Only)
HAVE YOU EVER TRIED to coordinate a group of people relatively quickly via text messaging or email to, for example, get everyone to agree on a lunch spot, arrange a time, and give directions? Nobody walks away from such an exchange feeling optimistic about the nature of human communication. Even if you figure out how to send text messages to multiple recipients, the replies arrive without context, and not everybody has access to email on their phone. That’s where Messenger, a feature of the Google+ mobile app, comes in. (When Google+ first launched, this feature was called huddles.)
Note
While the Google+ mobile website can do a lot of the same tricks as the Android and iPhone apps, you can’t use the browser version to start a Messenger session, although you can join a Messenger conversation someone else starts.
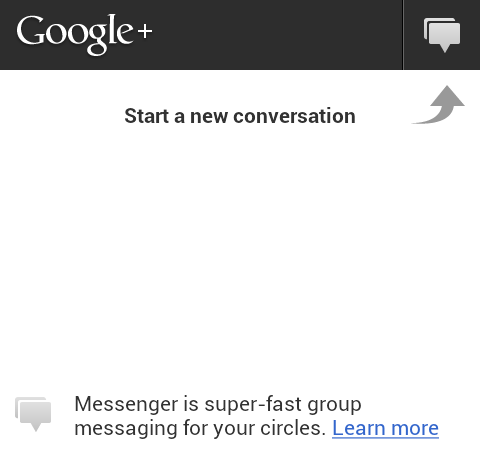
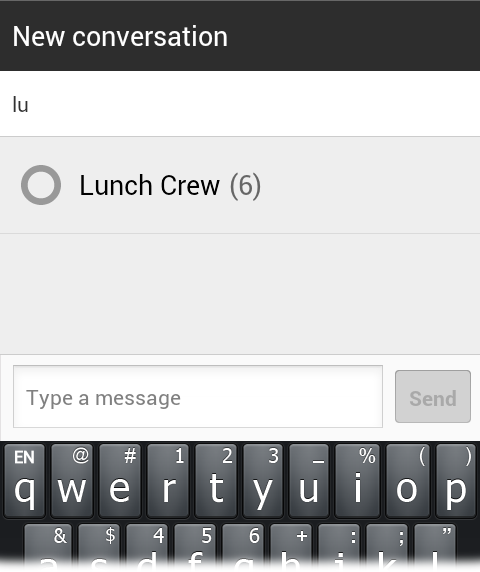
Tap Messenger on the home page of your Google+ app. There probably isn’t much on the page that appears, but Google+ points out just what to do: tap the speech-balloon icon in the upper right to start a Messenger session.
In the box at the top of the “New conversation” screen, you can type in people’s names or the name of a circle, just like when you share a post. If you’re going to be having a prolonged discussion with these folks, it’s often smart to create a circle for this purpose (see Chapter 2 for details), but otherwise, go ahead and type in names, and tap to select one of the contacts Google+ suggests.
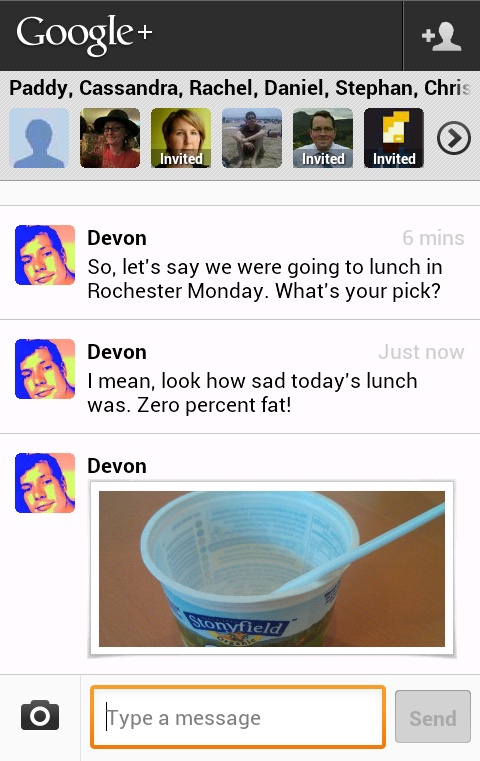
After you select who you want in this Messenger session, type a note in the text box and then tap Send. When you send out your message, what happens next depends on how you’re connected to the people you selected. Those who have the Google+ app installed on their phone, have you in their circles, and haven’t either blocked you (Blocking, Muting, and Reporting Posts) or set their notifications to ignore Messenger invitations (Starting a Messenger Session (Apps Only)) will see your note on their phones right away. Those who don’t have you in their circles or who haven’t used Messenger yet will be invited to the Messenger session via a notification (see Chapter 4) and they’ll see an invite in their streams, too.
Tip
To send an image via Messenger, tap the camera icon at the bottom of the screen. You’ll get to choose whether to take a new photo or use one that’s saved on your phone. Next, either shoot the photo or select the stored one you want to send, and then beam the photo out to your Messenger group. (Images you send via Messenger automatically get added to a special “Photos from Messenger” album in the “Your albums” category of your Photos page; see Viewing Photos.)
Even if you head away from the Messenger section of the Google+ app or quit the app entirely, you’ll still get notifications about new Messenger messages. The form exact these notifications take depends on your device, the OS it runs, and your Google+ settings.
If you’ve included people in a Messenger session who aren’t on a smartphone with the Google+ app installed, but they’re on Google+ and have activated a phone number for text message notifications (Text Messages), they’ll receive an invitation to join your Messenger conversation on their cellphones. If they respond in the affirmative, they’ll start receiving texts and be able to reply to the whole group.
You can trade both text and photos in a Messenger session at a pretty rapid pace. And the advantage of this kind of exchange over simply texting or emailing all your friends is that the replies arrive sequentially, and that they’re easy to scroll through.
So what happens if you’re part of a Messenger conversation where, for example, you’ve had lunch with the crew and returned to work to attend a meeting—but your Messenger buddies are still going on about a funny thing that happened involving the waiter? To temporarily stop receiving messages from a Messenger conversation (with the goal of perhaps picking them up later and getting back into the conversation), you can mute the exchange. On an Android phone, press and hold the conversation’s listing on the main Messenger screen, and then choose Mute. Or, if you’re looking at the Messenger exchange you want to mute, tap your phone’s Menu button and choose Mute from the menu that pops up. On an iPhone, tap the gear icon in the upper-right of the conversation you want to mute, and then tap the Mute switch to turn it on.
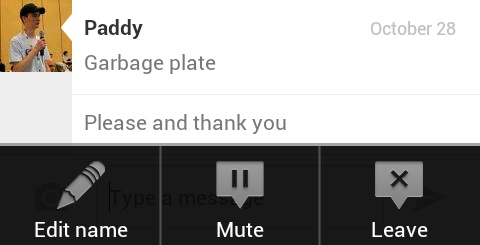
It doesn’t harm anything to leave a Messenger conversation open even if nobody’s sending anything new, but you might eventually want to formally end the conversation, so you can make room for new Messenger threads. Like muting, you can do this on an Android phone either from the main list of conversations, or from a menu inside the conversation itself. Choose Leave to end the session. On an iPhone, open the conversation, tap the gear icon in the upper-right corner, then choose “Hide conversation.”
I’ve started getting invitations from random people to join their Messenger sessions. Is there a way to stop receiving these invites?
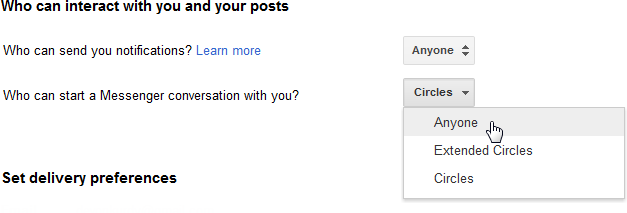
You’ll probably only ever use Messenger with your friends, but if you start getting Messenger invitations from folks you don’t know or don’t want to chat with, you can change your Google+ settings to limit who can send you such invitations. You do this via the Google+ settings page, which you have to access on a desktop or laptop computer, as described on Controlling Which Notifications You Receive. Look for the “Who can start a Messenger conversation with you?” setting, which is near the top of the page. To scale back from the default setting of Anyone, choose Extended Circles (basically “friends of friends”), or scale down to Circles so that only people in your circles can send you Messenger invites.
Mobile Notifications
THE HOW-TO OF SEEING, responding to, and setting up notification preferences on Google+ for Android or iPhone is covered extensively in Chapter 4 starting on Smartphone Notifications. If you don’t have an Android phone or iPhone, you can still see your Google+ notifications on the Google+ mobile website. Simply open your phone’s browser, head to the Google+ home page (type plus.google.com into the browser’s address bar), and then tap the Notifications item.
These notifications look just like the ones you learned about back in Chapter 4. Tap one to see what’s happening and why you were informed about it, then tap the Back button in the upper left to get back to the notification list.
Posting to Google+ via Text Message
IF YOU CAN’T INSTALL the Google+ Android or iPhone app or load the mobile-browser version of Google+ on your phone, you can create posts and receive notifications on your phone through simple text messages if you’re in the U.S. or India. You learned about setting up Google+ to send you notifications via text message in Chapter 4 (Text Messages). Once you’ve got that set-up work out of the way, it’s easy to post to Google+ from your phone.
Note
The directions in this section explain how to create text-message posts if you’re in the U.S. If you’re in India, you need to send the texts to 9222222222 (really—that’s nine 2s, to save you some counting), assuming you’re within the +91 country code. Simply swap in that number wherever you see “33669” below.
Create a text message addressed to 33669. (You’ll probably want to save 33669 in your contacts under the name “Google+” or “GPlus” so that it’s easy to pull up later.) Write out the message you’d like to post. You can include web addresses, which will show up as text links in your post, not as “attached” links with image previews (Adding Photos, Videos, Links, and Locations). If you want to send this post to “Your circles” and you don’t have a security code set up for your phone, that’s all you need to do—simply send your message and Google+ posts it.
If you do have a security code set up for SMS posting (Text Messages), you’ll need to enter that code somewhere in your text—anywhere is fine, as Google+ will automatically remove it before posting your message. If you want to share your post with a particular circle, type + and then the circle’s name, like so: +foodies. You can add as many circles as you’d like, but remember that you’re limited to 160 characters, minus any security code and your message itself. To post publicly, add “+public” to your post; to share with your extended circles (Writing a post while viewing your main stream), add “+extended.”
You can share this post with specific Google+ members by adding their first and last names after a +: How was that mountain bike trip? +devon kurdy. And if you want to share the post with someone who maybe isn’t signed up for Google+, add their email address after a +: Missing you here in salmon-soaked Alaska! [email protected].
If you’ve done everything correctly, you should receive a text back from 33669 that says something like, “Google+ SMS: Your update is successfully posted to your profile.”
Tip
Google+ treats @ symbols and + symbols the same way, at least when they’re sitting right in front of a name or email address. But you’ll probably want to stick to the more official + symbol, in case Google+ changes that. Keep that in mind, then, if you’re thinking about referring to a Twitter user in a post (Twitter usernames all start with @), since the person’s username would disappear and Google would try to share your post to a Google+ user with that name.
Sending Things to Google+ from Other Apps (Android Only)
We’ve covered how to send photos to Google+ from your phone’s gallery, but it’s also good to know that the Share button lets you share stuff to Google+ from many other apps on your Android phone. If you come across a neat page in the Browser app, for example, press your phone’s Menu button, tap the More option, and then select Share Page. The list that appears includes a Google+ option; tap it to hop over to a post-composing window in the Google+ app, with the link and the web page’s title automatically inserted.
The same thing applies if you find a funny tweet in Twitter, draw an interesting doodle in an art app, or discover a ridiculously good recipe in a culinary app. Most anywhere you can send out text or pictures from your phone, you can usually share with Google+, too.