
Chapter 2. Google Cloud Run
Google Cloud Run is a serverless compute solution that allows you to run your containerized applications without having to manage the underlying infrastructure. Cloud Run is built on the same foundation as the open source community project Knative. Knative allows developers to focus on their application code without having to worry about the management of compute resources. Google Cloud Run also provides features such as autoscaling, redundancy, logging, and custom domains which enterprises require to run production workloads.
Google Cloud provides you with two ways to run Cloud Run: Cloud Run (fully managed); and Cloud Run for Anthos. Cloud Run (fully managed) allows you to deploy containers without having to worry about the underlying infrastructure. Cloud Run for Anthos allows you to run your containers on-premises or on a Google Cloud Kubernetes Engine cluster. Running on a GKE cluster does require the management of the cluster but does provide additional benefits such as custom machine types and additional networking support. This chapter, however, will focus on Cloud Run (fully managed).
All code samples for this chapter are located at https://github.com/ruiscosta/google-cloud-cookbook/chapter-3. You can follow along and copy the code for each individual recipe by going to the folder with that recipe’s number
2.1 Deploying a Prebuilt Hello World Container
Problem
You want to deploy your first Cloud Run prebuilt container application to perform a simple Hello World.
Solution
Leverage an existing container image running on Google Cloud Source Repository located at gcr.io/cloudrun/hello to deploy a new Cloud Run container that responds to incoming web requests.
-
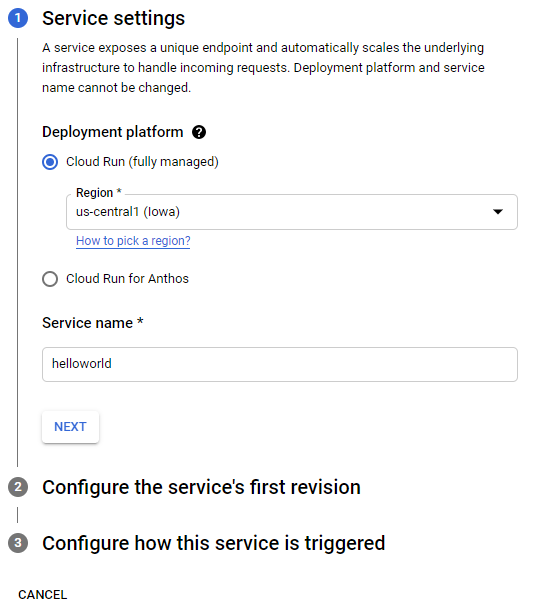
Open the Cloud Run in the Google Cloud Console.

-
Click Create service to start the create service form process.
-
Select a region and enter a name. In the image below, the service name is helloworld.
-
Click Next.
-
For the container image url enter us.gcr.io/cloudrun/hello.

-
Click Next.
-
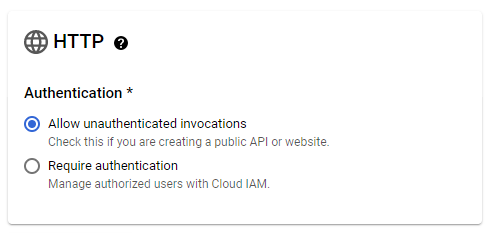
For authentication select Allow unauthenticated invocations.
-
Click Create
-
Click the URL displayed to launch your newly deploy Cloud Run container
-
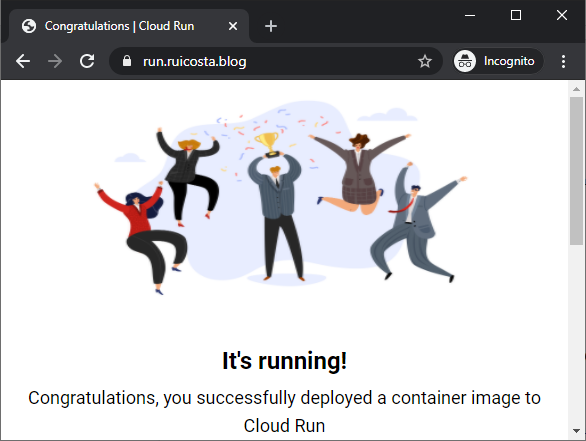
You should see the following page in your browser

Discussion
You have successfully deployed your first Cloud Run service from an existing container. It is a simple hello world application, but demonstrates some of the basic concepts in deploying Cloud Run services.
2.2 Building your own Hello World Container
Problem
You want to create a container for your application and deploy it to Google Cloud Run.
Solution
Build a container with your application code, deploy it to Google Cloud Container Registry and finally deploy your newly deployed container to Cloud Run.
-
Create a new directory on your local machine called helloworld
-
Initialize a go.mod file to declare the go module, type the code below to your go.mod file
-
module github.com/GoogleCloudPlatform/golang-samples/run/helloworld
go 1.13
-
Create a new file named main.go and type the following code into it:
package main import ( "fmt" "log" "net/http" "os" ) func main() { log.Print("starting server...") http.HandleFunc("/", handler) // Determine port for HTTP service. port := os.Getenv("PORT") if port == "" { port = "8080" log.Printf("defaulting to port %s", port) } // Start HTTP server. log.Printf("listening on port %s", port) if err := http.ListenAndServe(":"+port, nil); err != nil { log.Fatal(err) } } func handler(w http.ResponseWriter, r *http.Request) { name := os.Getenv("NAME") if name == "" { name = "World" } fmt.Fprintf(w, "Hello %s! ", name) } -
To containerize the application, create a new file named Dockerfile in the same directory as the source files, and type the following code:
FROM golang:1.15-buster as builder WORKDIR /app COPY go.* ./ RUN go mod download COPY . ./ RUN go build -mod=readonly -v -o server FROM debian:buster-slim RUN set -x && apt-get update && DEBIAN_FRONTEND=noninteractive apt-get install -y ca-certificates && rm -rf /var/lib/apt/lists/* COPY --from=builder /app/server /app/server CMD ["/app/server"] -
Create a .dockerignore file to exclude defined files from your container
# Exclude locally vendored dependencies.
vendor/
# Exclude "build-time" ignore files.
.dockerignore
.gcloudignore
# Exclude git history and configuration.
.gitignore
-
Build your container with the sample application image using Cloud Build. Run the following command from the directory containing the Dockerfile, replace PROJECT-ID with your Google Cloud Project ID
gcloud builds submit --tag gcr.io/PROJECT-ID/helloworld
-
Deploy the Cloud Run service using the newly deployed container image by running the following command
gcloud run deploy --image gcr.io/PROJECT-ID/helloworld --platform managed
-
Enter to accept the default name, helloworld.
-
Select the region of your choice, for example us-central1.
-
You will be prompted to allow unauthenticated invocations: respond y
-
Once the command completed successfully, the command will display the Cloud Run service URL. You can click or copy the URL and open in a Browser.
Discussion
You have successfully created a container image, deployed it to Google Cloud Container Registry and created a Cloud Run service from the deployed container image. In this recipe you also learned how to deploy a Cloud Run service with the gcloud command versus using the Google Cloud Console interface.
2.3 Using Cloud Run with a custom domain
Problem
You don’t want to use the generated URL that Google Cloud provides for your Google Cloud service and prefer to use your own domain.
Solution
Use your own domain to map a domain, or subdomain to the Cloud Hello World created in receipe 1.
-
Verify ownership of your domain. Do list the currently verified domains run the following command:
gcloud domains list-user-verified
-
If the command does not list any output that means you do not have any verified domains.
-
Run the following command to verify your domain.
gcloud domains verify BASE-DOMAIN
Example: gcloud domains verify ruicosta.blog
-
Note: If you want to map say run.ruicosta .blog , you will need to verify the root domain which is ruicosta.blog .
-
The command will open a new Browser window that will take you to the Google Webmaster Central. Follow the instructions to verify your domain.
-
Open the MANAGE CUSTOM DOMAINS page in the Cloud Run services page within Google Cloud Console.
-
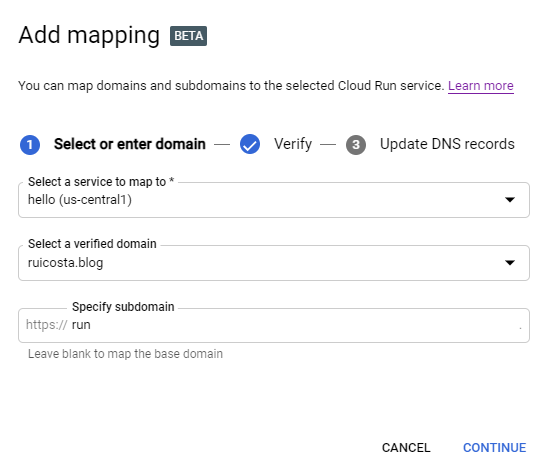
Click ADD MAPPING.
-
Choose your service to map to.
-
Select your verified domain.
-
Optionally: Choose a subdomain. You can choose to map to the root of the verified domain.
-
Click Continue
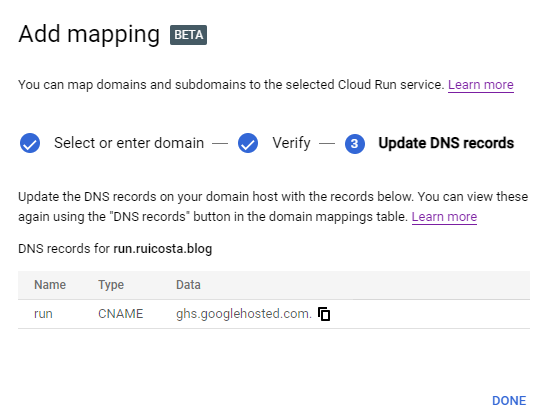
Update your DNS records at your domain registrar web site using the DNS records displayed in the last step.
-
Test your new custom domain mapping.
-
Example: Go to https://run.ruicosta.blog
-
Please note for your custom domain mapping it might take a few minutes for it to be updated with the newly verified domain.
Discussion
With custom domain mapping you can direct users to your Cloud Run service running with your domain name versus using the Google Cloud domain name. Benefits including; branding, easy to read and spell domain names. Please visit the Google Cloud Run documentation as custom domain names are not supported in all regions, check whether your region supports custom domains.
2.4 Triggering a Cloud Run from Cloud Pub/Sub
Problem
You want to trigger an operation when a message is published to a Cloud Pub/Sub topic. For example; A new message is received from your application by Cloud Pub/Sub and you want to execute an operation on the arrived message.
Solution
Set up Cloud Run to listen to arriving messages in Cloud Pub/Sub. On new message Cloud Run can run an operation on the newly arrived message.
-
Create a new Pub/Sub topic by running the following command:
gcloud pubsub topics create chapter-3-4-topic
-
Create a new directory on your local machine called chapter-3-4
-
Initialize a go.mod file to declare the go module, type the code below to your go.mod file
module github.com/GoogleCloudPlatform/golang-samples/run/pubsub
go 1.14
-
Create a new file named main.go and type the following code into it:
package main import ( "encoding/json" "io/ioutil" "log" "net/http" "os" ) func main() { http.HandleFunc("/", HelloPubSub) // Determine port for HTTP service. port := os.Getenv("PORT") if port == "" { port = "8080" log.Printf("Defaulting to port %s", port) } // Start HTTP server. log.Printf("Listening on port %s", port) if err := http.ListenAndServe(":"+port, nil); err != nil { log.Fatal(err) } } type PubSubMessage struct { Message struct { Data []byte `json:"data,omitempty"` ID string `json:"id"` } `json:"message"` Subscription string `json:"subscription"` } func HelloPubSub(w http.ResponseWriter, r *http.Request) { var m PubSubMessage body, err := ioutil.ReadAll(r.Body) if err != nil { log.Printf("ioutil.ReadAll: %v", err) http.Error(w, "Bad Request", http.StatusBadRequest) return } if err := json.Unmarshal(body, &m); err != nil { log.Printf("json.Unmarshal: %v", err) http.Error(w, "Bad Request", http.StatusBadRequest) return } name := string(m.Message.Data) if name == "" { name = "World" } log.Printf("Hello %s!", name) } -
Note: You return a code from the service such as HTTP 200 or 204, acknowledge complete processing of the Pub/Sub message. Error codes, such as HTTP 400 or 500, indicate the message will be retried.
-
To containerize the application, create a new file named Dockerfile in the same directory as the source files, and type the following code:
FROM golang:1.15-buster as builder # Create and change to the app directory. WORKDIR /app # Retrieve application dependencies. COPY go.* ./ RUN go mod download # Copy local code to the container image. COPY . ./ # Build the binary. RUN go build -mod=readonly -v -o server FROM debian:buster-slim RUN set -x && apt-get update && DEBIAN_FRONTEND=noninteractive apt-get install -y ca-certificates && rm -rf /var/lib/apt/lists/* # Copy the binary to the production image from the builder stage. COPY --from=builder /app/server /server # Run the web service on container startup. CMD ["/server"] -
Build the container image and push it to Google Cloud Container Registry:
gcloud builds submit --tag gcr.io/PROJECT_ID/pubsub
-
Deploy the Cloud Run service from the newly deployed container image, replace PROJECT_ID with your Cloud project ID.
gcloud run deploy pubsub --image gcr.io/PROJECT_ID/pubsub --platform managed
-
Enter to accept the default name, pubsub.
-
Select the region of your choice, for example us-central1.
-
You will be prompted to allow unauthenticated invocations: respond N. You will provide Pub/Sub the invoker service account permission so it can invoke the Cloud Run service.
-
Enable the Pub/Sub service to generate authentication tokens in your project:
gcloud projects add-iam-policy-binding PROJECT_ID      --member=serviceAccount:[email protected]
--role=roles/iam.serviceAccountTokenCreator
-
Replace PROJECT_ID with your Google Cloud project ID.
-
Replace PROJECT_NUMBER with your Cloud project number.
-
Create a service account that the Pub/Sub subscription will use.
gcloud iam service-accounts create cloud-run-pubsub-invoker --display-name "Cloud Run Pub/Sub Invoker" -
Give the newly created service account permission to invoke your pubsub Cloud Run service:
gcloud run services add-iam-policy-binding pubsub
--member=serviceAccount:cloud-run-pubsub-invoker@PROJECT_ID.iam.gserviceaccount.com
   --role=roles/run.invoker
-
Replace PROJECT_ID with your Google Cloud project ID.
-
Create a Pub/Sub subscription with the service account:
gcloud pubsub subscriptions create myRunSubscription --topic chapter-3-4-topic
--push-endpoint=SERVICE-URL/
--push-auth-service-account=cloud-run-pubsub-invoker@PROJECT_ID.iam.gserviceaccount.com
-
Replace the SERVICE-URL with the Cloud Run service URL.
-
Replace the PROJECT_ID with your Google Cloud project ID.
-
To test the newly deployed Cloud Run service, we will trigger it with the newly deployed Cloud Pub/Sub subscription:
gcloud pubsub topics publish chapter-3-4-topic --message "Test Runner"
-
Navigate to the Cloud Run service logs:
-
Click the pubsub service.
-
Select the Logs tab.
-
Look for the “Hello Test Runner!” message.
Discussion
-
By leveraging Cloud Pub/Sub you are able to invoke a Cloud Run service to perform operation. This process allows you to trigger an operation only when a message is received by Cloud Pub/Sub which becomes a powerful feature to perform background operations when certain events occur.
2.5 Deploy a Web application to Cloud Run
Problem
-
You need a method of deploying a static web application to Cloud Run.
Solution
-
Create a Cloud Run service that uses an nginx container to serve your web files.
-
Create a new directory on your local machine called nginx
-
Create the following directories in the root directory of of nginx; html and nginx
-
Create a new file named index.html in the html directory and type the following code into it:
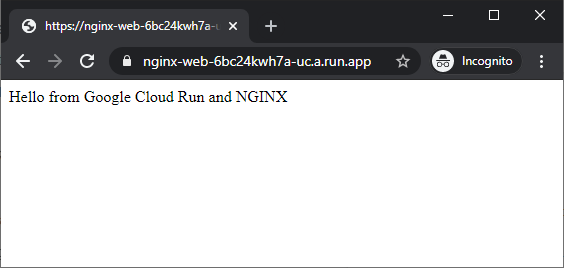
<html>
<body>Hello from Google Cloud Run and NGINX</body>
</html>
-
Create a new file named default.conf in the nginx directory and type the following code into it:
server { listen 8080; server_name localhost; location / { root /usr/share/nginx/html; index index.html index.htm; } # redirect server error pages to the static page /50x.html error_page 500 502 503 504 /50x.html; location = /50x.html { root /usr/share/nginx/html; } } -
To containerize the application, create a new file named Dockerfile in the same directory as the source files, and type the following code:
FROM nginx
COPY html /usr/share/nginx/html
COPY nginx/default.conf /etc/nginx/conf.d/default.conf
-
Notes: In this Dockerfile we are creating a new container based on the nginx container, adding the static html file plus setting the nginx configuration file.
-
Build your container by running the following command from the directory containing the Dockerfile, replace PROJECT-ID with your Google Cloud Project ID
-
gcloud builds submit --tag gcr.io/PROJECT-ID/nginx-web
-
Deploy the Cloud Run service using the newly deployed container image by running the following command
-
gcloud run deploy --image gcr.io/PROJECT-ID/nginx-web --platform managed
-
Enter to accept the default name, nginx-web.
-
Select the region of your choice, for example us-central1.
-
You will be prompted to allow unauthenticated invocations: respond Y
-
Once the command completed successfully, the command will display the Cloud Run service URL. You can click or copy the URL and open in a Browser.
-
You should now see the newly deployed container serving your html content with nginx
Discussion
Google Cloud provides other services to serve static and dynamic websites, but Cloud Run is a good option in cases where some customization is needed to the underlying runtime.
2.6 Rolling Back a Cloud Run Service Deployment
Problem
You need to rollback your Cloud Run service deployment due to a bug you found in your code.
Solution
Cloud Run allows you to deploy multiple revisions of your application. With this feature Cloud Run provides you the ability to rollback to a previous revision.
-
To roll back to a previous revision go to the Google Cloud console and navigate to Cloud Run.
-
Locate the service you need to rollback.
-
The revisions tab will list all the available versions of your service.

-
In the list of revisions, select the revision you are rolling back:
-
Click Manage Traffic
-
Select the previous revision you want to roll back to in the dropdown list.
-
Set that previous revision’s traffic percentage to 100.
-
Set the currently serving revision’s percentage to 0.
-
Click Save.

-
Once you click save, the traffic will be transitioned to the version you selected allowing you to rollback to older versions.
Discussion
With the ability to rollback to previous Cloud Run versions it provides the capability to quickly fix errors in the current version being served.
2.7 Cloud Run Gradual Rollouts
Problem
You need to deploy Cloud Run in a blue-green deployment.
Solution
Cloud Run allows you to split traffic between multiple versions of your Cloud Run service which gives you the capability to provide you with blue-green deployments.
-
To roll out a new Cloud Run service version gradually navigate to the Cloud Run services in the Google Cloud console.
-
Locate the service which you want to deploy a new revision gradually.
-
Click Deploy New Revision
-
Fill out the parameters as needed, make sure the checkbox labelled Serve this revision immediately is UNCHECKED.

-
Click Deploy
-
Click Manage Traffic
-
The new revision is listed but with a 0 percentage set: it is currently not serving any traffic since you unchecked Service this revision immediately.
-
In the Manage Traffic page:
Set it to the desired percentage for the new revision, for example, 10.
Click Save.
Repeat these Manage Traffic steps but with changed percentages, increasing the percentage as needed for the new revision. You do not need to redeploy to change the traffic percentages.
Discussion
With the ability to gradually roll out with a blue-green deployment, you can validate your updated revision is working as expected. If something was to occur with the new revision, only the percentage of the served traffic would be impacted. If you need to, you can rollback 100 percent of the traffic by following receipe 6.
2.8 Cloud Run Configuration Parameters
Problem
You need to fine tune Cloud Run parameters as to how many maximum instances are running, setting CPU allocation and adjusting the request timeout.
Solution
Cloud Run provides you with many options for tuning your service including setting request timeouts, how many instances to run and even updating CPU allocation all through the Google Cloud console.
CPU Allocation
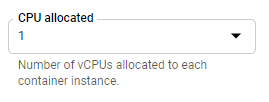
Cloud Run by default sets 1 CPU is allocated for each container instance. You can adjust the CPU allocation using the Cloud Console.
-
Navigate to the Cloud Run services in the Google Cloud console.
-
Click on the service you want to adjust the CPU allocation for and click Edit and Deploy New Revision.
Under Advanced Settings, click Container.
-
Select the desired CPU allocation from the dropdown list.
-
Click Deploy.
Request TimeoutThe request timeout specifies the time which a response must be returned by Cloud Run. If a response isn’t returned within the time specified, the request returns an error 504. The default timeout response for Cloud Run is 5 minutes.
-
Navigate to the Cloud Run services in the Google Cloud console.
-
Click on the service you want to adjust the request timeout for and click Edit and Deploy New Revision.
Under Advanced Settings, click Container.

-
In the Request timeout field, enter the timeout value that you want to use in seconds.
-
Click Deploy.
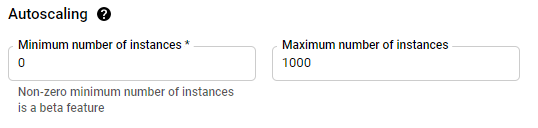
Maximum Number of InstancesMaximum number of instances in Cloud Run allows you to limit the scaling of the service in response to incoming requests. You can use this setting to control your costs or control connections to say backend services.
-
Navigate to the Cloud Run services in the Google Cloud console.
-
Click on the service you want to adjust the maximum number of instances for and click Edit and Deploy New Revision.
Under Advanced Settings, click Container.

-
Enter the Maximum number of instances. You can use any value from 1 to 1000.
-
Click Deploy.
Minimum Number of InstancesCloud Run scales to the number of instances based on the number of incoming requests.If your service requires reduced latency and you need to limit the number of cold starts, you can set the minimum number of container instances to be kept warm and ready to serve requests.
-
Navigate to the Cloud Run services in the Google Cloud console.
-
Click on the service you want to adjust the minimum number of instances for and click Edit and Deploy New Revision.
Under Advanced Settings, click Container.
-
Enter a value for the Minimum number of instances. This will allow the value of instances listed to be kept warm and ready to receive requests.
-
Click Deploy.