Before we can run the bintrayUpload task, we must add some configuration to our Gradle build file. The Bintray plugin can be configured with the bintray configuration block. Inside this configuration block, we see all the properties needed to deploy our project's publications to Bintray.
First, we need to set the username and the API key for the Bintray account we are using to deploy with. To get the API key, we must first log in to Bintray in our web browser. From our account page, we click on the Edit button. Next, we will select the API menu option to get to our API key. The key can then be copied to the clipboard so that we can use it in our build script. The user and key properties from the bintray configuration block contain information that we don't want to share. It is best to keep the values of these properties externalized from our Gradle build file. We can add a gradle.properties file to our project directory with the values for the properties. The gradle.properties file can also be added to our Gradle user home directory, which, by default, is <user_home>/.gradle. Alternatively, we can use the command-line options -P and --project-prop to set the values.
The user and key properties are required. Also, we must set the pkg.repo properties with the repository name we have in Bintray and pkg.name as the group name of our deployment. Finally, we need to define what we need to publish. Fortunately, the Bintray plugin supports the Gradle publishing plugin, so we can reuse the publication we have configured in the build file.
In the following example build file, we configure the Bintray plugin in the bintray configuration block:
// Define Bintray plugin.
buildscript {
repositories {
jcenter()
}
dependencies {
classpath 'com.jfrog.bintray.gradle:gradle-bintray-plugin:1.0'
}
}
// Apply plugin to project.
apply plugin: 'com.jfrog.bintray'
apply plugin: 'maven-publish'
apply plugin: 'java'
version = '1.0.RELEASE'
group = 'book.gradle'
repositories {
jcenter()
}
dependencies {
compile 'org.springframework:spring-context:4.1.4.RELEASE'
}
publishing {
publications {
sample(MavenPublication) {
from components.java
}
}
}
bintray {
// Use externalized project property bintrayUsername.
user = bintrayUsername
// Use externalized project property bintrayApiKey.
key = bintrayApiKey
// Define publication that needs to be published
// to Bintray.
publications = ['sample']
pkg {
// Name of repository in Bintray
repo = 'book-sample'
// Name for package.
name = 'sample'
}
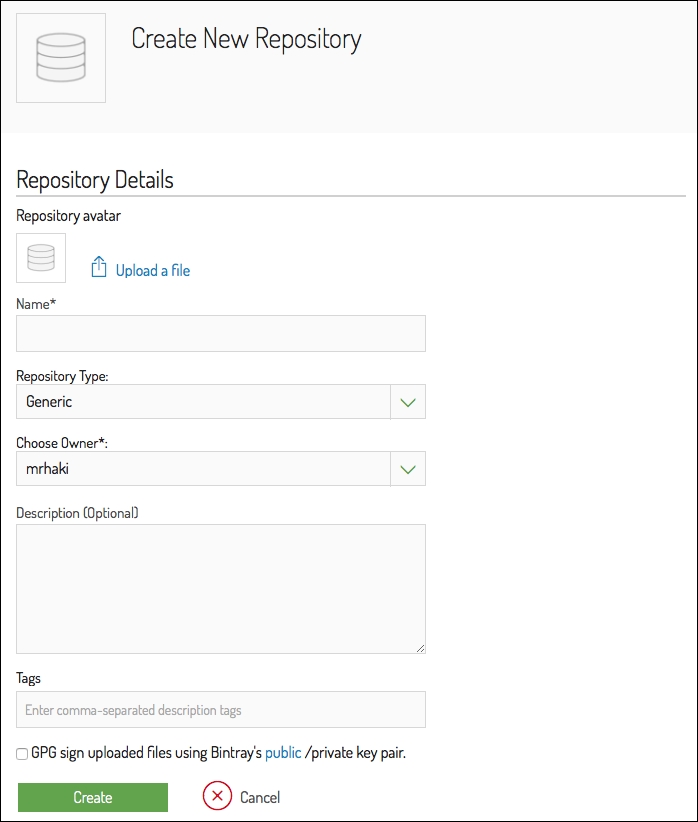
}Before we can upload our artifact, we must first create a book-sample repository with the sample package by using the web browser interface of Bintray. We need to log in using our account and then select the New repository link. In the following screenshot, we see the fields that need to be filled in:
After we have created a new repository, we get an overview of the repository, as shown in the following screenshot:
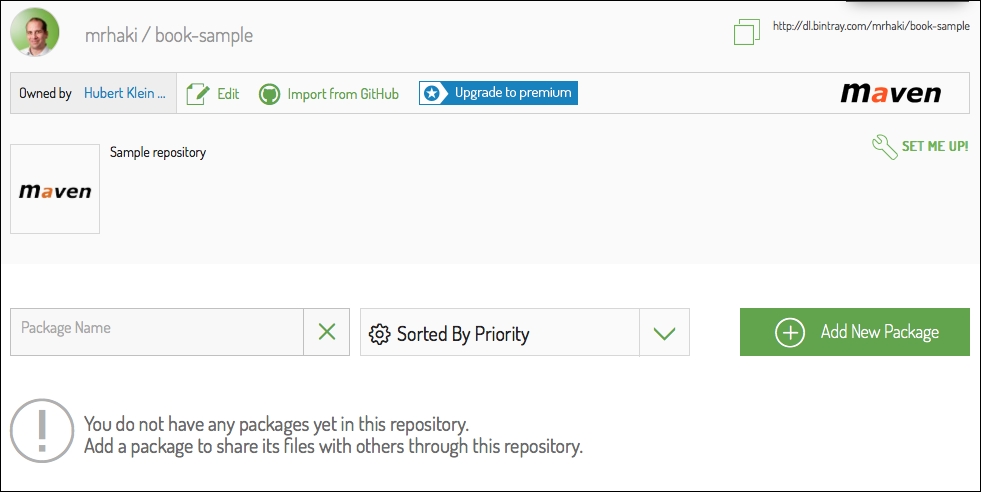
From this screen, we click on the New package button. A repository can contain multiple packages. The next screenshot shows the fields that we need to fill to create a new package. We must set the Name, the Licenses field, and a Version control link.
Once we have created the package in our repository, we can invoke the bintrayUpload task for our project. Let's see the output when we invoke the task:
$ gradle bintrayUpload
:generatePomFileForSamplePublication
:compileJava
:processResources UP-TO-DATE
:classes
:jar
:publishSamplePublicationToMavenLocal
:bintrayUpload

BUILD SUCCESSFUL

Total time: 9.125 secs
We notice that the bintrayUpload task is dependent on the tasks necessary to first compile and build our artifact before it is uploaded. We do not have to define this task dependency ourselves.
Everything was built successfully, so we can now open our web browser and go to the repository and package page. In the following screenshot, we see our updated package web page:
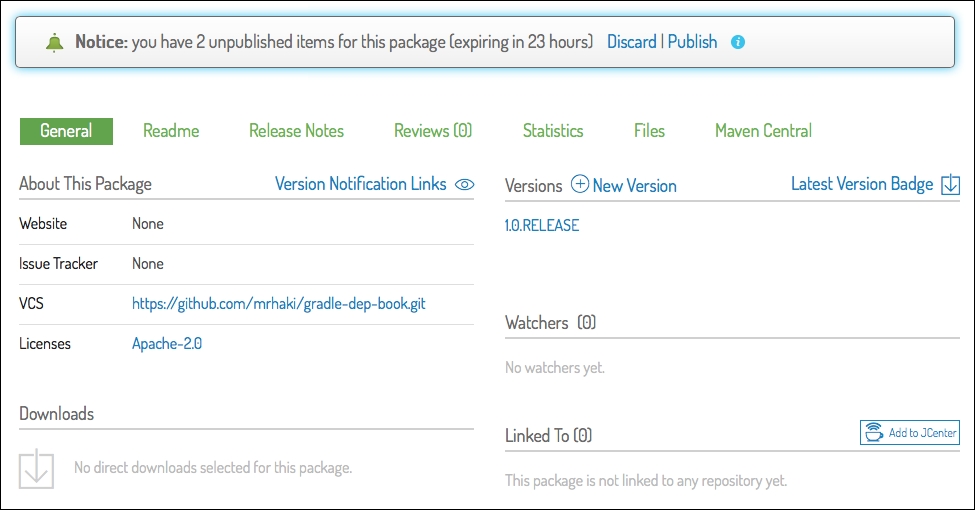
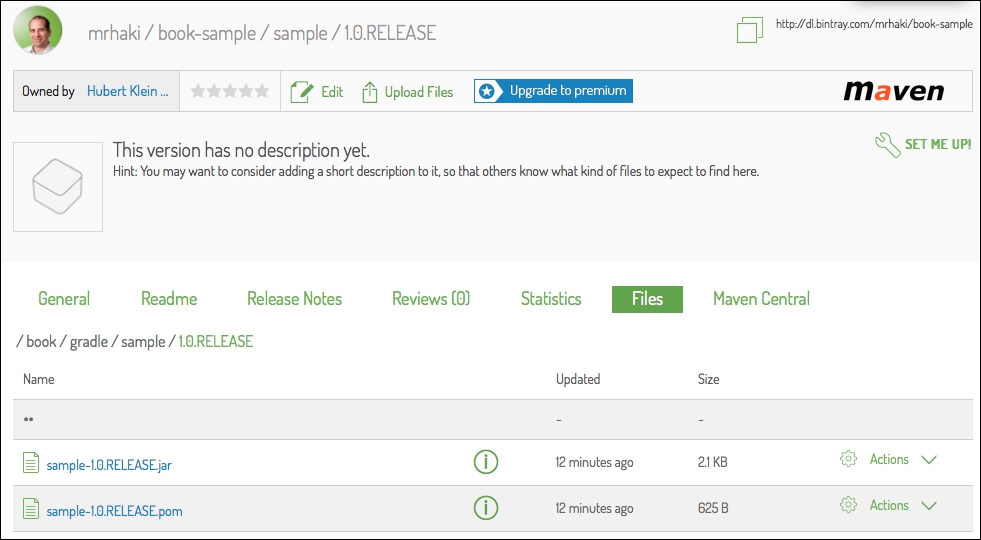
Bintray first puts the uploaded files into an unpublished state. This way, we have time to decide whether we really want to publish this version or not. We can see the message on our screen. We are sure that we want to publish this version, so we will click on the Publish link. Now, the files are published so that others can also see the files. If we click on the release version, we can even see the actual files in our web browser. The following screenshot shows our published artifact JAR file and the corresponding POM file: