
Chapter 8
Drag-and-Drop: Moving Things Around the Screen
The drag-and-drop technology of HTML5 offers ways to take interesting ideas and make them real. For example, can you really put a square peg in a round hole? Probably so with drag-and-drop.
Drag-and-drop works by identifying two types of items: ones that can be dragged and ones that can accept something being dropped on them. A number of events are in play when dragging and dropping happens. Essentially, you provide an attribute to an item (a div, an image, and so on) that makes it draggable. Other elements are set to accept the drop. In other words, a draggable element is dragged to a drop-enabled element.
Along the way in this process are events for when the dragging starts, when the dragging ends, when the item is dropped, and so forth. All of this is possible with the inclusion of a new object called dataTransfer. Similar to the way the canvas and other HTML5 features have an API or set of methods, the dataTransfer object is the conduit to making use of the events used in drag-and-drop.
A number of HTML5 sources demonstrate how a box or two or three can be dragged and dropped into another box elsewhere on the screen. Yes, this introduces the technology, but does a demo like that show anything useful? I would like to present a more relevant and useful application of this functionality. In this chapter, I’ll show you the basic drop a box into another, just to get your feet wet, and then continue with a couple more useful applications.
A Box in a Box
We’ll begin with an example that’s like “Hello World” for drag-and-drop. In the example, you click the mouse on the box on the left, drag it over to the box on the right, and then release the mouse button. The box that was on the left is now inside the box on the right. The box on the left has been set as draggable, and the box on the right has been set to accept a dropped object. Figure 8-1 shows the setup before the dragging has begun, and Figure 8-2 shows the smaller box inside the larger one after it was dropped into the larger box.
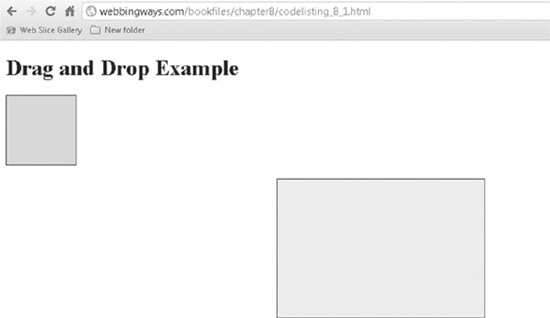
Figure 8-1 The boxes before drag-and-drop
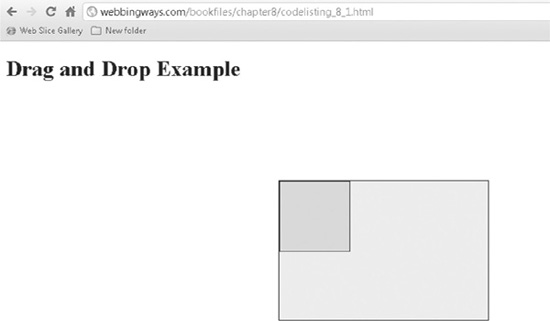
Figure 8-2 The boxes after drag-and-drop
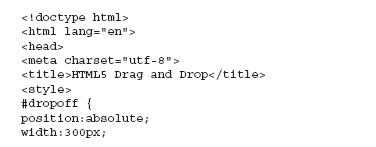
Code Listing 8-1 shows how the drag-and-drop is made operational. I phrase it this way since the code does not perform an active action—the user does. In the code, HTML elements are set as being draggable or accepting a drop.
Code Listing 8-1 A basic drag-and-drop example
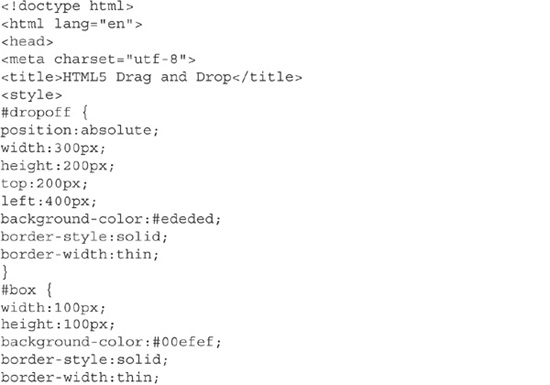
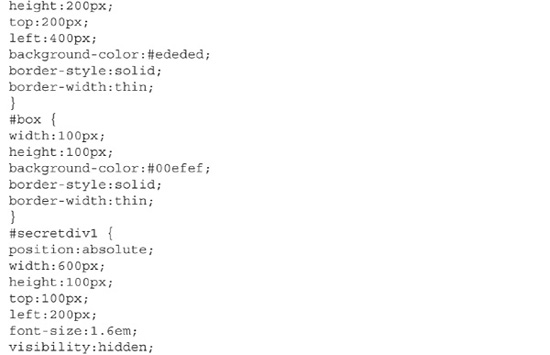
The two boxes are div elements, positioned and styled with color and borders. Appropriately, one is named dropoff and the other is named box. Here is the CSS that positions and styles them:
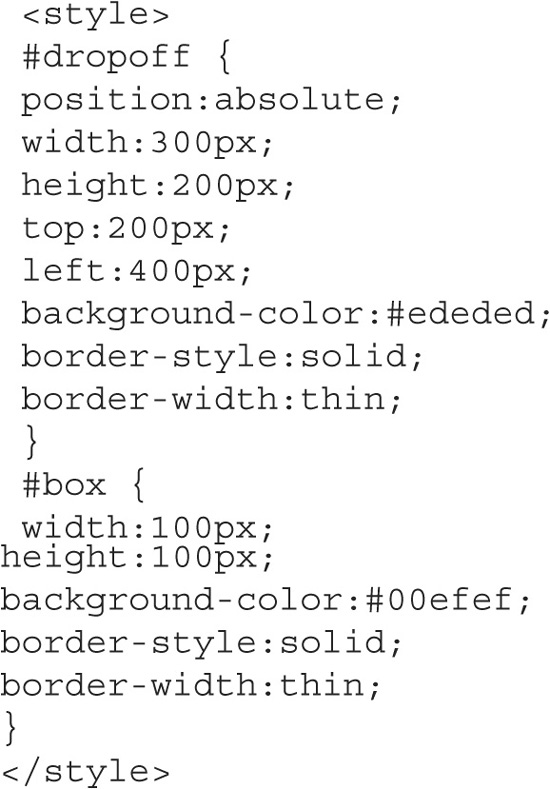
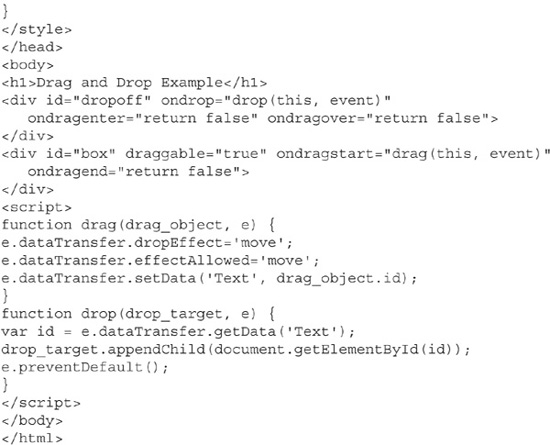
The divs are given the appropriate attribute and events:

The dropoff div has a drop event (ondrop), an event for when the dragged element enters the div (ondragenter), and an event that fires while the dragged element is over the div but not yet released (the mouse button is still being held down). Once the mouse is released, the drag-over event ends. In Code Listing 8-1, the drag-enter and drag-over events are simply set to false, as they are not used in the example.
The box div has the attribute draggable set to true. This attribute can be set to many other HTML elements, not just divs. The box div also has the drag-start and drag-end events. The drag-end event is also just set to false in this example.
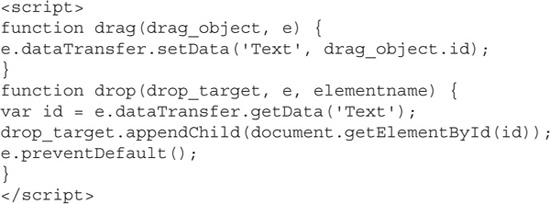
So, the example uses just two events: the drop event and the drag-start event. Each of these calls a JavaScript function (ondrop calls drop, and ondragstart calls drag). The real action is in these functions. Well, not quite—as I pointed out, the actual action is (shudder) performed by one of us humans. Here are the two functions:
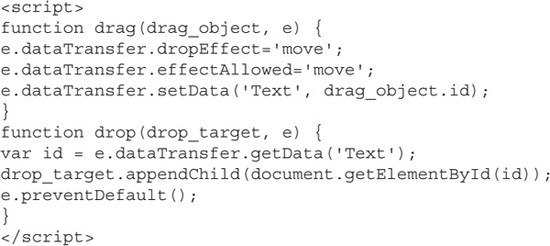
In the divs, the events send the functions two arguments: the element itself and the event itself. Both function calls are structured in the format function-name(this, event). These two arguments are necessary, and others can be included as well, as you’ll see in an example later in this chapter.
The box div has the drag event, so let’s look at that first. The event (e) connects to the dataTransfer element, which in turn sets a property. The first line in the drag function sets the effect (dropEffect) to be move. Other possible values are copy, link, and none. In practice (or until the browsers catch up), it seems move is the reliable usable action.
The second line is similar to the first. It defines the allowed effect (effectAllowed), which is also set as move. I must stop here a moment and point out how this is a confusing matter. What if the allowed effect is move, but the drop effect is copy? This is where the standardization and implementation in the browsers lose meaning for these properties. It seems at this point that these properties just move items around the screen. In fact, these first two lines can be left out!

On the other hand, the setData property is needed. The first argument of setData is the format of the second argument. In this example, the second argument returns the identifier of the div, and the first argument indicates for it to be treated as text. In other words, the id of the div is text. Although it seems rather obvious, you must still include this.
NOTE
For other setData formats, there does not yet seem to be consistency in what they are or how they are implemented. However, 'Text' does work. A specification of the setData property simply states “Adds the specified data” (see http://dev.w3.org/html5/spec-author-view/dnd.html#datatransfer).
The drop function, called from the drop event, of the dropoff div, is easier to follow. A variable (id) is set to the identifer of the div of the box (the draggable object), and then the following line appends it as a Document Object Model (DOM) child element, which places it inside the bigger dropoff box.

The e.preventDefault() statement effectively stops further JavaScript activity. Whether you need to have this statement in the code is questionable, since it is at the end of a function; the thought being that activity will end anyway. However, testing has shown that it is needed in at least FireFox (FireFox 7) to prevent the browser from trying to navigate to another web page named box. This is clearly buggy behavior and should not happen, but from another view, it does no harm to include the statement.
Adding Actions to Drag-and-Drop Events
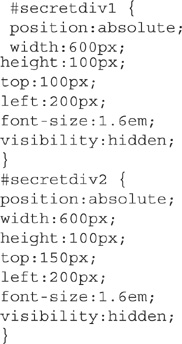
The example presented in this section expands on the previous simple box-drop example. Here, two other divs—secretdiv1 and secretdiv2—start as hidden, and then become visible when a given event is fired. When the drag-enter (dragenter) event is fired, secretdiv1 is set to visible, and when the drop (drop) event is fired, secretdiv2 is set to visible.
The web page initially looks the same as shown earlier in Figure 8-1. When the box is dragged to the point of entering the space of the bigger dropoff box, the drag-enter event fires, and secretdiv1 appears. Figure 8-3 shows how this occurs at the point of the smaller box entering the bigger one.
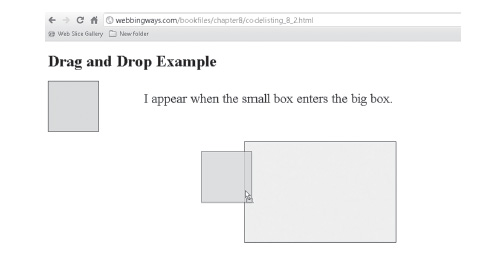
Figure 8-3 The drag-enter event is fired.
The second hidden div remains unseen for as long as the mouse button is held down. Once the button is released, the drop event fires, and secretdiv2 becomes visible, as shown in Figure 8-4.

Figure 8-4 The drop event is fired.
Code Listing 8-2 shows how these events are used.
Code Listing 8-2 An enhanced drop-the-box example

The two new divs are found in the body of the web page:
![]()
Each of the divs is styled, including having visibility set to hidden. Therefore, when the page opens, they are not seen.
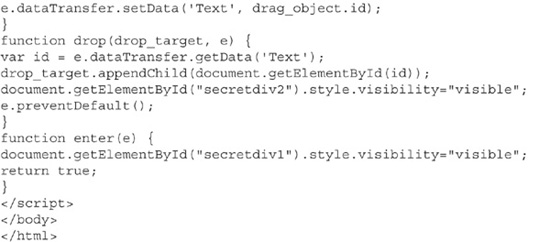
The dropoff div (the bigger box) now makes use of the enter event by calling a function named enter. The function is passed a single argument: the event.
![]()
In the enter function, secretdiv1 is set to visible. Note that this style change is in JavaScript syntax, not CSS, but the result is the same.

Finally, the drop event has an extra line that sets secretdiv2 to visible.

This example showed how events specific to drag-and-drop can do more than just handle the dragging and dropping. Making the two divs become visible serves as a demonstration of how the events can be used to make other actions occur. The rest of the chapter shows two real-life uses of drag-and-drop: a shopping cart application and a familiar game.
Online Shopping Made Easy
Typically, you make online purchases by adding items to a cart, and then checking out to pay. You fill the cart by clicking a button that has a caption like “Add to Cart” or something similar. The point is that you need to click a button to get the item into the cart. Granted, not all online shopping experiences follow this structure, but the majority do; it’s the tried-and-true approach.
In such purchasing activities, if you decide to remove an item from the cart, it’s typically done on a different web page, and the purchase amount is recalculated. The example in this section does not reinvent the wheel, but it does show an easier way of adding and removing items from a shopping cart. Perhaps when drag-and-drop technology is fully stable, this will be the acceptable way of using a cart.
Figure 8-5 shows several pieces of fruit: apples, bananas, and strawberries. In this visually simple example, the fruit is effectively on a shelf, although it’s just a div styled with color. Below is a shopping cart. The page also includes a purchase price, which starts at 0.00.
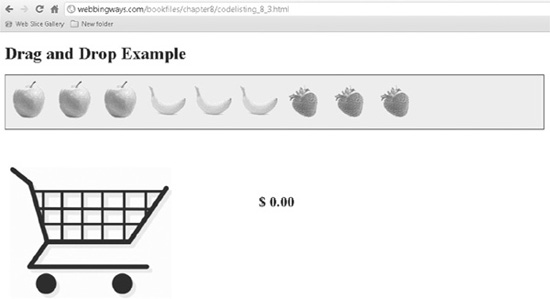
Figure 8-5 Preparing to shop
Each piece of fruit has been made draggable, and the shopping cart is the drop area. The drop area is not quite the shopping cart itself, but rather an area within the cart, about the size of the basket part. So, when moving fruit into the cart, you cannot drop it onto the wheels or handle, for example.
As each fruit is dragged into the cart, the price is updated. Apples are 20 cents each, bananas are 25 cents, and strawberries are 45 cents. These are some extraordinary strawberries to be priced so high! It’s all in the interest of showing how the example works. Figure 8-6 shows the cart filled with two apples, one banana, and one strawberry. The total price is $1.10.
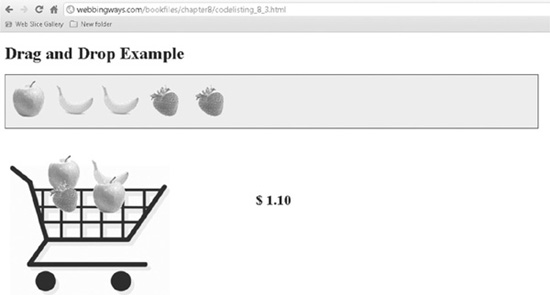
Figure 8-6 Placing some fruit in the cart
The interior of the shopping cart is a drop-enabled area, and so is the shelf where the fruit is kept. Therefore, you can drag fruit out of the cart and drop it back onto the shelf. This action is the same as the typical “Remove from Cart” function in many e-commerce web sites. Common sense dictates that the price should be lowered by the cost of the items being dragged out of the cart. This is precisely what happens here. Figure 8-7 shows that the two apples have been returned to the shelf. The banana and the strawberry remain in the cart, and the price has adjusted to 70 cents.
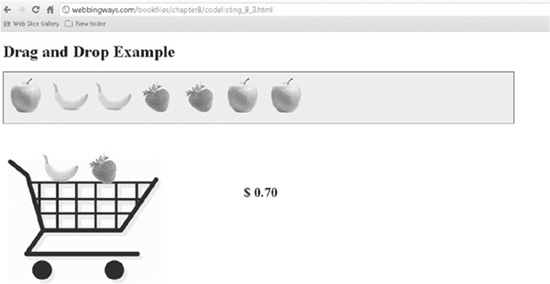
Figure 8-7 Removing items from the cart
Incidentally, the fruit images are within their respective divs, not just the plain divs, as shown earlier in the chapter. This confirms that drag-and-drop can be applied to various elements. Essentially, a div is being dragged, but effectively, a fruit image is what appears to be dragged! The shelf and the interior of the cart accept items being dropped. Code Listing 8-3 shows how all of this works.
Code Listing 8-3 A drag-and-drop shopping cart application
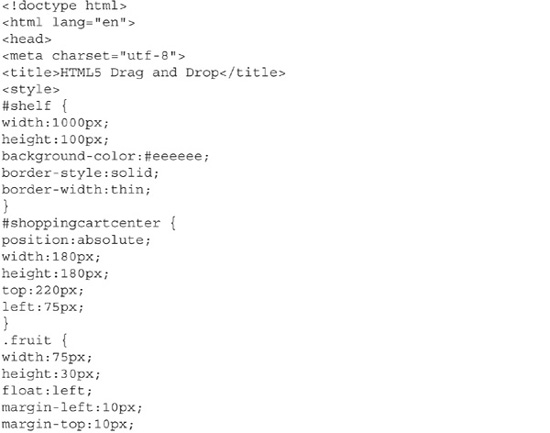

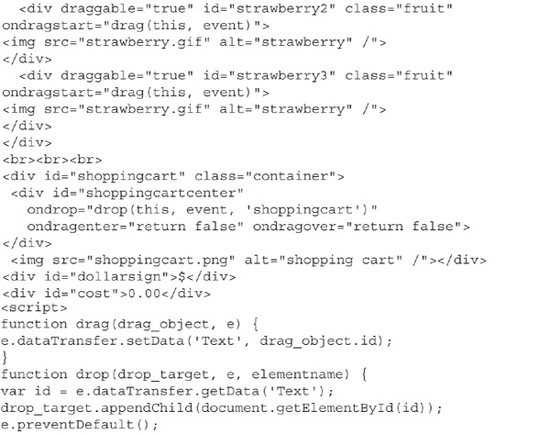
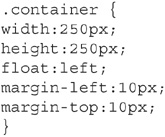
The style tag in the head contains the styling for many elements of the page. A few are of particular note. First is a class named container, which is applied to the shopping cart. The class specifies the size of the cart:
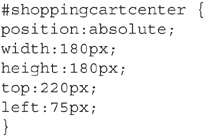
Next is the styling for the interior of the cart. This div, named shoppingcartcenter, is positioned absolute to be within the overall cart image. Notice how the cart image occupies a 250 × 250-pixel area, and the shopping cart center is sized at 180 × 180 pixels. The shoppingcartcenter div is smaller than the cart itself. Using top and left settings, this div is placed in the middle of the cart (previously referred to as the basket area). The shoppingcartcenter div is enabled to accept dropped items.
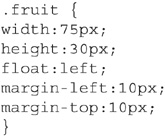
A class named fruit is used to style each piece of fruit. Each fruit image is sized to the same dimensions, and the margins keep them a bit separated from each other and vertically centered on the shelf.
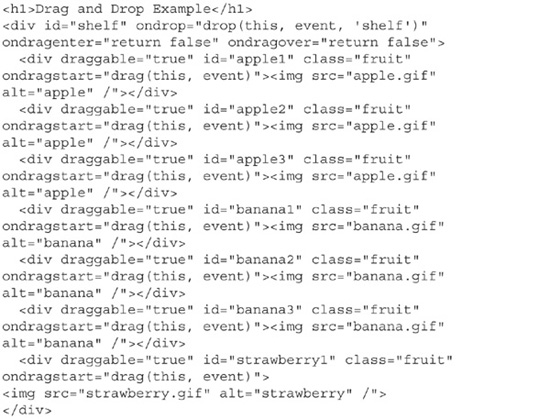
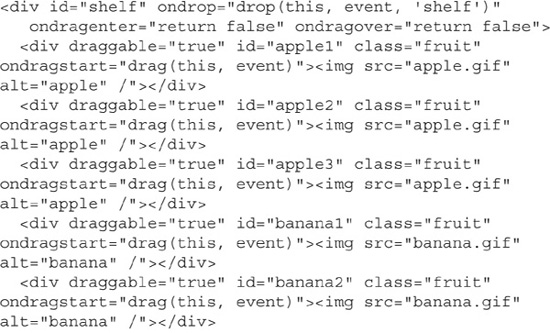
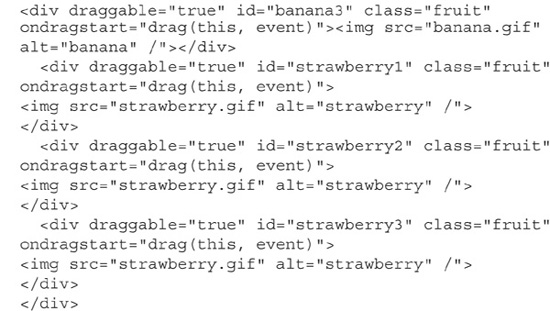
Each fruit is a div of its own, and these nine divs are inside the shelf div. This places the fruit on the shelf. The shelf div has the drop event, and each fruit is draggable. The drop event sends three arguments to the drop function: the element itself, the event, and a name used in the function, which is shelf in this example. Note that each fruit type—apple, banana, and strawberry—is a .gif image. There are just three images: one for each fruit. However, each image is used three times, showing a total of nine pieces of fruit. Each fruit is a separate div, and therefore has a unique id. For example, the three apples are apple1, apple2, and apple3.
The shoppingcartcenter div is inside the shoppingcart div. The shoppingcart div uses the image shoppingcart.png, which is what appears on the page. The shoppingcart div does not have any drag-and-drop properties or events. However, the inner shoppingcartcenter div uses the drop event. As with the shelf div, the call to the drop function uses a third argument, which is set to the name shoppingcart here:

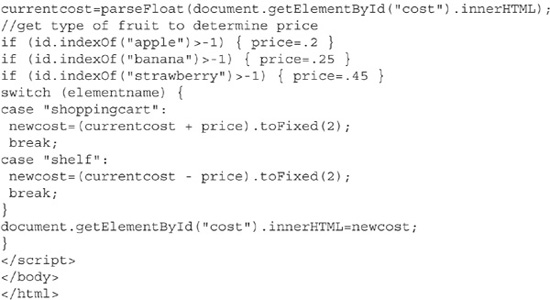
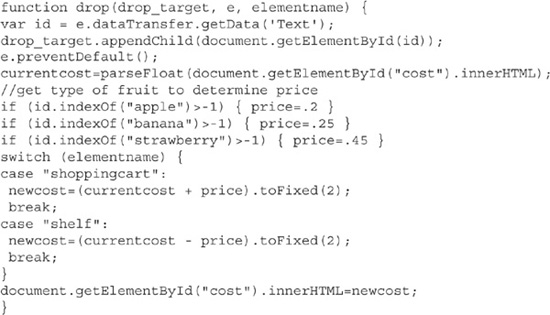
The drag function is used in the same manner as with the earlier box examples. The real action here is in the drop function. Recall that a third argument—a name indicating which element is calling the function—is sent to the function. The purpose is to differentiate whether to add to the price or subtract from it. When shoppingcart is the third argument, the price is increased as a piece of fruit is being dragged into the shopping cart. When shelf is the third argument, the price is decreased as a piece of fruit is being put back on the shelf.
These price changes depend on the cost of a piece of fruit and what the current total price is, so a few lines of code manage what happens. The current total price is stored in a variable named currentcost (by taking the innerHTML of the cost div, which displays the price). The id variable has been given the identifier of the dropped item. If it’s an apple, the variable price is set to .2 (20 cents). The same procedure applies to bananas and strawberries. The price variable is set to the price of the particular type of fruit. A new total price is calculated by adding or subtracting the price of the fruit (the add or subtract operation is determined by that third argument, used in a switch statement). Finally, the new total price is assigned to the innerHTML property of the cost div, which displays the new total price.
That wraps up the functionality of this shopping cart example. Much more functionality could be added to suit the requirements of the application (or your imagination). For example, you could have two carts, each designated with a different ship-to address. The entire page could be rendered as part of a past purchase (appearing upon opening with items already in the shopping cart), and then you could drag items out of the cart, as the initiation of processing a refund. Overall, the fact that you can have multiple draggable elements and multiple drop areas provides ample opportunity for many varieties of applications.
Playing Tic-Tac-Toe
It’s a game we all know. It’s easy. Sometimes you win, sometimes you lose, and sometimes no one wins. Most of the time, we play it on paper. That’s old hat! Let’s drag-and-drop our way to tic-tac-toe fun!
NOTE
Tic-tac-toe is a game in which two players try to get three of their pieces in a line (horizontal, vertical, or diagonal), on a three-row-by-three-column grid (nine squares in all). The players take turns placing a piece (usually drawing an O or an X) onto the grid. For example, if the player using X s can get three in a row, then X wins. The difficulty is that the other player places O pieces to block you.
The application of tic-tac-toe in this example uses drag-and-drop functionality. The grid of nine squares is a drop-enabled area. To be more precise, the grid is nine drop-enabled areas placed so that they resemble a grid (an HTML table is used). Two areas to the side each hold pieces: one with four Xs, and the other with four Os. The pieces are set to be draggable. They are images. In turn, a piece is dragged over and dropped onto one of the grid’s squares. Figure 8-8 shows how this looks at the start.
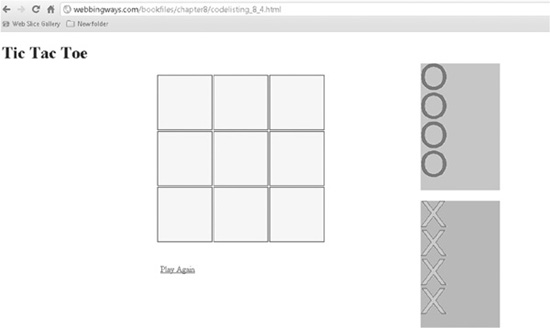
Figure 8-8 Preparing to play tic-tac-toe
The game as described here is dependent on the players keeping tabs on if someone wins. You can find an enhanced version online that incorporates having the code determine a winner. The JavaScript is extensive, so the simpler version is demonstrated here. You can review the enhanced version at www.webbingways.com/bookfiles/chapter8.
TIP
Two versions of the tic-tac-toe game are available online for review. Visit www.webbingways.com/bookfiles/chapter8 to see them both.
Figure 8-9 shows the game board after all moves have been made. Neither side won; there are not any three consecutive Os or Xs.
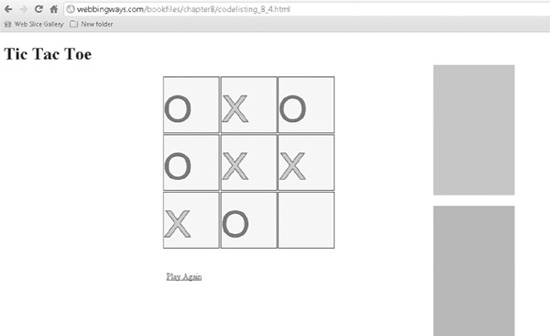
Figure 8-9 No one wins this game.
Figure 8-10 shows that X won a round, since there are three Xs in a diagonal line. Player O missed seeing that coming!
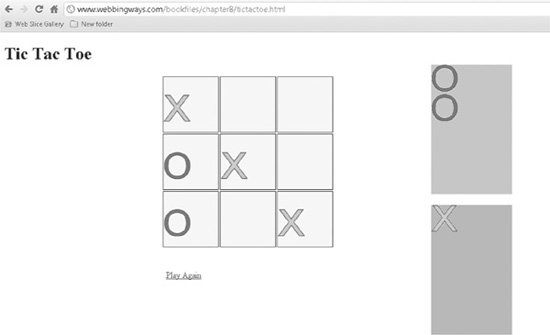
Figure 8-10 X wins!
Code Listing 8-4 shows all the code involved in the game.
Code Listing 8-4 The code behind tic-tac-toe
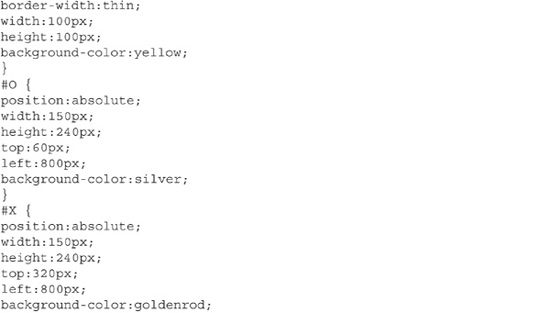
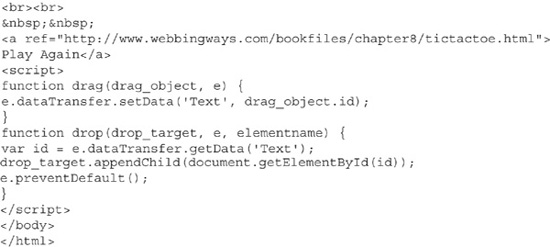
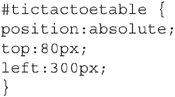
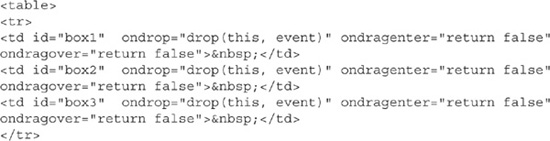
The grid is a table. The table is absolute positioned.
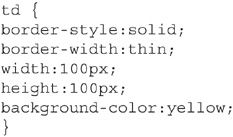
Within the table, the cells (the td tag) are given a size, a border, and a color. The width and height are the same (100 pixels), thereby making them appear as squares.
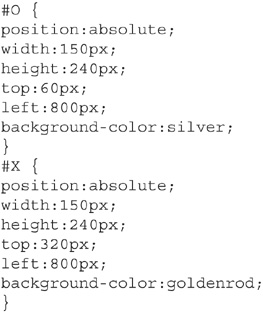
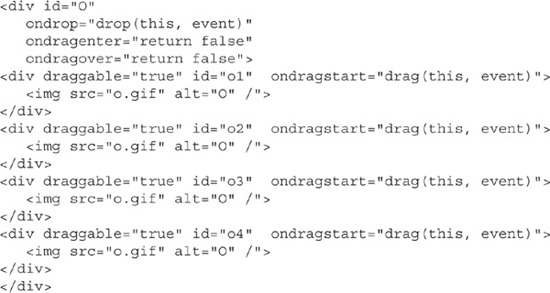
The areas that hold the pieces are divs with absolute positions and fixed dimensions. The divs are appropriately named O and X.
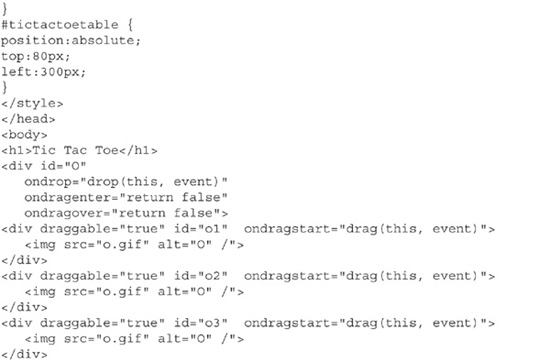
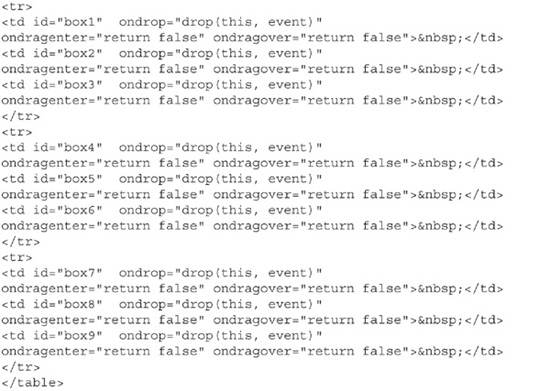
Each table cell is drop-enabled. The following is the first row of the table. Each cell uses the drop event.
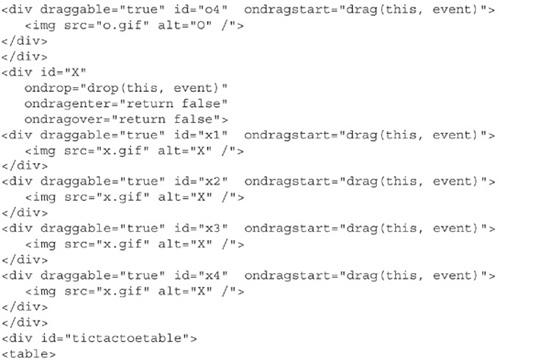
The divs that hold the pieces (O and X) are drop-enabled. This allows returning a piece to its holding area in case a mistake was made. These divs are containers for the inner divs that hold the actual pieces. These inner divs are set to draggable, and are shown as images (such as o.gif). Here is the O div with the four inner divs:
The drag-and-drop functions are basic in this version. Simply, the players drag pieces to the grid and keep an eye on who wins.
The enhanced version (available online, as mentioned earlier) uses a programmable approach to find the winner. It tests for a winner by examining the position of the pieces after each move. This requires gathering the top and left positions of the eight pieces and seeing if any three Os or Xs have the following:
![]() The same top position (three are in a row going across)
The same top position (three are in a row going across)
![]() The same left position (three are in a column going down)
The same left position (three are in a column going down)
![]() A series of three pieces with consecutive increasing tops and increasing lefts (a diagonal from upper left to lower right)
A series of three pieces with consecutive increasing tops and increasing lefts (a diagonal from upper left to lower right)
![]() A series of three pieces with consecutive increasing tops and decreasing lefts (a diagonal from upper right to lower left)
A series of three pieces with consecutive increasing tops and decreasing lefts (a diagonal from upper right to lower left)
Summary
Drag-and-drop might at first seem fun but of not much use. This is simply not so. This chapter has shown how this technology can be applied to business needs and entertainment enjoyment. No doubt, you will find many ways that drag-and-drop can be put to use.
The technology involved here contains enough specialized events to present variety in developing applications. With events capturing everything from the start to the end of a drag-and-drop, putting intelligent programming in the event functions offers many possibilities for sophisticated web page offerings. As more developers adapt to this new technology, we should see many new ways of interacting with web sites.