Chapter 2
JavaScript and CSS in HTML5 Web Development
HTML is the basic web page language, but on its own, it does nothing much more than lay out items on the page. It does not offer any inherent power to process routines or crunch numbers. HTML does not loop (meaning you can’t create a reusable HTML code snippet). HTML structures the page. That is its role. The rest is up to other technologies.
JavaScript adds the punch to the page. Quite powerful, JavaScript can do many things, from move an item on the page to sophisticated calculations. With its conditional statements (if, for, switch, and so on), JavaScript can be coded to make decisions and branch out in a specific area of processing based on other variables.
CSS, like HTML, is not a language with processing power. What it does excel at is making a page look pretty much any way you might imagine it should. CSS3 is the latest standard, and its implementation will be great once all the browsers catch up with what it can do. The progress toward this goal is continuing. Until there is uniformity, certain code structures of CSS3 are not supported across all major browsers.
JavaScript Is Integral to Web Development
Prior to coverage of what can be achieved with JavaScript, it’s prudent to first explain how JavaScript runs in the first place. When a web page is served (rendered in the browser from what is sent by the web server), the activity is sort of “first come, first served.” When there is JavaScript in-line with HTML code, the JavaScript will run as it is assembled in the browser. This might be what is needed, or it might be adverse to what is needed.
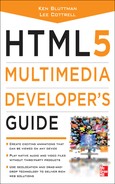
Two ways to control when JavaScript code runs are to place JavaScript in a function and to make use of the onload event of the body tag. An example is the best way to show this. First, note that all JavaScript goes within script tags, as shown in Code Listing 2-1.
Code Listing 2-1 A script section from a web page
In Code Listing 2-1, note an action that occurs immediately: changing the font color and weight used in div1 to blue and bold. The waitawhile() function would display an alert popup box, but only if the function is called in some way.
Let’s go a step deeper. Code Listing 2-2 shows a full page of code, including the part shown in Code Listing 2-1.
Code Listing 2-2 A web page with a script section

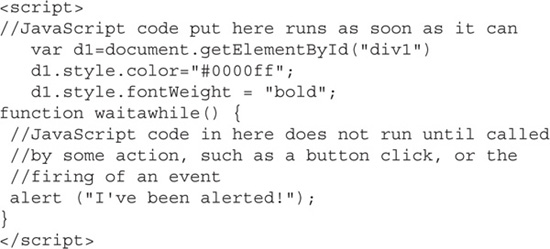
When the web page represented as code in Code Listing 2-2 appears in the browser, the wording “This is the content of div 1” does not appear as blue and bold. Why? The JavaScript is entered correctly; however, it is accessed before div1 is rendered in the page. In other words, the script attempts to change the font appearance of a page element that has not yet appeared. Figure 2-1 shows the result. All of the text is plain.
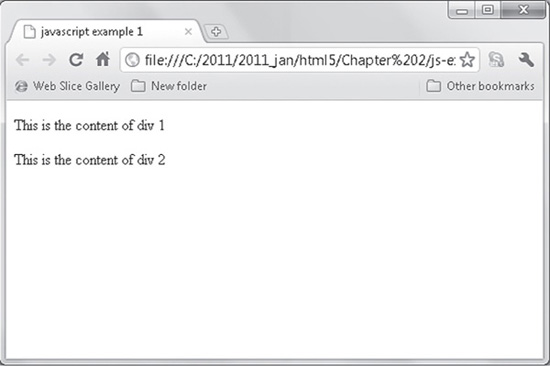
Figure 2-1 The page text is plain.
Placing a Script at the End of a Page
Code Listing 2-3 contains the same code as Code Listing 2-2, except the script section has been moved to the end of the code, just before the closing body tag (</body>).
Code Listing 2-3 Changing the text in div1

Since the page code is rendered sequentially, div1 exists prior to the JavaScript attempting to change its text. In this case, the font is blue and bold, as shown in Figure 2-2. So, by moving the JavaScript to the bottom of the code, or at least to a point after div1 is rendered, you can have JavaScript create the intended change.
Also in this page, an extra paragraph within div2 presents a link. Rather than the link navigating to a different web page or web site, the link calls the waitawhile() JavaScript function. Clicking the link causes the alert message to appear, as shown in Figure 2-3.
TIP
A JavaScript function must be called by an action—a click or some other activity or event. In Code Listing 2-3, the anchor tag is used to call a function, instead of the anchor tag’s typical use to navigate to another page or a bookmarked part of the current page. In the code listing, the syntax <a href="javascript:waitawhile()"> calls the function.
Figure 2-2 The text in div1 is blue and bold.
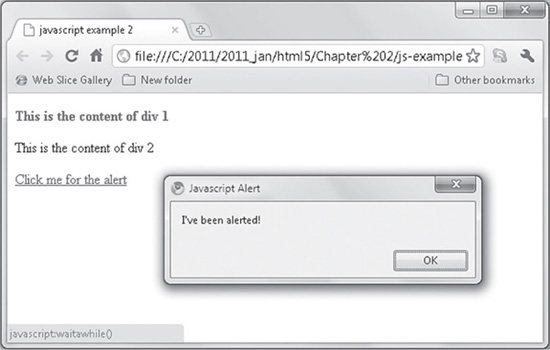
Figure 2-3 Clicking the link calls the JavaScript function.
Mentioned earlier is the option to call the JavaScript function by using the onload event. To do this, the body tag is given the instruction, like this:
![]()
Loops and Conditional Tests
JavaScript provides looping and conditional testing that interact with activities in the browser. This is key to creating actions that provide a unique experience. Code Listing 2-4 shows the HTML and JavaScript for a sample loop and conditional test.
Code Listing 2-4 A loop and a test
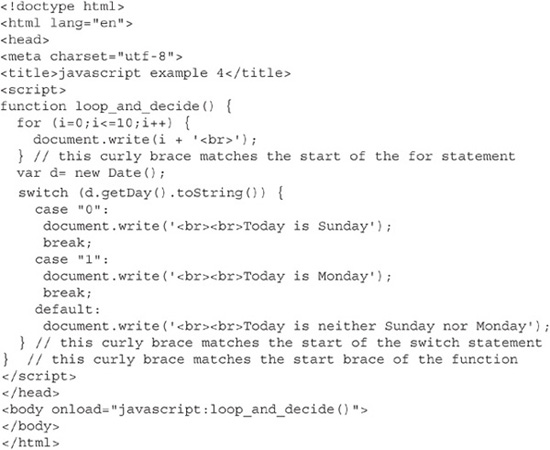
Curly braces ( { } ) are used to designate blocks of JavaScript code. They are necessary for many JavaScript statements to indicate the start and end of the statement.
The script in the page first performs a loop that counts from 1 to 10. Then conditional testing—using the switch statement—tests if the day is Sunday, Monday, or neither one. The appropriate answer is written out on the page, as shown in Figure 2-4.
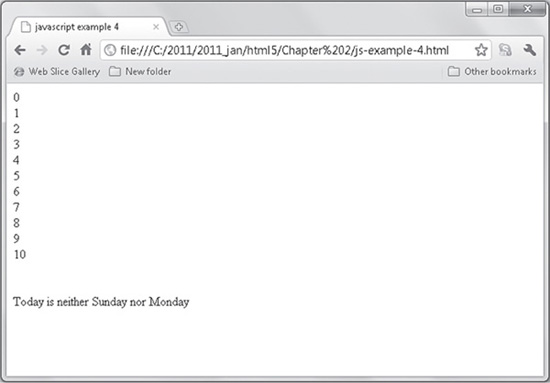
Figure 2-4 Loops and testing with JavaScript
The for statement facilitates the loop. The code sets a starting count, a value to reach to stop looping, and the increment. In this example, 1 is the starting value, and the counter increments by 1 until 10 is reached. As this occurs, the write method is used to create the output on the page, which is simply outputting the value of the counter (the variable i holds the value):

Whatever code is placed within the curly braces ( { } ) is run each time the loop increments. After the code, the switch statement is used to test the date. A series of if statements could have been used instead. It’s a matter of programming style. Finally, note that all this activity occurs only because of the onload event within the body tag:
![]()
JavaScript in an External File
JavaScript is often linked into a web page. In other words, the JavaScript code resides in an external file on the web server, rather than being written directly into the page. The script tag includes a source (src) attribute that points to the file. Here is an example:
![]()
Using JavaScript from an external file makes for easy changes when the JavaScript routines are used by numerous web pages. If any JavaScript needs to be updated, it is done in one place: in the external file. Then all the web pages that reference the external file will have the update. This beats the alternative of needing to update every page individually.
TIP
Serious web development requires a good understanding of JavaScript. There is much more to the language than is included in this book. Find books or online resources that appeal to you. One very well-designed site for learning JavaScript is the W3Schools site at www.w3schools.com.
CSS Overview
Cascading Style Sheets (CSS) has made the Web much more manageable and design-friendly since entering the mainstream. You may wonder about the name—what is cascading about the style sheets? To understand, consider the three ways CSS can be incorporated into a web page:
![]() From a block of style instructions in the head section of the HTML (also known as an internal style sheet), which will be inside a set of style tags
From a block of style instructions in the head section of the HTML (also known as an internal style sheet), which will be inside a set of style tags
![]() In-line—written as an attribute of a single HTML tag
In-line—written as an attribute of a single HTML tag
The hierarchy, or priority, of how these three methods of CSS are used can be said to cascade. Styling set at the tag level overrides styling found within a style tag in the head section. Styling in the head section overrides styling from an external file, assuming the external file is referenced before the style tag in the head section. If the external file is referenced after the style tag, then the styling in the external file overrides the styling set in the style tag. Note that it is not required to have all of the styling types present. Often, referenced external files are used without any head style tag or in-line styling.
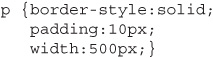
CSS works via a system of selectors, which are identifiers used to match page elements. A selector will have one or more declarations. A declaration consists of a property and a value. A colon sits between the property and the value, and a semicolon sits at the end of the value. The selector has a section of one or more property-value pairs, and the entire section is within curly braces. An example serves best here:
![]()
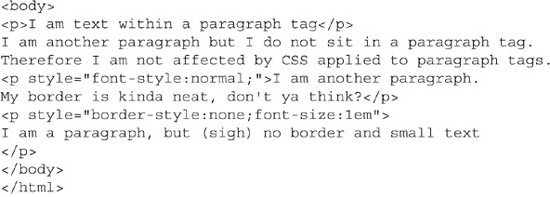
Here, the paragraph element (p) is the selector. Assigned to the selector is a declaration. The declaration gives the value solid to the property border-style. Assuming there is no other influencing CSS (as demonstrated later), all paragraphs in a web page will appear with a border. This affects only text within a set of paragraph tags. Consider this section of a web page:

Figure 2-5 shows what the CSS treatment of the <p> tag causes to appear on the page.
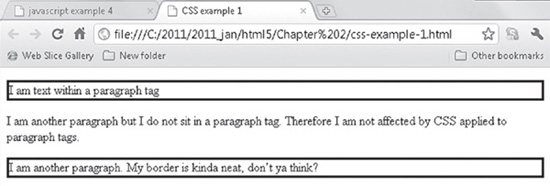
Figure 2-5 Paragraph-tagged text has a border around it.
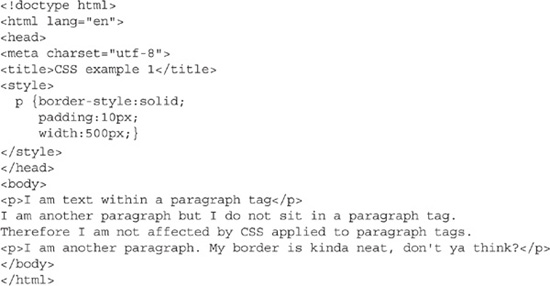
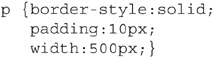
The appearance of the text shown in Figure 2-5 is not aesthetically pleasing. A particular thorny issue is that the text within the borders is butting up against the border. Also, the border is much wider than the text it contains. These issues are fixed with the padding and width properties, by giving them reasonable values for the intended visual presentation, as follows:
This example shows how multiple property-value pairs follow one another. Often, you will see them on separate lines. This is not a requirement; it is done for easy readability.
Figure 2-6 shows how the sample page looks with the padding and width properties. Code Listing 2-5 is the complete code for the page shown in Figure 2-6.
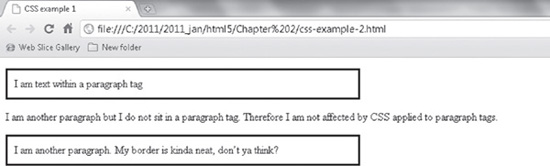
Figure 2-6 The page style has a better look when the padding and width properties are used.
Code Listing 2-5 A web page with a style section in the head section
Now about that cascading effect. Consider the paragraphs in the example shown in Figure 2-7.
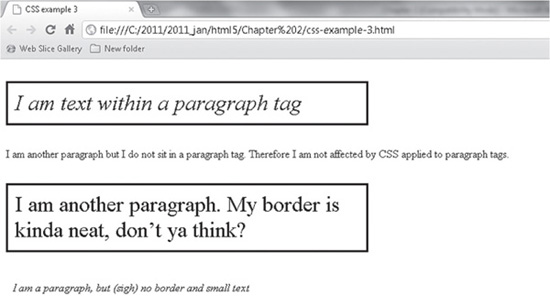
Figure 2-7 Various paragraph CSS treatments
What is going on here? Every paragraph looks different. Code Listing 2-6 shows the code for this page.
Code Listing 2-6 A web page with external, internal, and tag-specific CSS

First, an external style sheet is referenced with this line:
![]()
The style.css file contains the following:
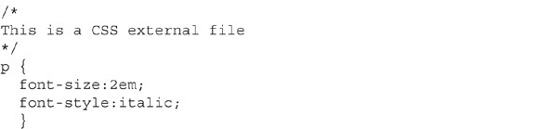
Since this is the external CSS file, any styling rules in here apply to the entire page, or more particularly, to the elements that are specified in the file—in this case, the paragraph tag. This means all text inside <p> and </p> tags is set to a large font size and italic. These rules apply until they are altered or enhanced by the styling set in the style tags in the head section (if there is a style there—it’s not required). In this case, the CSS instructions at the top of the page do not alter the font size or italic setting, but they do add the border, padding, and width:
However, a couple of individual paragraph tags override the top of the page styling. One paragraph overrides the font italic effect with this:
![]()
Also, the last paragraph of the page overrides the font size and removes the border, with this:
![]()
In-line CSS is managed by using the style attribute. The structure is style="CSS info goes here".
ID Selectors: Targeting Specific Page Sections
CSS can be applied to all visual HTML tags. In other words, it makes sense to apply CSS to the body, tables, lists, paragraphs, images, and so on. However, it does not make sense to apply CSS to the script tag, since this does not produce anything visual on the web page.
Besides the appropriate HTML tags, you can target specific page areas—areas that are typically segregated as divs or spans. In a web page, an area can be represented as a div. In fact, it is quite normal for a page to have several divs and nested divs. Each div tag can be given an identifier.
A single div is identified so CSS treatment will apply to it without affecting other div tags. This same approach applies to the all visual HTML tags, but in practice, divs seem to be the ones that are most likely to receive treatment using identifiers. (Classes, explained later in the chapter, tend to be applied to the typical page elements, but even this is a subjective observation.)
Code Listing 2-7 shows a portion of the markup of a page that uses divs to arrange the page layout.
Code Listing 2-7 Div tags with identifier attributes
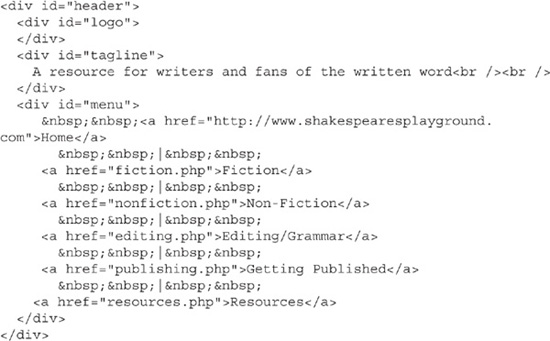
This code contains four divs. Each has an identifier (id=). They are named header, logo, tagline, and menu. The logo, tagline, and menu divs are nested inside the header tag.
The purpose of the naming is to give each div its own CSS treatment. Code Listing 2-8 shows a portion of the CSS file that is linked into the HTML page. Note that each of the four divs is represented in the CSS by its identifiers, which begin with a pound sign, as in #header {.
Code Listing 2-8 Identifiers in a CSS file
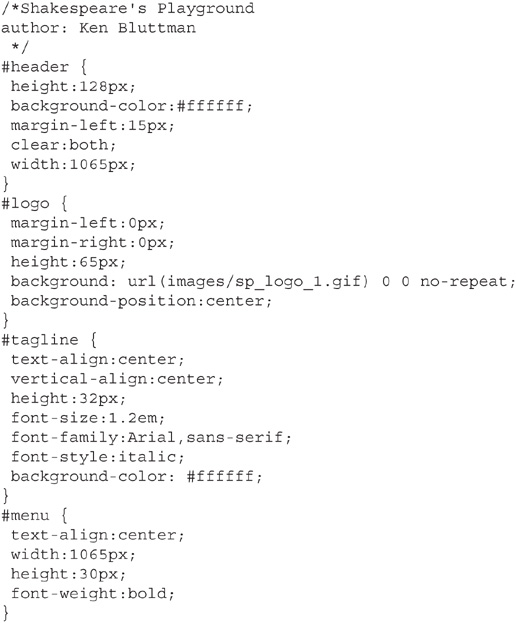
In this example, the tagline presents italic centered text, the menu occupies a height of 30 pixels, and the text is bold. (Actually, the text in the menu is mostly hyperlinks, which have additional styling not shown here.)
TIP
As with all live sites on the Internet, you can use the View Source feature in the browser to view any and all HTML, CSS, and JavaScript.
Figure 2-8 shows the web page styled with the HTML and CSS shown in Code Listings 2-7 and 2-8.

Figure 2-8 The appearance of a web site styled with CSS
CSS Classes
Identifier selectors are used to apply CSS to a particular page element. Classes are used for applying the same CSS to multiple tags. This is for efficiency. The CSS is written once and applied multiple times. If something needs to be changed, it is changed once in the class declaration.
Classes start with a period (.). Unlike straight tag names or identifier selectors, class names are not tag names. For example, a class might be called ad_section, product, or anything that makes for a sensible name. Code Listing 2-9 is a portion of a CSS file that shows a couple of classes.
Code Listing 2-9 Classes in a CSS file
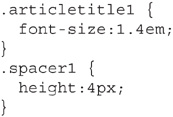
Any page element given a class designation of articletitle1 has a large font size. Any page element given a class designation of spacer1 will have a height of 4 pixels. Considering these names, it’s easy to surmise that there likely are several articles and several areas on the page to add a bit of space. Indeed, the two lines shown next are used multiple times in the page markup.
How CSS Is Applied to New HTML5 Multimedia Tags
Actually, there is nothing new in the application of CSS to any of the new HTML5 tags. The reason? Because they are true HTML tags. This means that they are treated in the same manner as any other HTML tags. The intent isn’t for this to sound like plain-old business. It’s quite the opposite. This treatment makes it easy to create visually appealing—dare I say stunning— visual renderings of these tags.
One tag that on the surface seems to have little visual impact is the audio tag. This tag plays audio, aimed to and for the ears, not the eyes. But the native audio player that is now part of HTML can take on a variety of looks. Figure 2-9 shows three audio players, all the same, rendered from the audio tag, but styled differently.
NOTE
The appearance of the players in Figure 2-9 is how they render in one browser: Chrome. The same page displayed in other browsers may yield a different visual result.
Code Listing 2-10 shows the page code for the example in Figure 2-9.

Figure 2-9 Applying CSS to the audio tag
Code Listing 2-10 Styling the audio tag
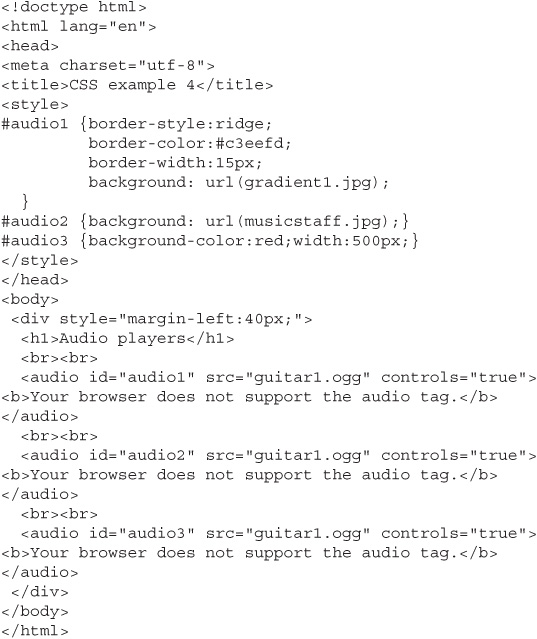
The CSS is set in the style tag in the head section. The audio players are named audio1, audio2, and audio3, and each has a corresponding CSS identifier.
Note that if there were just the tag name of audio in the CSS, then any of its properties would apply to all the audio players. However, when a single player is identified as, for example, audio1, its CSS treatment applies to just that one player. So, in this example, the audio players are styled individually by using their identifiers.
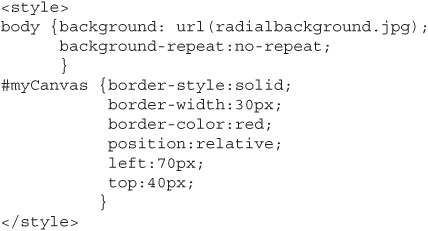
To close out this chapter, let’s consider CSS applied to the canvas element. The next chapter covers the canvas in detail, so this is a taste of what’s to come. Figure 2-10 shows a canvas element displaying a radial green and black image. The canvas, in the middle, is given a red border, via CSS.

Figure 2-10 Styling the body and the canvas together
An interesting point here is that the background image of the body (the page itself) is a .jpg file. The imagery in the canvas is created with JavaScript. Using CSS, the canvas element is positioned on the page in such a way that the radial imagery looks continuous from the center on out to the edges of the page. Techniques like this are possible with CSS by using positional properties such as top and left. The sophistication of JavaScript to create the dynamic imagery within the canvas is explained in the next chapter. For now, Code Listing 2-11 shows the CSS used for the image.
Code Listing 2-11 Applying CSS to create a continuous appearance of two separate page items
Summary
Whew! We covered a lot here. As HTML5 is put to use, the integration with JavaScript becomes quite a nice thing to do. Is that integration essential? You can code HTML5 pages without JavaScript, but those pages will be missing a lot of the excitement that occurs as a result of JavaScript making the pages jump.
Unlike HTML/HTML5, JavaScript follows handle coding techniques that all proper programming languages do—loops, conditional branching, and such. Therefore, incorporating JavaScript is essential in order to have your web pages become more than static.
CSS is the icing on the cake, and that’s not a bad metaphor. CSS provides the look, polish, and visual pizzazz. Good usage of CSS and JavaScript carries HTML to new heights. To wow your audience, take the time to become proficient in these technologies.