Chapter 5
Getting Visual with Video
Movies, web shows, video clips, and more—watching video is ubiquitous Web-wise. With YouTube, Vimeo, Netflix, Hulu, and other video-centric web sites, watching the Web has become as much an activity as exploring the Web or interacting with web sites and applications. There is so much video out there! Video is now a staple of the Web and will be until the day we can just implant the video clips in our brain cells.
However, to watch videos from the popular sites that serve them, there is overhead to manage, such as an account, uploading your own video, making decisions about the audience, and so forth. Also, you need to make a choice between having links back to the videos or embedding the code in your pages, which still means the video is coming from that “other” site. Now the game gets leveled.
HTML5 has a native video element. Since it’s a core HTML element, you can treat it with CSS, JavaScript, and whatever tricks you have up your sleeve. Add to this that the video file itself can sit on your web server, which should give a performance boost when the page showing the video is physically in the same place.
In this chapter, you will learn how to use the video element. It’s tag-based ![]() like other elements.
like other elements.
Although the video element is a core piece of HTML at this point, that doesn’t mean you can avoid browser considerations. This is because of the various formats that video can come in. Here, we focus on Ogg, MPEG-4, and WebM. As of this writing, these are the formats being used, based on the browser. We can hope that one format will be decided on by the browser creators, but for now, we live with incompatibilities. Luckily, though, there is an easy and neat trick to make it not matter, as you’ll learn in this chapter.
NOTE
Internet Explorer is not mentioned or demonstrated in this chapter, as it does not support the video element yet. Internet Explorer 9, which is on its way to the marketplace at the time of this writing, will supposedly support the video element, with additional codecs installed.
Of Formats, Codecs, and Other Confusing Matters
A few years ago, if someone said “ogg” to me, I would have thought of eggnog. That’s not so anymore. Ogg is a video format that supports video and audio. Theora and Vorbis are codecs that supply the capability for video and audio, respectively, to work in a browser that supports them. You could think of Ogg as a wrapper or container for Theora and/or Vorbis.
Codec (compression/decompression) technology is used to streamline, or stream media for use on the Web (the point mainly to be making files smaller; media files can get quite large). Currently, two codec wrappers have garnered popularity for showing video on the Web: H.264 and the aforementioned Ogg. H.264 is also known as MPEG-4. This format is synonymous with Apple products. For example, the Safari browser will play MPEG-4 videos on a computer, and also on an iPhone or iPad. There is a caveat though. H.264 has patent protection, making it an iffy proposition to have it become a standard across all browsers. So, the other browsers adopted Ogg, since it is open source and free to use without cost.
Ogg is maintained by the Xiph.Org Foundation (xiph.org). Much can be learned at this site. Of note is the decision for video files (Theora) to have the .ogv file extension and audio files to have the .oga extension.
The videos you create with your videocam, camera, webcam, or other device might not be saved in either of the formats (for example, I have a videocam that creates .mov files). So they need to be converted to MPEG-4 and/or Ogg in order to work in a browser. The support of these formats among browsers is spotty, so yet another format—WebM—is making inroads as the possible standard that the browser companies will agree on. To summarize, the following formats are available at the time of this writing:
![]() Theora (Ogg)
Theora (Ogg)
![]() MPEG-4 (H.264)
MPEG-4 (H.264)
![]() WebM
WebM
If I were to supply a matrix here of which browser supports which technology, it would probably be old news by the time this book reaches your hands. Luckily, there is a way out of this mess. When coding a page to play video through the HTML5 video element, you can place a succession of source files for the video element to use. This is known as fallback. If the first format doesn’t work, the video element will attempt to play the next one. You’ll see how this works in the examples presented in this chapter.
Reformatting Files
The first step on the road to video use is to convert your native video files into the formats that are supported. Many converters are available. I will mention the ones I use. You can follow how these work or find your own.
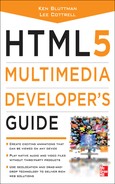
The Firefox browser has a great plug-in/extension available called Firefogg, used for converting files to Ogg. To get Firefogg, visit www.firefogg.org and follow the instructions for downloading and any required installation steps. Figure 5-1 shows the Firefogg site. Note that when I visit the site, the page recognizes that I already have Firefogg installed. On your first visit, you should see another version of the page that leads to the download. Be sure to visit the Firefogg site from the Firefox browser!
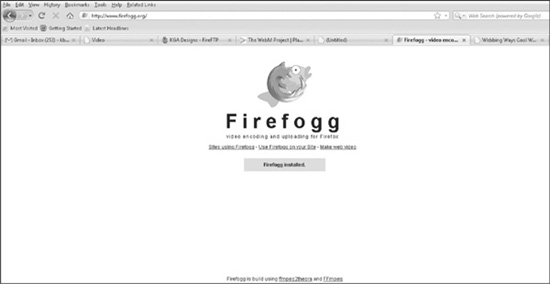
Figure 5-1 Firefogg is downloaded.
After Firefogg is installed, it is available on the Tools menu in Firefox, at least through version 3.x. (Otherwise, navigate to the Firefogg site, and you’re ready to go.) Choosing Firefogg brings you back to the Firefogg site, but to a page where you select a file on your computer, as shown in Figure 5-2.
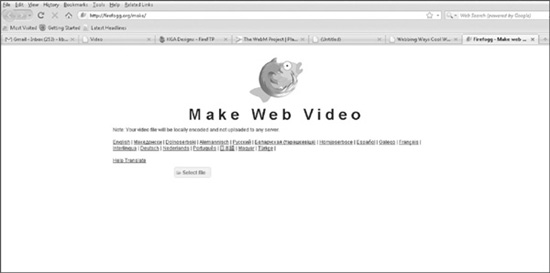
Figure 5-2 Preparing to convert a file
Click the Select File button, and you’ll see a file finder dialog, as shown in Figure 5-3. In the figure, a target file has been found. If the print isn’t too small, you might be able to see that the file is more than 16MB. By the way, the file being converted is a .mov video from my videocam.
Figure 5-3 Selecting a file to convert
After you choose a file, the next step is still on the Firefogg web site, as shown in Figure 5-4. A number of tabs appear, each containing settings to select. The top tab is open, and you make a selection from the drop-down list, which is to make a high-quality Ogg Theora/Vorbis file in this example. Note that selections to make WebM files are available here, too.
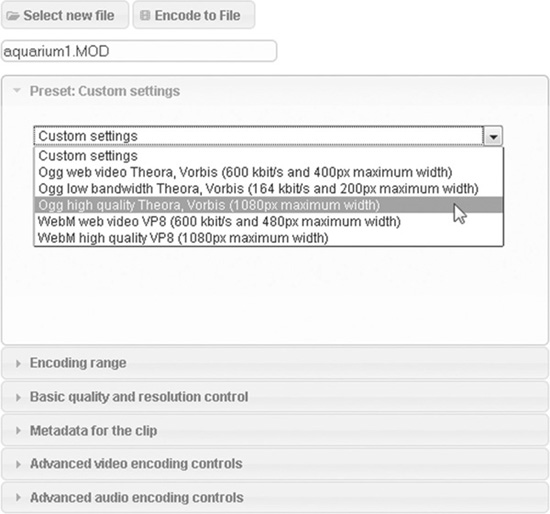
Figure 5-4 Selecting the format for the converted file
After you’ve made your conversion selection, click the Encode to File button. You’ll see a dialog for selecting the location where the converted file will go on your computer. Then the conversion process starts. You can watch the progress, as shown in Figure 5-5. Figure 5-6 shows the completion of the conversion.
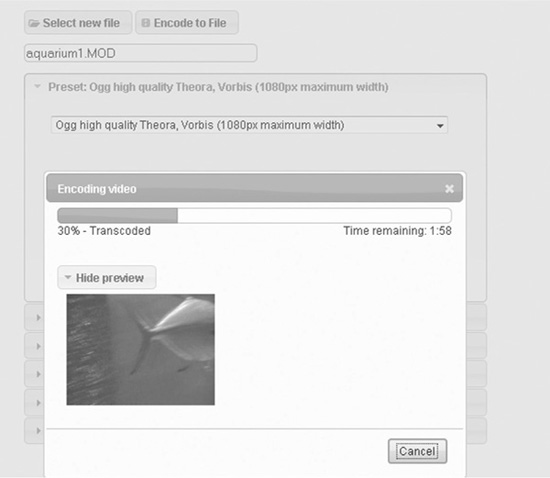
Figure 5-5 The file conversion in progress

Figure 5-6 The file conversion is complete.
The converted file is saved on the local computer, and you can send it via FTP to the web site space when needed. In the example, the conversion reduced the file size to a bit over 3MB. That may still seem substantial, but consider that the file will most likely be in the same location as the web page that displays it. The transmission time from the video file to the video element will effectively be seamless. The transmission to your browser may still be an issue; however, intelligent buffering in modern browsers handles this well.
Firefogg is also used to create a WebM version of the original video file. The steps are the same as those used to create the Ogg format file.
To convert the .mov file to MPEG-4, you need to use a converter other than Firefogg. You can find numerous converters via a search of the Web. Figure 5-7 shows a useful converter called the Total Video Converter, by OJOsoft (www.ojosoft.com).
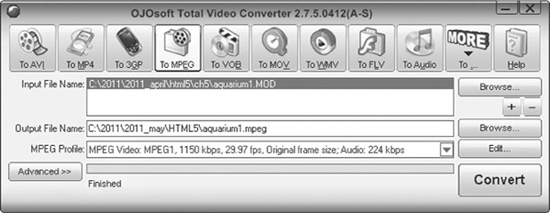
Figure 5-7 A video converter that can convert to MPEG-4
After all this conversion work, you should now have three versions of the source video, in Ogg, WebM, and MPEG-4. As shown in Figure 5-8, the converted file sizes differ, but all are much smaller than the original 16MB.
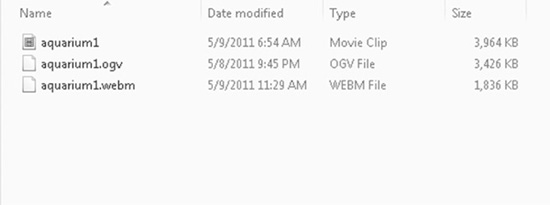
Figure 5-8 Three converted files, all smaller in file size than the original version
TIP
The reduction of converted file sizes also depends on the quality you selected (high, low, or web quality).
A final word on formats, file types, and codecs: You’ll find a confusing mess of competing technologies, as well as inconsistencies from browser to browser. An issue that comes into play is specifying the MIME type (for example, type='video/ogg; codecs="theora, vorbis"'). This is introduced in the upcoming examples.
Watching Video!
Enough prep and theory—time for a video! Code Listing 5-1 shows the code for a page that contains three video elements. This is to point out the different formats supported, or not, in different browsers. Each of the video elements has the same video file as its source, but in a different format.
Code Listing 5-1 Using the video tag
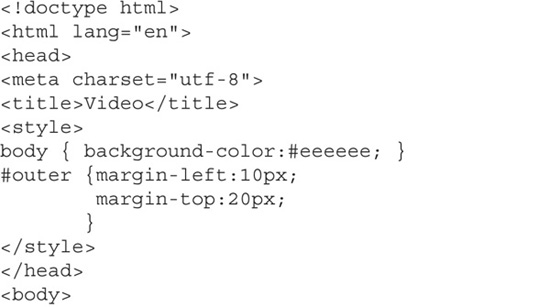
Here is one of the video tags, a core piece of this code:

The video tag has an opening and closing pair of tags. Within these tags, you provide a source, which is the path to the video. The video can be located anywhere on the Internet. In this example, it is simply sitting in the same directory with the web page. As the file name indicates, this is the Ogg version (ending in the .ogv extension). In the opening tag are a few attributes. The width and height define the size of the video. The presence of controls indicates the video has a play/pause toggle and a volume control. The presence of loop indicates the video will repeat endlessly.
Figure 5-9 shows three browsers displaying the same page with the three video elements. Notice that Firefox displays the Ogg and WebM versions, and puts up a blank gray box where the MPEG-4 version goes. Conclusion: Firefox does not play MPEG-4 files. Google Chrome follows suit in displaying the first two file types. Safari, on the other hand, shows only the MPEG-4 version. The vertical box above the middle video space must be some oddity of the browser giving it a shot to display the video, but not succeeding.

Figure 5-9 Three browsers, three video file types. Top left is Firefox, bottom left is Google Chrome, and on the right is Safari.
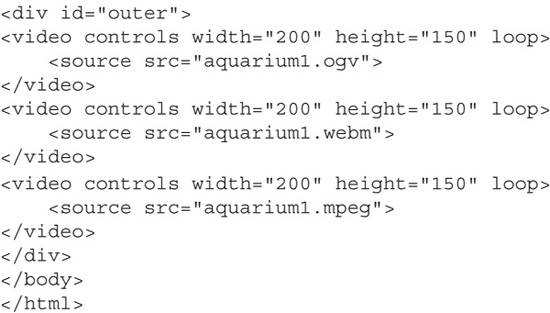
Falling Back
Code Listing 5-2 shows a rearrangement of Code Listing 5-1. In Code Listing 5-2, one video element is present, and within it are three lines indicating the source: one for each type. Now, if a browser cannot use the first format, it will try the second, and then the third, if necessary.
Code Listing 5-2 Arranging fallback in the video tag
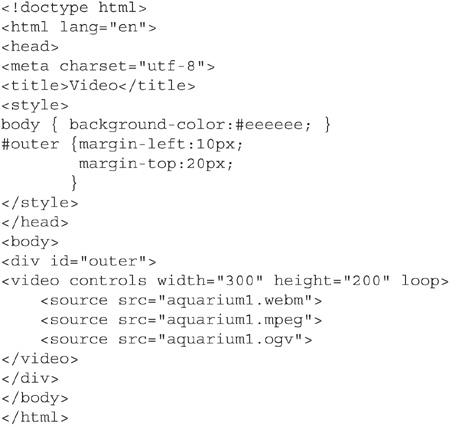
Figure 5-10 shows the three browsers—Firefox, Google Chrome, and Safari, left to right— all displaying the video. Success!

Figure 5-10 Three browsers, all able to play the video
TIP
It is likely necessary to indicate MIME types to get the videos to play from a web server.
MIME types are useful, and perhaps necessary to get the various configurations of videos to run. I use a Linux server running Apache, on which I am able to place an .htaccess file in the directory with the web pages and videos. In the .htaccess file, I have indicated some MIME types:
![]()
Web-hosting solutions differ, and you may not be able to create .htaccess files. The best advice I can give here is to research what you can do with your hosting company. (If .htaccess files are not something you are familiar with, you can find plenty of information about them on the Internet.)
An alternative is to provide the MIME types directly in the video tag, like this:
![]()
In the following examples, these type statements are left out, as my hosting solution allows me to create .htaccess files. You will need to figure out the best solution for configuring the MIME types to run video.
Video Controls
In its simplest form, a video tag is placed in the HTML source of a web page. Giving it a width and height is prudent (or perhaps using CSS to provide these properties). That is basically it for showing the video. However, adding the controls attribute provides a way for viewers to control the video, which is a good idea. Code Listing 5-3 shows an example. Looping has been removed, so when viewed, the video plays once.
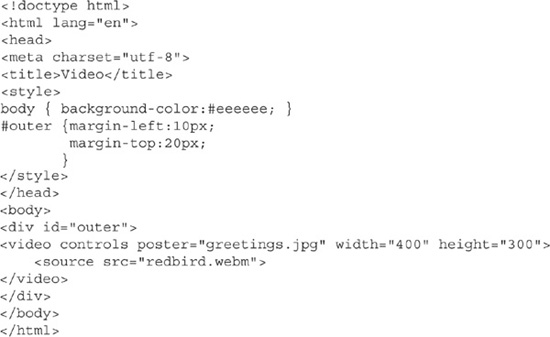
Code Listing 5-3 Controlling a video
Figure 5-11 shows the video brought to life from the code in Code Listing 5-3. Styling—in particular a thick, yellow ridge type border—has been set around the video element. The styling is set in the head section of the page’s HTML code.
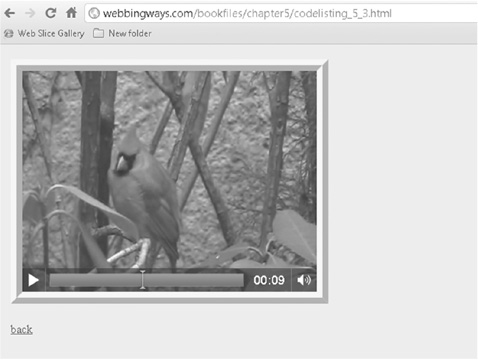
Figure 5-11 Adding controls for watching a video
More Video Attributes
The video tag has a few more attributes that allow flexibility in presenting video. First up is autoplay. When a web page with a video is presented, it doesn’t start playing unless specifically told to do so. You could just let the user click the play button, or you can have the autoplay feature start the video. In practical terms, this can be annoying if the people visiting the web page are not in control after the video starts. Common sense dictates including the controls attribute so they can stop the video once it has autostarted.
The following shows the autoplay attribute added to the video tag from Code Listing 5-3:

As noted earlier in the chapter, loop is the attribute that keeps the video chugging along; that is, the video will repeat, ad infinitum, until stopped (or if you navigate away from the page). This snippet is taken from Code Listing 5-2, with loop at the end of the opening video tag:
![]()
As pointed out with autoplay, do your viewers a favor and also provide the controls attribute, so they can stop the video.
The poster attribute is used to display a still image until the video starts playing. The poster is not necessary. If it’s not used, the first frame of the video is displayed. The catch is that the first frame may not be something desirable to have in view as a still image. For example, the first frame may be just a blur if the camera was in motion when shooting the video. Using a poster allows you to override the first frame and put something useful or desirable in its place. Code Listing 5-4 shows the poster attribute in use. In the video tag, the poster is set to an image—in this case, a .jpg.
Code Listing 5-4 Using the poster attribute
Since autoplay is not used, the poster attribute displays the image (greetings.jpg), as shown in Figure 5-12.
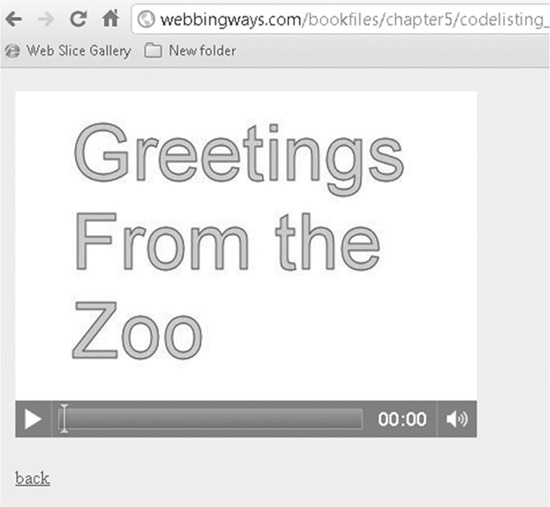
Figure 5-12 Using a poster image
Events and Video
The video element is useful in many ways. As a native HTML element, it can be formatted. It’s easily recognizable by JavaScript, and therefore can take advantage of events. Code Listing 5-5 shows how to do this. The video element is given an identifer (myvideo), and two events are added to the tag: a click event and a double-click event. The click event starts the video, and the double-click pauses it (or consider that “pausing” stops the video).
Code Listing 5-5 Using events with video
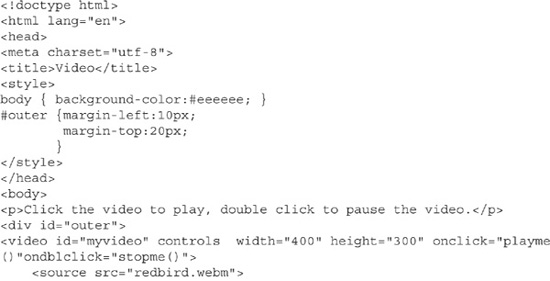
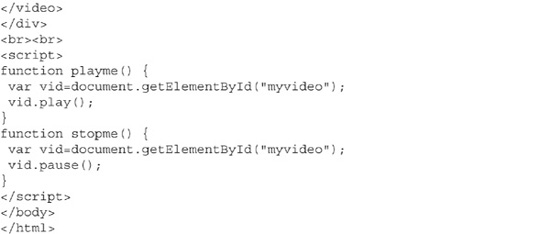
Simply, the onclick event calls the playme function, in which the play method is used. The ondblclick event calls the stopme function, in which the pause method is used.
Summary
Video on web sites was once a dream for many, but reality would have it that bandwidth, file sizes, and other problematic issues made having video an iffy proposition. Over time, however, high-speed connectivity became the norm for nearly all. Then sites such as YouTube showed what creativity and impact video can have as a feature offered on your web pages.
Now, with the native HTML5 video element, an extra step is achieved in that not only can you display video, but you can do so without any dependency on a third-party web service or even a third-party video player (such as a Flash player). In addition, since the native HTML5 video element is not Flash-based, it will play anywhere, on any device.
As seen in this chapter, with the use of video controls, CSS styling, and JavaScript interaction, the possibilities are nearly endless. Video display is now fully in the hands of the web site owner/developer and able to blend into any design. In the next chapter, the audio equivalent is explored.