
For this example, we'll export all the data from a single MySQL table into a correspondingly named table in Hive. You will need Hive installed and configured as detailed in the previous chapter.
- Delete the output directory created in the previous section:
$ hadoop fs -rmr employeesYou will receive the following response:
Deleted hdfs://head:9000/user/hadoop/employees - Confirm Hive doesn't already contain an employees table:
$ hive -e "show tables like 'employees'"You will receive the following response:
OK
Time taken: 2.318 seconds
- Perform the Sqoop import:
$ sqoop import --connect jdbc:mysql://10.0.0.100/hadooptest
--username hadoopuser -P
--table employees --hive-import --hive-table employees
- Check the contents in Hive:
$ hive -e "select * from employees"You will receive the following response:
OK
Alice  Engineering  50000  2009-03-12
Camille  Marketing  40000  2003-04-20
David  Executive  75000  2001-03-20
Erica  Support  34000  2011-07-07
Time taken: 2.739 seconds
- Examine the created table in Hive:
$ hive -e "describe employees"You will receive the following response:
OK
first_name  string
dept  string
salary  int
start_date  string
Time taken: 2.553 seconds
Again, we use the
Sqoop command with two new options, --hive-import to tell Sqoop the final destination is Hive and not HDFS, and --hive-table to specify the name of the table in Hive where we want the data imported.
In actuality, we don't need to specify the name of the Hive table if it is the same as the source table specified by the --table option. However, it does make things more explicit, so we will typically include it.
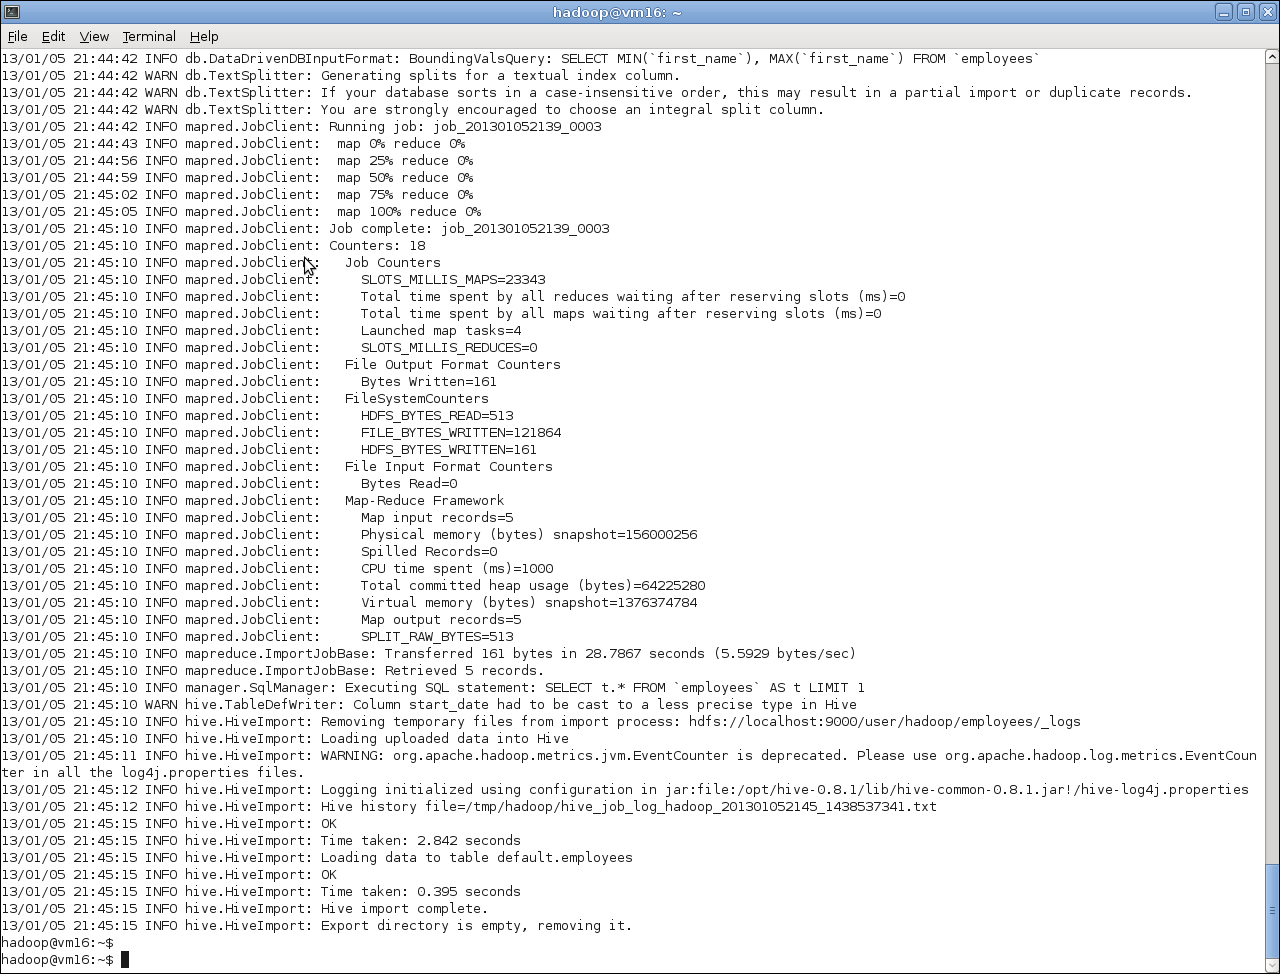
As before, do read the full Sqoop output as it provides great insight into what's going on, but the last few lines highlight the successful import into the new Hive table.
We see Sqoop retrieving five rows from MySQL and then going through the stages of copying them to HDFS and importing into Hive. We will talk about the warning re type conversions next.
After Sqoop completes the process, we use Hive to retrieve the data from the new Hive table and confirm that it is what we expected. Then, we examine the definition of the created table.
At this point, we do see one strange thing; the start_date column has been given a type string even though it was originally a SQL DATE type in MySQL.
The warning we saw during the Sqoop execution explains this situation:
12/05/23 13:06:33 WARN hive.TableDefWriter: Column start_date had to be cast to a less precise type in Hive
The cause of this is that Hive does not support any temporal datatype other than TIMESTAMP. In those cases where imported data is of another type, relating to dates or times, Sqoop converts it to a string. We will look at a way of dealing with this situation a little later.
This example is a pretty common situation, but we do not always want to import an entire table into Hive. Sometimes, we want to only include particular columns or to apply a predicate to reduce the number of selected items. Sqoop allows us to do both.