
Let's jump straight into an example on EMR using some provided example code. Carry out the following steps:
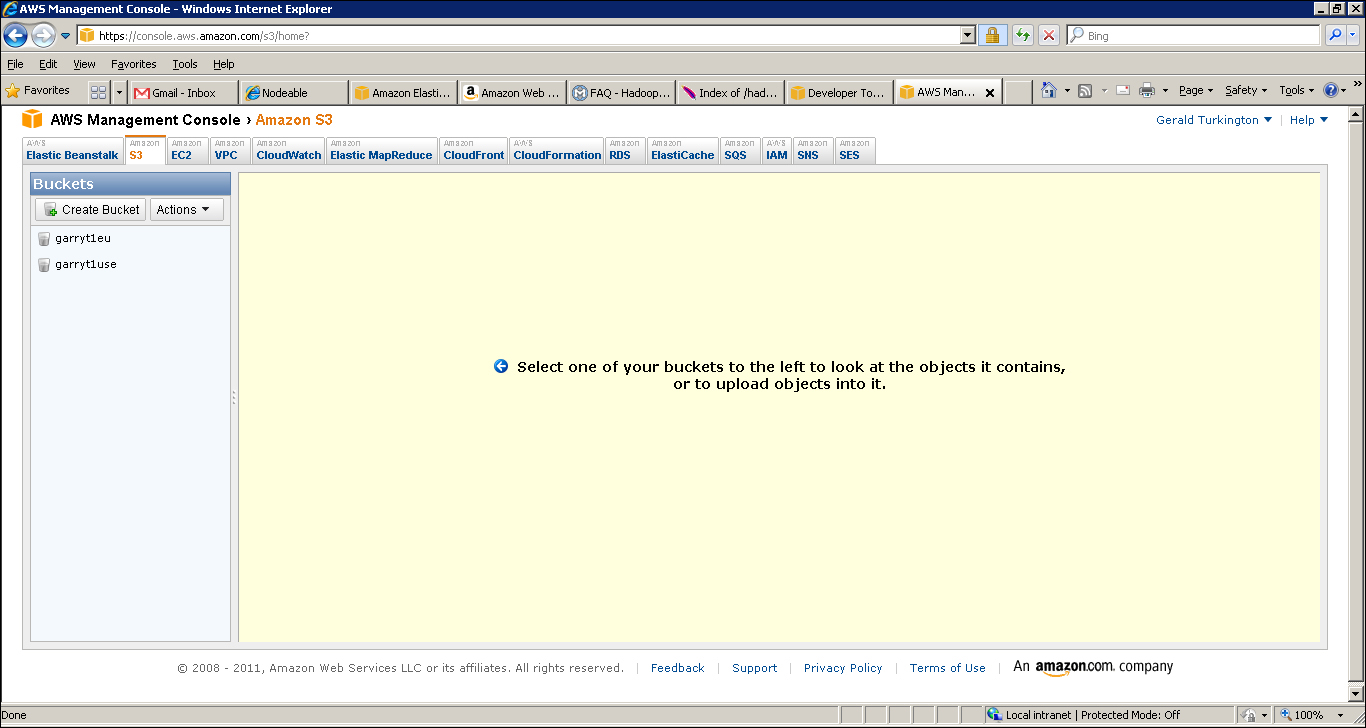
- Browse to http://aws.amazon.com, go to Developers | AWS Management Console, and then click on the Sign in to the AWS Console button. The default view should look like the following screenshot. If it does not, click on Amazon S3 from within the console.
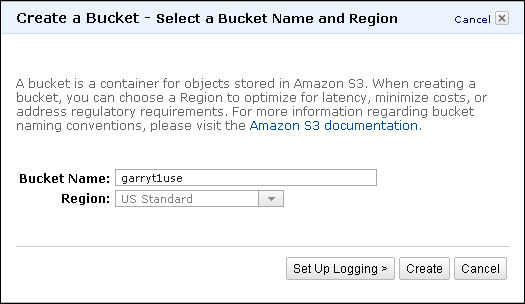
- As shown in the preceding screenshot, click on the Create bucket button and enter a name for the new bucket. Bucket names must be globally unique across all AWS users, so do not expect obvious bucket names such as
mybucketors3testto be available. - Click on the Region drop-down menu and select the geographic area nearest to you.
- Click on the Elastic MapReduce link and click on the Create a new Job Flow button. You should see a screen like the following screenshot:
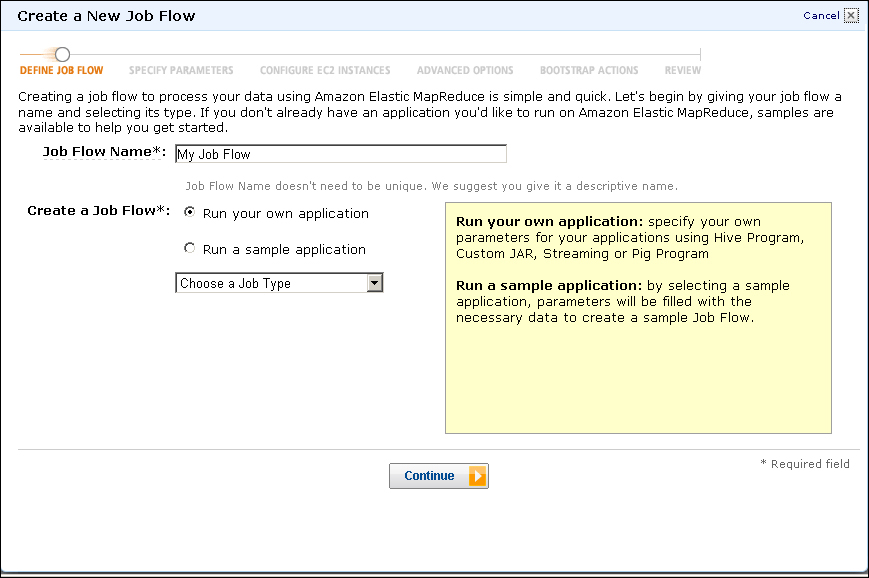
- You should now see a screen like the preceding screenshot. Select the Run a sample application radio button and the Word Count (Streaming) menu item from the sample application drop-down box and click on the Continue button.
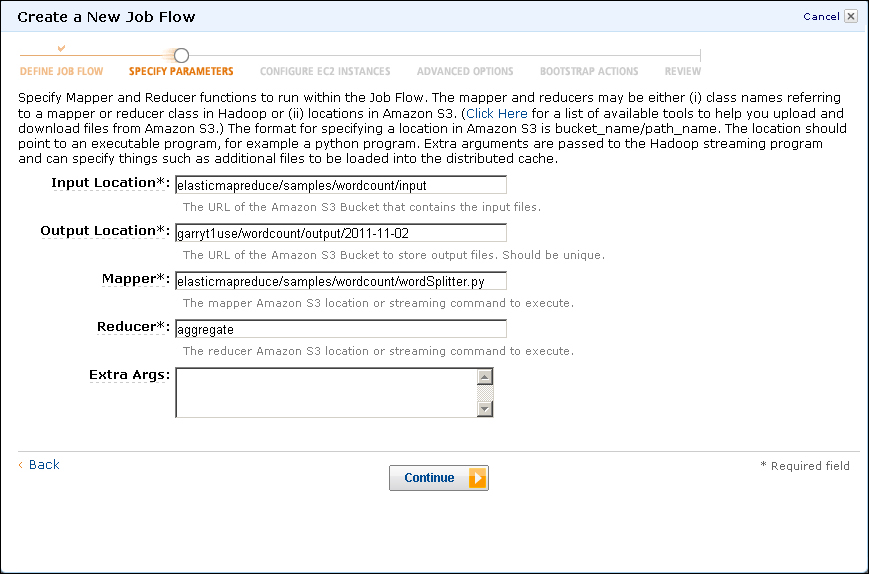
- The next screen, shown in the preceding screenshot, allows us to specify the location of the output produced by running the job. In the edit box for the output location, enter the name of the bucket created in step 1 (
garryt1useis the bucket we are using here); then click on the Continue button.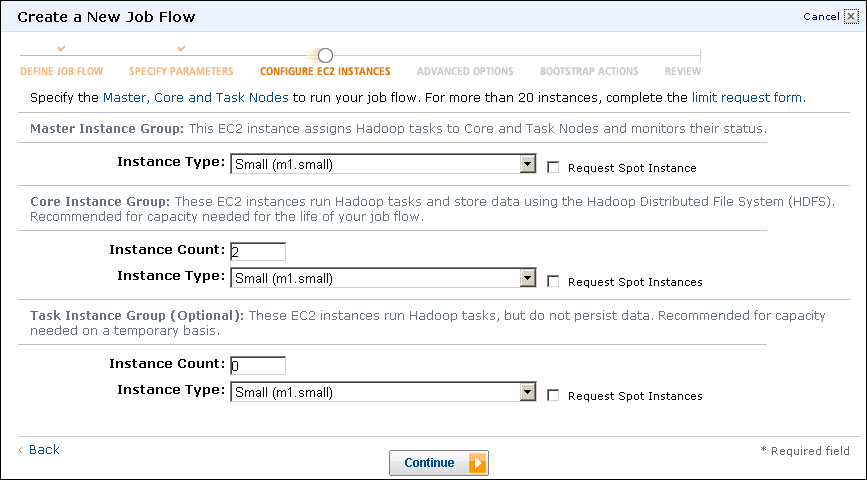
- The next screenshot shows the page where we can modify the number and size of the virtual hosts utilized by our job. Confirm that the instance type for each combo box is Small (m1.small), and the number of nodes for the Core group is 2 and for the Task group it is 0. Then click on the Continue button.
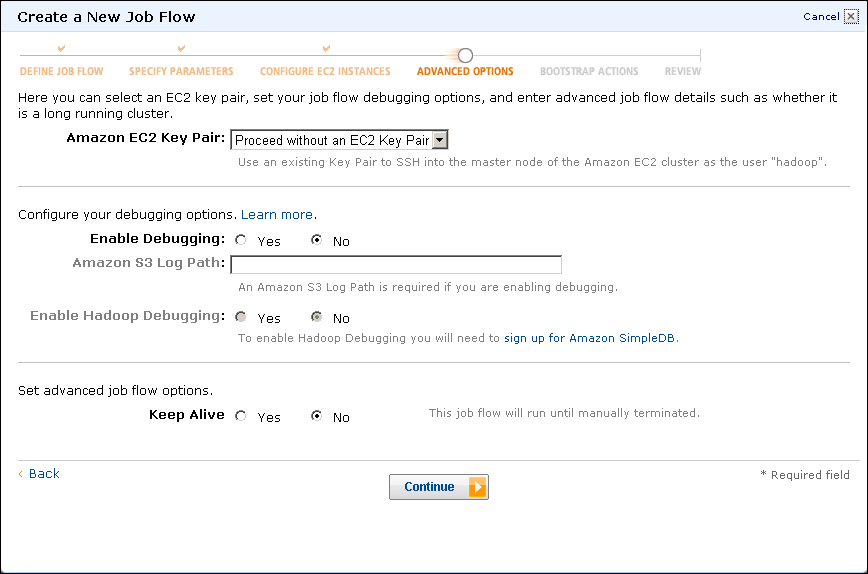
- This next screenshot involves options we will not be using in this example. For the Amazon EC2 key pair field, select the Proceed without key pair menu item and click on the No radio button for the Enable Debugging field. Ensure that the Keep Alive radio button is set to No and click on the Continue button.
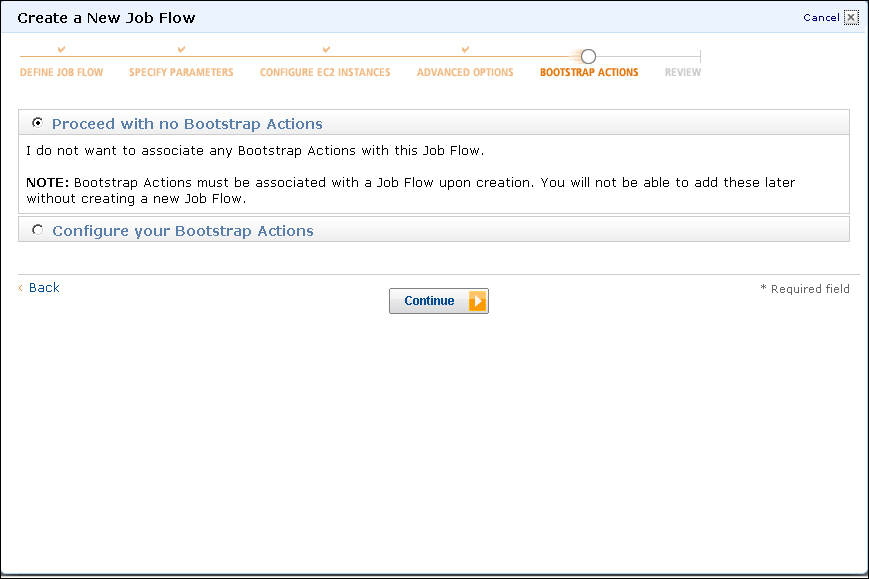
- The next screen, shown in the preceding screenshot, is one we will not be doing much with right now. Confirm that the Proceed with no Bootstrap Actions radio button is selected and click on the Continue button.
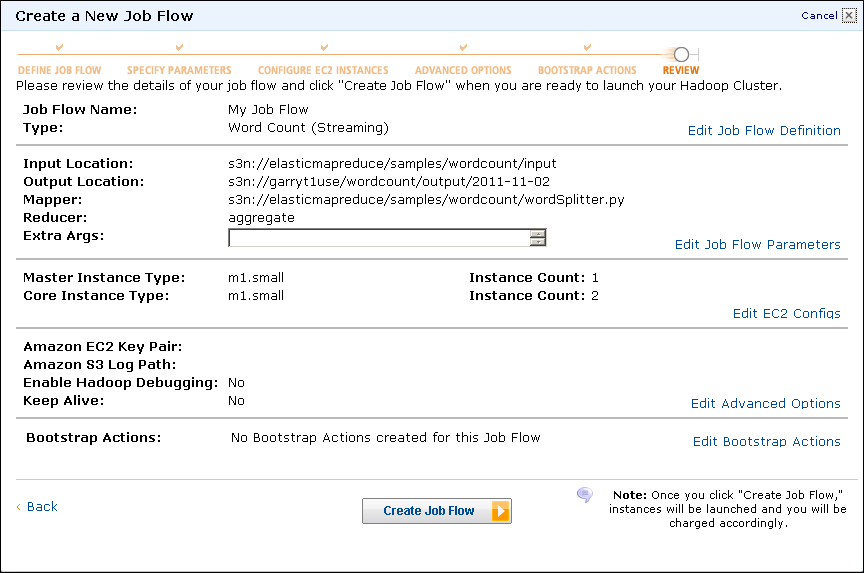
- Confirm the job flow specifications are as expected and click on the Create Job Flow button. Then click on the View my Job Flows and check status buttons. This will give a list of your job flows; you can filter to show only running or completed jobs. The default is to show all, as in the example shown in the following screenshot:
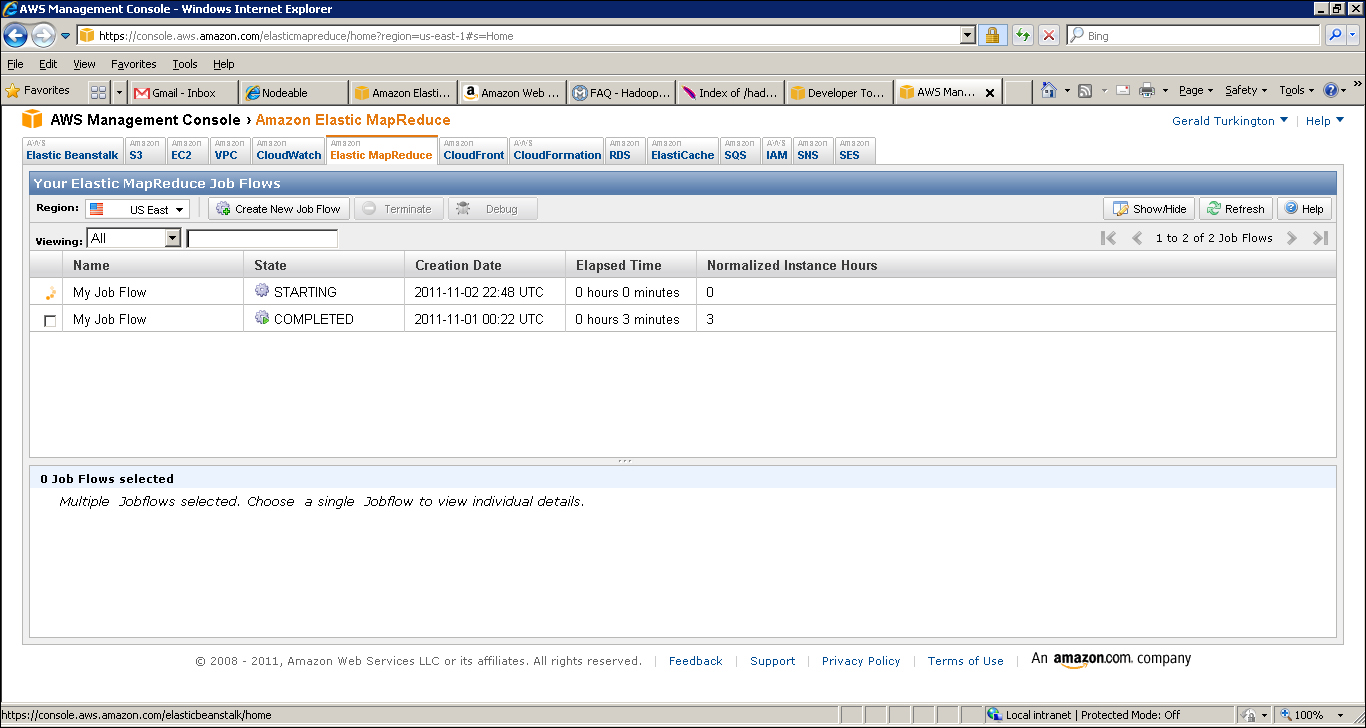
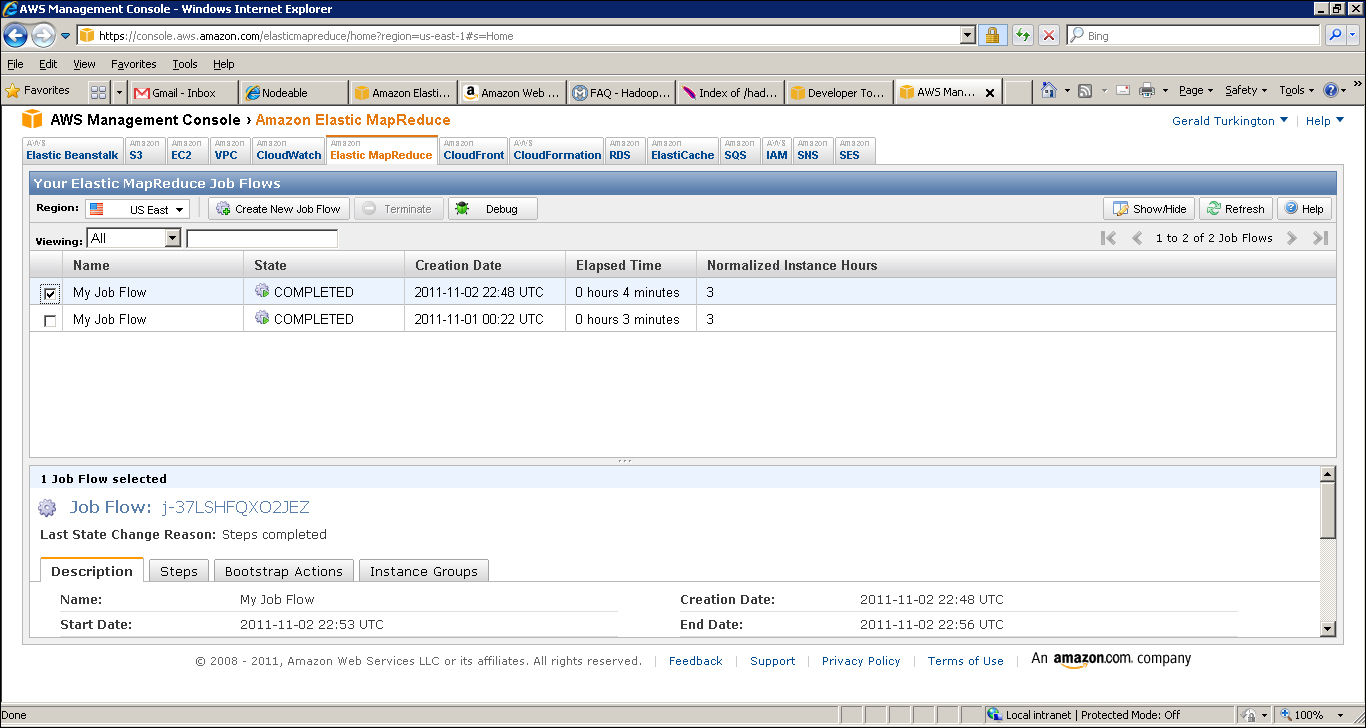
- Occasionally hit the Refresh button until the status of the listed job, Running or Starting, changes to Complete; then click its checkbox to see details of the job flow, as shown in the following screenshot:
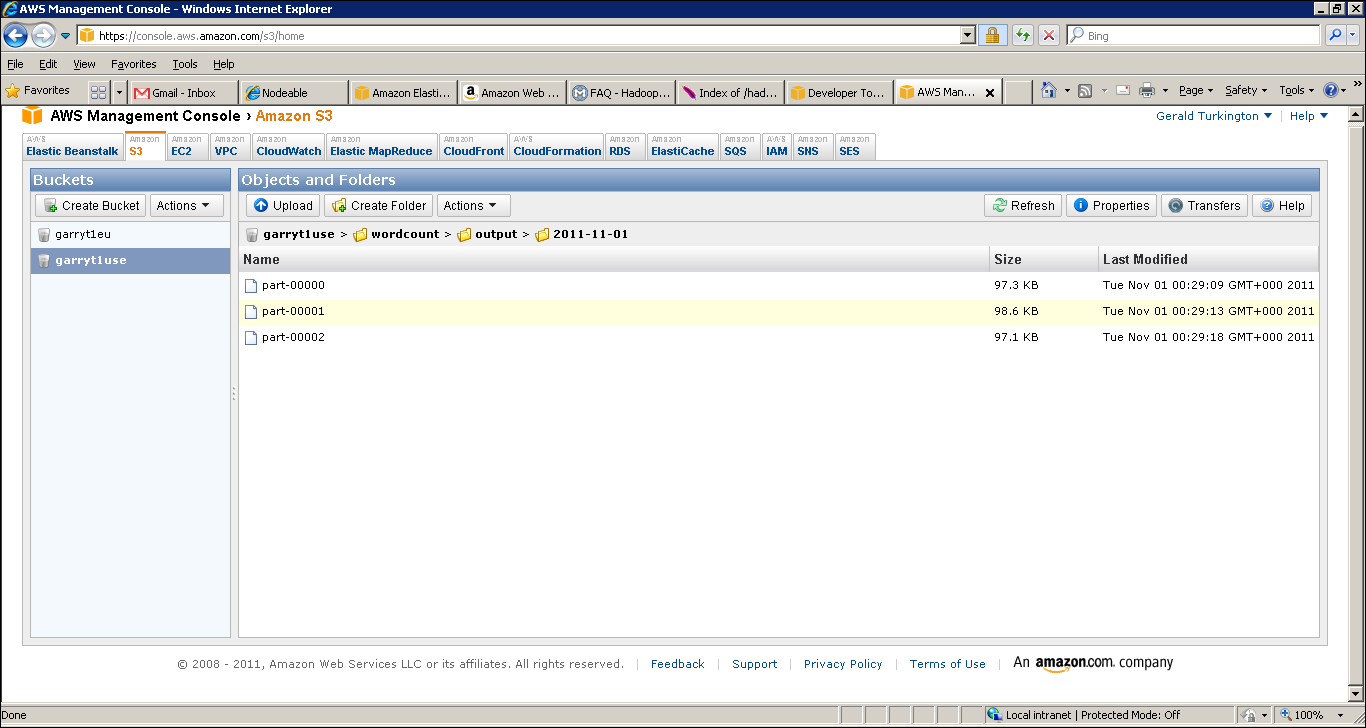
- Click the S3 tab and select the bucket you created for the output location. You will see it has a single entry called wordcount, which is a directory. Right-click on that and select Open. Then do the same until you see a list of actual files following the familiar Hadoop part-nnnnn naming scheme, as shown in the following screenshot:
Right click on part-00000 and open it. It should look something like this:
a              14716
aa             52
aakar          3
aargau         3
abad           3
abandoned      46
abandonment    6
abate          9
abauj          3
abbassid       4
abbes          3
abbl           3
…
Does this type of output look familiar?
The first step deals with S3, and not EMR. S3 is a scalable storage service that allows you to store files (called objects) within containers called buckets, and to access objects by their bucket and object key (that is, name). The model is analogous to the usage of a filesystem, and though there are underlying differences, they are unlikely to be important within this book.
S3 is where you will place the MapReduce programs and source data you want to process in EMR, and where the output and logs of EMR Hadoop jobs will be stored. There is a plethora of third-party tools to access S3, but here we are using the AWS management console, a browser interface to most AWS services.
Though we suggested you choose the nearest geographic region for S3, this is not required; non-US locations will typically give better latency for customers located nearer to them, but they also tend to have a slightly higher cost. The decision of where to host your data and applications is one you need to make after considering all these factors.
After creating the S3 bucket, we moved to the EMR console and created a new job flow. This term is used within EMR to refer to a data processing task. As we will see, this can be a one-time deal where the underlying Hadoop cluster is created and destroyed on demand or it can be a long-running cluster on which multiple jobs are executed.
We left the default job flow name and then selected the use of an example application, in this case, the Python implementation of WordCount. The term Hadoop Streaming refers to a mechanism allowing scripting languages to be used to write map and reduce tasks, but the functionality is the same as the Java WordCount we used earlier.
The form to specify the job flow requires a location for the source data, program, map and reduce classes, and a desired location for the output data. For the example we just saw, most of the fields were prepopulated; and, as can be seen, there are clear similarities to what was required when running local Hadoop from the command line.
By not selecting the Keep Alive option, we chose a Hadoop cluster that would be created specifically to execute this job, and destroyed afterwards. Such a cluster will have a longer startup time but will minimize costs. If you choose to keep the job flow alive, you will see additional jobs executed more quickly as you don't have to wait for the cluster to start up. But you will be charged for the underlying EC2 resources until you explicitly terminate the job flow.
After confirming, we do not need to add any additional bootstrap options; we selected the number and types of hosts we wanted to deploy into our Hadoop cluster. EMR distinguishes between three different groups of hosts:
- Master group: This is a controlling node hosting the NameNode and the JobTracker. There is only 1 of these.
- Core group: These are nodes running both HDFS DataNodes and MapReduce TaskTrackers. The number of hosts is configurable.
- Task group: These hosts don't hold HDFS data but do run TaskTrackers and can provide more processing horsepower. The number of hosts is configurable.
The type of host refers to different classes of hardware capability, the details of which can be found on the EC2 page. Larger hosts are more powerful but have a higher cost. Currently, by default, the total number of hosts in a job flow must be 20 or less, though Amazon has a simple form to request higher limits.
After confirming, all is as expected—we launch the job flow and monitor it on the console until the status changes to COMPLETED. At this point, we go back to S3, look inside the bucket we specified as the output destination, and examine the output of our WordCount job, which should look very similar to the output of a local Hadoop WordCount.
An obvious question is where did the source data come from? This was one of the prepopulated fields in the job flow specification we saw during the creation process. For nonpersistent job flows, the most common model is for the source data to be read from a specified S3 source location and the resulting data written to the specified result S3 bucket.
That is it! The AWS management console allows fine-grained control of services such as S3 and EMR from the browser. Armed with nothing more than a browser and a credit card, we can launch Hadoop jobs to crunch data without ever having to worry about any of the mechanics around installing, running, or managing Hadoop.
EMR provides several other sample applications. Why not try some of them as well?
Although a powerful and impressive tool, the AWS management console is not always how we want to access S3 and run EMR jobs. As with all AWS services, there are both programmatic and command-line tools to use the services.
Before using either programmatic or command-line tools, however, we need to look at how an account holder authenticates for AWS to make such requests. As these are chargeable services, we really do not want anyone else to make requests on our behalf. Note that as we logged directly into the AWS management console with our AWS account in the preceding example, we did not have to worry about this.
Each AWS account has several identifiers that are used when accessing the various services:
- Account ID: Each AWS account has a numeric ID.
- Access key: Each account has an associated access key that is used to identify the account making the request.
- Secret access key: The partner to the access key is the secret access key. The access key is not a secret and could be exposed in service requests, but the secret access key is what you use to validate yourself as the account owner.
- Key pairs: These are the key pairs used to log in to EC2 hosts. It is possible to either generate public/private key pairs within EC2 or to import externally generated keys into the system.
If this sounds confusing, it's because it is. At least at first. When using a tool to access an AWS service, however, there's usually a single up-front step of adding the right credentials to a configured file, and then everything just works. However, if you do decide to explore programmatic or command-line tools, it will be worth a little time investment to read the documentation for each service to understand how its security works.
In this book, we will not do anything with S3 and EMR that cannot be done from the AWS management console. However, when working with operational workloads, looking to integrate into other workflows, or automating service access, a browser-based tool is not appropriate, regardless of how powerful it is. Using the direct programmatic interfaces to a service provides the most granular control but requires the most effort.
Amazon provides for many services a group of command-line tools that provide a useful way of automating access to AWS services that minimizes the amount of required development. The Elastic MapReduce command-line tools, linked from the main EMR page, are worth a look if you want a more CLI-based interface to EMR but don't want to write custom code just yet.
Each AWS service also has a plethora of third-party tools, services, and libraries that can provide different ways of accessing the service, provide additional functionality, or offer new utility programs. Check out the developer tools hub at http://aws.amazon.com/developertools, as a starting point.