Appendix B. Set Up a Development Environment: Get Ready for the Big Times

You need a place to practice your newfound PHP skills without making your data vulnerable on the Web. It’s always a good idea to have a safe place to develop your PHP application before unleashing it on the world (wide web). This appendix contains instructions for installing a web server, MySQL, and PHP to give you a safe place to work and practice.
Create a PHP development environment
Before you can put your finished application on the Web with your newfound jQuery and AJAX skills, you need to develop it. And it’s never a good idea to develop your web application on the Web where everyone can see it. You can install software locally that lets you build and test your application before you put it online.
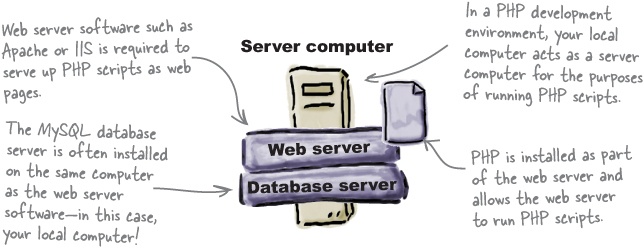
There are three pieces of software you’ll need on your local computer to build and test PHP and MySQL applications:
A web server
PHP
A MySQL database server
PHP isn’t a server; it’s a set of rules that your web server understands that allow it to interpret PHP code. Both the web server and the MySQL server are executable programs that run on a computer.
Keep in mind that we’re talking about setting up your local computer as a web server for PHP development. You’ll ultimately still need an online web server to upload your finished application to so that other people can access and use it.
Find out what you have
Before trying to install any of the pieces of the PHP development puzzle, your best bet is to first evaluate what you already have installed. Let’s take a look at the three pieces and how you can tell what’s already on your system.
The platform of your local computer makes a big difference when it comes to what’s already installed. For example, Mac OS X has a web server installed by default, while most Windows computers do not.
Do you have a web server?
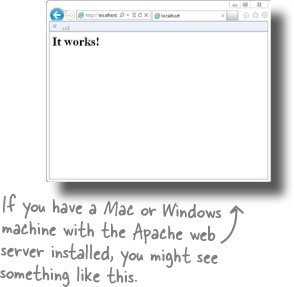
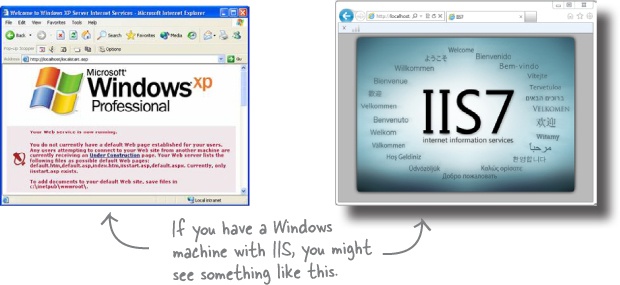
You probably already have a web server if you are using a newer PC or Mac. To find out quickly on either system, open a brower window and type http://localhost in the address bar. If you get an introductory page, that means your web browser is alive and well on your local machine.
Do you have PHP? Which version?
If you have a web server, you can check to see if you have PHP installed very easily, as well as which version you have. Create a new script named info.php and type this in it:
<?php phpinfo(); ?>
Save this file to the directory your web server uses. On Windows, it’s typically:
C:inetpubwwwroot (for IIS)
or:
C:Program Files (x86)Apache Software FoundationApache2.2htdocs (for Apache)
On the Mac, it’s usually something like:
/Users/yourname/sites/
If you try to open this file in your browser by typing http://localhost/info.php, you’ll see something like this if you have PHP installed:

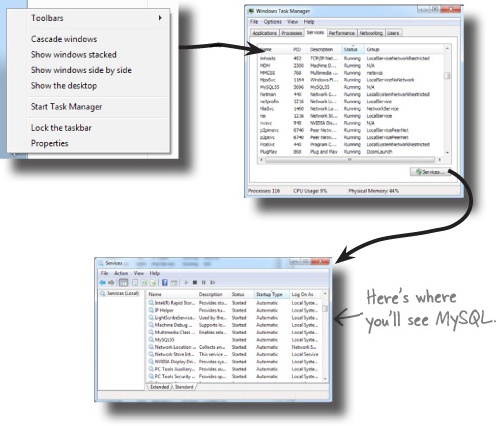
Do you have MySQL? Which version?
On Windows, you can tell by right-clicking on the Windows taskbar, selecting Task Manager, and selecting the Services tab. For more information, you can click the services button on Windows 7.
To determine whether you have MySQL on the Mac, open your terminal and type:
cd /user/local/mysql
If the command works, you have MySQL installed. To check the version, type:
mysql

Start with the web server
Depending on the version of Windows you have, you can download Microsoft’s Internet Information Server (IIS), or the open source Apache web server. If you need a server on the Mac, you should probably go with Apache since it’s already installed.
Here’s a brief overview of installing Apache on Windows:
Head over to http://httpd.apache.org/download.cgi.
If you’re using Windows, we suggest you download the apache_2.2.19-win32-x86-no_ssl.msi file. This will automatically install Apache for you after you download and double-click it.

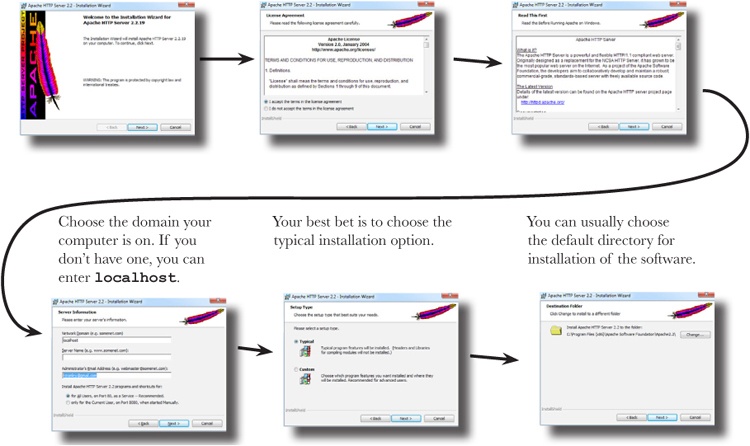
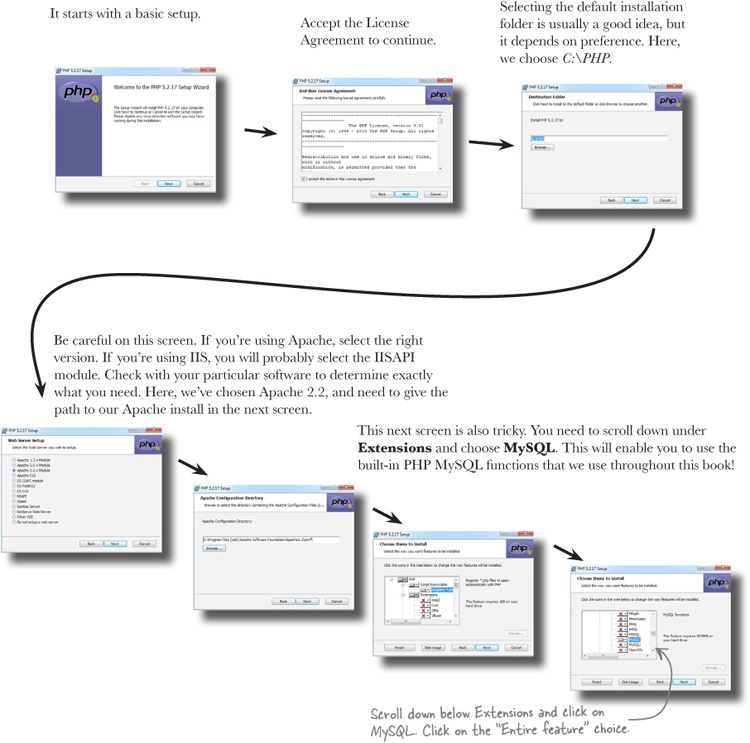
Next you’ll see the Installation Wizard. Most of the instructions are straightforward, and you can accept the default choices.
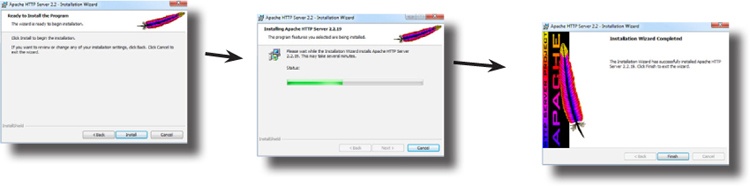
Apache installation...concluded
You’re nearly finished. Click Install and wait a minute or so for the installation to complete. That’s it!
Your web server is set to start automatically when you start up your computer. But you can control it using the Services panel by stopping and starting it in the Control Panel → Administrative Tools → Services dialogue, where it will now show up as Apache2.2.
If these instuctions don’t work for you, try again, or type “Installing Apache on Windows” into your favorite search engine for more help.
PHP installation
Go to http://www.php.net/downloads.php, or http://windows.php.net/download/, if you are using Windows.
Just as with Apache, if you’re using Windows, we suggest you download the Windows installer version. If you’re using Apache, download the php-5.2.17-Win32-VC6-x86.msi file. If you’re using IIS, download the php-5.3.6-Win32-VC9-x86.msi file. This will automatically install PHP for you after you download and double-click it.
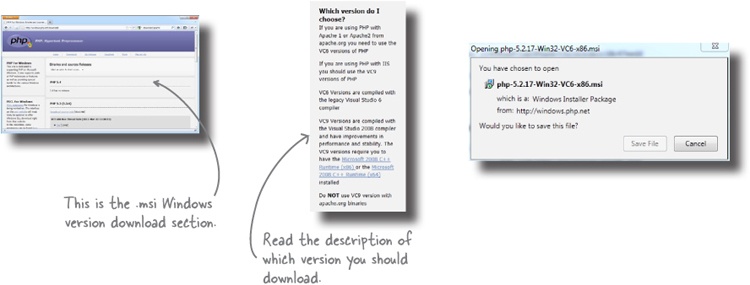
After you’ve downloaded the file, double-click it. Click the Run button to begin the installation.
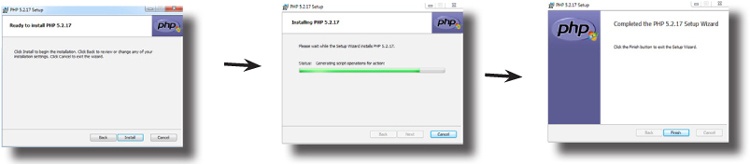
PHP installation steps...concluded
That’s it. Click on Install and then Done to close the installer.
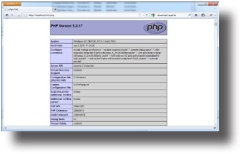
If you haven’t done so already, create a new script named info.php and type this in it:
<?php phpinfo(); ?>
Save this file to the directory your web server uses. On Windows, it’s typically:
C:inetpubwwwroot (for IIS)
or:
C:Program Files (x86)Apache Software FoundationApache2.2htdocs (for Apache)
On the Mac, it’s usually something like:
/Users/yourname/sites/
If you try to open this file in your browser by typing http://localhost/info.php, you’ll see something like this if you have PHP installed:
If these instuctions don’t work for you, try again, or type “Installing PHP for Apache [or IIS] on Windows” into your favorite search engine for more help.
Installing MySQL
Instructions and troubleshooting
You still need MySQL, so let’s work through downloading and installing it. The official name for the free version of the MySQL RDBMS server these days is MySQL Community Server.
The following is a list of steps for installing MySQL on Windows and Mac OS X. This is not meant to replace the excellent instructions found on the MySQL website, and we strongly encourage you to go there and read them! For much more detailed directions, as well as a troubleshooting guide, go here:
You’ll also like the MySQL query browser, where you can type your queries and see the results inside the software interface, rather than in a console window.
Steps to install MySQL on Windows
Go to:
and click on the MySQL Installer for Windows “Download the Beta” download button. (Note: It was “Beta” at the time of this writing.)
Choose Microsoft Windows from the list.

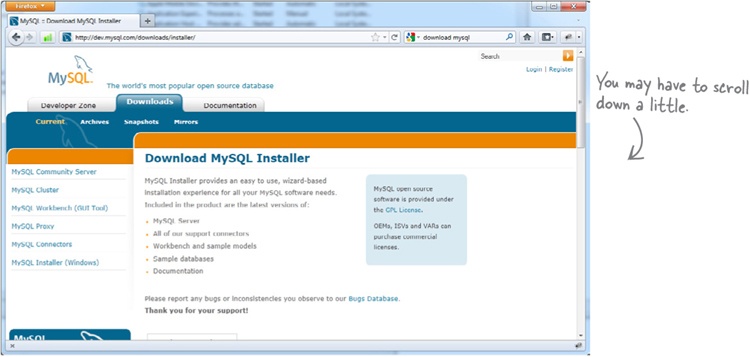
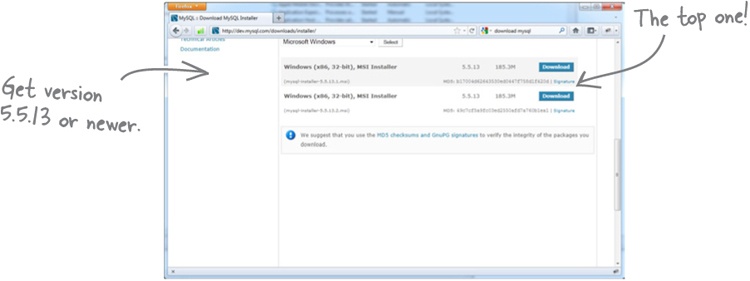
Download your installer
Choose Windows(x86, 32-bit), MSI Installer from the list.
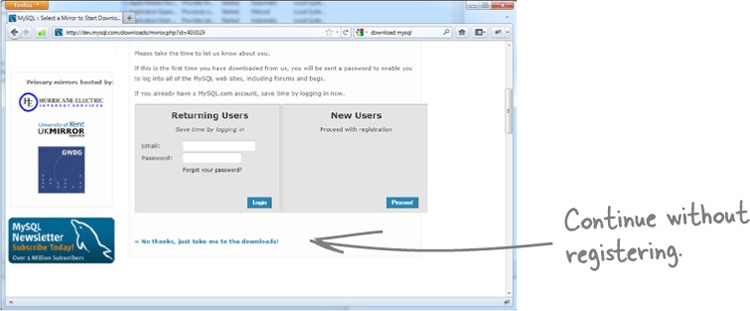
Click on No thanks, just take me to the downloads! unless you want to register for an account on the site, or already have one.
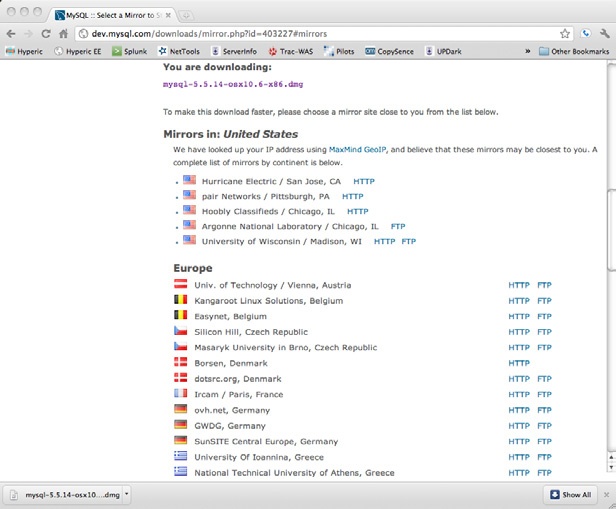
You’ll see a list of locations that have a copy you can download; choose the one closest to you.
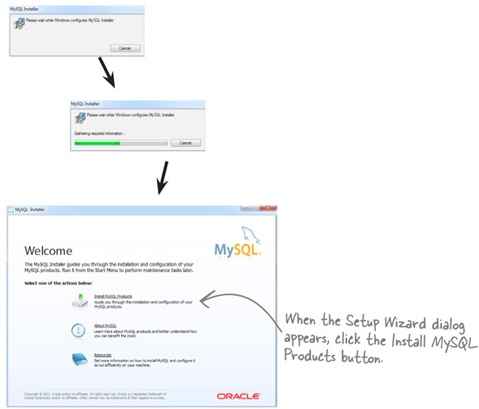
When the file has finished downloading, right-click on it and choose “Run as Administrator” to launch it, if you have Windows UAC enabled. At this point, you will be walked through the installation with the Setup Wizard. Click Next.
Pick a destination folder
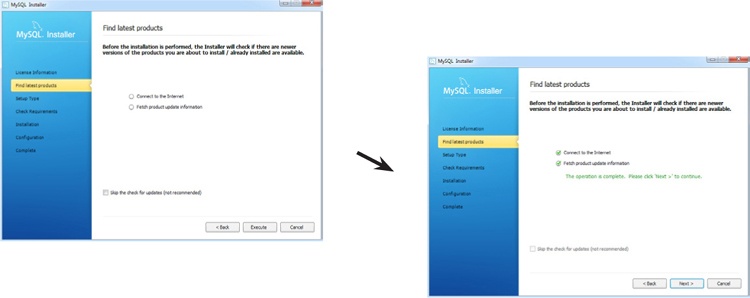
The next step will run an automatic update to make sure there are no newer versions. You can skip this by selecting the Skip Check box, but it is good practice to make sure your applications are up to date. After the update is complete, click Next to continue.
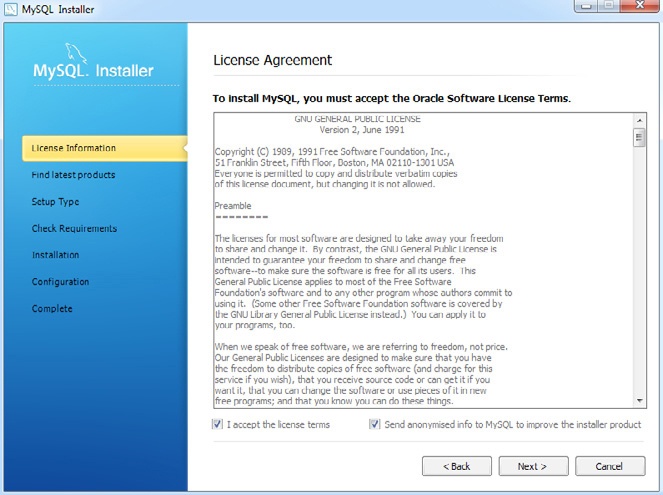
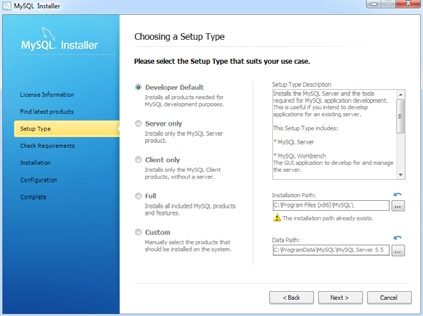
You’ll be asked to choose a setup type for your installation. For your purposes, the Developer Default will be perfect. Also, leave the installation paths as the default ones set for you already and click Next.
Next, the installer will check your compatibility with the Microsoft .NET Framework 4 Client Profile. This is to run the MySQL Workbench application. If you are missing this, update your Windows instance at http://update.microsoft.com/.
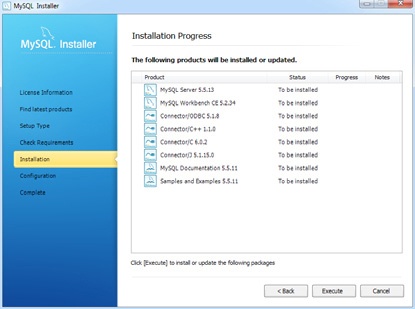
The next screen will list all the features to be installed. Click Execute to start the installation.
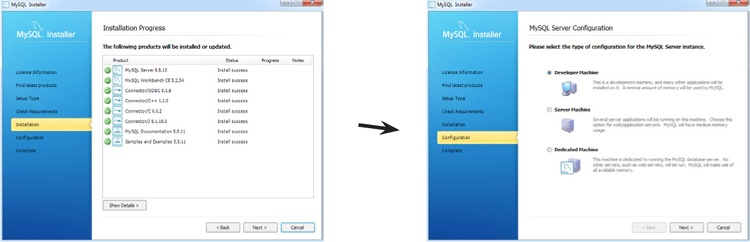
After all the services show a successful installation, click Next to access the configuration options for the MySQL service. Choose Developer Machine and click Next.
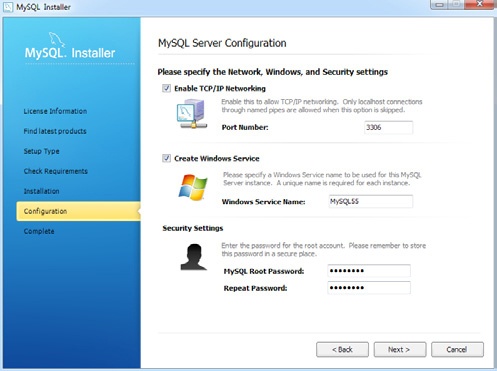
Make sure both the Enable TCP/IP Networking and Create Windows Service options are selected, and leave the default values in place. Enter a password for the root MySQL user into the boxes at the bottom and click Next.
The installation should now be complete. If it doesn’t start up automatically, open the MySQL Workbench from the Start → All Programs → MySQL menu.

Enabling PHP on Mac OS X
PHP is included on Macs with OS X version 10.5+ (Leopard), but it’s not enabled by default. You have to access the main Apache configuration file and comment out a line of code in order to get PHP going. This file is called http.conf, and is hidden inside the Apache install folder.
You’re looking for the following line of code, which has a pound symbol (#) in front of it to comment it out:
|
|
You need to remove the pound symbol and restart the server to enable PHP. The http.conf document is owned by “root,” which means you’ll have to enter your password to change it. You’ll probably also want to tweak the php.ini file so that Apache uses it. For more detailed information about how to carry out these steps and enable PHP, visit http://foundationphp.com/tutorials/php_leopard.php.
Steps to install MySQL on Mac OS X
If you are running Mac OS X server, a version of MySQL should already be installed.
Before you begin, check to see if you already have a version installed. Go to Applications/Server/MySQL Manager to access it.
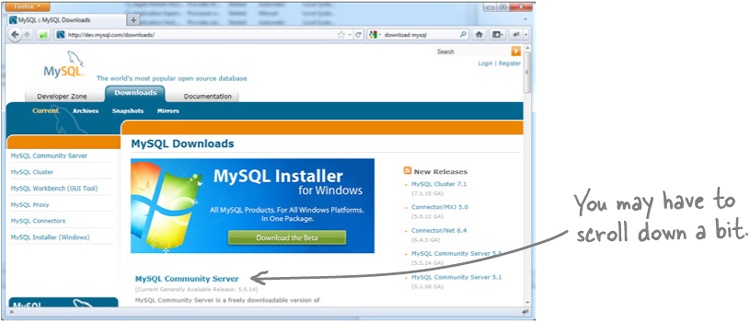
Go to:
and click on the MySQL Community Server link.
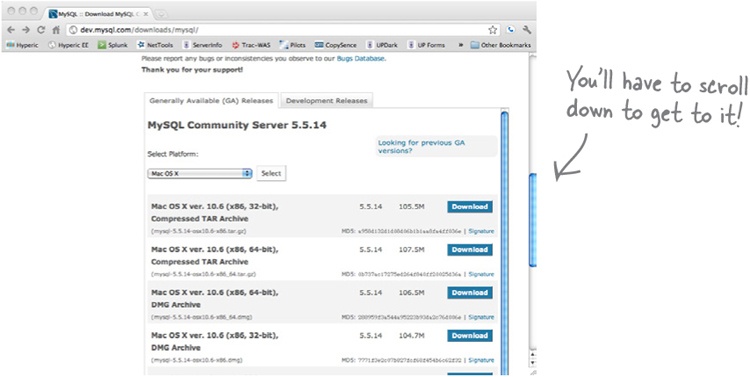
For these instructions, we’re downloading the 32-bit version. Make sure you download the version relevant to your operating system.
Click on the Mac OS X v10.6 (x86, 32-bit), DMG Archive download button.
Click on No thanks, just take me to the downloads! unless you want to register for an account on the site, or already have one.
Click on a mirror that is nearest you, for faster downloads.

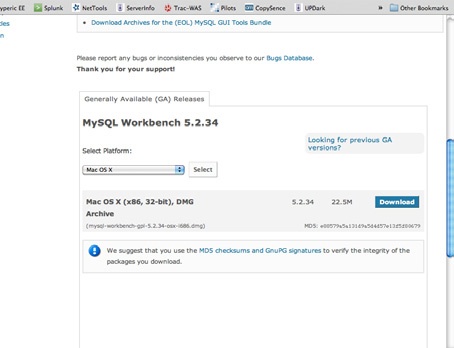
Download your installer
and click on MySQL Workbench (GUI tool).
Click on No thanks, just take me to the downloads! unless you want to register for an account on the site, or already have one, and choose a mirror again.
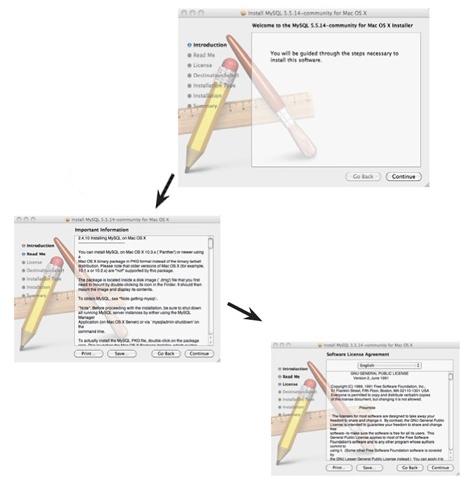
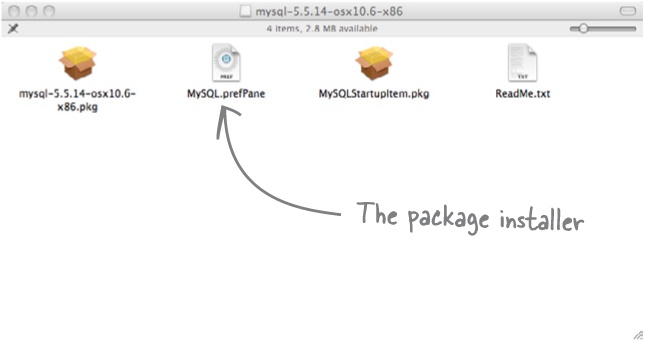
When both files have finished downloading, double-click on the mysql-5.5.14-osx10.6-x86.dmg file to mount the installer and then double-click on the mysql-5.5.14-osx10.6-x86.pkg file to start the package installer.


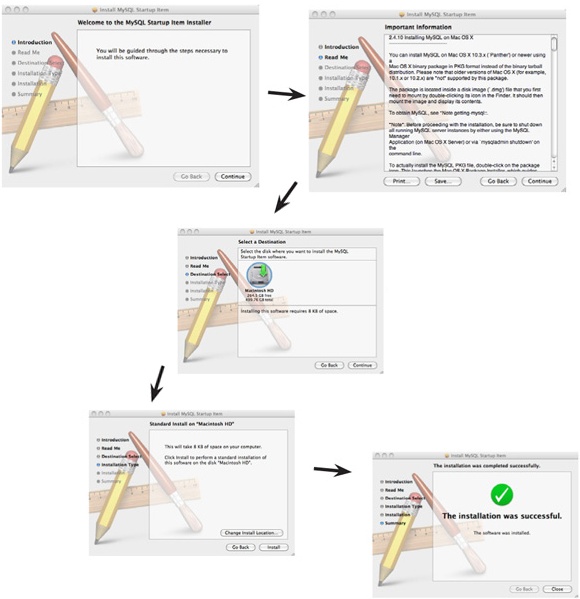
Run the package installer
The package installer should start. Click Next to continue to the Read Me page, and Continue to get to the License page.
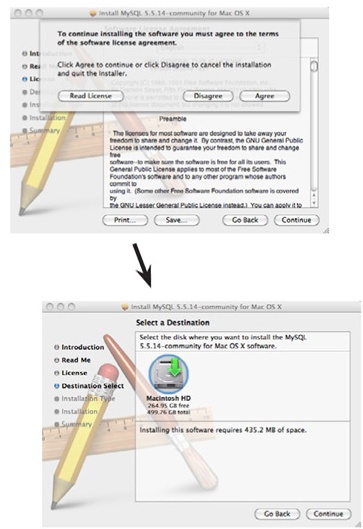
The next step will display this licensing information for MySQL. If you agree to the terms, click Continue, and then Agree. Select Continue again to install it in the default location.
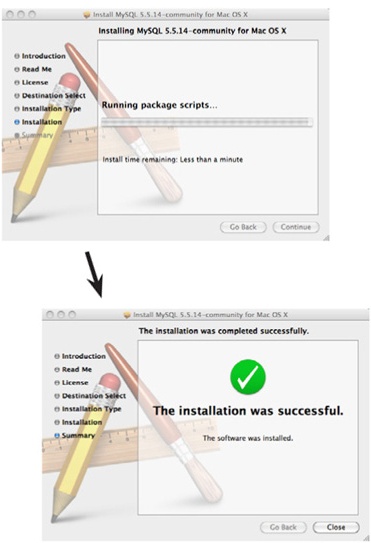
Click Install, enter the username and password of an admin user, and press OK to begin the installation.
The installation should start, and give a success message when complete.
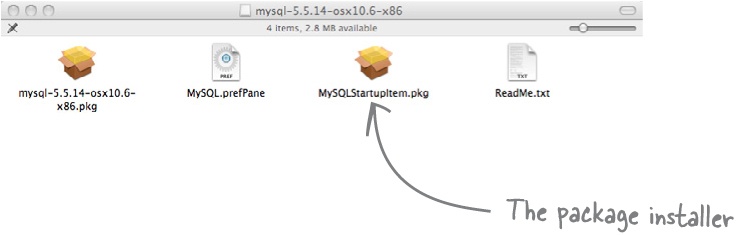
Repeat the same steps for the MySQLStartupItem.pkg file.
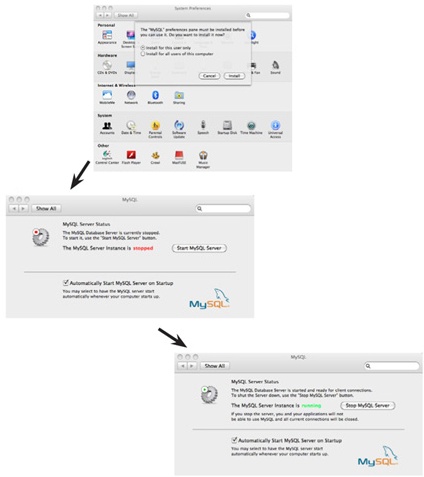
Double-click on the MySQL.prefPane, also found in the mysql-5.5.14-osx10.6-x86.dmg, to install the MySQL Preference pane; then, click on Start MySQL Server.
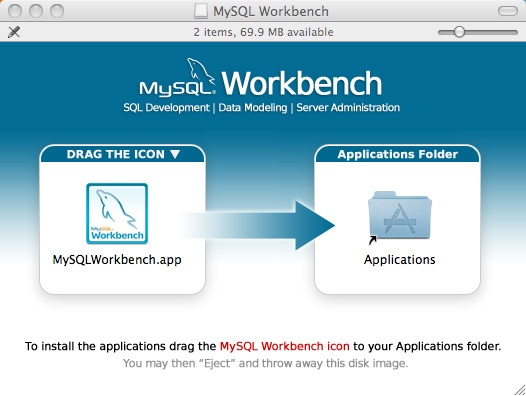
Double-click on the mysql-workbench-gpl-5.2.34.osx-i686.dmg file that you also downloaded to start the installer for the MySQL Workbench tool.
Drag the MySQLWorkbench.app into your Applications folder.
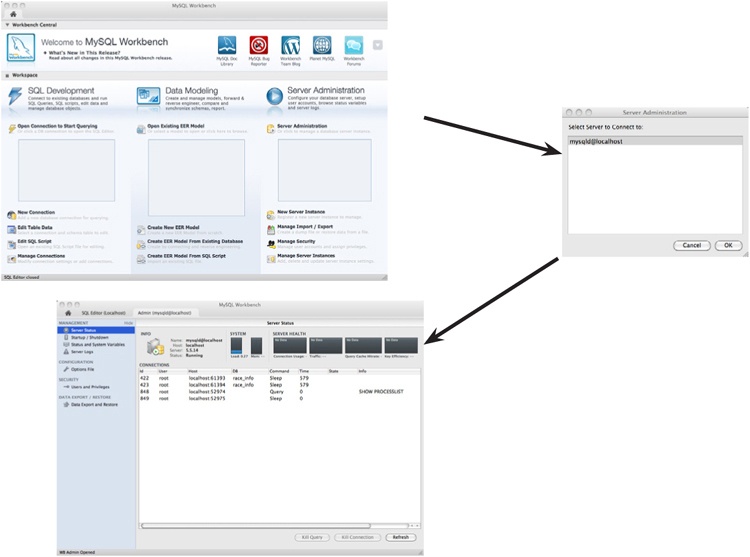
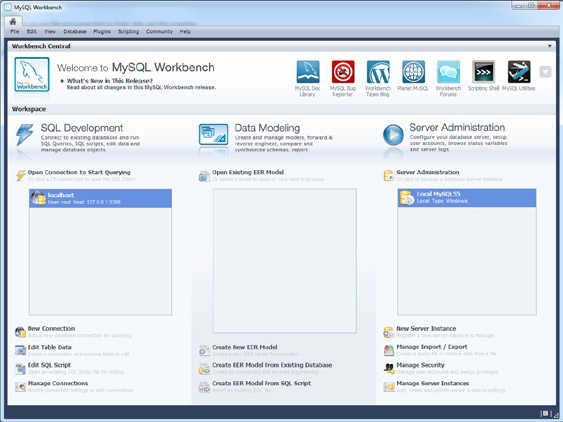
Open up the Workbench tool from your Applications list.
Using the Server Administration panel, ensure that your server is running. If the panel is empty, click the New Server Instance option and select your running server.
Create a new connection in the SQL Development section by clicking New Connection and completing the screen that pops up. Then, double-click on your new connection to open it.
For more help on MySQL or MySQL Workbench, visit http://dev.mysql.com/doc/.