
IBM Cloud Private Cloud Foundry and common systems administration tasks
In this chapter we introduce Cloud Foundry on IBM Cloud Private and the related technologies. We also discuss installation and common systems administration tasks for IBM Cloud Private Cloud Foundry.
This chapter has the following sections:
10.1 Introduction
Cloud Foundry continues to evolve as an application service platform. It allows developers to focus on code and not application infrastructure. Its ease of use allows new developers to publish applications from day one, without having to worry about hosting, routing, scaling, and high availability. Cloud Foundry provides all these operational capabilities in a way that’s easy for developers to consume, while being scalable and easily maintained by operations.
Cloud Foundry allows development in several languages, and has provisions to allow for containers or binaries to be incorporated as applications. This gives an enterprise endless flexibility, while maintaining ease of operation at scale.
Operationally, networking, applications, routing, and services are ritualized, so the physical infrastructure requirements are related to configuring an appropriate IaaS. IBM provides the stemcell, which guarantees that all platform VMs are cut from the same binaries, and also allows for a single stemcell patch to easily be propagated to all systems in the platform. This helps to lower the operational workload usually spent patching and maintaining systems.
Cloud Foundry takes this concept one step further to the garden containers. By basing each application container on the cflinuxfs base, security and container improvements are propagated to each application. This means that operations does not need to worry about container security on a per application basis. It frees operations to work on maintenance at a higher scale, and development can focus on coding and not application hosting foundations.
10.1.1 IaaS flavors
IBM Cloud Private Cloud Foundry is available on VMWare, OpenStack, AWS and on IBM Cloud Foundry (technical preview) itself.
10.1.2 Technology BOSH versus Kubernetes
One is not necessarily better then the other, but both can be used to serve the needs of your teams. BOSH (https://bosh.io/docs/) works well if you have a large virtual machine infrastructure such as VMware or OpenStack, where an IaaS team has been managing and dealing with these types of resources for many years. Full stack works seamlessly in these scenarios deploying, using native infrastructure APIs and then managing and monitoring the virtual systems.
Kubernetes abstracts the IaaS from the platform, so there is no need to worry about IaaS information or dealing with the systems. Kubernetes allows the focus to be shifted to platform management and development pursuits. It deploys quickly and scales fast. It consumes Kubernetes resources, no matter what underlying IaaS is being used.
This lowers the entry bar to Cloud Foundry when Kubernetes is already deployed, as well as provides a base for local services to be provisioned on demand for Cloud Foundry. This does preclude that Kubernetes has been configured, and it will be sitting on an IaaS, so this management piece is pushed down the stack.
In most cases you have both the IaaS and the Kubernetes. If you’re not running Cloud Foundry on Kubernetes, you will likely still use IBM’s Cloud Private platform for shared monitoring, logging, and data services.
|
Frequently asked questions:
•Does IBM Cloud Private Cloud Foundry Enterprise Environment install IBM Cloud Private?
IBM Cloud Private is a pre-requirement for the installation of IBM Cloud Private CFEE. IBM Cloud Private CFEE gets installed on top of an IBM Cloud Private installation.
•Do I need IBM Cloud Private to install IBM Cloud Private Cloud Foundry?
IBM Cloud Private Cloud Foundry (not the CFEE flavor) doesn’t need IBM Cloud Private to get installed. IBM Cloud Private is only needed for the IBM Cloud Private CFEE flavor. The IBM Cloud Private Cloud Foundry can be installed on different platforms (AWS, OpentStack and VMWare) and it relies on BOSH CPI to request resources on these platforms.
|
10.2 Installation and extensions
In this section we introduce the installation process and the notions of extensions which allows the deployer to customize the installation.
The installation is done in two steps, first the creation of the installer container and second Cloud Foundry deployment itself using the Cloud Foundry deployment tool.
The customer must download the installation kit from (link). The installation kit, if needed, must be copied to a Linux base server that has network connectivity with the targeted environment.
The installer host has different requirements depending if the target environment is Cloud Foundry Enterprise Environment (CFEE) or Cloud Foundry Full Stack.The installer container is created either by using the provided scripts or by deploying the provided Cloud Pak in IBM Cloud Private. Once the installer container is created, the installation is similar on all supported platforms. The installer container is used only for deployment and upgrades. Once deployment or upgrade of Cloud Foundry is done, the installer container is not needed anymore.
10.2.1 Installation of the installer container in a Cloud Foundry Full Stack environment
For Cloud Foundry Full Stack, the installer host is the server where the installation kit is downloaded and run. In case of an airgap environment, the deployer needs to copy the installation kit to a server that has access to the target environment. One prerequisite is to have Docker installed on that server. The deployer decompresses the installation kit and then runs the import_image.sh script which reads the installer kit directory.
It then uploads all images into Docker and executes launch.sh with some parameters to create the installation container. One of the parameters is the directory where the installation data should reside. It is useful to have a backup of the data directory and this eases the subsequent upgrade of the Cloud Foundry Full Stack as this directory contains all configuration parameters for the installation and upgrades. Once the installer container is installed, the environment is ready to get deployed.
Figure 10-1 shows the installation flow for a Cloud Foundry Full Stack environment.

Figure 10-1 Installation flow for a Cloud Foundry Full Stack environment
10.2.2 Installation of the installer container in a CFEE environment
For CFEE the installation is similar to the process for the Cloud Foundry Full Stack environment. The deployer downloads and copies the installation kit to a server which has access to IBM Cloud Private. After that the deployer launches the load_cloudpak.sh, which loads all artifacts to IBM Cloud Private. Browsing the IBM Cloud Private catalog, the deployer selects the ibm-cfee-installer. Check the listed prerequisite (for example, persistent volume) and deploy it.
A pod is created with the “installer container” as it is for the Cloud Foundry Full Stack solution. The deployer uses the Cloud Foundry deployment tool to start the deployment of Cloud Foundry. It is useful to have the installer persistent volume backed up to ease the Cloud Foundry upgrades in case of data lost.
Figure 10-2 shows the installation flow for a Cloud Foundry Enterprise Environment.

Figure 10-2 Installation flow for a Cloud Foundry Enterprise Environment
10.2.3 Config-manager role
The installer container runs the “config-manager” server. Its role is to orchestrate the deployment of the different extensions that compose the Cloud Foundry deployment. Each extension is wrapped as a Docker volume image and it provides the orchestration template, scripts, and assets to execute its own deployment. The main extensions are the “cfp-kubernetes-cf” for CFEE and “cfp-bosh-template” for Cloud Foundry Full Stack platforms.
The “config-manager” server reads the orchestration template from the extension-manifest.yml of the extension and starts its execution. The deployer can interact with the “config-manager” through the “cm cli” which is installed on the installation directory.
When the installer container is installed, either the installation can be executed using the script launch_deployment.sh for Cloud Foundry Full Stack, or through the deployment tool for Cloud Foundry Full Stack and CFEE. For Cloud Foundry Full Stack the deployment tool is accessible at the url http://<installer_host_ip>:8180. For CFEE, the deployer can launch the installer deployment tool from the IBM Cloud Private management console.
Figure 10-3 and Figure 10-4 show some screen captures of the Cloud Foundry deployment tool.

Figure 10-3 Configuration page

Figure 10-4 States page
10.2.4 Extensions
As mentioned, the base role of the config-manager is to deploy extensions.
IBM provides a number of embedded extensions to integrate external services. For example for Cloud Foundry Full Stack, IBM provides ready to use extensions to integrate LDAP, application logs, and system logs.
Figure 10-5 shows the extensions page.

Figure 10-5 Extensions page
An extension developer can create their own extensions by using the extension framework provided in the CFEE and Cloud Foundry Full Stack solution. These extensions are called “custom” extensions.
An extension is first developed, then registered, and then integrated in the main deployment flow.
An extension is basically composed of an extension-manifest.yml, script, and assets. The extension-manifest.yml contains different sections:
•global parameters: These define how the extension should behave when getting registered.
•states: These define the different steps of the extension deployment. Each step calls a command (script or executable), and provides the log path.
•ui_metadata: If defined, the Cloud Foundry deployment tool provides pages to enter the parameters needed for that extension.
Once the extension is developed, it is compressed in a .zip file. Through the deployment console or the command line, the deployer can register the extension and integrate it in the deployment flow.
An extension can be also set to auto-place itself into the flow by defining in the extension-manifest.yml where the extension needs to be placed.
Figure 10-6 shows the extension directory structure.
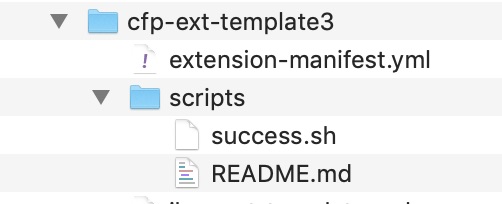
Figure 10-6 Extension directory structure
Example 10-1 shows an extension-manifest.yml file.
Example 10-1 An extension-manifest.yml file
extension:
name: extension-sample
version: 1.0
type: bosh-release
ui_metadata:
default:
groups:
- name: "ext_example"
title: "Extension example"
properties:
- name: "param_1"
label: "First parameter"
description: "This is a sample"
type: "text"
validation-regex: ".*"
mandatory: true
sample-value: "E.g. my sample value"
default: "my sample value"
states:
- name: task1
phase: ""
script: scripts/success.sh task1
next_state:s [ task2 ]
- name: task2
phase: ""
script: scripts/success.sh task2
next_states: [ task3 ]
- name: task3
phase: ""
script: scripts/success.sh task3
This configuration generates the following state sequence.
Figure 10-7 shows the extension states page.

Figure 10-7 Extension states page
Figure 10-8 shows this deployment tool page.

Figure 10-8 Generated user interface page
More information can be found at https://www.ibm.com/support/knowledgecenter/SSBS6K_3.1.2/cloud_foundry/integrating/extensions.html
10.3 High availability installation
This section describes the different options to install a Cloud Foundry high availability environment.
10.3.1 Zoning
Availability zones represent functionally independent segments of infrastructure where an issue or outage is likely to affect only a single availability zone. This means that resources in other availability zones continue to function as normal. This concept is implemented by most public IaaS providers, usually in the form of geographically distinct data centers.
The same concept can be implemented to some degree with on-premises IaaS solutions by dividing compute, storage, and networking infrastructure into groups.
Cloud Foundry supports deployment of its components into different availability zones for better high availability. It is often beneficial to have two instances of a component in separate availability zones, so that if one zone becomes unavailable, the remaining instance can keep the platform running. When three or more availability zones are configured, platform availability can usually be maintained as long as the majority of the zones remain operational.
By default, Cloud Foundry Full Stack uses two availability zones, z1 and z2, but both are configured with a single set of Cloud Provider Interface properties that you provide when configuring your Cloud Foundry installation. The effect of this is that if a single instance of a Cloud Foundry component fails you might still have some protection for components that deploy multiple instances. But if the entire availability zone experiences an outage, the Cloud Foundry platform will as well.
You can customize the z2 availability zone to use different infrastructure, thereby enhancing the high availability of your deployment, because for several of the components, multiple instances are deployed by default, and these instances are distributed over zones z1 and z2.
While availability zones cannot be configured in the main configuration file that you create for your Cloud Foundry installation, additional configuration files do provide a placeholder for a third availability zone, z3. If you want to use this third availability zone, you edit it to provide the applicable Cloud Provider Interface properties.
Next, you must modify the deployment to specify which Cloud Foundry components will be deployed over the three availability zones and to adjust the instance counts as desired. (With the exception of the number of Diego cells, which is specified in the main configuration file, the instance counts of all other Cloud Foundry components are fixed.) Instances are distributed in a round-robin fashion over the specified zones.
Further information about how to plan the number of instances of each Cloud Foundry component can be found in the article High Availability in Cloud Foundry. Full instructions for customizing the availability zones for your Cloud Foundry Full Stack deployment can be found in the Knowledge Center. See Configuring Availability Zones for IBM Cloud Private Cloud Foundry.
10.3.2 External database
IBM Cloud Private Cloud Foundry deployment is managed by the BOSH Director. Some components of the Director store its deployment data in several databases. Various component instances of IBM Cloud Private Cloud Foundry store their environmental and operational data in multiple databases. The BOSH Director and IBM Cloud Private Cloud Foundry are deployed with internal Postgres database servers.
It also comes with the default backup and restore configuration which utilizes internal NFS or GlusterFS servers. This might be sufficient but a highly-available external database might be a better choice in production environments for improved performance, scalability and protection against data loss.
The default BOSH Director deployment manifest needs to be modified to use external databases. The instruction is available at the following link:
We provide a custom extension that can be registered and configured prior to IBM Cloud Private Cloud Foundry installation to use external PostgreSQL or MySQL database servers. The extension is available at https://github.com/ibm-cloud-architecture/cfp-cf-ext-db-extension. Follow the instructions in the extension’s README.
10.3.3 External objects store
Support for external object store is used to add availability, performance, and resources to the location where build packs and droplets are stored. The default deployment uses a singleton blobstore. This is sufficient for normal use, and when two Cloud Foundry deployments are created in different data centers for disaster recovery, this is sufficient for the environment. We provide an example of using S3 on AWS as a blobstore alternative. The extension can be found at https://github.com/jnpacker/cfp-s3-objectstore-extension.
In AWS you would create the three buckets that are recommended by the extension, update the extension .yaml file if you changed the bucket names, then follow the instructions to load the extension. Loading the extension does not transfer existing data, but will reset the blobstore, so objects like apps might need to be pushed again.
10.4 Backup and restore strategy
In a Cloud Foundry environment, there are two main types of data: first the data used to install the Cloud Foundry environment which includes the environment configuration, the deployment configuration for each component that comprises the Cloud Foundry environment, and second, the runtime data like the user account and authorization database and the deployed application configuration. In this section we discuss the different backup procedures that have to be put in place to quickly recover after a disaster.
10.4.1 Installation data
In the installation procedure it is requested that you provide a directory where installation data will be stored. It contains the environment configuration, the configuration and release assets of each extension, and also certificates and credentials auto-generated during the installation. This directory, depending of the type of installation, can be a local directory, an NFS, or a GlusterFS. For a quick recovery, it is recommended to back up this directory after each installation and upgrade.
10.4.2 Director
In a Cloud Foundry Full Stack environment, the BOSH Backup and Restore (BBR) is responsible for backing up the BOSH director as well as the BOSH deployment of the Cloud Foundry environment. Backups can be configured to be copied to an external customer NFS server. BBR backup can be set up by configuring values in the uiconfig.yml files to define when backups occur, where the files should be copied to, and how many backups to keep before being overwritten.
Configuration options are explained in detail at https://www.ibm.com/support/knowledgecenter/en/SSBS6K_3.1.2/cloud_foundry/installing/common_params.html.
The restore procedure allows recovery of the BOSH director and deployment should a significant error occur. The restore produce is detailed at https://www.ibm.com/support/knowledgecenter/en/SSBS6K_3.1.2/cloud_foundry/configuring/backups.html.
10.4.3 Cloud Foundry database
The db_nfs_copy backup is responsible for the backup of the UAADB and CCDB. These are configured to back up hourly and if configured can be copied to a customer NFS share.
10.5 Storage and persistent volumes
In this section we discuss the storage and persistent volume options for a Cloud Foundry environment.
10.5.1 Cloud Foundry Full Stack
The traditional Cloud Foundry deployment requires both persistent and ephemeral storage allocation used by various deployed VMs. Specifically, persistent storage is needed in three categories of areas:
•Inception Container: The Inception container uses persistent storage mounted on “/data” of the container that it uses to store various deployment-related data. The data is used during the Cloud Foundry upgrade process, as well as for collecting deployment logs.
– Deployment configuration data, certificates and secrets, and their backup copies. (Future versions of Cloud Foundry will provide an option to host the deployment data in a secure store such as CredentialHub as an alternative.)
– Deployment extensions and the associated state files, scripts, and binaries
– Deployment log files for troubleshooting
•BOSH Director: The Director is the orchestrator of the Cloud Foundry deployment. It needs persistent storage to store various BOSH releases and related binaries (blobstore), as well as storing the BOSH deployment state, secrets, and certificates information. Both blobstore and database information can be stored local to the Director VM on a persistent disk, or can be stored on an external persistent store via a configuration option.
•Cloud Foundry components: Persistent storage is needed by various components of Cloud Foundry.
– Blobstore: An object store used for storing application binaries (can be internal or external) and buildpacks.
– Database: Stores various databases such as Cloud Controller DB, UAA database, Locket, Consul (if present).
– Backup-restore: Backs up deployment data for various Cloud Foundry releases
– NFS WAL (Write-ahead logging) server: Hosts continuous backups of various databases, object stores and Director data.
– External NFS server: It is recommended that an external NFS server is configured for taking a secondary backup to offload data from NFS WAL server for holding backups longer than one week.
Storage requirements also vary depending on whether you are deploying “developer” environment vs. “production” environment. Detailed description of storage requirements for various IaaS platforms can be found at: https://www.ibm.com/support/knowledgecenter/en/SSBS6K_3.1.2/cloud_foundry/configuring/prep_cf.html.
10.5.2 Cloud Foundry Enterprise Environment (CFEE) technology preview
The Cloud Foundry Enterprise Environment (CFEE) is a technology preview at the time of this writing, and leverages storage services provided by IBM Cloud Private Kubernetes. This includes support for GlusterFS, NFS Volume service, or other storage services provided IBM Cloud Private platform. There are some differences between CFEE and Cloud Foundry Full Stack environment.
1. Inception container is deployed via the ibm-cfee Helm chart, it hosts containers and provides function similar to the Inception container in Cloud Foundry Full Stack environment. It needs persistent storage for storing Cloud Foundry Enterprise Environment configuration parameters, deployment extensions configuration data, and their states, and execution logs of various deployment extensions. You can configure your environment to use GlusterFS or NFS storage with inception container Helm chart.
2. Cloud Foundry Full Stack environments do not use BOSH for deployment. Instead they use IBM Cloud Private Kubernetes services for deployment orchestration of various Cloud Foundry services. Certificates and secrets are stored as Kubernetes secrets objects. The logic for various BOSH releases is built into Docker images, which are deployed as Helm charts delivered via a Cloud Foundry Enterprise Environment Cloud Pak.
3. Cloud Foundry components are deployed via Helm charts, and require persistent and ephemeral storage similar to Cloud Foundry Full stack deployment. You can configure GlusterFS or NFS storage to be used for persistent storage while deploying Cloud Foundry Enterprise Environment Helm charts.
Similar to Cloud Foundry Full Stack, Cloud Foundry Enterprise Environment supports both developer and high availability configuration modes. For detailed storage requirements for each of the modes, see https://www.ibm.com/support/knowledgecenter/en/SSBS6K_3.1.2/cloud_foundry/tech_preview/install_cfee.htm.
10.6 Sizing and licensing
The basic sizing for the management plane can be found here: https://www.ibm.com/support/knowledgecenter/en/SSBS6K_3.1.2/cloud_foundry/configuring/prep_cf.html. There are also sizing for the application hosts (Diego cells). The reference size we use for these is 4x vCPU, 32 GB RAM, and 300 GB of ephemeral disk. This is the default Diego cell size for VMware and OpenStack. AWS uses a t2.2xlarge which is 8x vCPU, 32 GB RAM and 300 GB of attached storage (ephemeral). Each vCPU is counted as one VPC license unit.
This means if you have 3 Diego Cells in VMware or OpenStack, you would license IBM Cloud Private Cloud Foundry for 12x VPC because you would be using 12x vCPU. Now that we understand the mappings of vCPU to VPC (1:1) and Diego cells to memory, a sizing calculation can be made. Most sizings are done based on memory. You might want 64 GB, 128 GB, or 256 GB of application memory. If you want to buy 256 GB of application memory, the VPC calculation would be as follows: 256 GB / 32 GB = 8 (Diego Instances) x 4 (vCPU/VPC) = 32 (vCPU/VPC).
You would want to purchase 32 VPCs of IBM Cloud Private Cloud Foundry. This would support running the required number of instances, until it hits the memory maximum. The default overcommit is 2:1, so the platform’s users would have approximately 512 GB of virtual application memory available if an overcommit of 2:1 is used. 2:1 is fine for development and test, and a 1:1 is recommended in production, but this can be changed if the application profile warrants.
From a hardware perspective, the link provides a Totals table, that allows you to calculate the full hardware requirements based on management systems and Diego cells. You should also keep in mind, as the number of cells is increased, as you approach 512 GB of memory, your application profile might dictate that the management systems be horizontally scaled (routers, loggregators, or cloud controllers). This does not incur a licensing cost, but does require additional virtualization resources to host.
10.7 Networking
This section describes the network implementation for IBM CLoud Private Cloud Foundry.
The Cloud Foundry container-to-container networking feature enables application instances to communicate with each other directly. It uses an overlay network to manage communication between application instances without going through the router, thereby enabling efficient communication between applications in a controlled fashion. Each application container gets a unique IP address in the overlay network. Container networking is enabled by default in the IBM Cloud Private Cloud Foundry offering.
Cloud Foundry administrators can specify a set of network policies that enable communication between application instances. Each of the policy specifications typically includes source application, destination application, protocol (both TCP and UDP are supported) and port. The policies are dynamically applied and take effect immediately without the need to restart Cloud Foundry applications. Network policies also continue to work when applications are redeployed, scaled up or down, or placed in different containers.
By default, Cloud Foundry includes a Silk CNI plug-in for providing overlay IP address management and a VXLAN policy agent to enforce network policy for traffic between applications. These network components are designed to be swappable components in Cloud Foundry so they can be replaced with an alternate network implementation.
More details on customizing container networking in IBM Cloud Private Cloud Foundry can be found at https://www.ibm.com/support/knowledgecenter/en/SSBS6K_3.1.2/cloud_foundry/configuring/configure_container_networking.html.
10.8 Security
In this section, we describe the encryption, credentials, and certificates aspects of IBM Cloud Private Cloud Foundry.
10.8.1 TLS encryption
The Cloud Foundry deployment is encrypted throughout with TLS. Cloud Foundry uses its own encryption starting at the ingress routers. The router is TLS-encrypted to the cell, where the traffic then travels over the cell’s private network to the container.
TLS is also used to guarantee routes to the application. Other traffic between cell and the Diego components as well as the Cloud Foundry management back end use TLS to remain encrypted at every step.
10.8.2 Inbound routing
Domain SSL is terminated at the router. The management as well as the application domains are hosted on the router. Certificates loaded for management and application (can be multiple) domains are specified in the installer. These certificates are loaded in the router, which allow for customer-provided wildcard certificates to be used. This means a company can use its own certificates, for a domain like https://acme.company.com. These certificates can be signed by the company’s root certificate, or a commercial registrar.
10.8.3 Credentials and certificates
Changing credentials can be straight forward, but requires the equivalent changes to the environment of a major version upgrade. This means that your standard procedure for maintenance must be followed. This can be a notification of possible disruptions, or shifting traffic to an alternate production deployment.
This procedure can be used to either have the installer auto-generate new certificates, secrets, or tokens. It can also be used to update values generated by you or your security department. If the user or certificates are not part of the uiconfig file (has wildcard certificates and the admin password), then you need to locate the installer configuration directory. This is the directory that was specified when running the launch.sh command. Inside this directory, you will find a “CloudFoundry” directory.
This directory contains a certificates.yml and credentials.yml file. These files might be encrypted and stored elsewhere when the installer is not being used. Make sure these files are restored and editable. Open the appropriate file and find the certificate, secret, or token you want to change. If you want to let the installer generate a new value, remove the entry. Alternately you can replace the entry with your won value, making sure to meet the complexity and length described for the value.
When all of the changes have been made, make sure that the launch.sh has been run and the installer is available. Run cm engine reset and then re-run the launch_deployment.sh command you used to install or update the system last. If you used the Install Deployment Console, you can launch the installer there. The cm command sets all the installation and update states to “READY”.
After the installer has completed, the new certificates, secrets, or tokens will have been applied. This works for both the director and the Cloud Foundry installation. The process can take a long time if director certificates are involved, because this might require all of the BOSH virtual machines to be rebuilt.
10.9 Monitoring and logging
This section discusses how to manage monitoring and logging in an IBM Cloud Foundry environment.
10.9.1 Monitoring
Logging is supported through internal and external options. External options include Prometheus, Splunk, and third party Cloud Foundry compatible tools. Internal monitoring is provided through a shared Prometheus and Grafana tool set. The internal monitoring is provided in IBM Cloud Private Kubernetes and is accessible by that administrator. To enable the capability, you can use Prometheus exporters, which are configured by the installer.
The exporters are provided as a configured Helm chart that can be loaded, and automatically starts tracking monitoring metrics for the Cloud Foundry deployment. This monitoring is available through Full Stack and Enterprise Environment (Kubernetes-based Cloud Foundry).
Figure 10-9 shows the flow from IBM Cloud Foundry to Exporter to Prometheus and pull from Grafana.

Figure 10-9 The flow from IBM Cloud Foundry to Exporter to Prometheus and pull from Grafana
When the Helm chart is loaded, you have access to BOSH, API, and Firehose metrics. In Grafana, you still need to find or define dashboards. There are a number of dashboards available in the community to choose from and you can create your own.
The following are recommended BOSH dashboards found in the files bosh_overview and bosh_deployments located at: https://github.com/bosh-prometheus/prometheus-boshrelease/tree/master/jobs/bosh_dashboards/templates.
The following are recommended Cloud Foundry dashboards found in the files cf_summary, cf_router, and cf_cell_summary, located at: https://github.com/bosh-prometheus/prometheus-boshrelease/tree/master/jobs/cloudfoundry_dashboards/templates.
10.9.2 Logging
A Cloud Foundry deployment can produce a lot of log output, both from the components that make up the Cloud Foundry platform itself and the applications you run in the environment.
Logs produced by Cloud Foundry components, which we see as syslogs, can be viewed directly on the BOSH instances (for Cloud Foundry Full Stack) or the Kubernetes pods (for Cloud Foundry Enterprise Environment). Most logs are output to a subdirectory corresponding to the job name under the /var/vcap/sys/log directory.
Syslogs are subject to rotation to avoid using up all the storage available to the Cloud Foundry components, so their lifespan is limited.
Logs from applications deployed in the environment, or applogs, can be accessed using the Cloud Foundry CLI or any tooling that integrates with the Cloud Foundry firehose, such as the Cloud Foundry management console. These logs are a real-time stream, with a limited amount of history available.
Cloud Foundry Full Stack provides extensions for log forwarding that allow you to forward logs to a logging system of your choice for retention and analysis. An integration with the Elastic Stack logging system in IBM Cloud Private is also provided.
The cfp-ext-syslog-forwarder and cfp-ext-applog-forwarder are embedded extensions for the Cloud Foundry deployment tool that allow you to configure forwarding of syslogs and applogs. When you add either extension, it is automatically inserted after the “Prepare Cloud Foundry” state and before the “Deploy Cloud Foundry” state. You configure the extensions by providing the details of where and how the logs should be forwarded.
Then, when the deployment is run, the extensions insert the configuration values in the required configuration files so that the “Deploy Cloud Foundry” state will configure the Cloud Foundry components to forward logs according to the configuration. For syslog forwarding, all Cloud Foundry components are modified and individually forward their logs according the configuration. For applog forwarding, the Doppler instances (typically 4), a core component of the Cloud Foundry logging system, are modified to forward all application logs. Both extensions can be configured automatically if you are using the integration with the Elastic Stack provided in IBM Cloud Private.
Integration with Elastic Stack in IBM Cloud Private is achieved by using a Helm chart that Cloud Foundry Full Stack exports during the “Prepare Helm charts” state. After running this state of the deployment, an archive file containing the ibm-cflogging Helm chart and required images can be found in the IBMCloudPrivate subdirectory of the installation configuration directory.
The ibm-cflogging Helm chart provides a Logstash deployment that can be configured to accept syslogs and applogs from the cfp-ext-syslog-forwarder and cfp-ext-applog-forwarder extensions. This deployment of Logstash outputs logs to the Elasticsearch deployment provided by IBM Cloud Private, which allows you to view, search, and visualize logs in Kibana. By default, all connections are made securely using mutual TLS.
If you provide the Configuration Manager endpoint address and access token when installing the ibm-cflogging Helm chart, a job is run during installation that adds the chosen extensions (cfp-ext-syslog-forwarder or cfp-ext-applog-forwarder or both) to the deployment and configures them with the required IP addresses, ports, certificates, keys, and other settings. A typical setup process looks like this:
1. If not already installed, deploy the Cloud Foundry Full Stack environment, then obtain the ibm-cflogging Helm chart archive from the installation configuration directory.
2. Use the cloudctl CLI to load the Helm chart archive into IBM Cloud Private.
3. Obtain the Configuration Manager address and token from your Cloud Foundry Full Stack deployment. Create a Kubernetes secret containing the token.
4. Install the ibm-cflogging chart from the IBM Cloud Private catalog, configuring as desired and providing the Kubernetes secret for the Configuration Manager token.
5. In the Cloud Foundry deployment tool, launch deployment to run the newly inserted logging extensions. The “Deploy Cloud Foundry” state will be rerun with new configuration and the affected instances will be updated to forward syslogs or applogs to the Logstash deployment created by ibm-cflogging.
Full instructions for installing the ibm-cflogging chart for integration with Elastic Stack in IBM Cloud Private, and for installing the logging extensions to forward syslogs and applogs to other logging solutions, are available in the Knowledge Center. See the following articles:
•Connecting to Elastic Stack in IBM Cloud Private: https://www.ibm.com/support/knowledgecenter/en/SSBS6K_3.1.2/cloud_foundry/integrating/icplogging.html
•Configuring platform system log forwarding: https://www.ibm.com/support/knowledgecenter/en/SSBS6K_3.1.2/cloud_foundry/configuring/syslog_forwarding.html
•Configuring application log forwarding: https://www.ibm.com/support/knowledgecenter/en/SSBS6K_3.1.2/cloud_foundry/configuring/applog_forwarding.html
10.10 Integrating external services
This section describes the integration process with external services.
10.10.1 IBM Cloud Private services
IBM Cloud Private comes with some database and messaging software Helm charts: MongoDB, PostgreSQL, MariaDB, Db2 Developer-C Edition, and RabbitMQ. The ibm-osb-database which comes with IBM Cloud Private Cloud Foundry implements Open Service Broker API to make these IBM Cloud Private database and messaging Helm charts available as services in IBM Cloud Private Cloud Foundry’s marketplace. That way the cloud application developers can provision instances of these services and bind applications to the service instances to use them. The lifecycle of these service instances can also be managed by the Cloud Foundry administrative console or the CLI.
The ibm-osb-database is installed and run on IBM Cloud Private using these high-level steps.
1. The ibm-osb-database IBM Cloud Private catalog archive can be found in the IBM Cloud Private Cloud Foundry installation configuration directory. The archive contains a Docker image and a Helm chart.
2. Use the IBM Cloud Private cloudctl CLI to load the archive into IBM Cloud Private.
3. Install the ibm-osb-database Helm chart.
4. Then once the ibm-osb-database is registered in IBM Cloud Private Cloud Foundry, the services and their service plans are available in the marketplace.
For more information, see the following articles:
•https://www.ibm.com/support/knowledgecenter/SSBS6K_3.1.2/cloud_foundry/integrating/icp_db_srvc.html
10.10.2 IBM Cloud services
IBM provides a number of syndicated services. These services are running in the IBM datacenter and now are available for IBM Cloud Private Cloud Foundry, too. The administrator can decide which services are available for each organization and space. The Cloud Foundry administrator creates a Cloud Foundry service broker. Then the administrator can enable the service and the service plans that the end user can use.
More details at: https://www.ibm.com/support/knowledgecenter/SSBS6K_3.1.2/cloud_foundry/buildpacks/service_broker.html.
10.10.3 Legacy services
The integration with legacy services can be done by following the standard Cloud Foundry process. See https://docs.cloudfoundry.org/devguide/services/user-provided.html.
10.11 Applications and buildpacks
This section provides information about applications and buildpack management in an airgap environment.
10.11.1 Installing extra buildpacks
The IBM Cloud Private Cloud Foundry comes with a number of IBM supported buildpacks but the environment allows authorized users to upload their own or community buildpacks and choose the order in which they are used.
The standard Cloud Foundry CLI commands are used to manage the buildpacks: cf create-buildpacks, cf delete-builpacks. The position can be changed by using cf update-buildpacks.
For more details see the following URL: https://www.ibm.com/support/knowledgecenter/SSBS6K_3.1.2/cloud_foundry/buildpacks/buildpacks_cloudprivate.html
10.11.2 Application for an airgap environment
There are several Cloud Foundry buildpacks that assume the environment has internet access and has the ability to access external websites and download additional prerequisite software artifacts during cf push operations for an application. If you have an airgap environment and do not have internet access, cf push operations will fail anytime something needs to be downloaded from the internet. An example of this would be a Node.js app where Node modules are typically downloaded when the app is pushed.
To avoid these node module downloads in an airgap environment, there are some additional steps to perform prior to the cf push of the application. These steps need to be performed on a machine that has internet connectivity. For example:
1. Download the NodeJS app from the Git repository:
git clone https://github.com/IBM-Bluemix/get-started-node
2. Change to the app directory
cd get-started-node
cd get-started-node
3. Install all the tools we need to create a Node.js airgap buildpack using the following commands:
a. apt-get update
b. apt install nodejs
c. apt install npmapt
d. install nodejs-legacy
4. Force all the Node.js modules to be downloaded and packaged with the application. Run the following:
a. npm install
b. npm dedupe
c. npm shrinkwrap
Now that the Nodes.js application is built to work in an airgap environment, a simple cf push can be used to deploy the application. If you need to copy the application files to the airgap environment, create a tar file and copy it to the airgap machine. After an untar of the file, the cf push can be performed.
If you make any changes to the package.json file, rerun:
a. npm dedupe
b. npm shrinkwrap
10.12 iFix and releases
IBM releases iFixes and fix packs between its quarterly releases. There is no set number of interim releases, and it is usually dictated by the severity of the security fixes that become available between major releases. Major releases are delivered every quarter, with one or more iFix or fix packs delivered in between. iFixes are small deliverables, affecting only one component and are made up of a quick start guide, container (used for binary packaging), and a BOM.yml (bill of materials that includes the new container). Most of the time, there are multiple security fixes to be delivered, so a fix pack is used. This is a standalone installable fix, available on Fix Central if you have the appropriate license.
10.12.1 Zero downtime
There are a few ways to obtain zero downtime updates. One is to deploy your infrastructure using external database and blobstores for the Cloud Foundry environment. These extensions are detailed in this book. In this scenario, there are no singleton elements in the deployment, so our deployment configuration which targets only one BOSH job at a time, is able to maintain full capability of the platform.
An alternative option to using external databases and blobstores is to deploy to instances of IBM Cloud Private Cloud Foundry. This has the added disaster recovery capability of using geographically separate data centers. In this scenario, traffic is drained from one deployment while it is being updated. This allows maintenance to appear seamless to the end user. Once maintenance is complete traffic is restored to both deployments.
There is also the option of doing both. This gives you seamless updates, with no need to scale either deployment to handle the additional load while traffic is being redirected. This gives you full HA in each data center, while allowing for disaster recovery through geographically separate deployments.
..................Content has been hidden....................
You can't read the all page of ebook, please click here login for view all page.