


Managing IBM FlashCopy and Metro Mirror sessions with IBM Spectrum Virtualize-based storage
In this chapter, we provide an overview of the tasks that are necessary to successfully deploy IBM Copy Services Manager (CSM) for managing IBM FlashCopy and Metro Mirror sessions with IBM Spectrum Virtualize-based storage. We have IBM SAN Volume Controller (SVC) in our environment.
We briefly describe supported platforms for CSM server deployment and considerations for CSM server replication options for deploying CSM in a disaster recovery (DR) environment, as well as security considerations for typical deployments.
The following topics are described in this chapter:
3.1 Overview
In this section, we describe a set of scenarios that we have tested in our environment. For testing, we used a configuration that consists of two IBM SAN Volume Controller clusters located in two distinct sites. A schematic diagram of our test environment is shown in Figure 3-1.
|
Note: In our test environment, we have used IP-based replication. Design and configuration of the transport infrastructure between sites is out of the scope of
this document. |

Figure 3-1 Test environment diagram
The scenarios described in the following chapters cover a set of what the authors of this document consider the most common tasks relevant for using IBM CSM. For a list of storage-based copy services types managed by IBM Copy Services Manager version, we have used (CSM 6.1.3) see Chapter 1, “IBM Copy Services Manager introduction” on page 1.
The scenarios cover the following actions for IBM SVC:
•Creating a FlashCopy session (single site)
•Configuring and managing Metro Mirror sessions
•Testing Metro Mirror failover and failback
•Enabling practice for a Metro Mirror session (Metro Mirror with Practice)
3.2 Configuring and managing FlashCopy sessions
In this section we describe how to configure and manage FlashCopy Sessions with IBM SAN Volume Controller:
|
Note: IBM Copy Services Manager does not provision (create, delete, or modify) volumes, pools, or other storage entities. IBM CSM only manages (copy services) session and consistency groups.
|
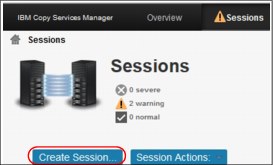
Figure 3-2 Create Session
2. For our tests, we used the IBM SVC cluster located in the secondary location, as shown in Figure 3-3. Complete the Session name, Session type, and chose the location (site). Click OK to proceed.

Figure 3-3 Defining the session
3. Select Launch Add Copy Sets Wizard to add copy sets to the newly defined sessions, and then click Next, as shown in Figure 3-4.

Figure 3-4 Adding copy sets
4. For defining the copy sets we have chosen to use a file that contains the list of volumes as comma-separated values (CSV) data file. Example 3-1 shows1 an excerpt of the .csv file used to define the copy sets.
Example 3-1 Format of the .csv file
#FCtest,
#FlashCopy,
#Sep 16, 2016 3:51:52 PM
,
H1,T1
# Field significance
#<Stg_type>:VOL:<Stg_name>:<VOL_name>
SVC:VOL:SVC_SECONDARY:iOS_test_1,SVC:VOL:SVC_SECONDARY:iOS_test_1_fc01
SVC:VOL:SVC_SECONDARY:iOS_test_2,SVC:VOL:SVC_SECONDARY:iOS_test_2_fc01
SVC:VOL:SVC_SECONDARY:iOS_test_3,SVC:VOL:SVC_SECONDARY:iOS_test_3_fc01
...<< Snippet >>...
5. When the .csv file has been loaded into CSM, it is matched with existing storage information. Figure 3-5 shows that the matching has been done successfully. Click Next.

Figure 3-5 Data from the .csv file loaded into CSM

Figure 3-6 Checking selected copy sets
A summary of the actions that will be taken is shown in Figure 3-7.

Figure 3-7 Actions summary
7. Click Next to confirm. The copy sets are added to the session and the results are displayed (see Figure 3-8).

Figure 3-8 Add copy sets complete
The newly defined session is inactive at this point, as shown in Figure 3-9.
|
Note: At this time, no actions are performed at storage level (SVC).
|

Figure 3-9 Defined session
8. Before initiating any action, you can check the settings for the FlashCopy (for example, incremental, background copy, and so on). Use Session Actions → View/Modify Properties. Figure 3-10 on page 37 shows the View / Modify Properties dialog.

Figure 3-10 View/Modify session properties
9. After checking and adjusting parameters, we start the session (Session Actions → Start menu) and confirm the action, as shown in Figure 3-11. The first time the session is started (right after creating it), both options (Start or Flash) have the same result (FlashCopy).

Figure 3-11 Starting the session
10. After the session has been started for the first time, a point-in-time copy is placed on the target volumes (T1). For subsequent actions, you can use the Flash action (see Figure 3-11) to create a new point-in-time copy (T1’) of the source volumes. Note that creating a new point-in-time copy overwrites the previous copy (T1’ overwrites T1).
3.3 Configuring Metro Mirror sessions
Metro Mirror provides a real-time copy of a storage volume (or multiple volumes) in the remote site that contains another SVC Cluster. The copy process is synchronous (primary site I/O is considered complete only when write to secondary site has been confirmed and acknowledgment has been received by primary site.
Application performance is strongly influenced by the distance between sites.
3.3.1 Scenario overview
In this scenario, in each site we use systems connected to the storage with similar configurations. After creating the Metro Mirror relationship, we test both failover and failback operations.
3.3.2 Creating the Metro Mirror relationship
In this section, we describe how we have configured a Metro Mirror relationship using the CSM GUI.
We assume that all required volumes are configured in both sites.
1. We define the session details and click OK, as shown in Figure 3-12 (Session type, name, and locations).
|
Note: IBM Copy Services Manager does not provision (create, delete, or modify) volumes and pools or other storage entities. IBM CSM only manages (copy services) sessions (represented in HW as consistency groups).
|

Figure 3-12 Defining the session
2. After we define the session, we launch the Add Copy Sets wizard and choose volumes from both sites (PRIMARY and DR_site), as shown in Figure 3-13. Click Next.

Figure 3-13 Selecting volumes from PRIMARY site

Figure 3-14 Selecting volume from DR_site (Secondary)

Figure 3-15 Select Copy Sets
5. Click Select Copy Sets (from both PRIMARY and DR_site). For this configuration, we have chosen to add the copy sets one by one, so, after adding the first copy set (shown in Figure 3-16) we add one more, repeating steps 2, 3, and 4.

Figure 3-16 Copy sets for MM_Test session
6. When finished adding copy sets (H1 and H2), we finalize the process (Confirm), as shown in Figure 3-17 on page 41.

Figure 3-17 Finalizing the “Add Copy Sets” process
7. After adding the copy sets, the session is Inactive and no actions are performed at SVC level at this time. We visualize the session, as shown in Figure 3-18.

Figure 3-18 Session MM_Test defined (Inactive)
8. To start the session, we use Session Actions → Commands → Start H1 -> H2 (Figure 3-19 on page 42). This action creates the rcrelationship in the SVC inside of a consistency group, as shown in Example 3-2 on page 43.

Figure 3-19 Start the session
9. Next, we confirm and monitor progress, as shown in Figure 3-20. When the relationship is in Normal / Prepared state, the copies are in consistent synchronized and H2 can be used for recovery actions (if necessary).

Figure 3-20 Confirm session start and monitor progress
10. We check the status of the relationships in the SVC interface, as depicted in Figure 3-21.

Figure 3-21 Metro Mirror relationship status in SVC GUI
For exemplification purposes, in Example 3-2 we also show the SVC commands that are issued by the IBM Copy Services Manager.
Example 3-2 Excerpt from SVC (PRIMARY) Audit Log
## Create MM relationship
1378 161003165318 csmuser 10.100.10.10 0 3 svctask mkrcconsistgrp -name MM_Test -cluster SVC_Secondary
1379 161003165318 csmuser 10.100.10.10 0 143 svctask mkrcrelationship -master 143 -aux 540 -cluster SVC_Secondary -consistgrp MM_Test
1380 161003165318 csmuser 10.100.10.10 0 144 svctask mkrcrelationship -master 144 -aux 541 -cluster SVC_Secondary -consistgrp MM_Test
1381 161003165319 csmuser 10.100.10.10 0 svctask startrcconsistgrp -primary master -force MM_Test
The session MM_Test is now available for data protection.
3.4 Metro Mirror failover and failback testing
In this section, we test the Metro Mirror (MM) configuration for failover and failback. The attached hosts configuration is not the subject of this document. However, for testing purposes we list the summary actions to be performed:
•Initial state:
Hosts running connected to the SVC in PRIMARY site; MM replication from H1 -> H2 (copies are in consistent synchronized state)
•Failover:
– Stop I/O on hosts in PRIMARY site
– Suspend session (IBM CSM)
– Recover volumes in secondary (DR_site) site (IBM CSM)
– Access volumes in the SVC in DR_site (hosts in DR_site perform I/O)
•Failback:
– Enable copy to PRIMARY site and start replication (H2 -> H1) (IBM CSM)
– Stop I/O on hosts in DR_site site
– Suspend session (IBM CSM)
– Recover volumes in PRIMARY site (IBM CSM)
– Access volumes in the SVC in PRIMARY site (hosts in PRIMARY site perform I/O)
– Enable copy to DR_site and start replication (H1 -> H2) (IBM CSM)
•End of test: Hosts and MM relationship in initial state
3.4.1 Failover (controlled)
|
Note: We stop I/O on the host systems accessing volumes in the PRIMARY site. Use platform-specific tools or utilities for this action.
|
To perform a controlled failover,2 complete the following steps:
1. When the I/O on the host has been stopped, we can suspend the MM session, as shown in Figure 3-22.

Figure 3-22 Suspending MM_Test session
Figure 3-23 shows the result of the Suspend action in CSM.

Figure 3-23 Session MM_Test suspended
2. We recover the volumes in DR_site for host access (H2), as shown in Figure 3-24 on page 45.

Figure 3-24 Recovering volumes in DR_site for host access
3. When the session is in Normal / Target Available state, we can activate host systems in DR_site to perform I/O (H2), as shown in Figure 3-25.
|
Note: It is out of scope for this material to describe details about how to activate host systems and access volumes from these. Each operating system has platform-specific methods and tools or utilities for this purpose.
|

Figure 3-25 Session MM_Test prepared for I/O in DR_site
4. After I/O has been performed on volumes in DR_site, we can enable (if wanted) reverse replication, as shown in Figure 3-26 on page 46.

Figure 3-26 Enabling copy to PRIMARY site
At this stage, reverse replication has been enabled, but not yet started, as shown in Figure 3-27.

Figure 3-27 Reverse replication prepared
5. We start replication to the PRIMARY site, as shown in Figure 3-28.

Figure 3-28 Enabling H2 -> H1 replication
3.4.2 Failback (controlled)
When the volumes are synchronized (relationship in Normal / Prepared state, as shown in Figure 3-29), we can start the failback to PRIMARY site operation. At this time, the host system in DR_site is active and performs I/O.

Figure 3-29 H2 -> H1 replication active
6. For data consistency,3 we stop the I/O to the volumes in DR_site in preparation for the failback operation. After the host I/O has been stopped, we can suspend the H2 -> H1 relationship, as shown in Figure 3-30.

Figure 3-30 Suspending H2 -> H1 replication
7. To render the volumes in PRIMARY site accessible for the host systems, we perform recovery, as shown in Figure 3-31.

Figure 3-31 Recover H1 volumes for host access
8. At this time we can activate host systems in the PRIMARY site and access the volumes for I/O, and enable copy to DR_site (for continuous protection in case of storage failure), as shown in Figure 3-32.

Figure 3-32 Enabling H1 -> H2 replication
9. We start the H1 -> H2 replication, as shown in Figure 3-33.

Figure 3-33 Failback complete: MM_Test session “Normal / Prepared” for H1 -> H2
The status has been reverted to the original status (H1 -> H2 replication).
You can also check the SVC Activity log (for both PRIMARY and DR_site) for the commands that have been issued by IBM Copy Services Manager. Example 3-3 shows the commands issued to the SVC cluster in PRIMARY site.
Example 3-3 SVC in PRIMARY site: Audit log excerpt for Failover / Failback
## FailOver MM
1382 161003170315 csmuser 10.100.10.10 0 svctask stoprcconsistgrp MM_Test
1383 161003171029 csmuser 10.100.10.10 0 svctask startrcconsistgrp -primary aux -force MM_Test
3.5 Enabling practice for Metro Mirror session
In this scenario, we use an existing (active) Metro Mirror (MM) relationship and convert it to Metro Mirror with Practice (MM with Practice).
|
Tip: It is important to follow the steps in the right order to avoid application downtime and maximize data availability.
Note: During this change, the copy sets part of the initial MM session continues to be replicated by the underlying HW (IBM SVC), and is in Consistent Synchronized state.
|
Overview
The following is an overview of the steps we have followed to change an existing MM relationship to MM with Practice:
1. Based on existing session (identified as a consistency group in the SVC), we create in the DR_site FlashCopy volumes (to be used for practice) for each target volume in the MM session. This step is done on the SVC directly (GUI or CLI), no CSM involvement.
2. While the MM relationship is in the Normal / Prepared state, we remove the MM relationship from Copy Services Manager (H1 -> H2) without removing the base hardware relationship on the storage system. This leaves the copy sets in the base hardware (storage) untouched (in all copy sets in Consistent Synchronized state).
3. In CSM, we define a new session of type Metro Mirror Failover/Failback with Practice and “populate” it with the designated volumes (H1, H2, and I2).
4. We start the new (MM with Practice) session and monitor it.
3.5.1 Scenario
The starting point is the existing MM_Test session, as shown in the SVC GUI depicted in Figure 3-34.

Figure 3-34 Metro Mirror relationship status (Consistency Group MM_Test) in SVC GUI
Complete the following steps:
1. We create the FlashCopy volumes in DR_site based on the existing relationship (represented as a Consistency Group in the SVC).
|
Note: It is important to create the volumes before removing the session from CSM, because this action can be scripted based on the SVC CG information. This is especially useful for sessions that consist of many copy sets.
If you remove the session from the CSM (without removing the relationships from the underlying hardware), the Consistency Group information will not be available in SVC (CLI or GUI), making it difficult to identify the copy sets.
|
The FlashCopy volumes (designated as H2) in the Secondary site (DR_site) can be created from the GUI, but this can be cumbersome for sessions with a large number
of volumes.
of volumes.
We have used a script and SVC CLI. The script shown in Example 3-4 can be used for similar actions. This script creates the following volumes in the Secondary site (DR_site):
MM_Test1_prct
MM_Test2_prct
Example 3-4 Script for creating volumes (to be used for FlashCopy) for each H2 volume in an MM session
CG=MM_Test
POOL=IT_test
lsrcrelationship -filtervalue consistency_group_name=$CG -nohdr |while read -a rc
do
lsvdisk -nohdr -bytes -filtervalue id=${rc[8]} | while read -a v
do
echo Creating volume ${v[1]}"_prct" with virtual size ${v[7]} bytes
mkvdisk -autoexpand -iogrp ${v[3]} -mdiskgrp $POOL -name ${v[1]}"_prct" -rsize 0 -size ${v[7]} -unit b
done
done
|
Hint: The script can be used for other sessions by adjusting the CG and POOL variables.
Attention: SAN Volume Controller scripting and CLI skills are required to perform this action. Make sure that you understand the actions in the script before running it in your environment.
|
2. At this point, we proceed to defining the new session, as shown in Figure 3-35 on page 51.
|
Note: Defining a new session does not impact the existing MM_Test session. By defining the new session into CSM, we minimize the transition time from MM to MM with practice session.
Also, data replication is not affected during the transition of the copy sets from MM to MM with practice sessions (copy sets remain in a Consistent Synchronized state).
|

Figure 3-35 Creating a new session for MM w/ Practice
3. In the Add Copy Sets wizard, we define H1, as shown in Figure 3-36.

Figure 3-36 Defining H1 for first copy set
4. Next, we define H2, as shown Figure 3-37.

Figure 3-37 Defining H2 for the first copy set
5. Next, we define I2 (intermediate), as shown in Figure 3-38.

Figure 3-38 Defining I2 for first copy set
6. Repeat the procedure for additional copy sets. When all wanted copy sets (H12..n, H22..n, I22..n) have been defined, you select all copy sets and confirm the action, as shown in Figure 3-39.

Figure 3-39 Confirming copy sets to be added to MM_Test_prct session
7. When copy sets have been added to the session, the results are shown. Click Finish to exit the Add Copy Sets wizard, as shown in Figure 3-40.
|
Note: No commands are issued to the underlying hardware (SVC) at this time. The session has been defined into CSM, but we do not activate it before removing the previous MM session (MM_Test).
|

Figure 3-40 Add Copy Sets wizard results
8. To start removing the current session select Session Action → View / Modify → Remove Copy Sets, as shown in Figure 3-41.

Figure 3-41 Initiating the Remove Copy Sets action
9. We select the copy sets to be removed (MM_Test1 and MM_Test2 in this case), as shown in Figure 3-42.

Figure 3-42 Remove Copy Sets wizard
10. Select the copy sets (in this case, all: MM_Test1 and MM_Test2), as shown in Figure 3-43.

Figure 3-43 Selecting copy sets to be removed
11. Make sure that you select Yes, keep base hardware relationships on the storage system and then confirm. Check the results and click Finish to exit the wizard, as shown in Figure 3-44.

Figure 3-44 Finalizing the copy sets removal
12. You can check the underlying hardware to verify that the MM relationships are available and in the Consistent Synchronized state, but are not part of a consistency group anymore, as shown in Figure 3-45.

Figure 3-45 SVC view of MM relationship removed from CSM
13. At this point, we can start the previously prepared relationship (MM_Test_prtc), as shown in Figure 3-46.

Figure 3-46 Starting the session

Figure 3-47 Confirming session start
15. Check progress, as shown in Figure 3-48. When the H1 -> I2 has reached 100%, the session is ready for practice DR configuration.

Figure 3-48 Session status and progress
16. To prepare the practice volumes (H2) for host access (in secondary site), select Session Actions → Commands → Flash, as shown in Figure 3-49.

Figure 3-49 Preparing H2 for practice (host access in DR_site)
17. Confirm as shown in Figure 3-50, and H2 can be accessed.

Figure 3-50 Confirming FlashCopy
|
Note: It is out of scope for this material to describe details about how to activate host systems and access the volumes from these. Each operating system has platform-specific methods and tools or utilities for this purpose.
|
1 The target volumes in SVC_Secondary have been created before defining the session in CSM.
2 Metro Mirror (synchronous replication) is block-level replication. Applications are unaware of the moment of suspending a relationship. In case of primary storage failure, the target can be made available for I/O. However, application-level recovery procedures might be required.
3 Metro Mirror (synchronous replication) is block-level replication. Applications are unaware of the moment of suspending a relationship. In case of active storage failure, the target volumes can be made available for I/O. However, application-level recovery procedures might be required.
..................Content has been hidden....................
You can't read the all page of ebook, please click here login for view all page.