
JasperReports allows you to place your company logo anywhere in your report. You may even use your logo as a background image or a watermark in a report.
This recipe shows you how you can place, position, and size your company logo within the title of a business report.
There is no database connection required in this recipe.
If you have not made any database connection so far in your iReport installation, you will see an Empty datasource selected in a drop-down list just below the main iReport menu. This is the requirement to run this recipe. If any other option (for example, some database connection) is previously selected, then change it to Empty datasource from the drop-down list, as shown in the following screenshot:

- Open the
ASimpleTitleWithLogo.jrxmlfile from theTask5folder of the source code for this chapter. The Designer tab of iReport shows an empty report with a title (Packt Publishing) as shown in the following screenshot:
- Use the palette of components available on the right of your iReport main window to drag an Image component into the Title section of your report. Now you can browse to your image file that contains your company logo. JasperReports supports the rendering of all popular image formats such as JPG, GIF, BMP, PNG, and so on.
- Once you have selected the image file, click on Open. Your image will be placed in the Title section of your report, as follows:

- The logo shown here does not fit and looks a bit too big. You need to adjust the size of the image. Click on the logo; its properties will appear in the Properties window just below the Palette of components. Look for the Width property and change its value to
180. Similarly, look for the height property and change it to80. Now it looks quite normal, but still its placement in the Title section looks inappropriate, as shown in the following screenshot: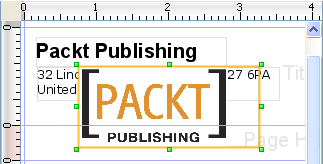
- Click on the logo and then use the mouse or arrow keys to place it in the top-right corner of the Title section, as shown in the following screenshot:

- Switch to the Preview tab; you will see the preview of your report as shown here:

Switch to the XML tab and you will see the following JRXML code:
<jasperReport
<title>
<band height="94" splitType="Stretch">
<!-- other JasperReports XML tags -->
 <image>
<reportElement x="365" y="10" width="180" height="80"/>
<imageExpression class="java.lang.String">
<![CDATA["X:\Images\packt.png"]]>
</imageExpression>
</image>
</band>
</title>
<!-- other JasperReports XML tags -->
</jasperReport>
Notice the<image> tag, shown highlighted in the preceding code. This<image> tag represents the logo you inserted into the Title section.
The<image> tag has a child named<imageExpression>, which specifies the<image> that you want to insert. The<imageExpression> tag provides two important bits of information:
- The
classattribute of the<imageExpression>tag specifies what type of image you want to use. In this case, you just want to provide the URL of the image. So it is a Java string. Another possibility can be that you want to pass a Java file object to JasperReports. In that case, the value of theclassattribute will bejava.io.File. - The content of the
<imageExpression>tag specifies the actual URL.