
You will often need to provide a brief summary or general information about your report on the last page. JasperReports provides you with a section named Summary, which is displayed before the footer on the last page of your report. For example, if you have a large report of customer invoices, you may display a product-wise summary of invoice totals in the Summary section.
This recipe shows how to display some general information such as the date and time of your report generation as well as the total value of all invoices at the end of your report.
Refer to the installPostgreSQL.txt file included in the source code download for this chapter to install and run PostgreSQL, which should be up and running before you proceed. The source code for this chapter also includes a file named copySampleDataIntoPGS.txt, which helps you to create a database named jasperdb2 and copy sample data for this recipe into the database.
These steps show how to include a summary at the end of your report:
- Open the
General_Summary.jrxmlfile from theTask7folder in the source code for this chapter. The Designer tab of iReport shows a simple report, as shown in the following screenshot: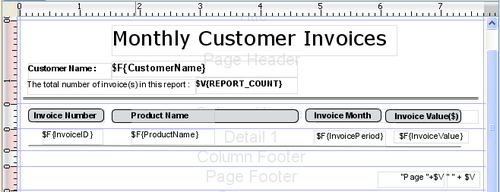
- Drag the current date component from the Tools section of palette of the components and drop it into the Summary section of your report. A Pattern editor dialog will open, as shown in the following screenshot:
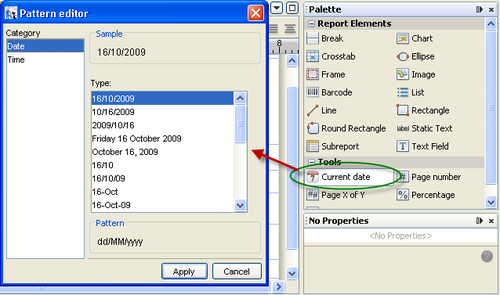
- The Pattern editor dialog has two sections. The section on the left is named Category and the one on the right is named Type.The Category section has two values,
DateandTime. Dateis selected by default. You can see different patterns for date in theTypesection. Select a pattern for the date and press Apply button. This will insert a text field component with an expressionnew java.util.Date()into the Summary section of your report, as shown in the following screenshot:
- Repeat steps 2 and 3 to insert another current date component. This time select Time from the Category section of the Pattern editor dialog and choose an appropriate pattern for the time from the Type section. This will insert another text field component with the same
new java.util.Date()expression.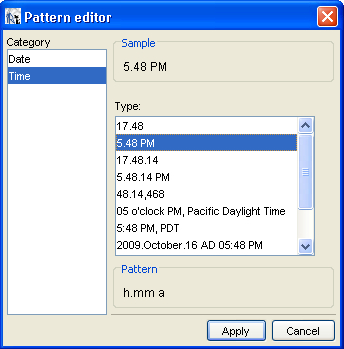
- Select a static text component from the palette; drag-and-drop it into the summary section of your report.
- Double-click and edit the static text component to enter
This report was generated on atas its value. The text will disappear from the view area, as it is longer than the length of the static text component. Enlarge the rectangular boundary of the static text component by dragging one of its corners, as shown in the following screenshot:
- Insert whitespace between the words
onandatof the static text component by pressing the space bar 35 times, as shown in the following screenshot:
- Select the date text field component of step 3. Use the arrow keys to move the date text field component until it sits in the space between the words
onandat, as shown in the following screenshot:
- Now select the time text field component of step 4. Move the time text field component until it sits just next to the static text component, as shown in the following screenshot:

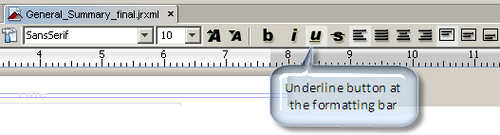
- Underline the date and time text field components by selecting each component while holding down the Ctrl key and then (after releasing the Ctrl key) pressing the Underline button from the formatting bar of the Designer tab in your report window.
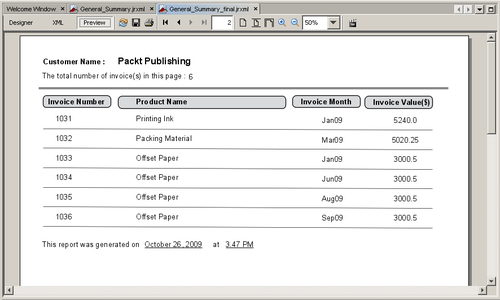
- Switch to the Preview tab and go to the last page of your report. You will find a summary of your report at the end of this page, as shown in the following screenshot:
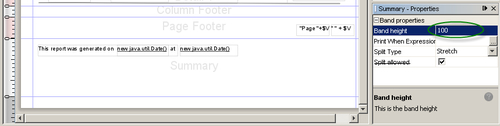
- Switch to the Designer tab. Click on the Summary section of your report and go to the Band properties section of Properties below the palette and select the Band height property. Change its value to 100. This will increase the height of the Summary section in your report, as shown in the following screenshot:
- The left-most part of the main iReport window is a Report Inspector window, which shows a tree with many nodes. Double-click on the Fields node; it will list all its child fields.
- Drag-and-drop CustomerName field from the Fields node into the Summary section of your report. A dialog window will appear, as shown in the following screenshot:
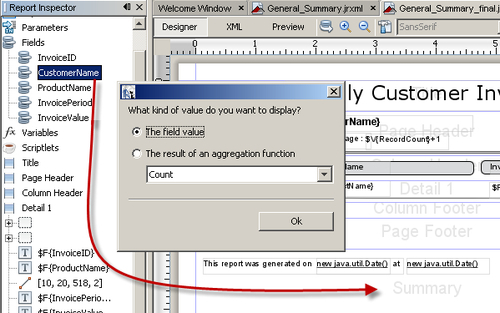
- Don't change anything; just click the Ok button to dismiss it. A text field component with the expression
$F{ProductName}will appear in the Summary section of your report, as shown in the following screenshot:
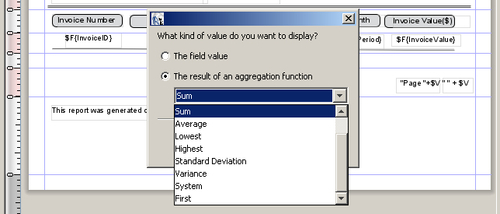
- Similarly, drag-and-drop InvoiceValue field from the Fields node into the Summary section of your report. A dialog window will appear; this time select The result of an aggregation function from the Radio buttons option and Sum from the Combo box option, as shown in the following screenshot:
- Click Ok to dismiss the dialog window.
- Drag-and-drop a Static Text component from the palette of components into the Summary section just below the already dropped Static Text component.
- Double-click and edit the Static Text component and type
Total for all invoices for isas the summary text in the Summary section of your report. Part of the summary text will disappear from view in the static text component. So, enlarge the rectangular boundary of the static text component by dragging one of its corners, just like in step 6 of this recipe. - Insert whitespace of 30 characters between the words
Invoices forandisof the static text by pressing the spacebar 30 times, as shown in the following screenshot: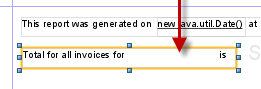
- Now use the arrow keys to move the
CustomerNametext field component until it sits adjacent to the wordInvoices forof the summary text, as shown in the following screenshot: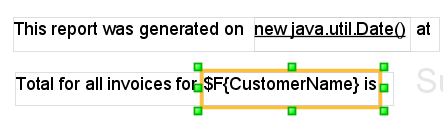
- Similarly, move the
InvoiceValuetext field component until it touches the boundary of the static text component containing the summary text, as shown in the following screenshot:
- Select the CustomerName and InvoiceValue text field components while keeping the Ctrl key pressed. Release the Ctrl key and click the Underline button on the formatting bar of the Designer tab in your report window.
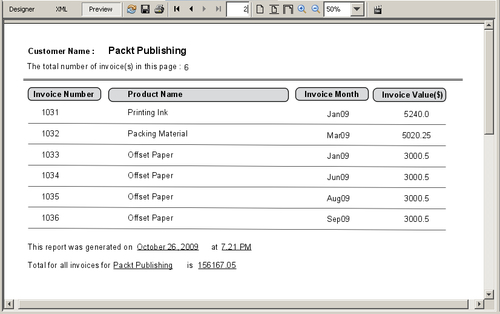
- Switch to the Preview tab and go to the last page of your report; your report summary will look as shown in the following screenshot:
You dragged-and-dropped a Current date component into the Summary section and configured it to display the date in the required format in steps 2 and 3 of the recipe. Similarly, you dragged-and-dropped the same Current date component into the Summary section and configured it to display the time in step 4 of the recipe.
Then, in steps 5 to 10, you transformed this information into a presentable style. In step 14 of the recipe you dragged-and-dropped the CustomerName field element into the Summary section of your report. iReport intelligently identified that there are a number of records which cannot be displayed in a single text field and therefore presented a dialog window asking your permission for the aggregation function. In step 15, you kept the default selection which was The field value. This option tells JasperReports to use the first occurring value of the CustomerName field.
Similarly, in step 16, you dragged-and-dropped an InvoiceValue field element into the Summary section. iReport identified that there is more than one entry beside it. Therefore, iReport asked your permission for the aggregation function and you told iReport to perform a sum operation on the values by selecting The result of an aggregation function from the Combo box option.