
In this recipe, you will create a report from data stored in an XML file. In order to process an XML file and extract information from it, JasperReports uses XPath, which is a popular query language to filter XML data. So you will also learn how to use XPath expressions for report generation.
You need to connect your iReport installation to your XML file before starting this recipe. Refer to the Connecting to XML datasource recipe of this chapter to learn how to connect iReport to your XML file.
- Open the
XMLDatasource.jrxmlfile from theTask3folder of the source code for this chapter. The Designer tab of iReport shows a report containing data in the Page Header, Detail 1, and Page Footer sections, as shown in the following screenshot: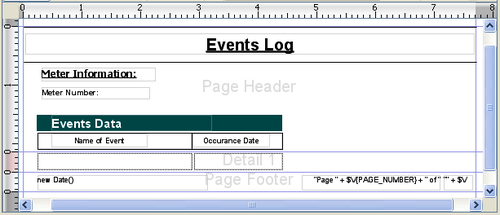
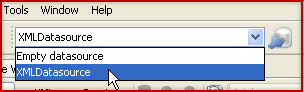
- Select XMLDatasource from the drop-down list just below the main menu of iReport, as shown in the following screenshot:
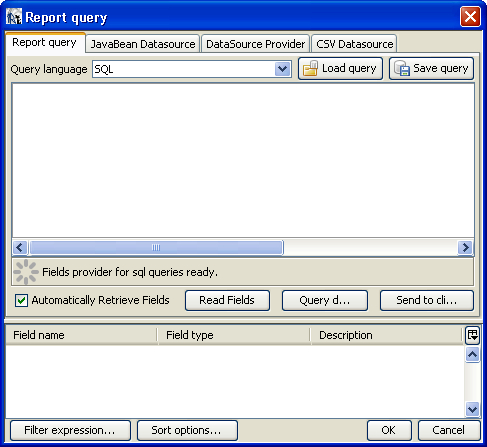
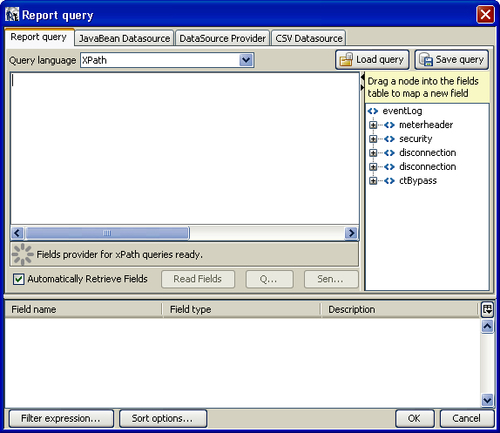
- Click the Report query button on the right of the Preview tab. A Report query dialog will appear, as shown in the following screenshot:
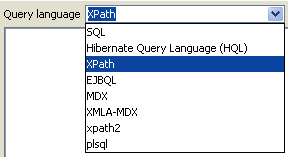
- You will see a Query language drop-down list at the top of the Report query tab. Select XPath as the query language from the drop-down list, as shown in the following screenshot:
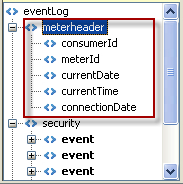
- The text area below the Query language drop-down list will split into two parts. The left part shows the actual XPath expression, whereas the right part shows XML nodes, as shown next. Expand the security node from the eventLog tree in the right part.
- Type
/eventLog//eventas the XPath expression. All event nodes will appear in bold, as shown in the following screenshot: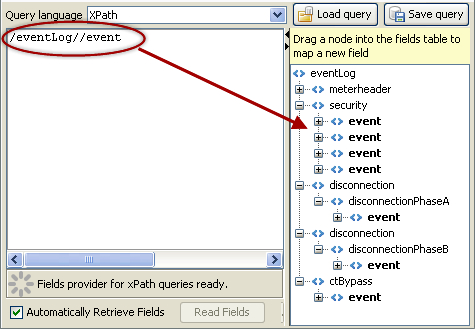
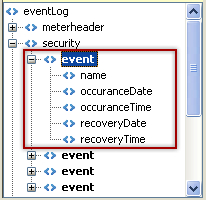
- Add the child nodes of the first event node as fields to the report. For this purpose, double-click on the first event node, it will expand to show its child nodes, as shown in the following screenshot:
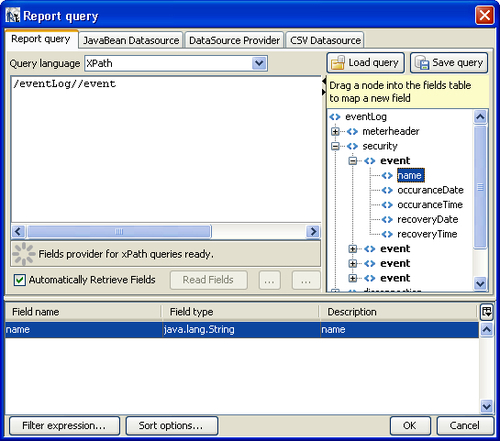
- Right-click on the name child of the event node. A pop-up menu will appear; select the Add node as field option. This will add name as a field in the lower-half of the Report query tab, as shown in the following screenshot:
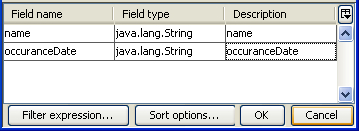
- Similarly, repeat step 8 for the occurrenceDate child of the event node. The lower-half of the Report query tab will be updated to show the two children of the event node, as shown in the following screenshot:
- Double-click on the meterheader child of the eventLog node. It will expand to show its children, as shown in the following screenshot:
- Repeat step 8 for the meterId child of the meterheader node. Finally, the lower-half of the Report query tab will show the name, occurrenceDate, and meterId fields, as shown next. Click the OK button at the bottom to dismiss the Report query dialog.

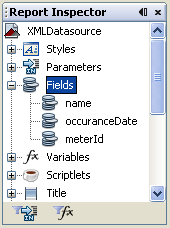
- Double-click on the Fields node in the Report Inspector window on the left of your report. The Fields node will expand to show the fields' name, occurrenceDate, and meterId added in steps 8 to 11, as shown in the following screenshot:
- Drag-and-drop the meterId field from the Fields node into the Page Header section of your report. A dialog window will appear, as shown in the following screenshot; don't change anything just click the Ok button to dismiss it. A Text Field component with the expression
$F{meterId}will appear in the Page Header section of your report.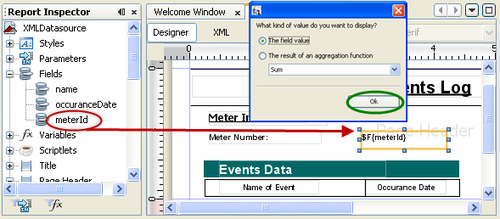
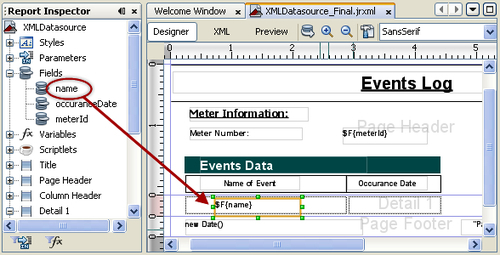
- Drag-and-drop name field from the Fields node into the Detail 1 section of your report under the label named Name of Event, as shown in the following screenshot:
- Similarly, drag-and-drop
occurrenceDatefield from the Fields node into the Detail 1 section of your report under the label named Occurrence Date, as shown in the following screenshot: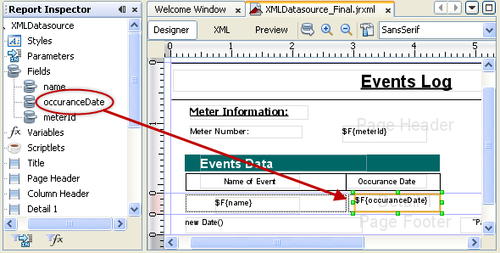
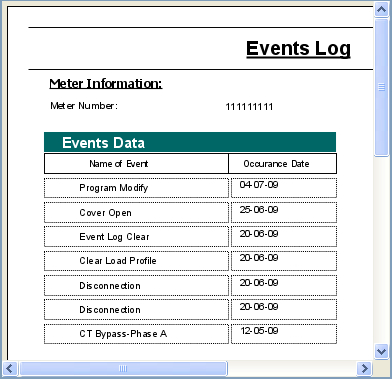
- Switch to the Preview tab and you will see your report showing the events log fetched from the XML datasource using the XPath expression you authored in step 6.
In this recipe you learned how to create a report when your report data source is XML.
In steps 2 to 11 you established a connection to the XML data source, and in step 12 iReport's Report Inspector window showed the XML data as local fields (name, occurrenceDate, and meterId). Then, in steps 13 to 15, you dragged-and-dropped the local fields to design your report.
Recall step 5 where the Report query dialog changed its view. iReport changed this dialog according to the data source used. All changes related to a data source are confined to this dialog only. The rest of the report-designing steps are mostly the dragging-and-dropping of local fields and do not depend on the type of data source.
This feature can be referred to as loose coupling between a data source and report design. It is very useful. It makes your report design robust and independent of the type of data source used. This means you will not have to redesign the report if your data source changes.
iReoprt is very flexible towards XML data files. It allows you to use XPath to process and filter well-formed XML files. You can use any well-formed XML file in your report and JasperReports will process it to generate local fields, which you can drag-and-drop to design your report.