
JasperReports allows full flexibility of combining different types of data into a single report. The data can even come from multiple databases.
This recipe shows how you will display multiple types of data in a single report. You will use multiple subreports and multiple-detail sections to achieve your goal.
Refer to the installPostgreSQL.txt file included in the source code download of this chapter to install and run PostgreSQL, which should be up and running before you proceed.
The source code of this chapter also includes two files named copySampleDataIntoPGS.txt and copyCustomerHistorySampletDataIntoPGS.txt. The copySampleDataIntoPGS.txt file will help you create a database named jasperdb6 and create a table named CustomerInvoices with five columns (InvoiceID, CustomerName, InvoicePeriod, ProductName, and InvoiceValue) and copy sample data for this recipe. Similarly, the copyCustomerHistorySampletDataIntoPGS.txt file will help you create a database named jasperdb6a and create a table named CustomerHistory with five columns (InvoiceID, CustomerName, InvoicePeriod, ProductName, and InvoiceValue) and copy sample data.
You will be using three JRXML files MultipleData.jrxml, CustHistorySubreport.jrxml, and ProductInvoices.jrxml in this recipe. You will find these files in the Task6 folder of the source code download of this chapter. The MultipleData.jrxml file is the master report, which uses the other two files as subreports. The master report has to refer to all of its subreports using a complete path (you cannot use relative paths). This means you have to copy the three JRXML files to the C:JasperReportsCookBookSamples folder in your PC. I have hardcoded this complete path in the master report (MultipleData.jrxml).
- Open the
MultipleData.jrxmlfile from theC:JasperReportsCookBookSamplesfolder of your PC. The Designer tab of iReport shows a report with data in the Title and Customer Group Header 1 sections, as shown in the following screenshot:
- Switch to the Preview tab and you will see a report with just a title and a customer name.

- Switch back to the Designer tab. Drag-and-drop a Subreport component from the Palette into the Detail 1 section. A Subreport wizard dialog will appear, as shown in the next screenshot.
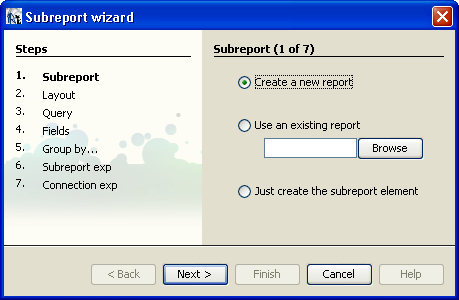
- Select the Use an existing report option and click on the Browse button to browse to the
CustHistorySubreport.jrxmlfile placed in theC:JasperReportsCookBookSamplesfolder of your PC and press the Open button, as shown in the next screenshot. The browse dialog will disappear. Press the Next button in the Subreport wizard dialog.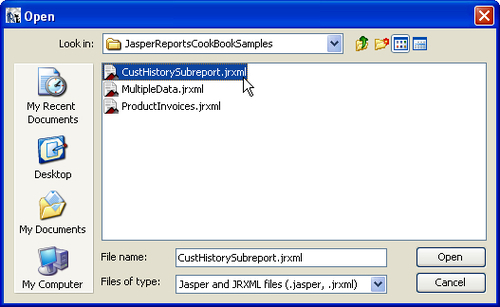
- A Connection exp (2 of 4) dialog will appear, as shown. Notice that now the left-side of the Subreport wizard shows four steps (Subreport, Connection exp, Parameters, Subreport exp). You are at step 2 (Connection exp), which is shown in bold.
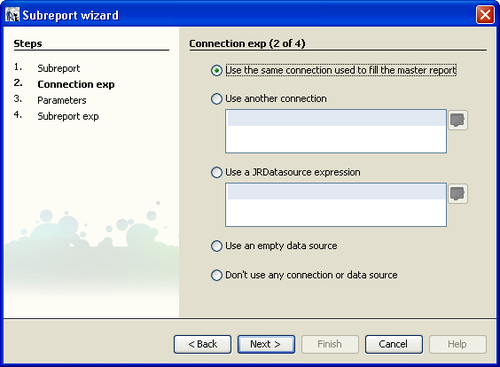
- Choose the Use another connection option and type the
java.sql.DriverManager.getConnection("jdbc:postgresql://localhost:5432/jasperdb6a", "postgres", "postgres")expression in the area below the Use another connection option, as shown in the following screenshot. Press the Next button at bottom of the window.
- A Parameters (3 of 4) dialog will appear. This will show
InvoiceIDandCustomerNameparameters of theCustHistorySubreport.jrxmlsubreport and allows you to enter expressions to map these to a number of elements (that is, Fields or Variables) of the mainMultipleData.jrxmlreport.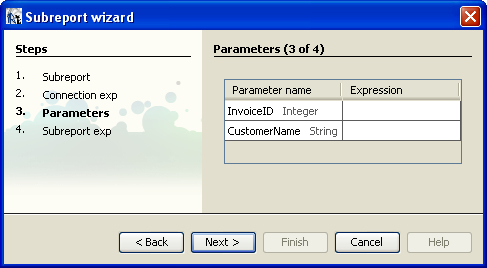
- Click the Expression field against the
CustomerNameparameter. A drop-down list will open. This will show all elements of theMultipleData.jrxmlreport. SelectCustomerName Fieldfrom the list, as shown. Press the Next button.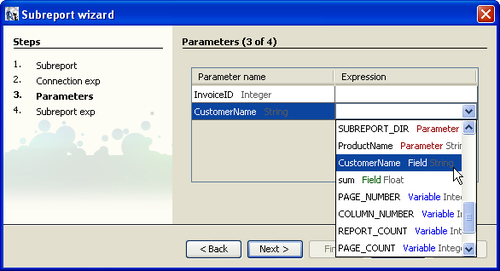
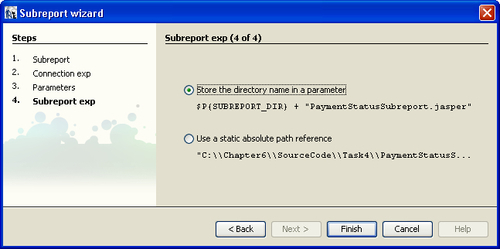
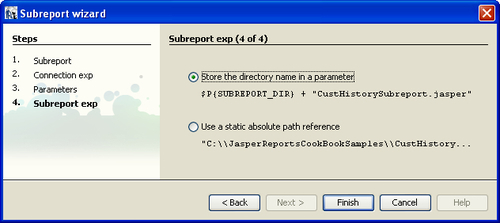
- A Subreport exp (4 of 4) dialog will appear. Continue with the Store the directory name in a parameter option selected and press the Finish button.
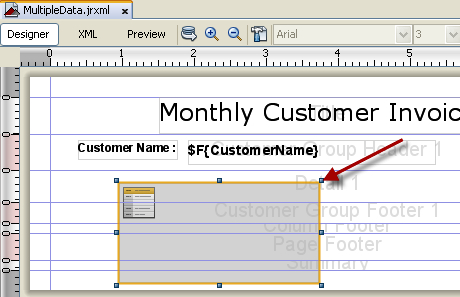
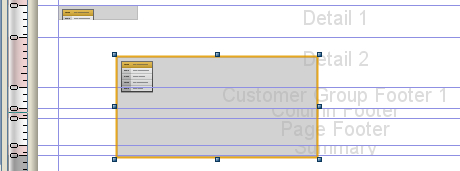
- The Subreport element will be placed in the Detail 1 section, as shown in the following screenshot:
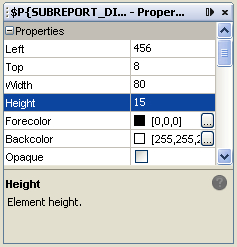
- Click the Subreport element, and its properties will appear in the Properties window below the Palette. Find the Width property and set its value as
80. - Click the Height property and set its value as
15.
- The size of the Subreport element will become smaller. Align it to the top-left position inside the Detail1 section using your mouse, as shown in the next screenshot:

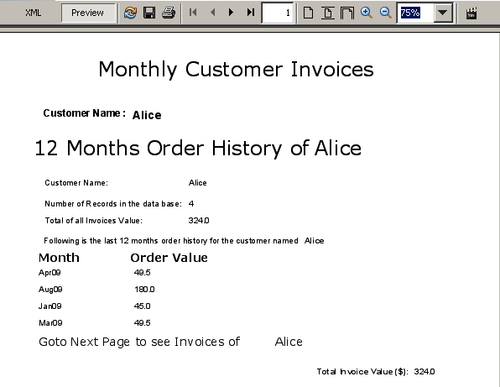
- Switch to the Preview tab, and compare the report that you see this time with the report that you saw earlier in step 2. You will find that now your report shows a 12-month order history for each customer.
- Switch back to the Designer tab. Right-click on the Detail1 node in the Report Inspector window. A pop-up menu will appear. Click on the Add Another Detail Band option in the pop-up menu.
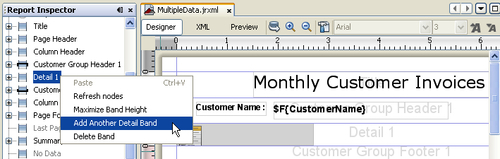
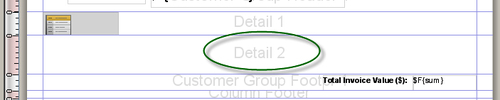
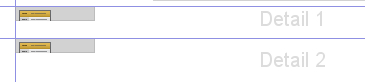
- A new section named Detail2 will appear in your report.
- Drag-and-drop a Subreport component from the Palette into the Detail 2 section. A Subreport wizard dialog will appear.
- Select the Use an existing report option and press the Browse button to browse to the
ProductInvoices.jrxmlfile placed in theC:JasperReportsCookBookSamplesfolder of your PC and press Open button. The browse dialog will disappear. Press the Next button in the Subreport wizard dialog. - A Connection exp (2 of 4) dialog will appear. Choose the Use the same connection used to fill the master report option as shown. Press the Next button at the bottom of the window.

- A Parameters (3 of 4) dialog will appear. This will show the
CustomerNameparameter of theProductInvoices.jrxmlsubreport and allows you to enter expressions to map these to a number of elements (that is, Fields or Variables) of the mainMultipleData.jrxmlreport. - Click the Expression field beside the
CustomerNameparameter. A drop-down list will open. This will show all elements of theMultipleData.jrxmlreport. SelectCustomerName Fieldfrom the list. Click the Next button.
- A Subreport exp (4 of 4) dialog will appear. Continue with the Store the directory name in a parameter option selected and click the Finish button.
- The Subreport element will be placed in the Detail 2 section, as shown in the next screenshot:
- Click this Subreport element (of the Detail2 section), and its properties will appear in the Properties window below the Palette. Find the Width property and set its value as
80. - Click the Height property and set its value as
15.
- The size of the Subreport element will become smaller. Align it to the top-left position inside the Detail2 section using your mouse.
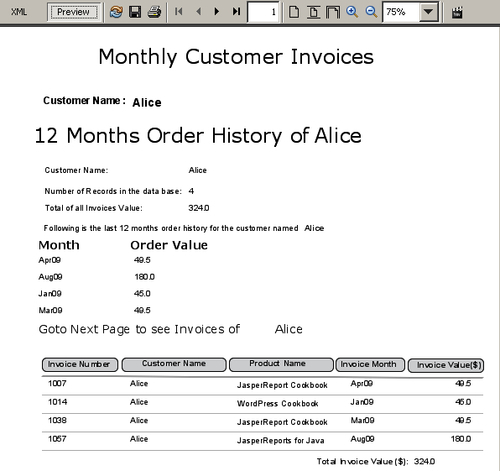
- Switch to the Preview tab, and compare the report that you see this time with the report that you saw earlier in step 16. You will find that now your report shows customer invoices in addition to the order history, as shown in the following screenshot:
You have learned to combine different types of data from different sources into a single report. For this purpose, you inserted two subreports into a master report. Each of your subreports uses its own database connection, which you authored in step 6 for your first subreport and step 19 for your second subreport.
Note that the first subreport uses a database connection that is different from the master report's database connection. This is why you chose the Use another connection option in step 6.
The second subreport uses the same database connection as the master report. So you chose the Use the same connection used to fill the master report option in step 19.
Also notice that you passed the CustomerName field as parameter to the first subreport in steps 7 and 8. Similarly, you passed the same CustomerName field as parameter to the second subreport in steps 20 and 21. This way, both subreports provide their specific types of data for a specific customer at a time. The master report calls each subreport for different customers, one at a time, and organizes the presentation of all data in a single multi-page report.