
You can place subreports in your master report in such a way that the look and feel of the master report resembles that of a multi-column report. Therefore, you can use subreports to design multi-column reports.
However, doing this may cause minor problems in certain scenarios. This recipe demonstrates how to use subreports in multi-column reports and resolve problems that occur while doing this.
Refer to the installPostgreSQL.txt file included in the source code download of this chapter to install and run PostgreSQL, which should be up and running before you proceed. The source code of this chapter also includes a file named copySampleDataIntoPGS.txt, which helps you to create a database named jasperdb7 and copy sample data for this recipe into the database.
You will be using three JRXML files in this recipe: SimulatingMultiColumnReport.jrxml, CustomerInvoicesSubreport.jrxml, and MonthlyOrderHistorySubreport.jrxml. You will find these files in the Task5 folder of the source code download of this chapter. The SimulatingMultiColumnReport.jrxml file is the master report, which uses the other two files as subreports. The master report has to refer to all its subreports using a complete path (you cannot use relative paths). This means you have to copy the three JRXML files to the C:JasperReportsCookBookSamples folder on your PC. I have hardcoded this complete path in the master report (SimulatingMultiColumnReport.jrxml).
- Open the
SimulatingMultiColumnReport.jrxmlfile from theC:JasperReportsCookBookSamplesfolder on your PC. The Designer tab of iReport shows a report containing data in the Title, Column Header, and Customer Group Header 1 sections, as shown in the following screenshot: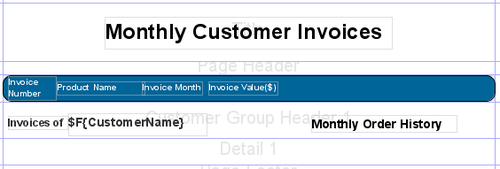
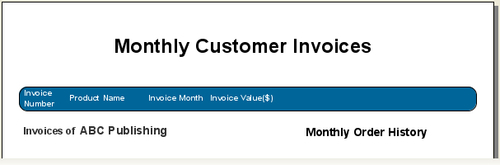
- Switch to the Preview tab and you will see a report displaying a title, a column header, as well as customer names but no invoice data, as shown in the following screenshot:
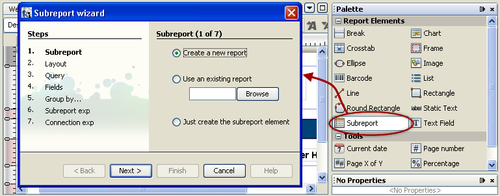
- Switch back to the Designer tab. Drag-and-drop a Subreport component from the Palette into the Detail 1 section just below the static text component labeled Invoice of. A Subreport wizard dialog will appear, as shown in the following screenshot:
- Choose the Use an existing report option and press the Browse button. A browser dialog will appear. Browse to the
CustomerInvoicesSubreport.jrxmlfile placed in theC:JasperReportsCookBookSamplesfolder on your PC and press the Open button, as shown in the following screenshot. The browser dialog will disappear.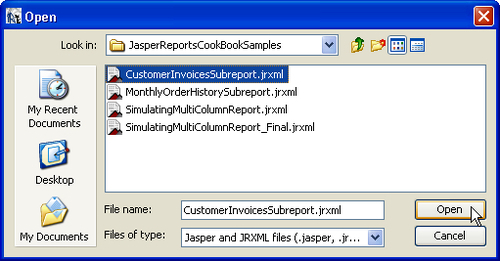
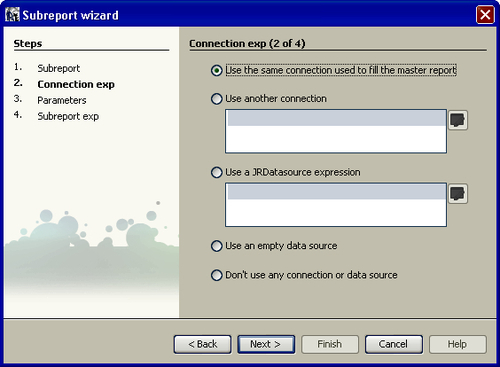
- Press the Next button in the Subreport wizard dialog. Notice that now the left side of the Subreport wizard shows four steps (Subreport, Connection exp, Parameters, Subreport exp). You are at step 2 (Connection exp), which is shown in bold. The Connection exp (2 of 4) dialog allows you to specify a database connection for your subreport. Press the Next button at the bottom to continue with the default Use the same connection used to fill the master report option, as shown in the following screenshot:
- A Parameters (3 of 4) dialog will appear. This shows the
CustomerNameparameter ofCustomerInvoicesSubreport.jrxmland allows you to map it to elements (that is Fields or Variables) of the mainSimulatingMultiColumnReport.jrxmlreport. Click the Expression field beside theCustomerNameparameter. A drop-down list will open, which shows fields and variables of the master report. Select theCustomerNamefield from the list, as shown in the following screenshot. Press the Next button.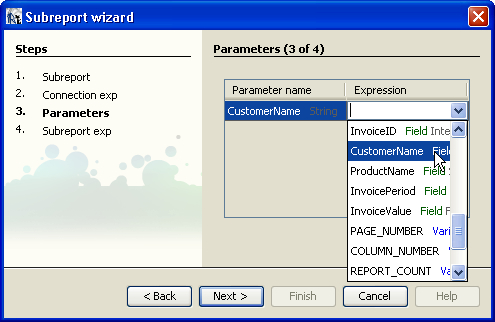
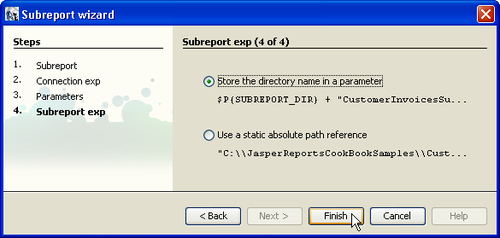
- A Subreport exp (4 of 4) dialog will appear. Continue with the Store the directory name in a parameter option selected by default and press the Finish button.
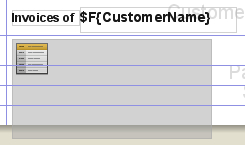
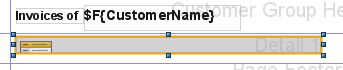
- The Subreport component will be placed in the Detail 1 section, expanding to other sections as well, as shown in the following screenshot:
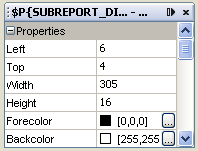
- Click on the Subreport component. Its properties will appear in the Properties window below the Palette. Find the Width property and set 305 as its value. Similarly, set 16 as value of its Height property, as the shown in the following screenshot:
- The size of the Subreport component will now fit inside the Detail 1 section.
- Switch to the Preview tab. You will see that the subreport (that is,
CustomerInvoicesSubreport.jrxml)repeats for each record in the Detail 1 section of the master report (that is,SimulatingMultiColumnReport.jrxml).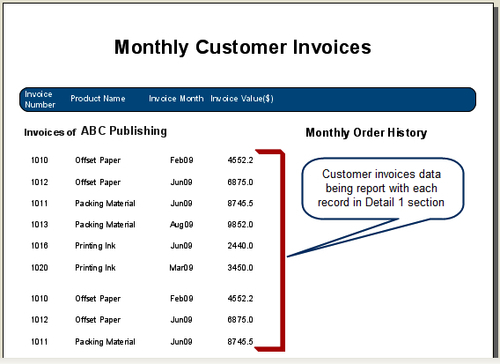
- Switch back to the Designer tab. Right-click on the Variables node in the Report Inspector window. A pop-up menu will appear. Select the Add Variable option.
- A new variable named
variable1will be added at the end of the variables list. - While
variable1is selected, find the Name property in the Properties window below the Palette and change its value toFirstRecordOfANewGroup. Now the name of thevariable1variable will change toFirstRecordOfANewGroup. - Select the Variable Class property and change its value to
java.lang.Integer. - Select the Calculation property and change its value to
Count. - Select the Reset type property and change its value to
Group. - Select the Reset group property and change its value to
Customer, as shown in the following screenshot: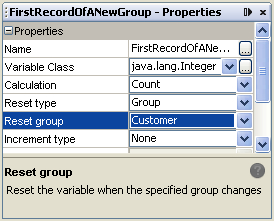
- Select the Variable Expression property and click on the button beside it. A Variable Expression window with no default expression will open. Type
$V{FirstRecordOfANewGroup} + 1in the expression editor window, as shown in the following screenshot. Press the OK button.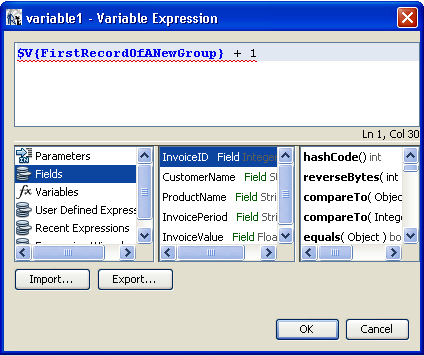
- Select the Subreport component in the Detail 1 section. Its properties will appear in the Properties window below the Palette. Find the Remove Line When Blank property and check the box beside it.
- Look for the Print When Expression property and click on the button beside it. A Print When Expression window with no default expression will open, as shown in the following screenshot:

- Type the
$V{FirstRecordOfANewGroup} == 0as value in the Print When Expression window, as shown in the following screenshot. Press the OK button to dismiss the window.
- Switch to the Preview tab. This time you will see that the subreport is shown only once for each customer and does not repeat itself for every record.

- Switch back to the Designer tab. Drag-and-drop another Subreport component from the Palette into the Detail 1 section just to the right of the first subreport below the Monthly Order History static text component.
- A Subreport wizard dialog will appear. Choose the Use an existing report option, press the Browse button to browse to the
MonthlyOrderHistorySubreport.jrxmlfile located in theC:JasperReportsCookBookSamplesfolder on your PC, and press the Open button, as shown in the following screenshot: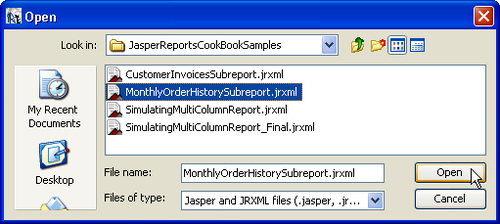
- Press the Next button in the Subreport wizard dialog. A Connection exp (2 of 4) dialog will appear. Press the Next button at the bottom to continue with the default Use the same connection used to fill the master report option.
- A Parameters (3 of 4) dialog will appear. This will show the
CustomerNameparameter ofMonthlyOrderHistorySubreport.jrxmland allows you to map it to elements (that is, Fields or Variables) of the mainSimulatingMultiColumnReport.jrxmlreport. Click on the Expression field beside theCustomerNameparameter. A drop-down list will open, which shows the fields and variables of the master report. Select the CustomerName field from the list, as shown in the following screenshot. Click the Next button.
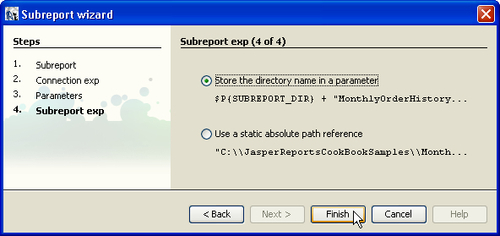
- A Subreport exp (4 of 4) dialog will appear. Continue with the Store the directory name in a parameter option selected and click the Finish button.
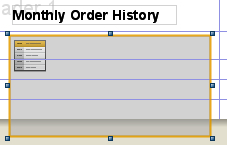
- The Subreport component will be placed in the Detail 1 section, vertically expanding to other sections as well, as shown in the following screenshot:
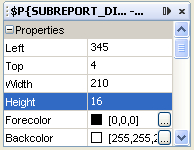
- Click on the Subreport component you just dropped Its properties will appear in the Properties window below the Palette. Find the Width property and set 210 as its value. Similarly, set 16 as value of its Height property, as the shown in the following screenshot:
- Select the Remove Line When Blank property and check the box against it.
- Select the Print When Expression property and click on the button beside it. A Print When Expression window with no default expression will open.
- Type
$V{FirstRecordOfANewGroup} == 0as value in the Print When Expression window, as shown in the following screenshot. Press the OK button.
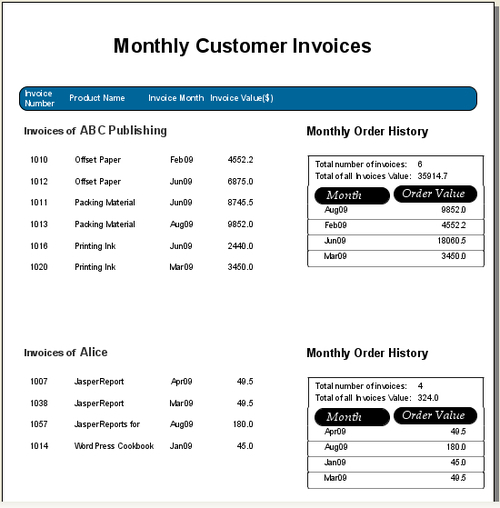
- Switch to the Preview tab. You will see that the left part of the report body contains customer invoices, whereas the right part of the report contains monthly order history for customers, as shown in the following screenshot:
In this recipe, you have used two subreports in a master report. You placed the two subreports in such a way that the master report looks like a multi-column report.
Notice from the recipe that when you inserted the first subreport in step 3 of the recipe, it started repeating itself for every record. This is a common problem that you may encounter when you insert a subreport in any detail section of a master report.
In order to stop the subreport from repeating itself, you configured a variable named FirstRecordOfANewGroup in steps 12 to 19. Then you configured the Print When Expression property of the two subreports in steps 22 and 33, which prints the subreports only on the first record of every customer, so that the subreports do not repeat for every record.
Also notice steps 20 and 31 of the recipe, where you configured the Remove Line When Blank property of the two subreports. This property removes the white space left empty when a subreport does not print due to the Print When Expression property.
You normally need to configure the Remove Line When Blank property whenever you wish to print a subreport conditionally. If you don't use this property, you will see a lot of unwanted white space in your report.
You can switch to the XML tab to see the following JRXML code:
<detail>
<band height="28" splitType="Stretch">
<subreport>
  <reportElement x="6" y="4" width="305" height="16" isRemoveLineWhenBlank="true">
  <printWhenExpression>
<![CDATA[$V{FirstRecordOfANewGroup} == 0]]>
</printWhenExpression>
</reportElement>
    <subreportParameter name="CustomerName">
     <subreportParameterExpression>
<![CDATA[$F{CustomerName}]]>
</subreportParameterExpression>
</subreportParameter>
<connectionExpression>
<![CDATA[$P{REPORT_CONNECTION}]]>
    </connectionExpression>
     <subreportExpression class="java.lang.String">
   <![CDATA[$P{SUBREPORT_DIR} + "CustomerInvoicesSubreport.jasper"]]>
      </subreportExpression>
</subreport>
<subreport>
   <!—details of this subreport omitted for brevity-->
    </subreport>
</band>
</detail>
In this recipe, you dragged-and-dropped two subreport components and so iReport authored two<subreport> tags as shown in the above JRXML code. In steps 3 to 10, iReport authored the first<subreport> tag, while in steps 24 to 30 it authored the second<subreport> tag.
The following is a mapping of recipe steps to JRXML code of the first<subreport> tag:
- In step 5 of the recipe, you told iReport to use the same database connection for the subreport as the master report. In response, iReport authored the
<connectionExpression>tag shown highlighted. - In step 6, you mapped a master report parameter to the subreport. This is when iReport authored the
<subreportParameter>tag shown highlighted. - Similarly, in step 7 of the recipe, you asked iReport to save the path to subreport file. In response to this, iReport authored the
<![CDATA[$P{SUBREPORT_DIR} + "CustomerInvoicesSubreport.jasper"]]>CDATA section. - iReport authored the
isRemoveLineWhenBlank="true"attribute in response to your action of step 20, where you changed the Remove Line When Blank property of thesubreportcomponent. - Similarly, in step 21, you changed the Print When Expression property of the
subreportcomponent and iReport authored the<printWhenExpression>