
This recipe teaches you the simplest operation you can do inside the body of your report. This includes displaying your report data as name-value pairs in the body. The name-value pair consists of a label (the name) and a field value (the value). The recipe also teaches you how to associate the field value with a column in your database table.
Refer to the installPostgreSQL.txt file included in the source code download for this chapter to install and run PostgreSQL, which should be up and running before you proceed. The source code for this chapter also includes a file named copySampleDataIntoPGS.txt, which helps you to create a database named jasperdb2 and copy sample data for this recipe into the database.
- Open the
SingleFieldBody.jrxmlfile from theTask1folder of the source code for this chapter. The Designer tab of iReport shows a title and a header: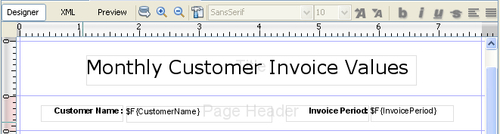
- Drag-and-drop a new static text component from the Palette of components into the Detail 1 section of your report. Double-click the static text component and enter
Invoice Valueas its label. Position it to the extreme left of your report.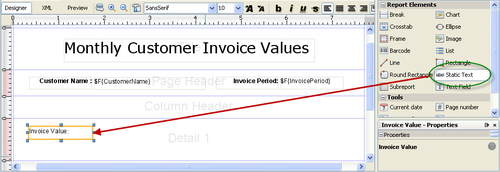
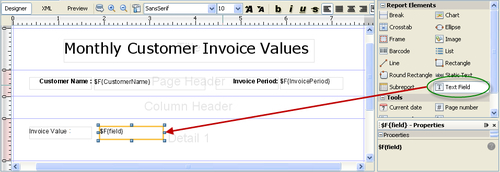
- Now, drag-and-drop a text field component into the Detail 1 section. Place the text field to the right of the static text you already dropped and positioned in step 2. This text field will show the value of each invoice issued to a customer in a month.
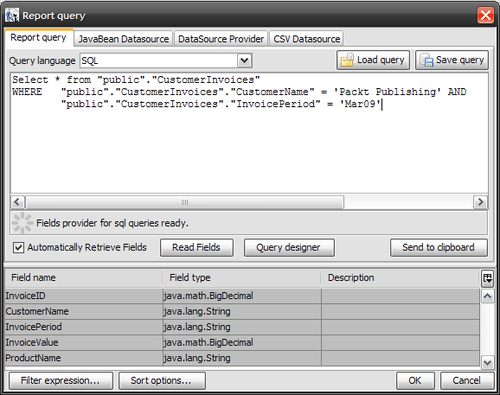
- Open the Report query window by clicking the Report query button to the right of the Preview tab. Its icon is similar in shape to a standard database icon and looks like A Report query window will appear, as shown here:
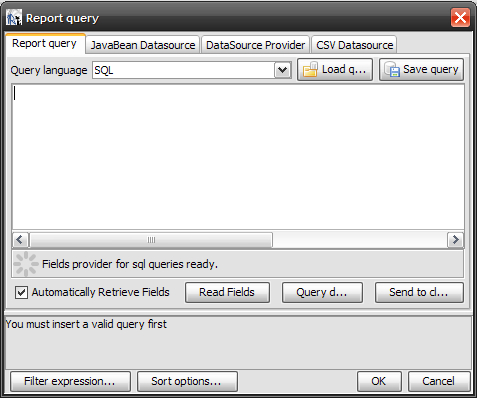
- Enter the following SQL query into the Report query window:
Select * from "public"."CustomerInvoices" WHERE "public"."CustomerInvoices"."CustomerName" = 'Packt Publishing' AND "public"."CustomerInvoices"."InvoicePeriod" = 'Mar09'
The lower part of the Report query window will show all five columns of the CustomerInvoices table. Click OK.
- Now you will link the text field you created in step 3 with the
InvoiceValuecolumn of theCustomerInvoicestable. For this purpose, right-click the text field and select the Edit expression option from the pop-up menu. An Expression editor window will open, as shown: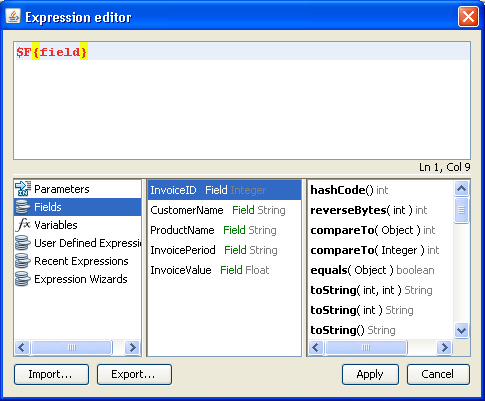
- Delete the existing text ($F{field}) from the Expression editor window and select Fields in the first column of the lower half of the Expression editor window. Then select
InvoiceValuein the second column, as shown.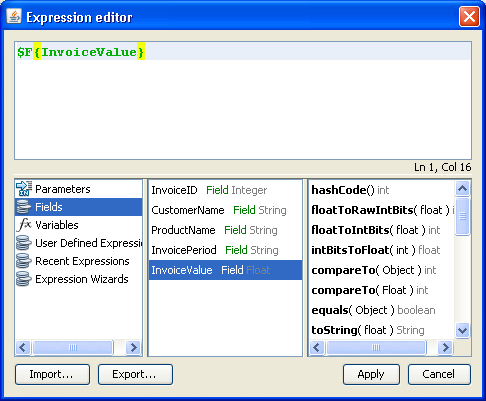
- Double-click
InvoiceValuein the second column and click the Apply button. This will attachInvoiceValuewith the text field:
- Now you will decrease the height of the Detail 1 section. For this purpose, click inside the Detail 1 section; its properties will appear below the Palette of components on the right of your iReport main window. Set 40 as the value of the Band height property in the Properties window. The Detail 1 section will look as follows:

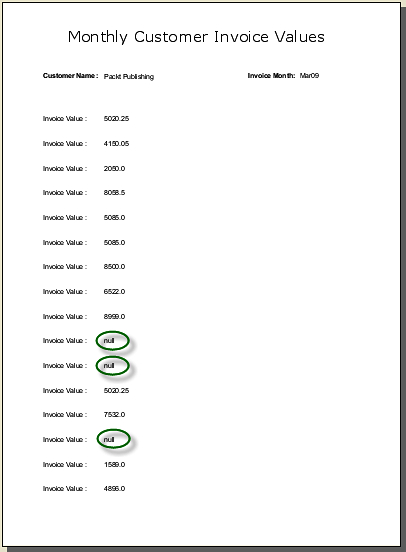
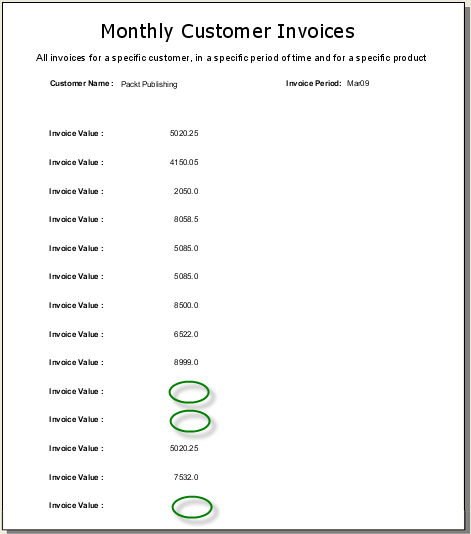
- Switch to the Preview tab and you will see that your report looks like the following. Also note that your report body contains null values, shown encircled in the screenshot here:
- Click on the
$F{InvoiceValue}text field component in the Detail 1 section. Its properties will appear in the Properties window just below the Palette of components. Find the Blank When Null property and check it, as shown in the following screenshot: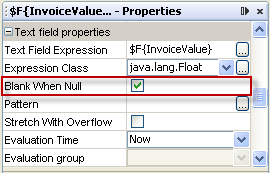
- Click the Preview button and you will see that the null values are replaced with blank spaces, as shown in the following screenshot:
Switch to the XML tab and you will see the following JRXML code:
<?xml version="1.0" encoding="UTF-8"?>
<jasperReport>
   <queryString>
<![CDATA[SELECT * from "public"."CustomerInvoices"
WHERE "public"."CustomerInvoices" ."CustomerName" = 'Packt Publishing' AND
"public"."CustomerInvoices" ."InvoicePeriod" = 'Mar09']]>
</queryString>
   <!-- other JasperReports XML tags -->
<detail>
<band height="40" splitType="Stretch">
 <staticText>
   <reportElement x="10" y="12" width="69" height="20"/>
  <textElement>
<font isBold="false"/>
</textElement>
<text><![CDATA[Invoice Value :]]></text>
</staticText>
<textField isBlankWhenNull="true">
<reportElement x="106" y="12" width="93" height="20"/>
<textElement/>
<textFieldExpression class="java.lang.String">
<![CDATA[$F{InvoiceValue}]]>
</textFieldExpression>
</textField>
  </band>
</detail>
<!-- other JasperReports XML tags -->
</jasperReport>
You can see that the<queryString> tag is highlighted in this JRXML code. The<queryString> tag wraps the SQL query that you authored in step 5 of this recipe. This query fetches all the records of the CustomerInvoices table.
You will also see a<detail> tag in the preceding JRXML code. The<detail> tag represents the body of your report, which you just authored in this recipe. The<band> child of the<detail> tag specifies the height of the section that you set in step 9.
The<band> tag contains a pair of<staticText> and<textField> tags. This pair of tags represents the label and value components you dragged-and-dropped in steps 2 and 3.
The<textField> tag has a child named<textFieldExpression>, shown highlighted in this JRXML code. The<textFieldExpression> tag has an expression ($F{InvoiceValue}) as its content. This $F{InvoiceValue} expression attaches the text field with the InvoiceValue column of your database. You authored this attachment in step 7 of the recipe, when you double-clicked InvoiceValue in the field expression window.
Finally, note that anything put inside the<detail> tag will be repeated for every record. You can simply say that JasperReports evaluates the data of the Detail 1 section once for every record. Then it appends the evaluated data at the end of what it already contains from the previous evaluation. This way JasperReports evaluates the Detail 1 section record by record until all the records are delivered. This is why the preview of step 10 shows the invoice values for all the records.