
Almost every report has a footer. The simplest footer will provide information about the report such as the name of the report and the date and time when the report was generated among others.
This recipe teaches you how you will display the name of the report and the date when the report was generated.
The steps to a simple footer design are as follows:
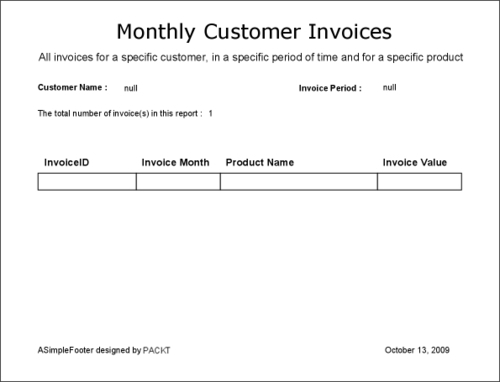
- Open the
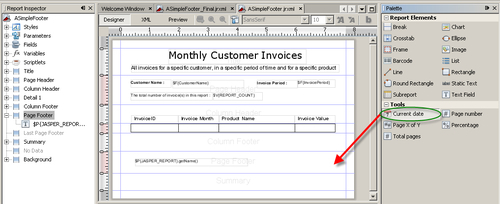
ASimpleFooter.jrxmlfile from theTask6folder of the source code for this chapter. The Designer tab of iReport shows that the report contains a main title, a subtitle, a page header, a column header, and an empty footer, as shown in the following screenshot: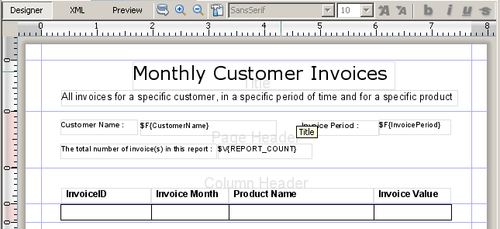
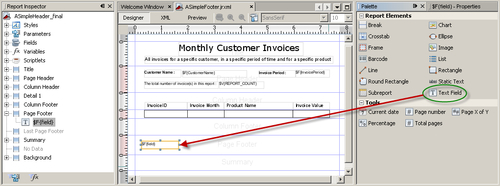
- Now you are all set to insert a simple footer into your report. A palette of components is available on the right of the main iReport window. Select the text field component from the palette and drag it into the Page Footer section in the Designer tab.
- Right-click on the text field component of step 2 and select the Edit expression option from the pop-up menu. An Expression editor window will open, as shown in the following screenshot:
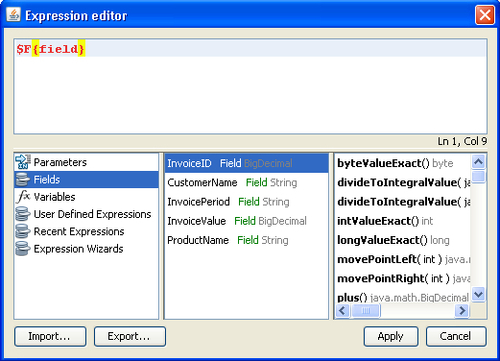
- Delete the default expression
($F{field})from the Expression editor window. - Click on Parameters in the first column of the lower half of the Expression editor window. This will list all the parameters in the adjacent second column. Scroll down the list of parameters in the second column to find the
JASPER_REPORTparameter and select it. This will list all methods for this parameter in the adjacent third column. Scroll down the list of methods in the third column to find thegetName()method. Double-click on it. This will set$P{JASPER_REPORT}.getName()in the Expression editor, as shown in the following screenshot: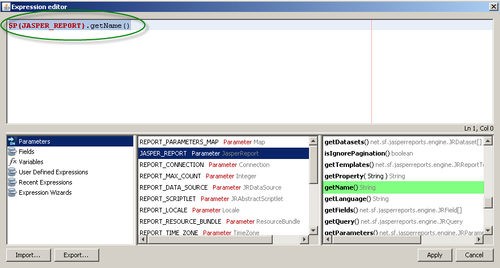
- Click the Apply button. This will attach the
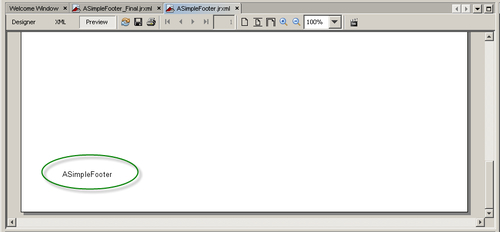
$P{JASPER_REPORT}.getName()expression to your text field component of step 2. - Switch to the Preview tab and scroll the vertical scroll bar down until you see the footer of your report at the bottom, as shown in the following screenshot:
- Switch back to the Designer tab for more editing in the Page Footer section.
- Now you are about to insert the current date into your report. Drag a new Current date from the Tools section of the palette and drop it into the Page Footer section of your report, as shown in the following screenshot:
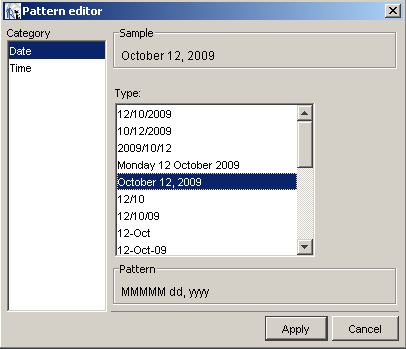
- A Pattern editor dialog will appear, as shown next. Select Date in the Category column and the appropriate date format from the Type column and click the Apply button.
- A text field with the
new java.util.Date()expression will appear in the Page Footer section of your report. Select this date text field component and use the arrow keys to roughly align this text field horizontally and vertically to the right-middle position in the Page Footer section of your report, as shown in the following screenshot: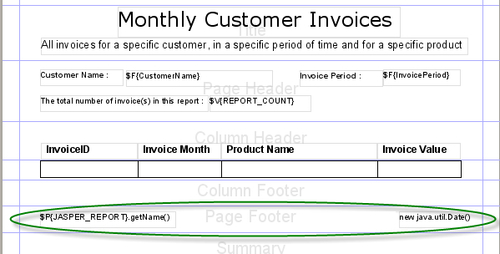
- Switch to the Preview tab. You will see the current date on the bottom-right corner of your report, as shown in the following screenshot:

- Switch back to the Designer tab. Select a static text component from the palette and drag it into the Page Footer section in the Designer tab.
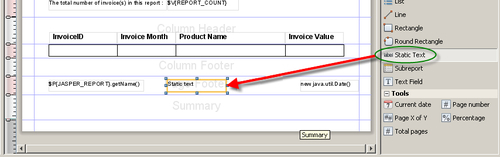
- Double-click and edit the static text component to add
designed by PACKTtext in it. Then select the static text component and use the arrow keys to select its position, as shown in the following screenshot: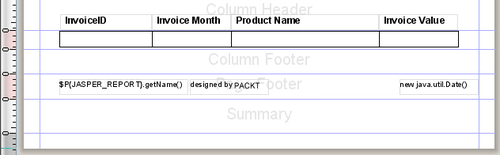
- Switch to the Preview tab, which shows what your report looks like.
- You have dropped three components (a text field, a date field, and a static text) into your report. Now you will combine the text field and static text components to improve the look of the Page Footer. Switch back to the Designer tab.
- Double-click the static text component and copy the selected text (designed
by PACKT)by pressing Ctrl+C. Then double-click on the text field component with the expression$P{JASPER_REPORT}.getName(),. The text of expression will be selected. Deselect the text and move your cursor to the end of the expression. Type+"and then a space, now press Ctrl+V to insert your copied static text (designedby PACKT). The expression in the text field component will change to$P{JASPER_REPORT}.getName() +" designed by PACKT. Move your cursor to the end of expression and press the " key of your keyboard. Now your expression in the text field component will look like$P{JASPER_REPORT}.getName() +" designed by PACKT". - Delete the static text component by selecting it and pressing the Delete key on your keyboard.
- Select the text field component with the expression
$P{JASPER_REPORT}.getName() +" designed by PACKT"using your mouse and increase its size by dragging its corners to show a full text view, as shown in the following screenshot: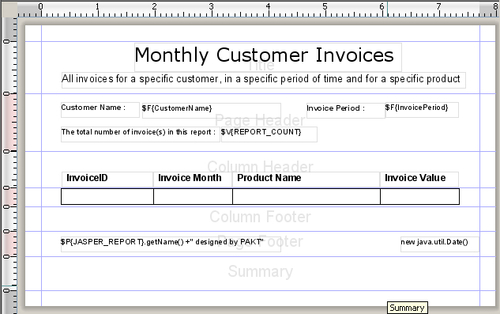
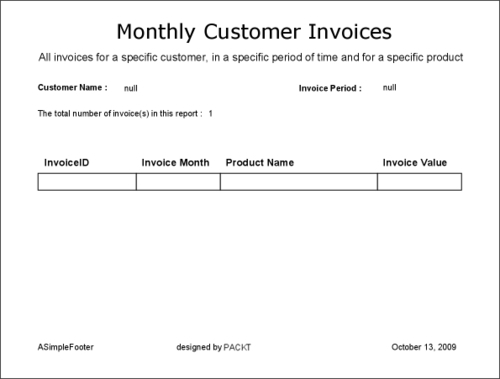
- Switch to the Preview tab, which shows what your report looks like:
- You have successfully designed a simple footer for your report. Save it by selecting Save from the File menu.
You have learned how to display the name of your report and the date when the report was generated in the footer. You have also learned the small trick of combining two components into one in step 17 of the recipe. Switch to the XML tab to see how all this works:
<?xml version="1.0" encoding="UTF-8"?>
<jasperReport>
<!-- other JasperReports XML tags -->
<pageFooter>
<band height="32" splitType="Stretch">
<textField>
<reportElement x="25" y="7" width="279" height="20" isPrintInFirstWholeBand="true"/>
<textElement/>
<textFieldExpression class="java.lang.String">
<![CDATA[$P{JASPER_REPORT}.getName()
+" designed by PACKT"]]>
</textFieldExpression>
</textField>
<textField pattern="MMMMM dd, yyyy">
<reportElement x="446" y="7" width="100" height="20"/>
<textElement/>
<textFieldExpression class="java.util.Date">
<![CDATA[new java.util.Date()]]>
</textFieldExpression>
</textField>
</band>
</pageFooter>
<!-- other JasperReports XML tags -->
</jasperReport>
I have shown only a<pageFooter> tag (which corresponds to the Page Footer section of your report) omitting all the other tags, which are not relevant to this discussion.
The<pageFooter> tag has a<band> child, with two children, both named<textField>. The first<textField> tag corresponds to the name of the report that you dropped in step 2 of the recipe and later edited in step 17. Notice that the expression and text combination that you authored in step 17 ($P{JASPER_REPORT}.getName() +" designed by PACKT) is part of the content inside the first<textField> tag. This means when you followed step 17, iReport copied the expression and text combination into the first<textField> tag.
The second<textField> tag simply corresponds to the Current date component that you dropped in step 9 of the recipe.
Also look at the $P{JASPER_REPORT}.getName() expression of step 5. JasperReports provides many other useful parameters like this JASPER_REPORT parameter, which holds information about your report (for example, the name of the report, the SQL query used in your report, and so on). You can follow steps 3, 4, and 5 to play with different available parameters and their methods to discover the different bits of information you can display in any text field.