
6. Starting MIDlets Automatically
ONE way a MIDlet comes to life is when a person chooses to run it. In this chapter, you’ll find out other ways that a MIDlet can be launched.
Incoming network connections can start a MIDlet. For example, a Short Message Service (SMS) message arriving on a certain port or an incoming socket connection could launch a MIDlet.
MIDlets can request to be started at a specific time.
MIDlets can respond to specific types of content. For example, an audio player MIDlet can be set to handle one or more audio file types. Other applications can ask the device to launch a MIDlet to handle a certain type of content.
6.1. Responding to Network Connections
MIDP defines a push registry so that incoming network connections can launch specific MIDlets. The push registry simply maps network connection strings to MIDlet class names. When a network connection comes to the device, a matching entry in the push registry will cause the corresponding MIDlet to be launched.
Three pieces of information are needed to register a MIDlet in the push registry:
A connection string represents an incoming network connection. You’ll learn all about connection strings in Chapter 18, but you’ll see some examples in this chapter. A connection string that represents incoming SMS messages on port 50,000 is
sms://:50000.A class name describes the MIDlet that should be launched to handle the network connection.
The last item is a string representing allowed senders. You can use wildcards in this string, so if you are interested in all incoming network connections from any address, use
*.
There are two ways to create an entry in the push registry. Dynamic registration occurs while the MIDlet is running. Static registration occurs when the MIDlet suite is installed.
6.1.1. Dynamic Registration
The push registry is represented by a single class, javax.microedition.io.PushRegistry, which has only static methods. To add an entry, just call registerConnection(). For instance, here is how to register PushyMIDlet to respond to incoming SMS network connections on port 50,000 from any sender:
![]()
This is powerful stuff. If this method succeeds, any incoming SMS message on port 50,000 will cause PushyMIDlet to be launched.
To clear an existing push registry entry, just supply the connection string to unregisterConnection(). The previous connection could be cleared like this:
![]()
6.1.2. Static Registration
Information about push registry entries can be embedded in the MIDlet suite’s descriptor. Your build tool will handle the details.
In the Sun Java Wireless Toolkit, click on Settings…, then choose Push Registry from the list on the left. Click Add to create a new entry. Enter a connection string, a MIDlet class name, and the allowed senders, and press OK to add the entry. You can examine the descriptor with a text editor to see the information that was added.
In NetBeans Mobility Pack, right-click on your project and choose Properties. Click on Push Registry in the left column and push Add…. Choose a MIDlet class name, specify the allowed senders, fill in the connection string, and press OK to add the entry.
When your MIDlet suite is about to be installed, the device finds the push registry entry in the descriptor. It can check to see if the specified connection is available. If it is available, the push registry will be updated as the MIDlet suite is installed.
Static entries in the push registry are automatically cleared when the MIDlet suite is removed from the device.
6.1.3. Finding Incoming Connections
To find out what incoming connections are mapped to your MIDlet suite, call PushRegistry’s listConnections() method. Pass false to listConnections() to get a list of every connection. Pass true to get a list of connections that have input available.
The connection strings returned by listConnections() tell only part of the story. They are the registered incoming connections for the entire MIDlet suite. If you want to find out the specific MIDlet class name and allowed senders, pass the connection string to getMIDlet() and getFilter() respectively.
6.1.4. A Push Registry Example
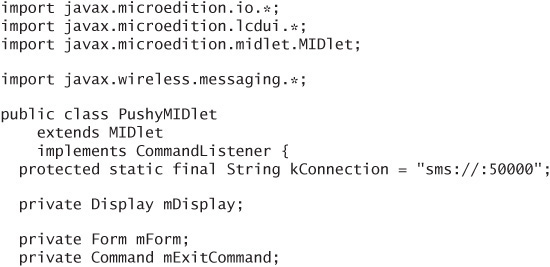
PushyMIDlet shows how to register and unregister with the push registry. It also retrieves the currently registered connections and any connections with waiting data:
To fully appreciate this example on an emulator, you need to simulate installing the MIDlet suite over the air (OTA), just as you would on a real device. The whole point of the example is to show how an incoming network connection can start a MIDlet that isn’t already running. In the Sun Java Wireless Toolkit, choose Project > Run via OTA from the KToolbar menu. Follow the prompts to install and run the MIDlet suite. Check the Users Guide if you are not sure what to do. NetBeans Mobility Pack uses the same emulator, so the installation and running will be similar. To activate OTA mode, right-click on your project, choose Properties, click on Running in the left pane, and choose Execute through OTA.
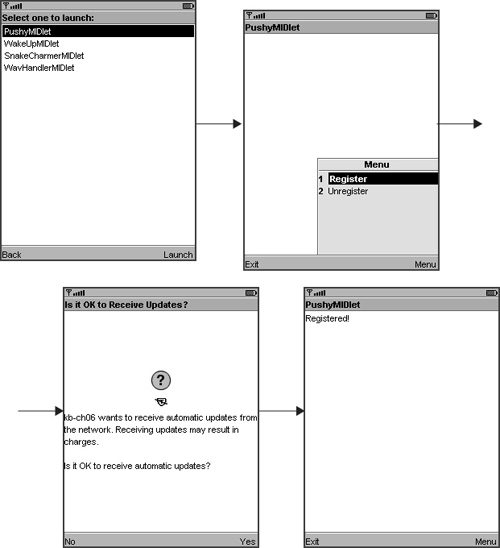
Run PushyMIDlet and choose Register to get set up in the push registry (see Figure 6.1).
Figure 6.1. Running PushyMIDlet
Now exit PushyMIDlet, which returns the emulator to its list of installed applications. A real device will return to its idle screen. To test the push registry, you must send an SMS message on port 50,000 to the device or emulator.
In the Sun Java Wireless Toolkit, you can use the WMA Console to simulate sending a message to the running emulator (Figure 6.2).
Figure 6.2. Using the WMA console to send an SMS message
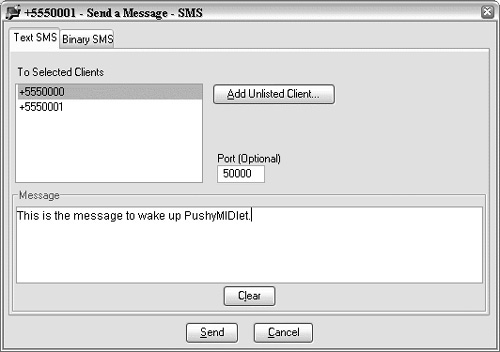
If you download the source code for the book, the kb-ch06 suite also includes SendMIDlet, which prompts you for a destination number and a message and sends the message on port 50,000.
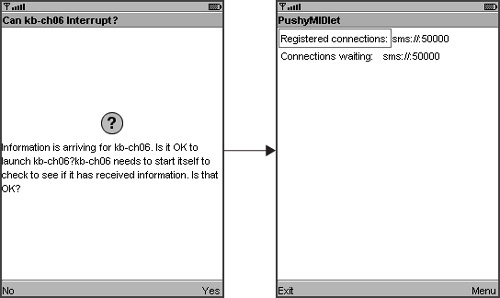
When the emulator receives the incoming SMS, it asks for permission to run PushyMIDlet. If you grant permission, you’ll see a message about a waiting network connection (Figure 6.3).
Figure 6.3. PushyMIDlet awakens!
Now that you understand how to run the example, take some time to understand the source code.
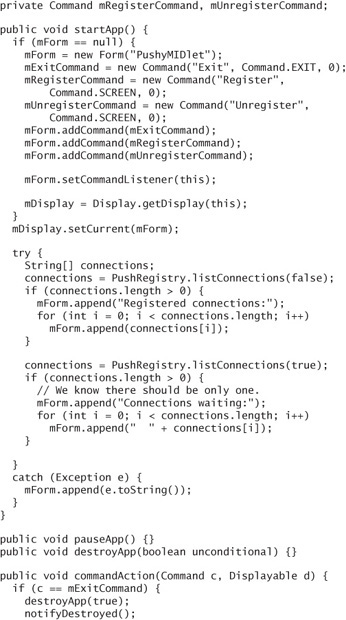
The first part of the constructor takes care of setting up the main form, which includes commands for registering, unregistering, and exiting. The second part of the constructor calls PushRegistry.listConnections() twice. The first time is to retrieve all registered connections. The second time is to retrieve connections that have waiting data. When you send a message to an idle emulator or device, PushyMIDlet should wake up and realize that data is waiting at sms://:50000.
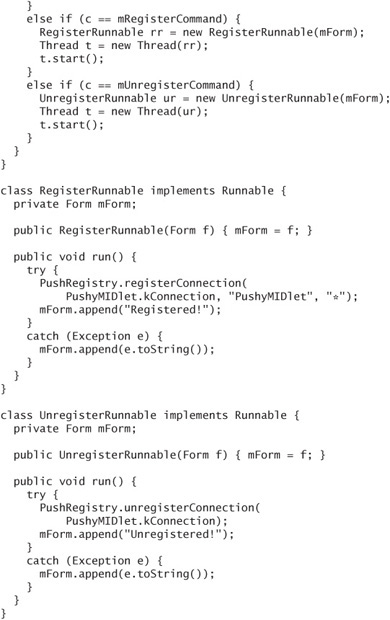
Other than that, it’s a mostly straightforward example. When you choose the Register or Unregister commands, the actual calls are put in their own threads, using RegisterRunnable and UnregisterRunnable respectively. As I mentioned, it’s a good idea to isolate networking or push registry code in an application thread rather than using the system thread that calls commandAction(). The Sun Java Wireless Toolkit emulator will get stalled if push registry work is performed in a system thread.
6.2. Running a MIDlet at a Specific Time
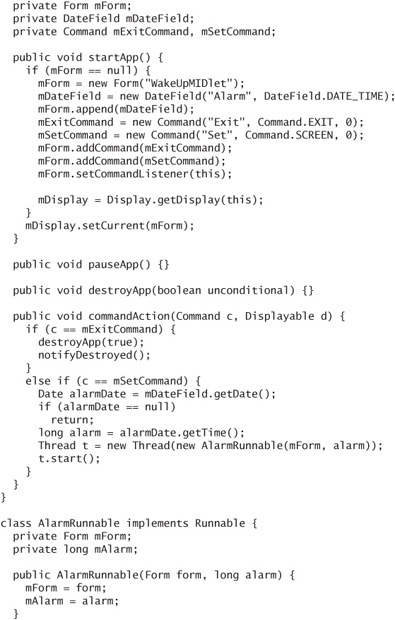
Use registerAlarm() in PushRegistry to request that a MIDlet be run at a specific time. Just pass a time (represented by a long). When the MIDlet runs, there is no way to know if it was launched by the user or by the push registry alarm. If you are writing an alarm clock MIDlet, you will need to store the alarm time and compare it to the current time when the MIDlet runs. Another strategy is have one MIDlet that sets the alarm time for another MIDlet to run.
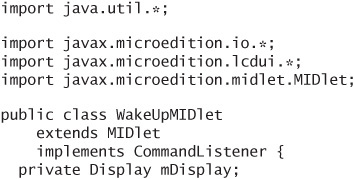
Here is a simple MIDlet that allows you to set a time for the MIDlet to be run again.
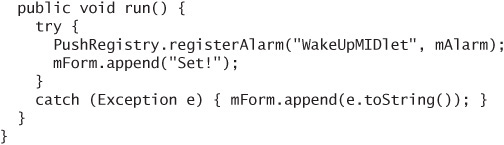
You will have to run WakeUpMIDlet in OTA mode in order to see things working on the emulator.
WakeUpMIDlet uses a DateField to allow you to set the alarm time. When you’ve set a time, choose the Set command to register the alarm with the push registry. Now exit the MIDlet and wait for your alarm time. The device will usually ask the user for permission to start up WakeUpMIDlet. When it starts up, you’ll just see the Form with the DateField again.
6.3. Responding to Content
Devices can receive and store many different types of content, including images, sounds, applications, and application-specific data like game levels. The JSR 211 Content Handler API (CHAPI) maps content to MIDlets. CHAPI is required by the MSA specficiation.
Content is mapped to MIDlets using the content type. A MIDlet that knows what to do with a certain type of content is a handler. Applications can request a handler for content that they do not recognize.
Handlers have associated actions, which are a high-level exposure of the kinds of operations the handler can perform with the content. To the rest of the world, a content handler is a magic box that knows what to do with some kind of content and gives the calling application some buttons to push. For example, a content handler that plays audio files could provide one action to play the content and one action to save the content on the local file system.
CHAPI is not restricted to MIDlets. Content handlers can be other types of applications, such as the Xlets of the Connected Device Configuration (CDC) stack or even native applications. Likewise, native applications on a device (a browser, for instance) are free to use CHAPI to find handlers for unrecognized content types. The device’s implementation determines the depth of native integration.
Although CHAPI has lots of potential, it is unclear how powerful real-world implementations will be. Lots of power is available if the device’s browser, messaging client, and e-mail client are all integrated with the CHAPI registry. In that case, a game application could act as a content handler and receive new game levels or add-ins via SMS or e-mail messages. Users could click on all sorts of interesting content in their browsers and have it displayed or consumed by content handler MIDlets. Unfortunately, neither the CHAPI specification nor the MSA specification makes any requirements on CHAPI’s integration with the rest of the device. In the absence of such teeth, CHAPI’s main value is allowing MIDlets to cooperate with each other.
In this chapter, I describe how your MIDlets can use CHAPI to run a content handler and how you can write a content handler MIDlet yourself.
6.3.1. Invoking a Content Handler
Your application can invoke a content handler without having to know much about the handler itself. The centerpiece of CHAPI is the javax.microedition.content.Registry class, which is conceptually similar to PushRegistry.
To run a content handler, first create an Invocation that represents the content you want handled, then pass it to one of Registry’s invoke() methods.
Here is a complete example that attempts to run a handler for an audio file on the Internet:
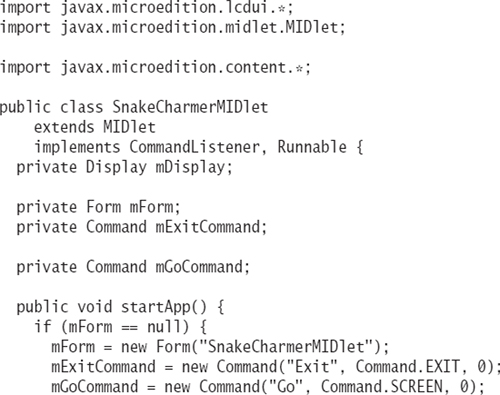
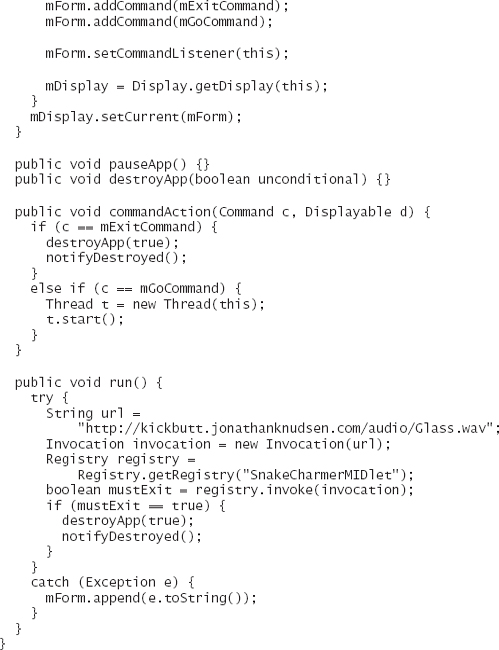
Everything up until run() has to do with the user interface of the MIDlet and should look familiar. In run(), SnakeCharmerMIDlet creates an Invocation based on the URL of an audio file. Then it retrieves an instance of the Registry by passing in its own class name. To find and invoke an appropriate handler, the MIDlet calls the Registry’s invoke() method.
On some devices (including the Sun Java Wireless Toolkit emulator), only one MIDlet can be running at a time. If invoke() returns true, it means that the current running application should shut itself down. The application management software (AMS) will take care of starting up the content handler and passing the Invocation to it. When the handler has finished and shut down, the AMS restarts the original application.
There are more complicated ways to create an Invocation. You can be more specific about the type of content, or you can even specify which content handler you wish to use. If the content handler supports more than one action, you can specify which action to use.
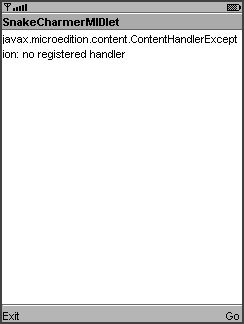
By itself, SnakeCharmerMIDlet isn’t much fun (Figure 6.4). You can try it if you wish, but without an appropriate content handler, all you’ll get is an exception from invoke(). The next section contains the content handler, and the following section describes how to make everything run.
Figure 6.4. It’s not much fun without the content handler.
6.3.2. Writing a Content Handler MIDlet
A content handler MIDlet resembles the basic structure of a push registry MIDlet. It usually runs a separate thread that listens for incoming content, and it checks for waiting content when initializing.
Here is a content handler MIDlet that knows how to play a WAV audio file. You’ll find all about audio in Chapter 23, but for now just take the two lines that play the file on faith.
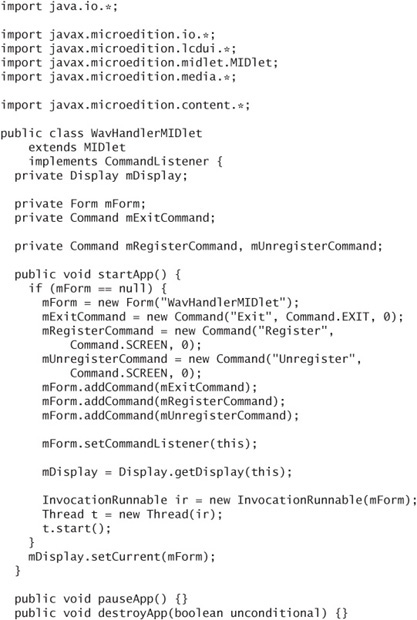
WavHandlerMIDlet includes three separate Runnable implementations for registering the content handler, unregistering the content handler, and waiting for incoming content.
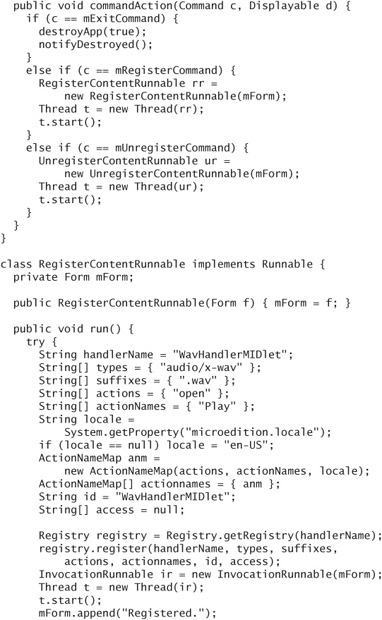
You need quite a bit of information to register a content handler:
The most important item is the class name of the content handler.
A string array contains the content types supported by the content handler. These should be MIME types. In our example, the content handler supports the
audio/x-wavtype.A string array of suffixes is a fallback for situations in which MIME types are not available. When reading data from a file, for example, the device might have to locate a content handler based on the filename
suffix.The content handler’s actions, and appropriate display strings, are passed as an array of
ActionNameMaps. Actions are strings that are specific to your application, but action names are suitable for display to the user. EachActionNameMapcontains action names in a specific language. In theWavHandlerMIDletexample, a singleActionNameMapfor United States English is used to map theopenaction to thePlayaction name.You can assign an ID to your content handler, which is useful if you want to invoke a specific content handler from another application.
Finally, if you wish to limit access to the content handler, pass a string array of IDs that are allowed access. Passing
nullfor this argument allows any application to use the content handler.
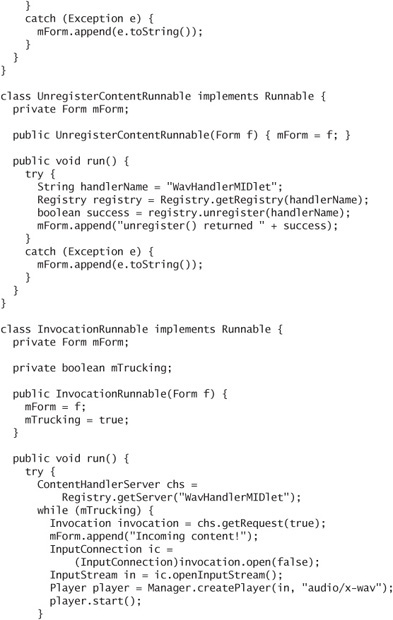
Unregistering is much easier. Just pass the class name to Registry’s unregister() method. If the return value is true, the content handler was successfully unregistered.
In WavHandlerMIDlet, the InvocationRunnable class handles incoming content. The basic idea is simple. Get a ContentHandlerServer and keep asking it for incoming Invocations. The ContentHandlerServer is returned from the Registry when you call getServer() with the class name of the content handler.
You can retrieve the next incoming invocation with getRequest(). Pass true to wait for an incoming request. If you pass false, getRequest() returns right away, but the result might be null.
Once you’ve got an incoming Invocation, you can retrieve the actual content by calling open() on the Invocation. The content is returned as a Connection or some subtype, which is fully covered in Chapter 18. The sound data is retrieved using this object.
6.3.3. Putting It All Together
Assuming you have SnakeCharmerMIDlet and WavHandlerMIDlet ready to go, here is how you can test them out.
First, try running SnakeCharmerMIDlet to verify that an appropriate content handler cannot be found. You’ll have to run the MIDlet in OTA mode. Once you’ve installed the MIDlet suite, run SnakeCharmerMIDlet and choose the Go command. You should see an exception message that says “no registered handler.” This makes sense.
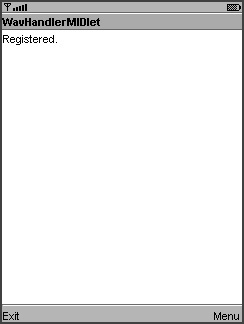
Next, run WavHandlerMIDlet and choose the Register command. You will see a message on the screen that says “Registered” (Figure 6.5).
Figure 6.5. Now the content handler is registered.
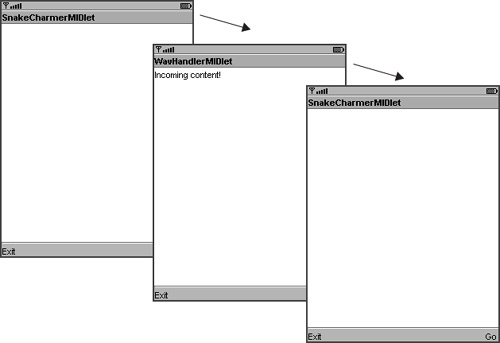
Now exit WavHandlerMIDlet and go back to SnakeCharmerMIDlet. This time when you choose Go, SnakeCharmerMIDlet exits to allow WavHandlerMIDlet to launch and play the sound. When you manually leave WavHandlerMIDlet, SnakeCharmerMIDlet is automatically started again (Figure 6.6).
Figure 6.6. WavHandlerMIDlet obligingly handles content for SnakeCharmerMIDlet.
6.3.4. Static Content Handler Registration
WavHandlerMIDlet shows how to register a content handler at runtime, but you can also arrange to have content handlers registered at installation time. This is also similar to how the push registry works. Special attributes in the MIDlet suite descriptor specify which content handlers should be registered when the MIDlet suite is installed.
Your development tool formats the attributes for you. In the Sun Java Wireless Toolkit, click on Settings… in KToolbar, then choose Content Handlers from the list on the left. Click Add to add a new content handler. You can specify all the same information that gets passed to Registry’s register() method, like content types and filename suffixes. The Actions tab gives you a chance to enter the actions and action names for as many locales as you wish.
In NetBeans Mobility Pack, you will have to add the attributes manually. By the time you read this, things might have changed, but right now, the content handler attributes appear in the list as custom items. To see how this works, use NetBeans to import the CHAPIDemo project from wherever the Mobility Pack is installed. Then right-click on the imported project and select Attributes in the left pane.
6.4. Summary
This chapter describes how MIDlets can be run automatically. The push registry can launch MIDlets to respond to specific types of incoming network connections. MIDlets can register at runtime using the PushRegistry API or at installation time based on MIDlet suite descriptor attributes. MIDlets can also be launched at specific times. The Content Handler API makes it possible for MIDlets to launch other applications to display or manipulate specific kinds of data. Content handlers can be registered through the Registry API or at installation time based on descriptor attributes.