Sewing


Have you ever been having sew much fun you didn’t realize you were building your skills? Join us as we take you from the basics of hand stitching to the fun of machine sewing and off to the world of creative design! As you are learning new skills you will be making projects that are exciting and fun. Once you learn the basics, you can add your own design elements and embellishments, which increase not only your knowledge and skills, but the fun factor as well! When you become comfortable sewing simple projects, you will then move on to creating items just for you!
This section offers a unique view of sewing, which needs your creativity and imagination to see how far you can go. A simple task of stitching a chenille pot holder can expand into making a chenille rug for your pet—or even one for your room! After completing a technique and project, think of how to expand, change, or embellish it. Your imagination will become the focus as you move through the book and build your skills and confidence.
Your job is to believe in yourself. You’ll learn about the tools you will need, the machine you will use, and how to organize your sewing tools. In addition, you’ll learn how to be safe while using the machine and sewing tools. All the techniques and know-how can be learned in this book while having fun.
The more you know, the more fun it is to sew.
The more you sew, the more you will know!
As you begin to sew, you will be using tools that, perhaps, you have never seen or used before. Although we will describe the correct way to use these tools and give you tips on safety, it will be up to you and your parents to discuss what they feel comfortable with you using—whether it will be alone, with adult supervision, or with adult assistance. It is important to keep in mind that many of these tools are pointy, sharp, or hot, and you will need to remain focused as you use them. Always ask for help if you are unsure.
Like the rest of the book, this chapter features several projects, all of which have suggestions and tips on how to make it your own through embellishment and design. Throughout this section are tips that will explain special methods and offer ideas or refer you to a page where you can learn more. We hope you find this system easy to use so all the information you need is at your fingertips.
—Janith Bergeron and Christine Ecker
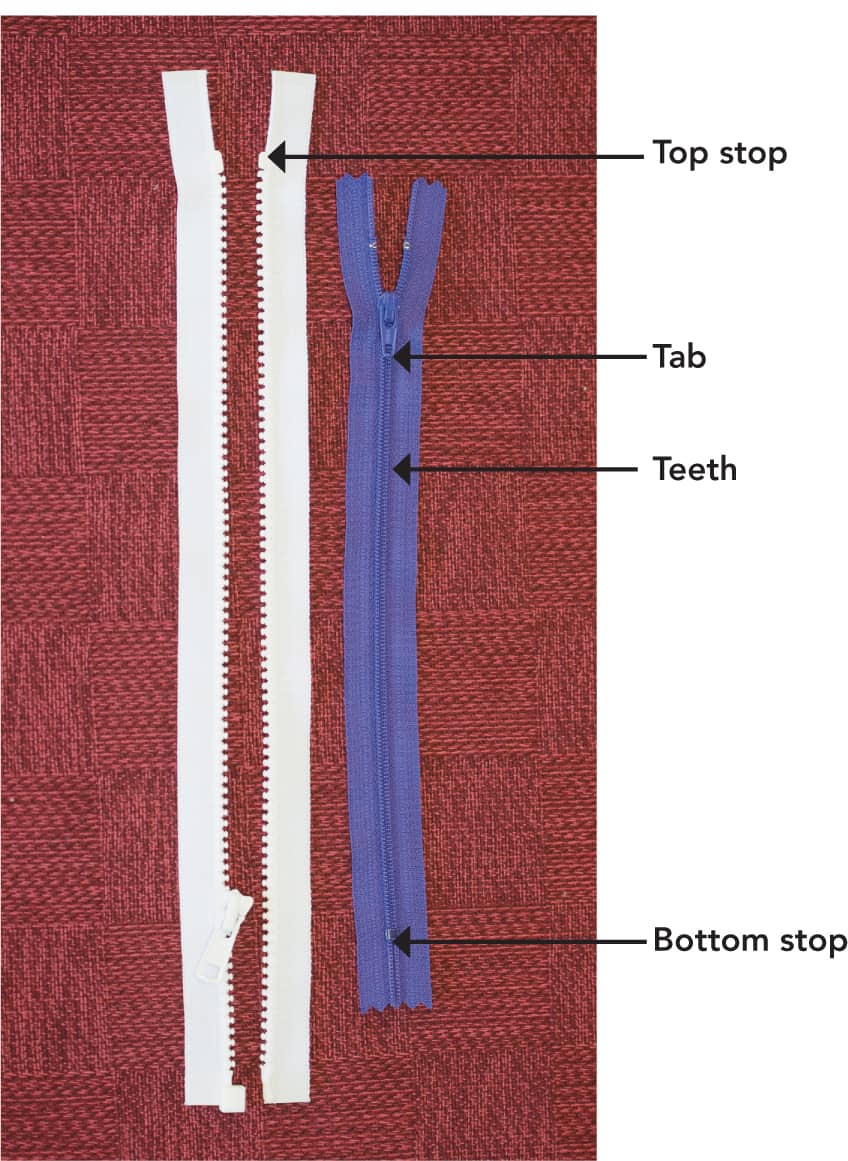
The following offers a brief description of fabrics and fibers used in this book. It by no means is a complete list of what you may find or choose to use. Pretesting is always recommended. Fabrics can be woven, knit, or felted. Batik Light- and medium-weight cotton or rayon. Resist dyeing creates beautiful designs. Canvas A heavy-duty woven. It can be used as a stabilizer. Cotton A versatile woven fabric whose fibers come from the cotton plant. Corduroy A woven fabric with ridges that run the length of the fabric. These ridges can range from very fine to a wide-wale corduroy. It is strong and wears well. The nap is important. If cutting multiple pieces, make sure the nap goes in the same direction. Denim A strong cotton fabric. Pretreating is important. Felt This is a nonwoven made of pressed fibers. Wool felt is pressed with 100% wool fibers or wool and synthetic fibers. Craft felt can be thick and strong or weak and flimsy and is pressed synthetic fibers. Fleece This synthetic material is lightweight and provides warmth. It doesn’t fray or shrink. Fusible Interfacing This material is either woven or pressed fibers with the addition of adhesive (glue). It is used to stabilize a thin material or add body and stiffness to areas of garments (such as collars and cuffs). Fusible interfacing is pressed onto the wrong side of the fabric using a hot iron and a press cloth. Enough heat and pressure are required to melt the adhesive or puckers will appear and the interfacing will not be effective. Fusible Web This material comes in sheets or in a roll of various widths and has a paper back to protect the glue surface. It has many uses and is very helpful in appliqué work. It is fused onto the wrong side of the design, the paper is removed, and the design is then fused to the project. Knit This nonwoven material ranges from thin T-shirt to thick sweatshirt fabric, and is stretchy. Muslin A plain-weave fabric, muslin is usually made from cotton or a cotton blend. It is sold in a variety of qualities. Nonwoven Fabric These materials are made of pressed fibers and have no grain lines. Examples include fleece and felt. Polyester This fabric is made from synthetic fibers (petroleum-based products). Most are not biodegradable. Beware that you must use a cool/warm iron and a low dryer temperature, or polyester can melt. Sew-in Interfacing This is an interfacing that must be sewn into the garment when making seams, unlike the fusible interfacing, which is fused with adhesive to the garment using a hot iron. Woven Fabric This material contains warp fibers (threads put onto a loom before the fabric is woven) and weft fibers (threads woven across and through the warp fibers). Raw Edge The raw edge of fabric is the cut edge, and this is prone to fraying or unraveling. Take care to finish off the raw edges. Selvage (or Selvedge) The selvage is the edge of the fabric. Some selvage edges are printed with information about the manufacturer or company or even offer little dots displaying the colors used in the fabric. The selvages are often more tightly woven and can shrink at a different rate from the fabric, so they should be cut off and not used as part of a project. Directional Designs If you are working with a print, take a careful look at the direction of the design. Designs can go one way (such as letters), two ways (such as stripes), or in any direction (such as polka dots). The distance from one design to the next is called a repeat. Nap This is a texture on the surface of the fabric. It is smooth in one direction and rough in the opposite direction. Make sure the nap goes in the same direction when piecing fabric together. Grain Line The grain line describes the direction in which the fibers line up in the fabric. It’s important to cut out pieces from material in the way the pattern directs, because it will affect how much the fabric stretches. Straight of grain means the cuts are made parallel to the selvage edge, and this will give the strongest piece of material with little, if any, stretch. Cross grain means the cuts are made from selvage edge to selvage edge (the opposite of straight of grain) and has a bit of stretch. Bias means cutting on the diagonal of the fabric (corner to corner), and it has the most stretch. Pretreating It’s important to wash and dry a fabric before you use it because most fabrics shrink. Less expensive fabrics have a “sizing,” or stiffening agent, such as starch, added to them. Sizing washes out, often leaving fabrics thin and limp and not acceptable for certain projects. Some fabrics may need to be dry-cleaned, depending on the fiber. Zippers If your project calls for a zipper, it will specify which type of zipper to use. All-purpose zippers (right) do not separate at the bottom, and they come in different weights to suit the project. Separating zippers (left) come apart in two pieces. Zippers like the white one shown have teeth that are intended to be exposed. You can shorten an all-purpose zipper by creating a new zipper stop at the desired length. Center the closed zipper under the presser foot, set the machine stitch length to 0 and the stitch width to the widest setting. Using your handwheel, zigzag five times over the zipper teeth to create a bar tack. Trim the excess zipper tape using an old scissors.
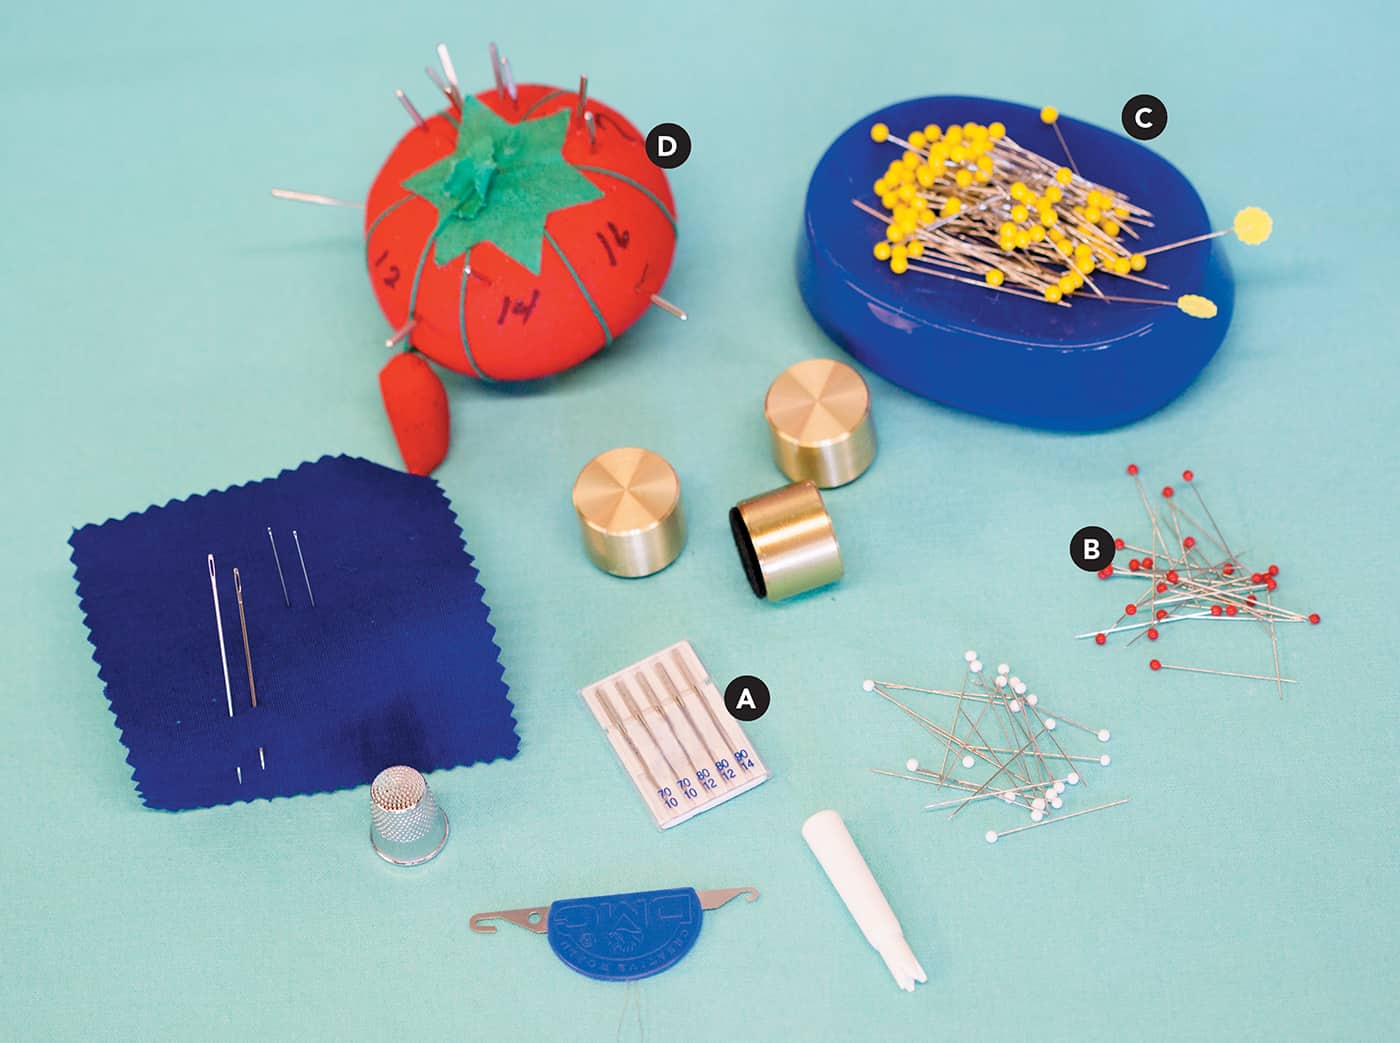
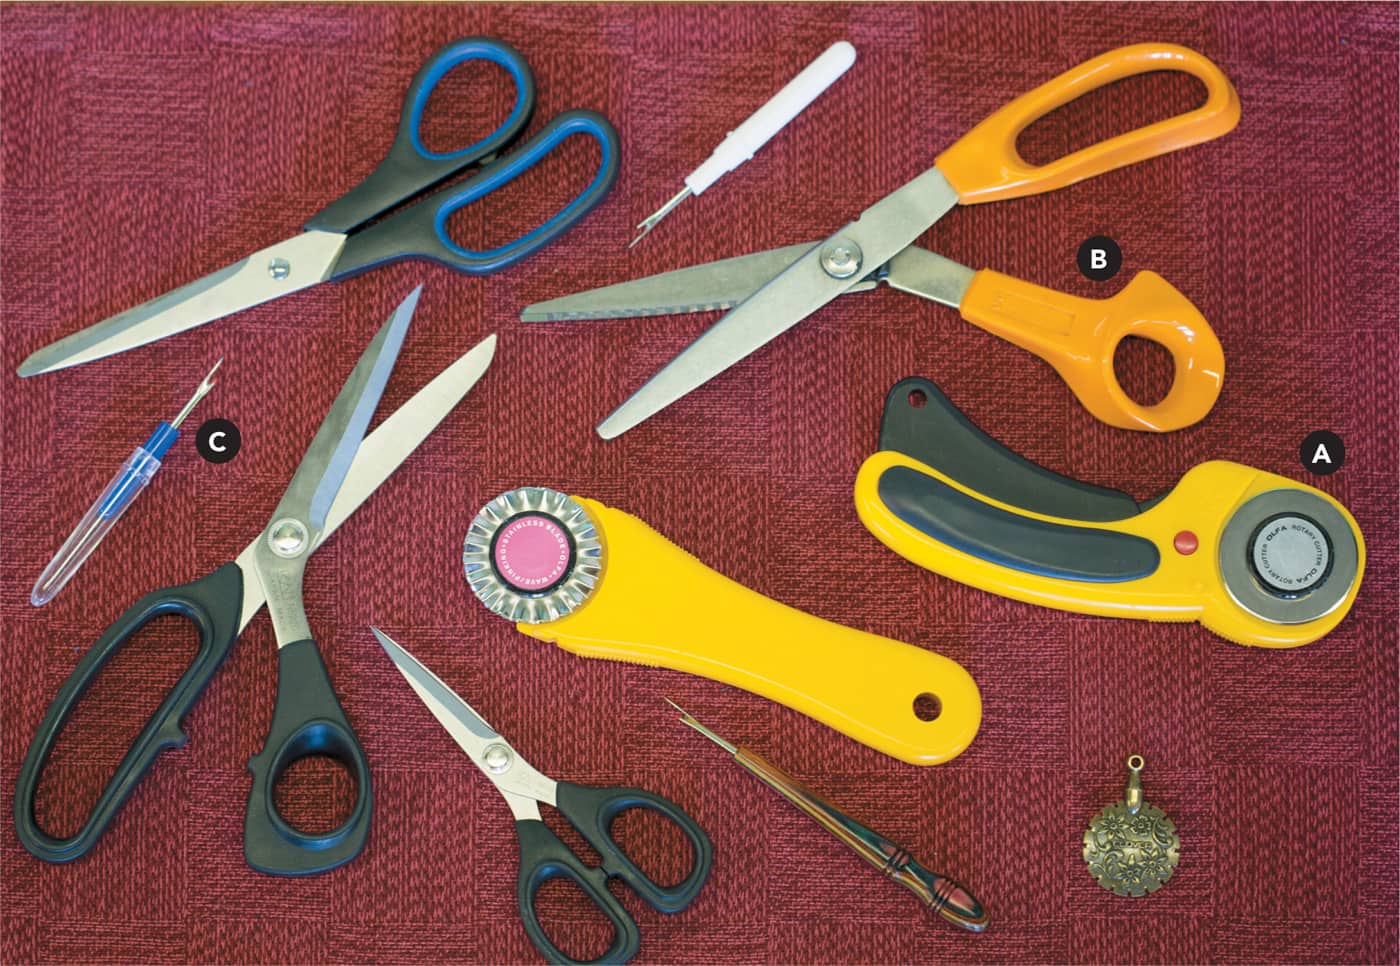
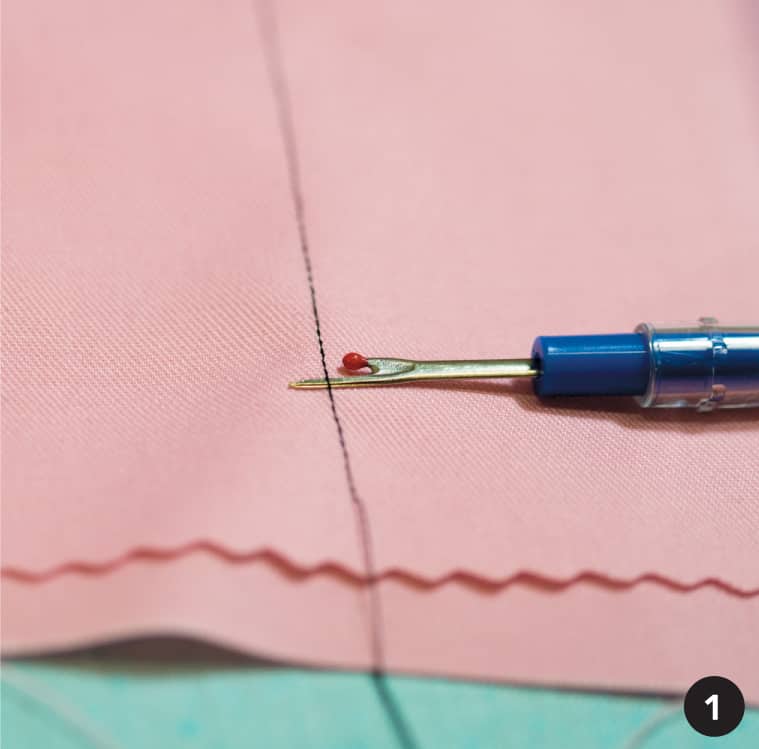
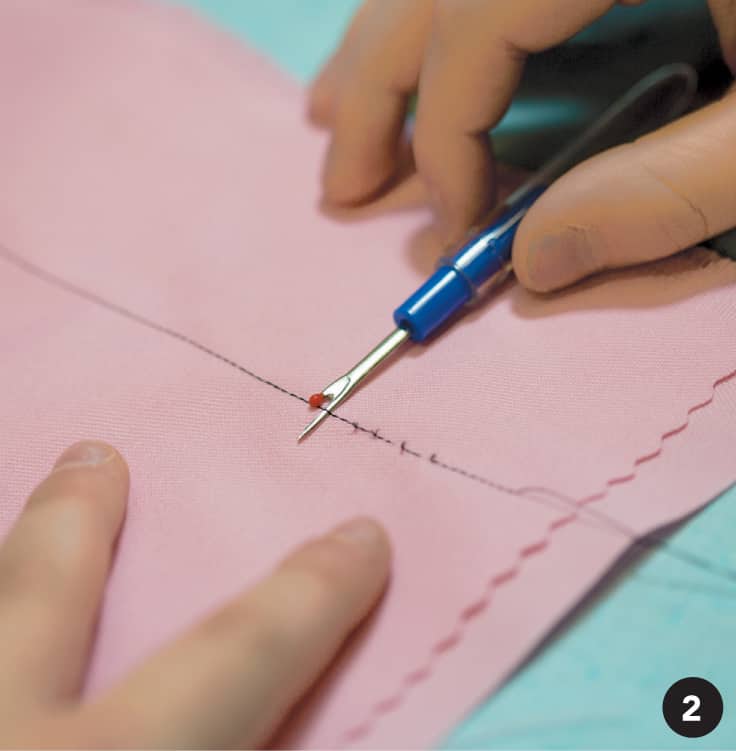
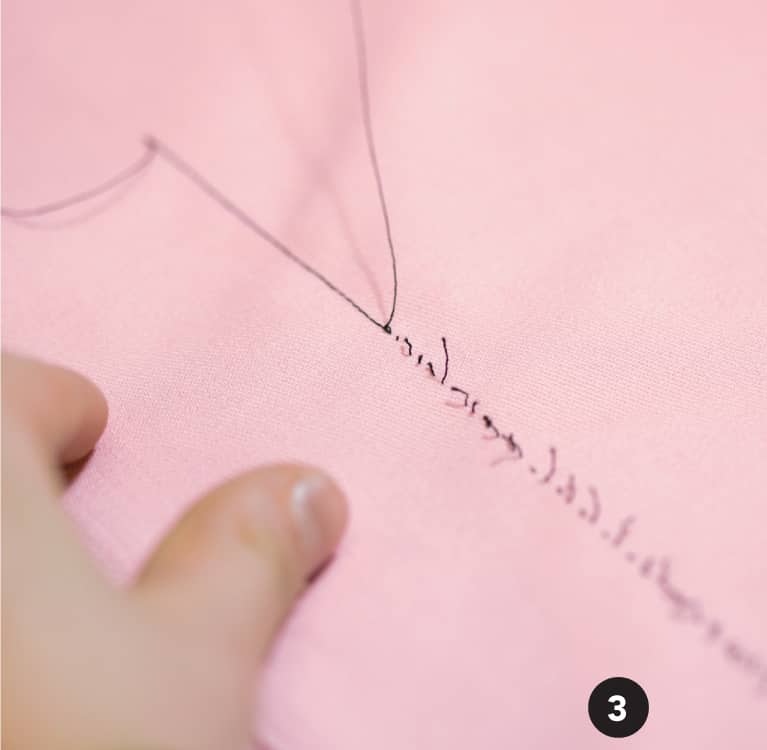
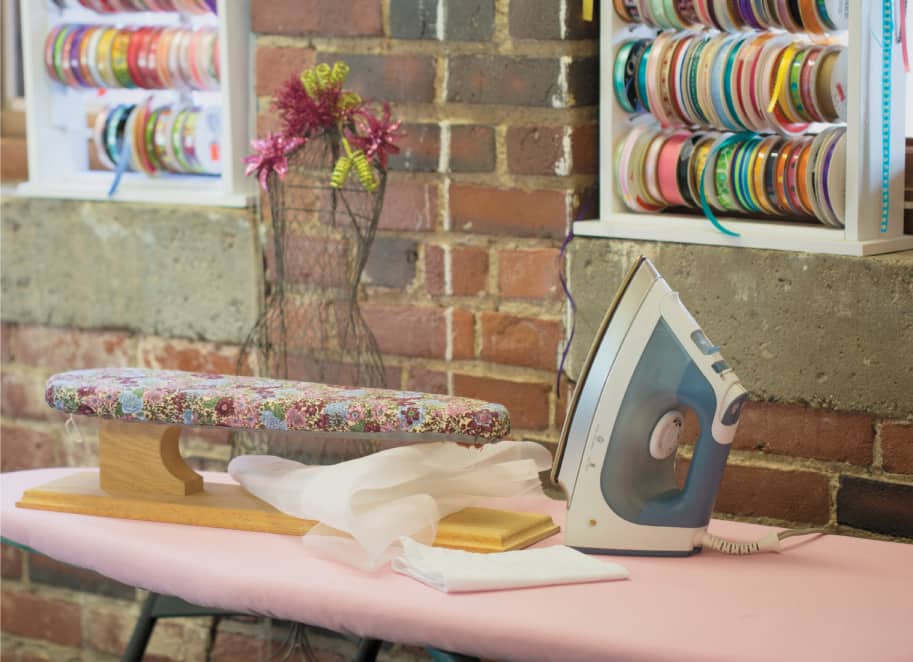
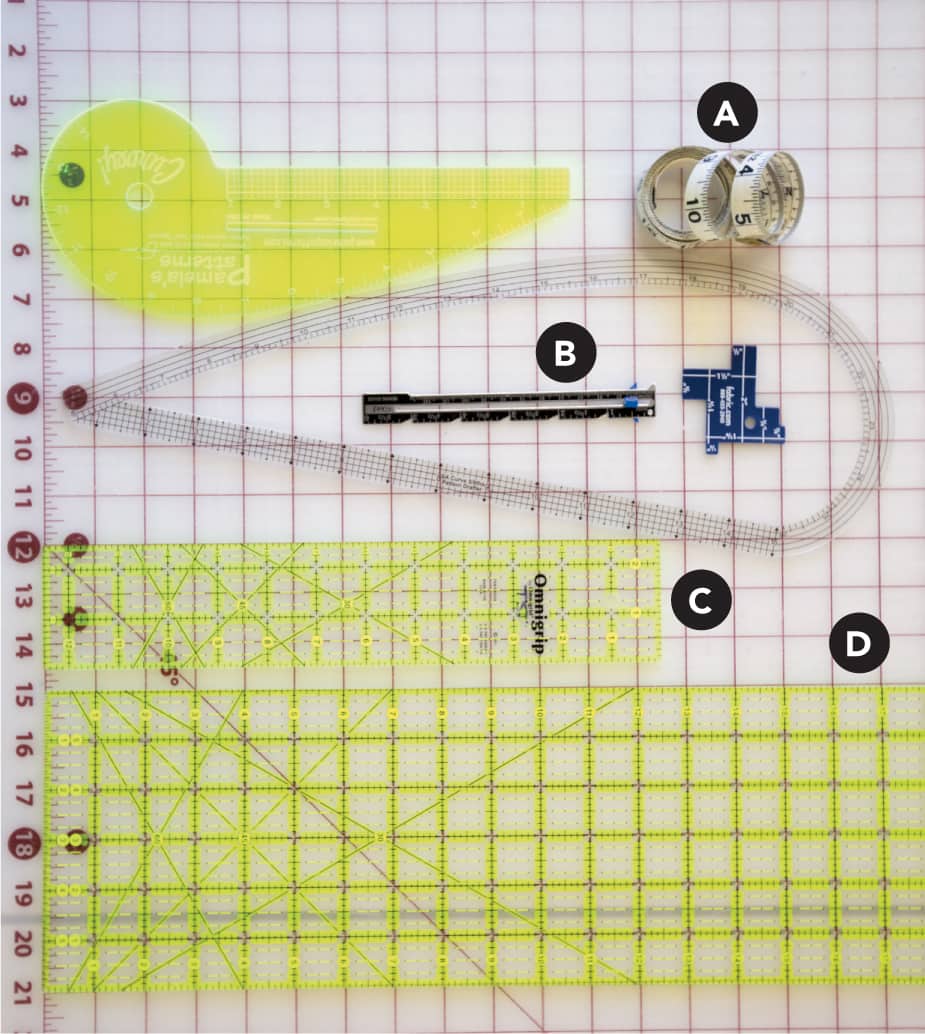
PARTS OF A ZIPPER Many of the tools and materials you’ll need are listed on these and the following pages. You might not use all the materials and tools pictured in the projects that follow, but they are handy to know about for future projects. Machine Needles (A) Needles are important to understand and as you sew you will learn more and more about why they are shaped a certain way and which needles sew best on which fabrics with which threads. For now, it is important to remember that needles are disposable. They will get dull, bend, and even break at times! You should change your needle after every eight hours of sewing, more often if you are having trouble with missed stitches or frayed and broken thread, or are sewing on specialty fabrics. When you are sewing on woven fabrics you will use a “sharp” class of needle and when you sew on knits or things that stretch you will use a “ball” or “stretch” needle. Needles range in size, with the smaller number needles used for lighter weight fabrics while sewing with finer threads. Heavyweight fabrics use a larger needle, which can accommodate a heavier weight thread. There are also twin needles, triple needles, and double-eye needles, as well as needles for metallics, embroidery thread, and leather, plus many, many more! You should use the correct needle for the project at hand. Pins: (B) Pins come in a variety of sizes with different shaped heads. Sturdy pins approximately 1¾" (4.5 cm) long with round heads are helpful when you are beginning to sew. This will give you something substantial to grasp as you learn how to pin, and they will not bend as easily as some other pins. However, they have plastic heads that will melt, so be careful when pressing. Other types of pins include glass head pins, which will not melt when used at the iron, and flower head pins, which have larger heads that are flat and easy to see, making it easier to put a ruler over them when measuring. The flower head pins also hold lace and loosely woven fabrics without having the head slip through the holes. Whatever type of pin you use, the important thing to remember is to discard your bent and dull pins. Magnetic Pin Cushion (C) This is a great way to store your pins. It’s easy to use and great for picking up if you drop any! Tomato Needle/Pin Holder (D) Mark needle sizes on the sections of a tomato-shaped cushion and you will always know where to find the correct needle! Thread The type and weight of thread is chosen based on the fabric that you are using. Thread is made of fibers that are twisted together. Higher quality thread is made of fibers that are long, making the thread strong and smooth. Poorer quality thread is made of shorter fibers, which weaken it, allowing it to break and fray more easily. It can also cause the thread to have a fuzzy look, so if you use it to topstitch a seam it can look unfocused. Make sure you use a quality thread instead of bargain thread to have more success and less frustration. Scissors You will need two pairs of good-quality scissors in your sewing basket: one pair of angled shears approximately 8" (20 cm) long and a short pair of scissors about 5" (12.5 cm) long. The shears are used to cut your fabric and the shorter scissors are for thread cutting and smaller cuts on fabric like trimming corners. Both of these scissors should only be used on fabric! Cutting paper with them will dull them and make it hard to cut your fabric precisely. It is a good idea to have a pair of paper scissors in your tool kit as well. Snips are very small scissors that are used just for clipping threads. Zipper scissors are the pair of old scissors you use to trim across the zipper teeth. This will ruin the scissors, so it is usually the oldest pair of scissors you can find! Rotary Cutter (A) A rotary cutter, gridded mat, and gridded ruler are used together to cut fabric with nice clean edges. This is a time-saving way to cut, but it does take a bit of practice. When you purchase a rotary cutter, it is best if you buy one that automatically retracts the blade when you release the grip. Use the grids on the mat to line up your fabric along a straight edge, lay your ruler on top of the fabric, and make sure you check that the ruler is lined up on your guidelines at the top and the bottom. It is easy to cut a crooked line if you don’t check both. To hold the ruler in place, use the pads of your finger and thumb to create five points of pressure. This will hold your ruler in place better and be safer than placing the palm of your hand on the ruler. Press the grip of your rotary cutter and squeeze to engage the blade. Place one finger on top of the rotary cutter to gain the proper pressure as you cut. Starting just off the beginning of your fabric, place the blade flush against the ruler. Press firmly and start rolling along the ruler to cut your fabric. Use a smooth forward motion and resist sawing back and forth. You should always cut away from or across your body, never toward it. Rotary cutters are very sharp and should only be used with adult supervision. Pinking Shears (B) Pinking shears are scissors that have a blade made up of points so that when it cuts your fabric it makes a zigzag edge. This is an easy way to finish the raw edge of your fabric to reduce fraying. Another option for pinking edges is a wave rotary cutter blade. Seam Rippers (C) Seam rippers are used to unstitch seams that didn’t sew correctly or are in the wrong spot. Seam rippers have a blade in the curved area near the pointed end and usually have a ball to protect your fabric from getting snagged. They are disposable and should be discarded when the blade becomes dull and you have to start pushing too hard to cut the thread. The best way to rip a seam—putting the least amount of stress on your fabric and leaving the smallest holes—is to lay it flat, slip the point of the seam ripper under a stitch (1), and gently push away from you to cut the threads (don’t pull up on your seam ripper or you can poke your eye!). Cut every three or four stitches (and every backtack stitch) (2). Turn the fabric over and pull the thread, “unzipping” the seam (3). Iron and Ironing Board You will need a good iron and an ironing board to make your projects look as professional as possible. An iron is very hot and should only be used with adult supervision. Never leave the iron lying flat on the ironing board, as it will burn if left too long. It is important to take care not to scratch the soleplate (bottom) of your iron. An iron that steams from the bottom is preferable to one that sprays water out the front. Pressing correctly and taking the time to do it well will do as much for your project’s appearance as stitching a straight seam. Remember that before you cut your fabric, it is okay to iron your material, meaning you can move your iron around and slide it on top of the fabric. Once you have cut the fabric out, you will need to press your fabric by lifting the iron off the fabric when you move it to a different place so as not to distort or stretch the fabric. Press Cloth Silk organza or a polyester-organza blend are great because you can see through them and they can withstand high heat. An old, clean cotton handkerchief will do in a pinch. Using a press cloth protects your fabrics. When fusing interfacing it will keep your iron clean, and it can be laundered. Measuring Tape (A) A flexible 60" (152 cm) fiberglass tape measure is used to measure around the body. Hem Gauge (B) A hem gauge is a handy tool for easy marking and can be used at the iron as well. It is easy to move the blue slider to hold your measurement. Gridded Ruler (C) Gridded rulers come in many sizes and usually have 1" (2.5 cm) squares to help line things up. They are easy to read and are sometimes used with rotary cutters and gridded mats. (See Rotary Cutter here). Beware that “quilter’s rulers” sometimes add ¼" (6 mm) seam allowances to the rulers. Gridded Mat (D) A large gridded mat will help you measure accurately and “square” things up. It is a great workspace for cutting and pinning. Marking Tools (A) There are a variety of marking tools out there; some work great and others not so much. We have found that when you are marking your fabric, generally a regular pencil or colored pencil will work and comes out easily. If you are marking somewhere on your project that may show (e.g., darts, placement lines, etc.), you should use tailor’s chalk, which does not have any wax in it and will brush off fabric easily. Most important is to test your marking tool on a scrap of your fabric to make sure it will come out easily. Point Turner (C) Point turners are used to reach into corners and points to make them the proper shape. You can use the rounded side to ease curves into their natural shape as well as running along straight seams to straighten them out, thus making pressing easier. Point turners come in bamboo or plastic. Magnetic Seam Guide (D) A magnetic seam guide can be a help if you are having difficulty staying on a certain seam allowance marking on your machine. You can place the magnetic guide at the seam allowance mark on your throat plate and butt the fabric up against it to stay on the line. Do not use magnets on computerized machines. Hump Jumper (E) A Hump Jumper can help you go more easily over thick seams or uneven fabrics. It slips under your presser foot to raise it to the level of thick fabric and allow your machine to stitch better. Tool Box A medium-size, clear plastic food container works well for a tool kit. Scissors Pins Needles Hem gauge Measuring tape Thread Marking tools Seam ripper
If you come across something you are not familiar with or wish to know more about, chances are it will be in the Appendix: information on the sewing machine, a tool kit, and understanding fabrics and fibers are at your fingertips. Taking a quick walk through these pages will allow you to get up and running with the fewest problems. We’ll practice some stitching on paper and learn some basic techniques. Then you can move on to the first project.Materials and Tools
Fabric and Fibers
Types
Working with Fabric

Tool Kit
Needles and Pins
Thread
Cutting Tools
Pressing Tools
Measuring Tools
Other Handy Tools

Standard Sewing Tool Box
Getting to Know Your Machine
 First, identify key parts of your machine and understand how they work. Sit at your machine with your owner’s manual and refer to the Appendix in the back of this book entitled “Sewing Machine” to explore the parts of your machine and see how they move. It is best if you do this with a machine that is not threaded so that you will not run into tangles and can focus more clearly on the machine itself. Obviously, when you get to threading the machine and seeing how a stitch is formed you will need to thread your machine. If you do not have a manual, most can be downloaded from the Internet. Remember that proper maintenance and frequent cleaning of your machine will keep it running smoothly, which will translate into more fun for you! Once you have explored your machine parts, practiced using your foot pedal, wound a bobbin, and threaded your machine, it is time to talk about putting it all together!
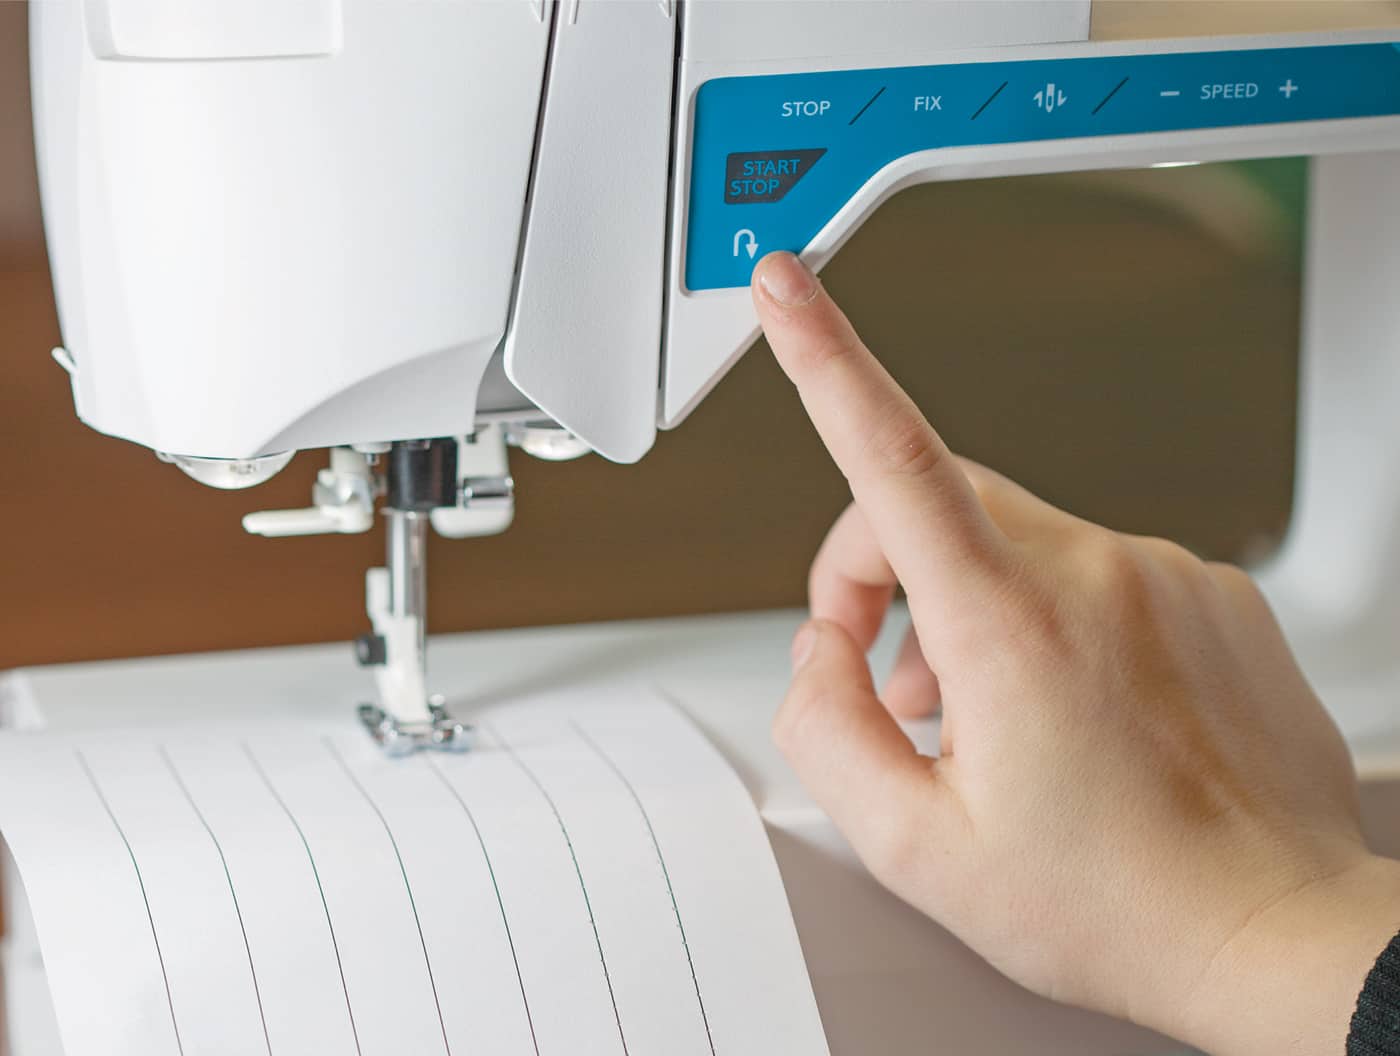
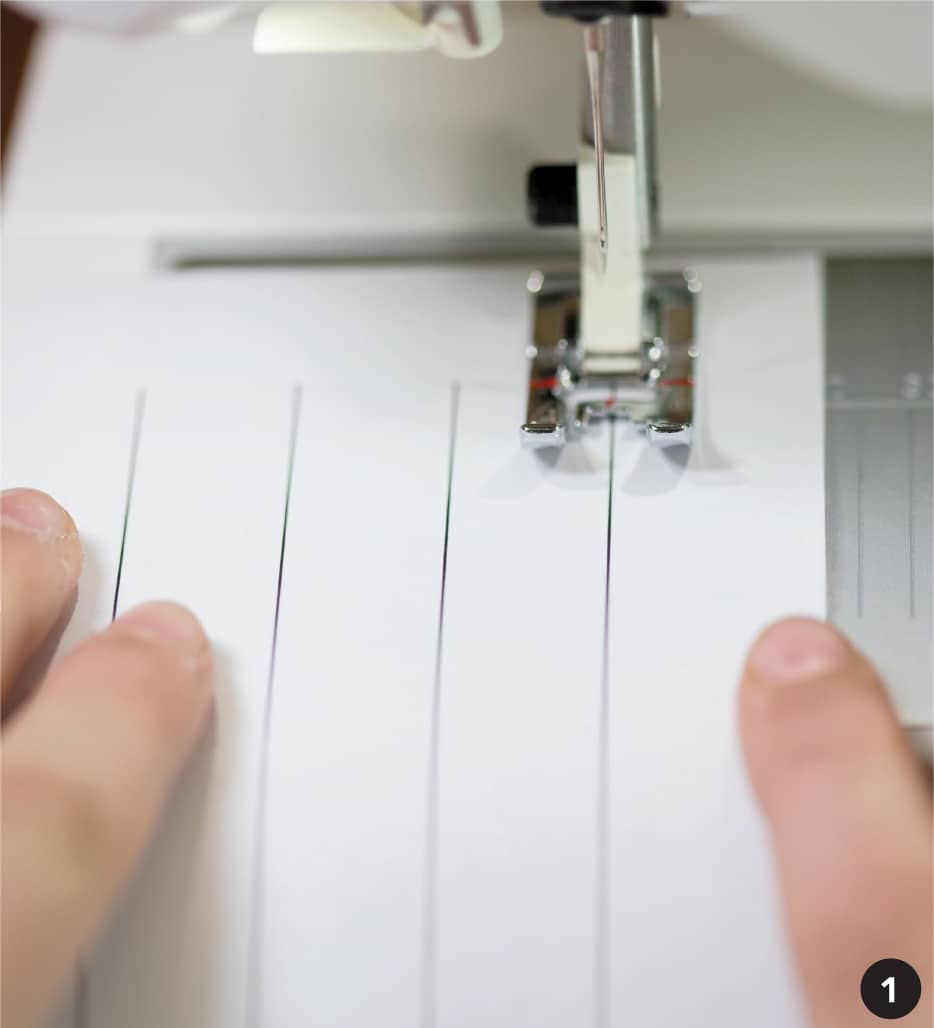
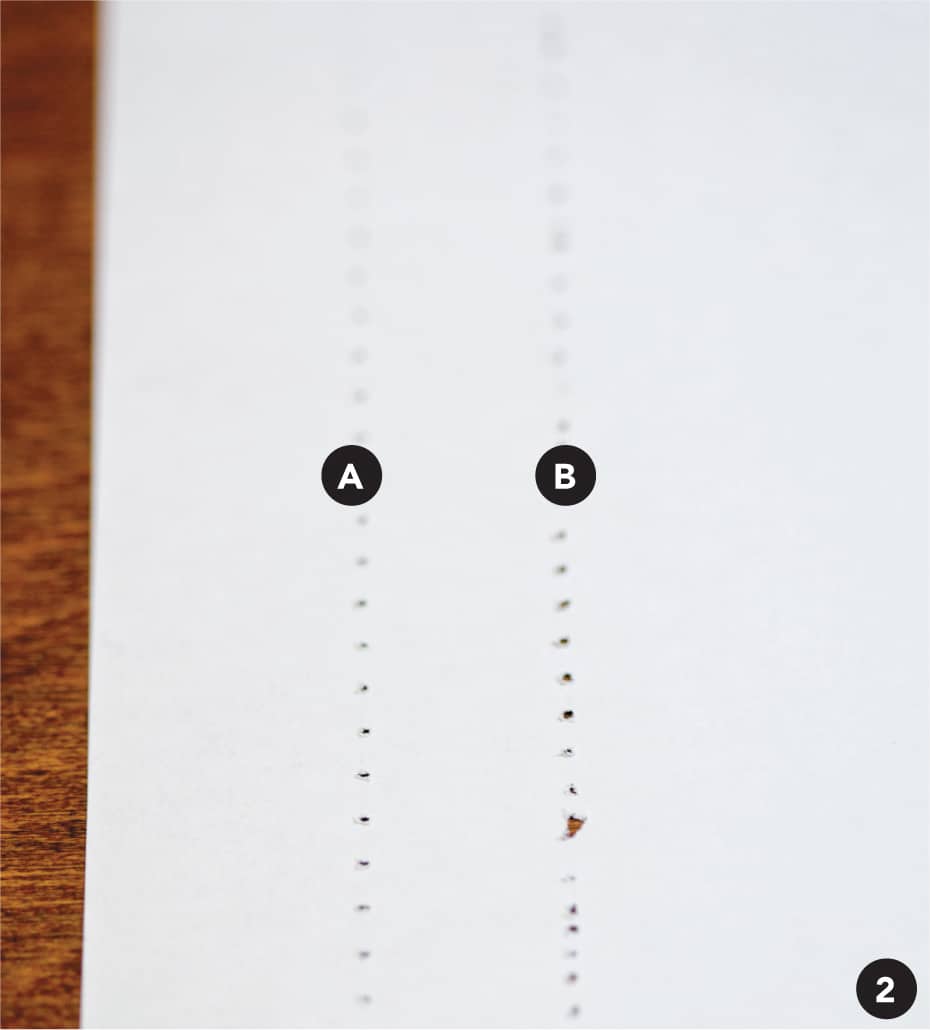
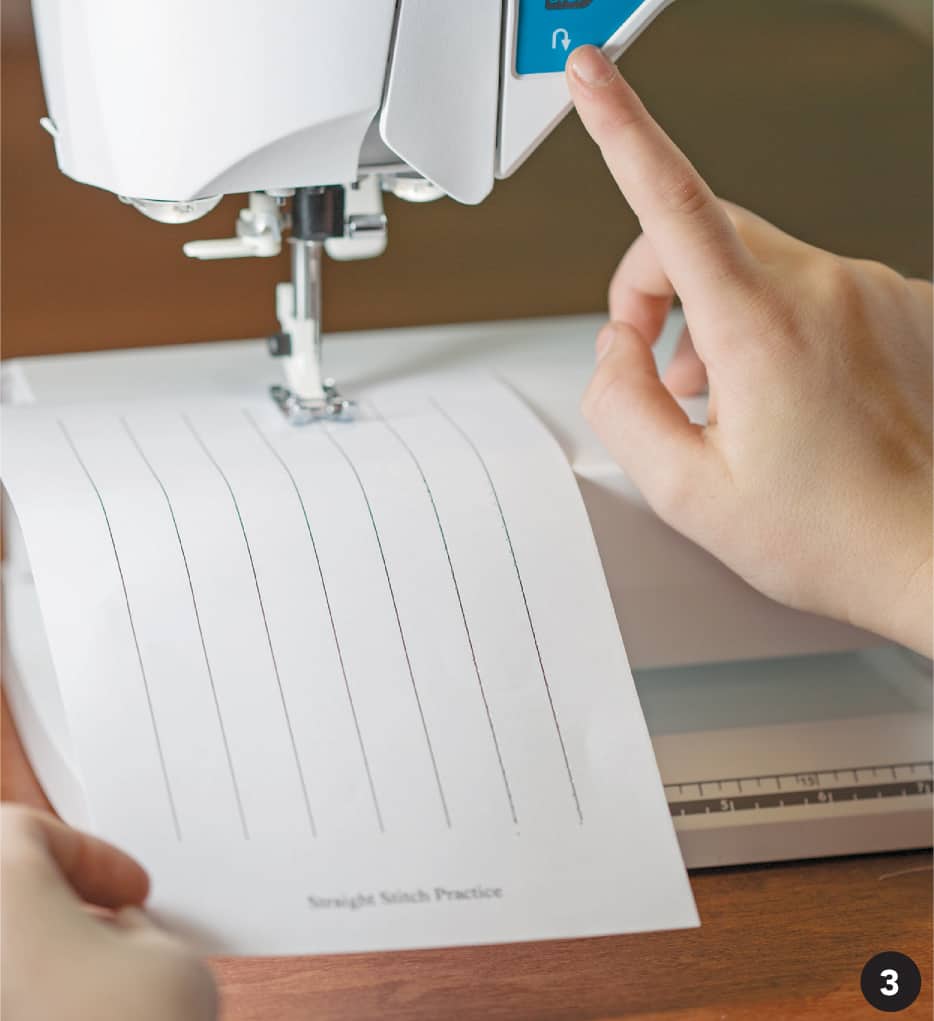
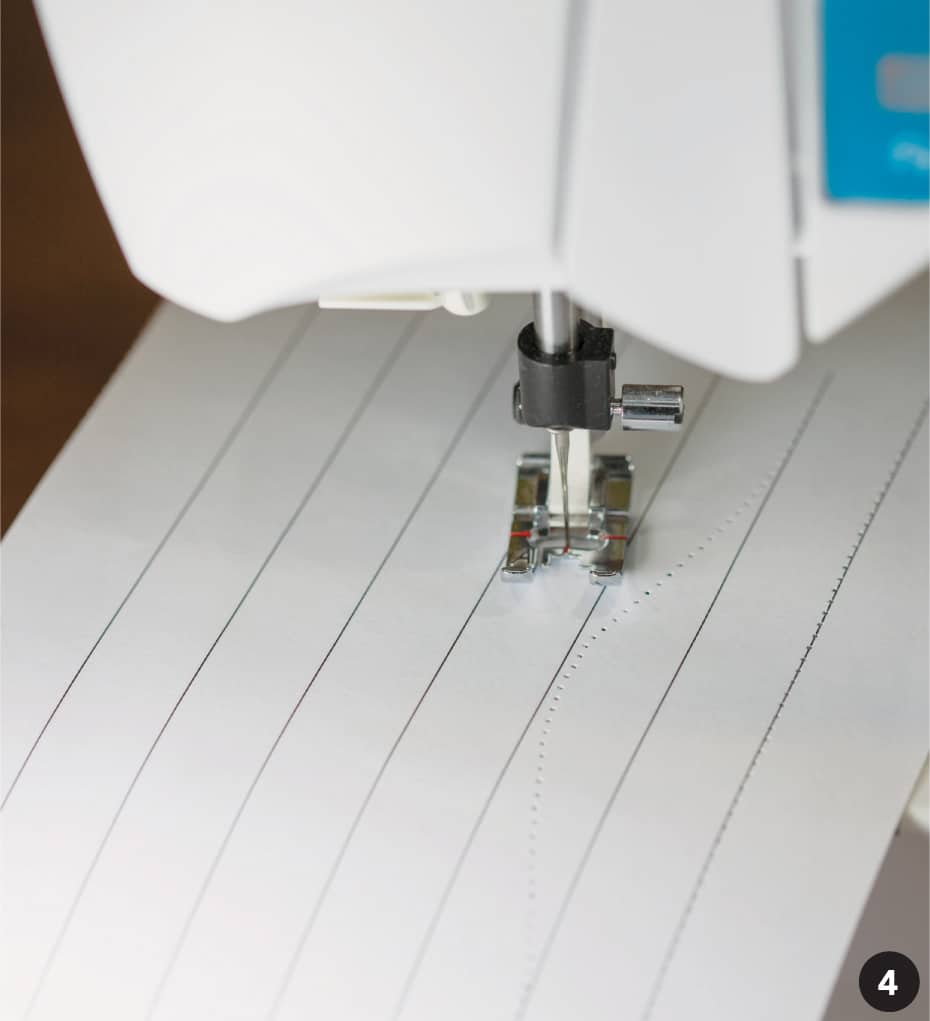
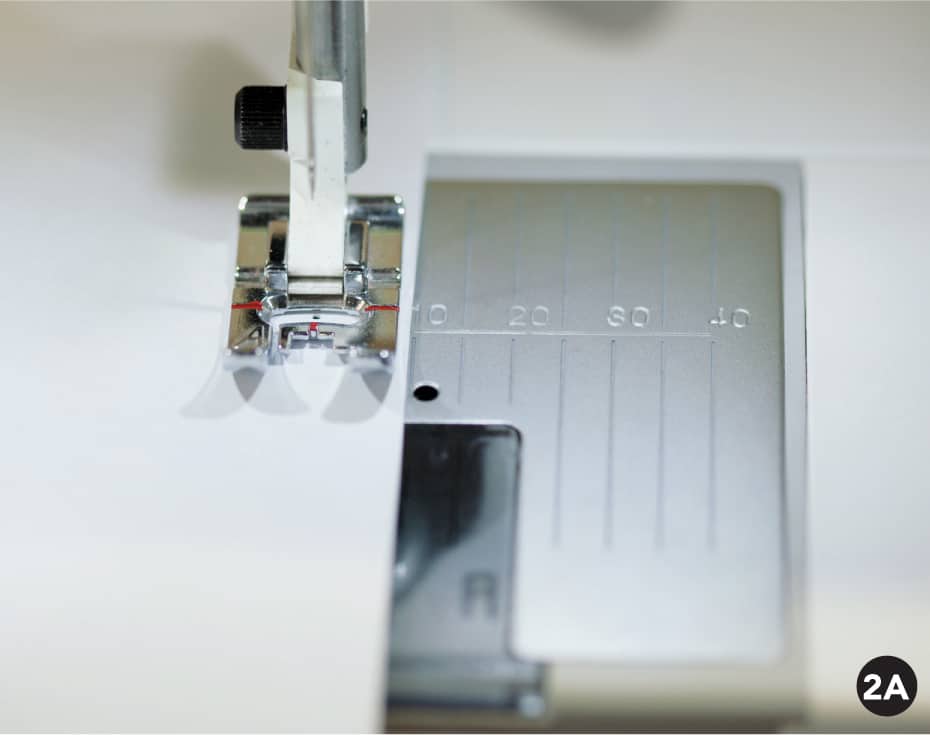
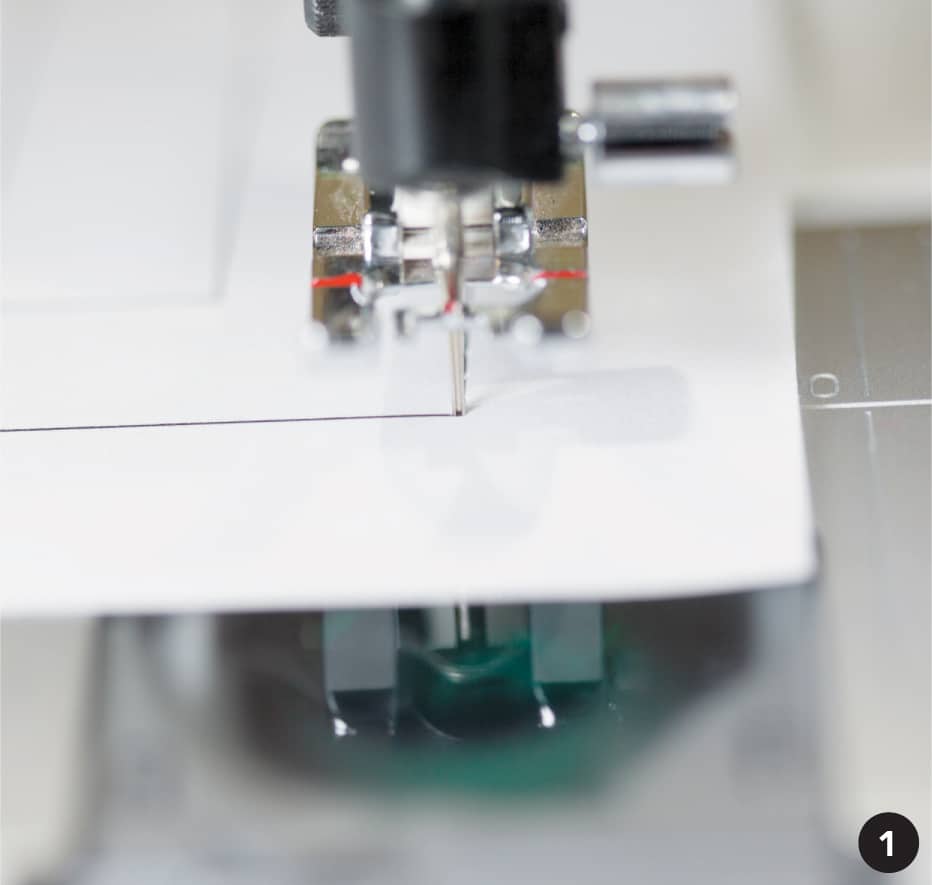
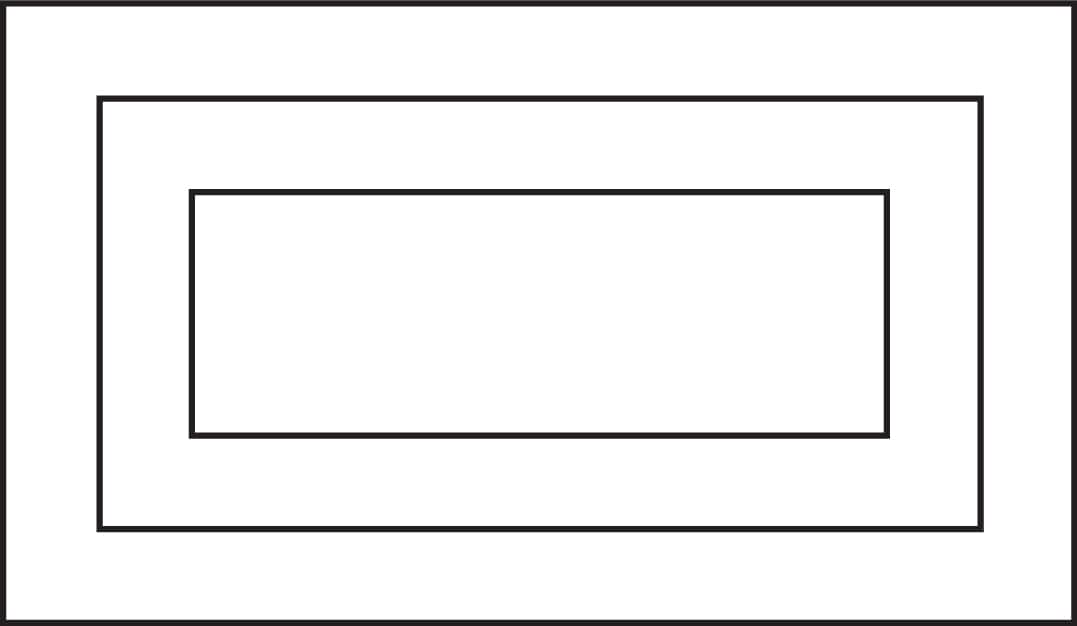
These first exercises will help you become more comfortable and proficient at the sewing machine. You will be working on paper without the machine threaded, learning some of the language of sewing, and practicing controlling your machine. Practicing without thread at first allows you to focus on the process without worrying about any thread tangles or other issues. Directions Notes: For safety reasons, when you are not sewing, keep your foot off the pedal. Sometimes, when you are adjusting your fabric and lining things up, you can accidentally lean on the foot pedal, making the machine run, and you don’t want your fingers to be near the needle if this happens. Directions These exercises will get you familiar with seam allowances. A seam allowance is the distance from the edge of your fabric to the seam. Seam allowance widths are marked on the throat plate of your machine (see here for details). The most common seam allowances and their general uses are ¼" (6 mm) for quilting, ⅜" (1 cm) for craft sewing, ½" (1.3 cm) for home décor sewing, and ⅝" (1.6 cm) for garments. Please remember this is just a general outline. Your pattern will tell you the actual seam allowance required. For the seam allowance exercise, you will need a blank 5" x 7" (12.5 x 17.8 cm) piece of paper. Notes: For this exercise, we will be using the edge of the general purpose presser foot as the guide for ¼" (6 mm) seam allowance. On some sewing machines, this is pretty accurate; on others it may be a bit wider than ¼" (6 mm). When you really need an exact ¼" (6 mm) seam allowance, such as for quilting, you may need to purchase a special presser foot. Directions Notes: Sewing on paper is great practice, but it will dull the machine needle, so be sure to change to a new needle before moving on to a fabric project. For sewing on paper, use an older needle that is dull but not bent! When you need to change the direction of your stitch line at an angle, you need to pivot. Before lifting the presser foot to turn, it is important to anchor the paper (or fabric) by lowering the needle into it. For this exercise, make a copy of the pivot practice sheet here. Directions Directions
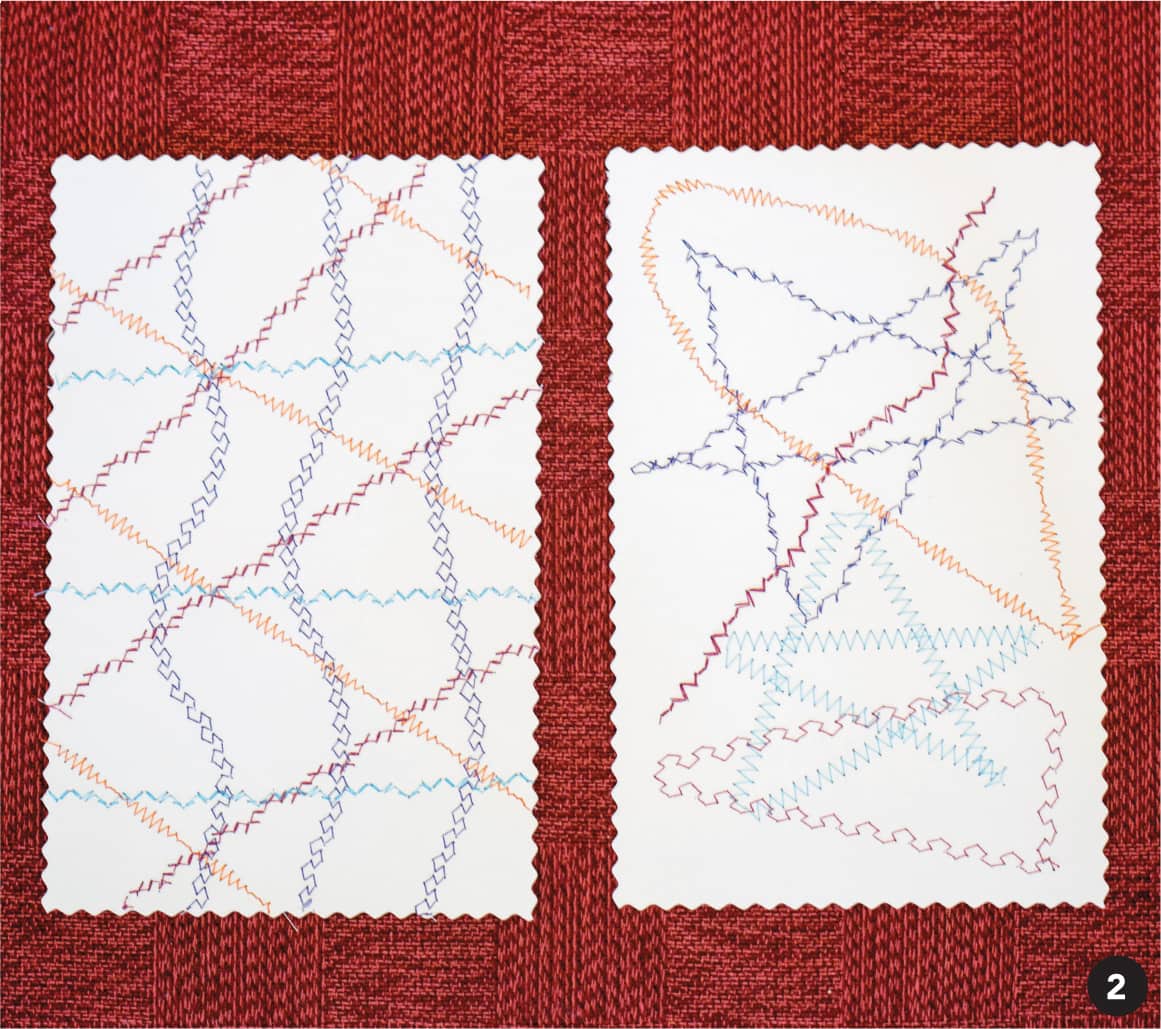
Once you are comfortable with the practice exercises, thread up your machine and have some fun stitching scraps of fabric to card stock. These creative, free-form cards are fun to make and share. Directions
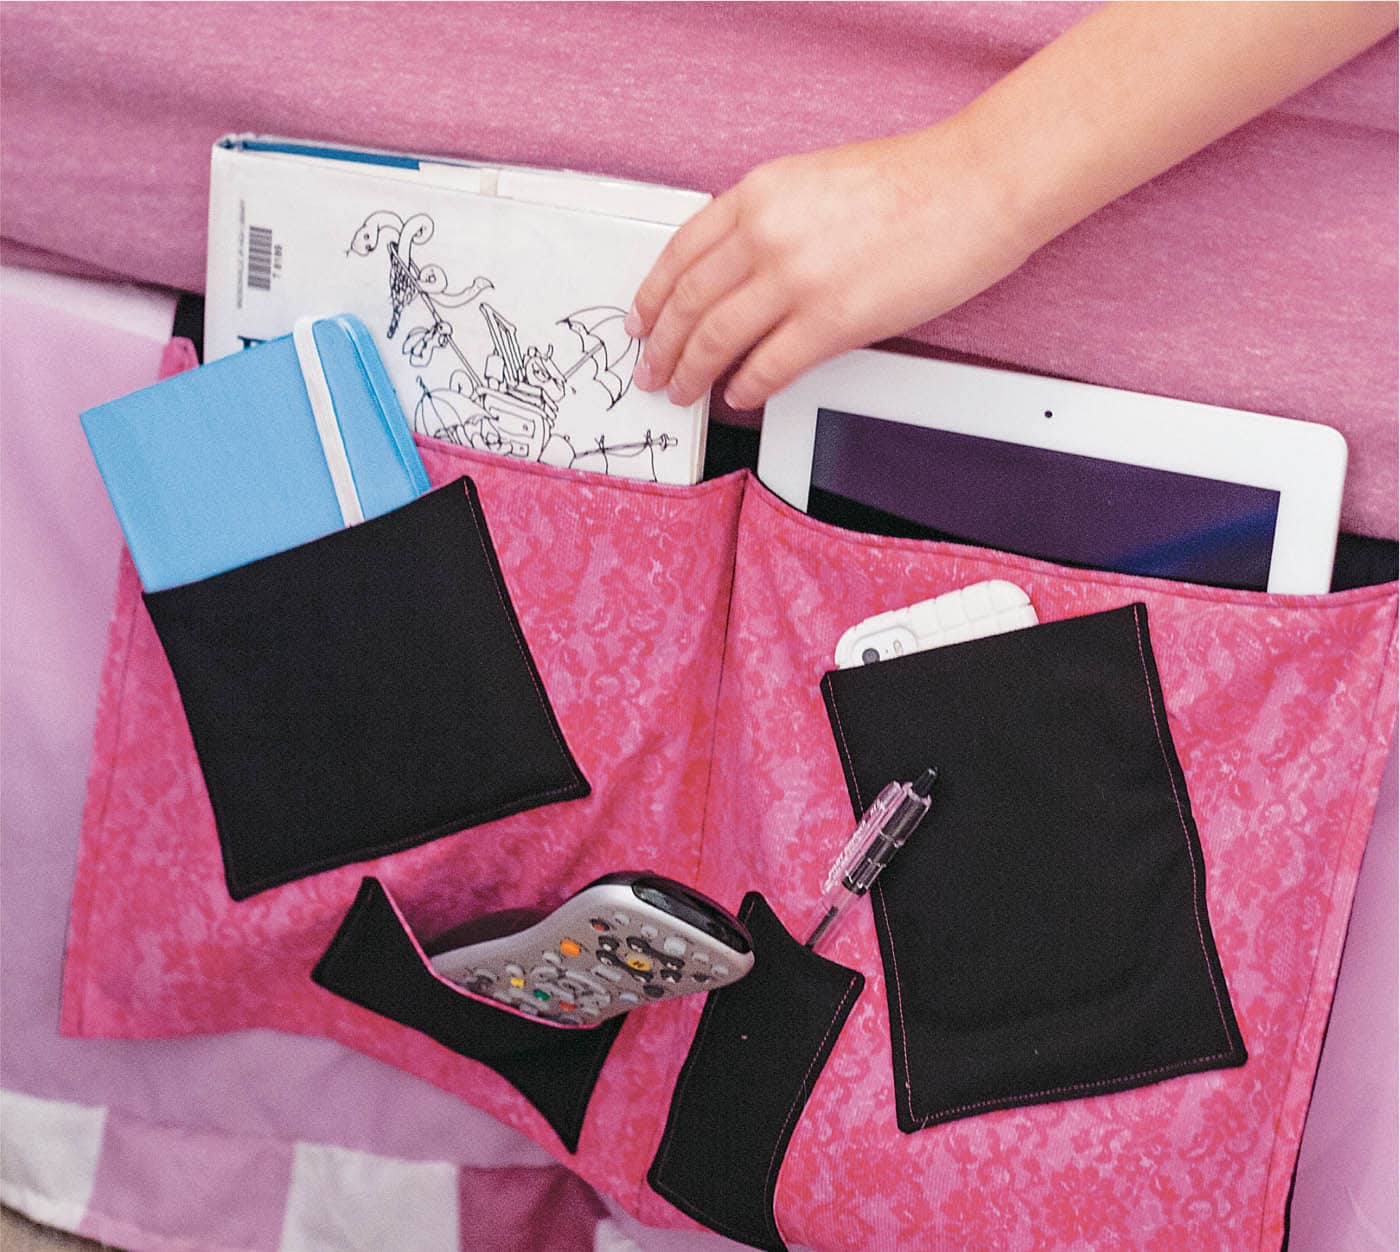
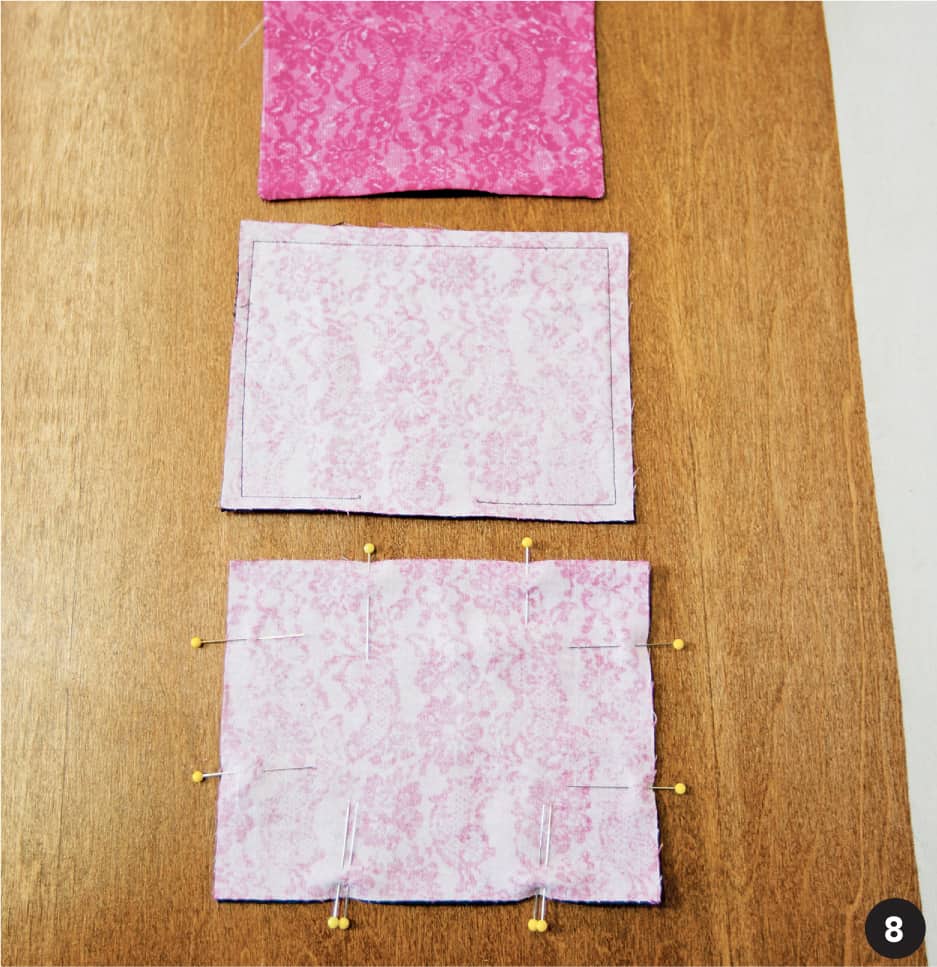
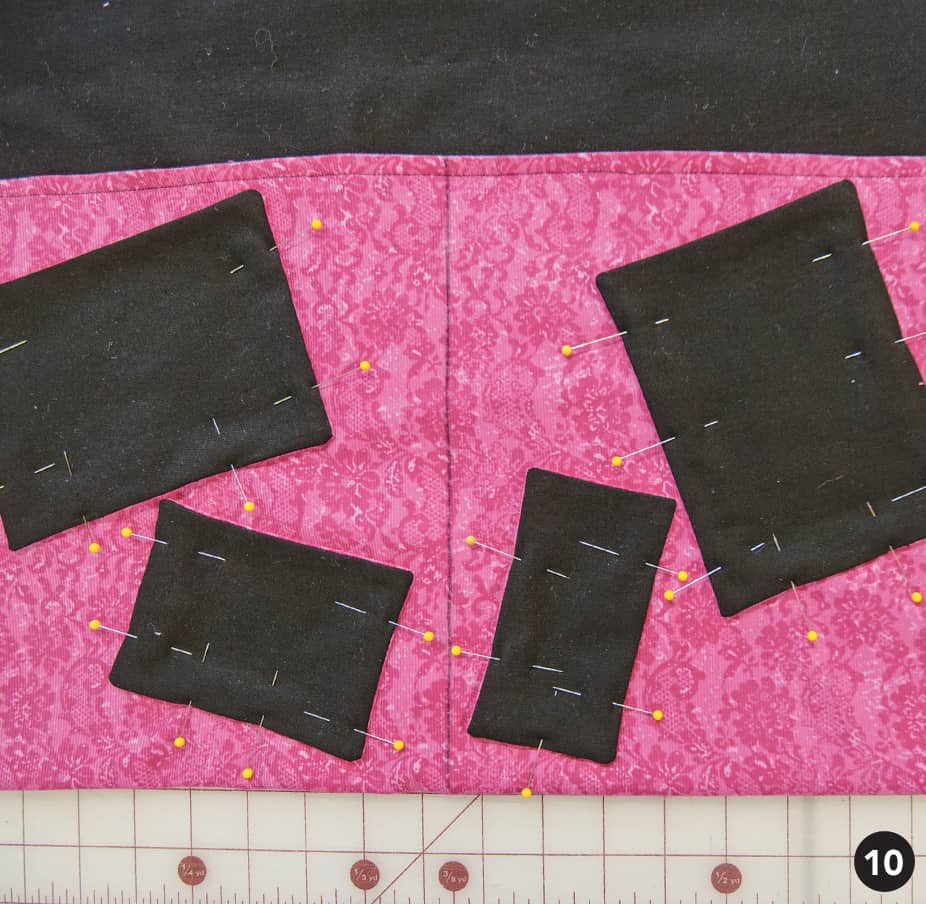
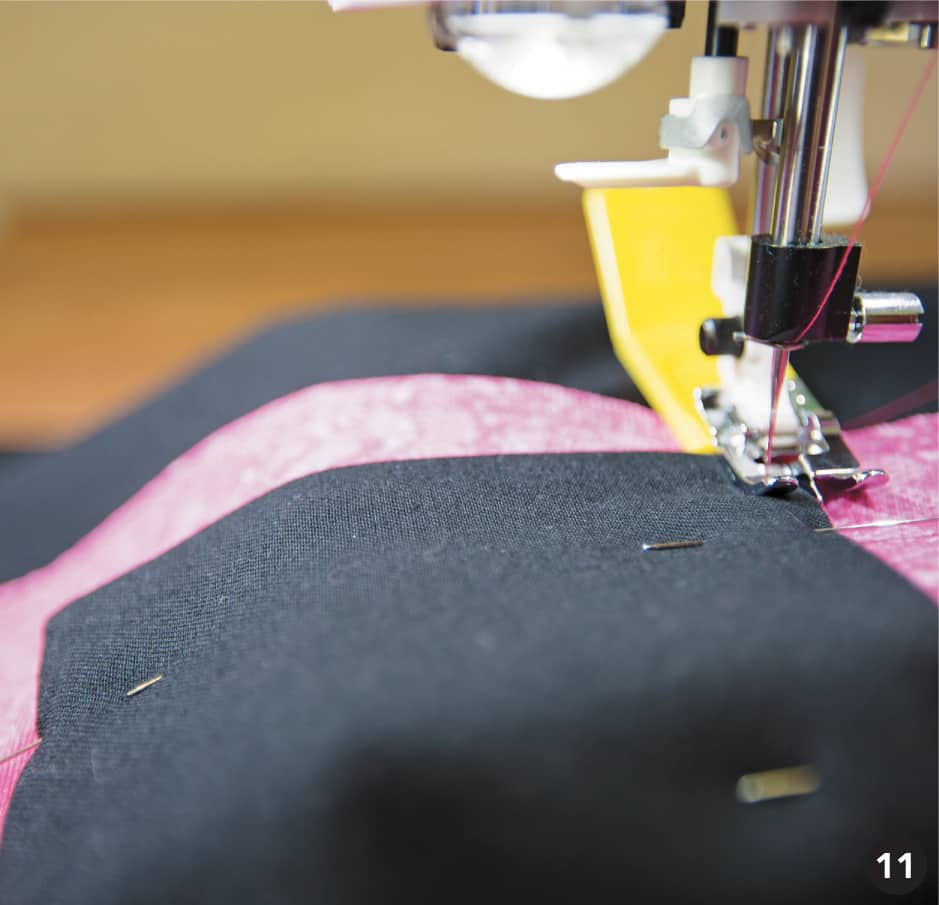
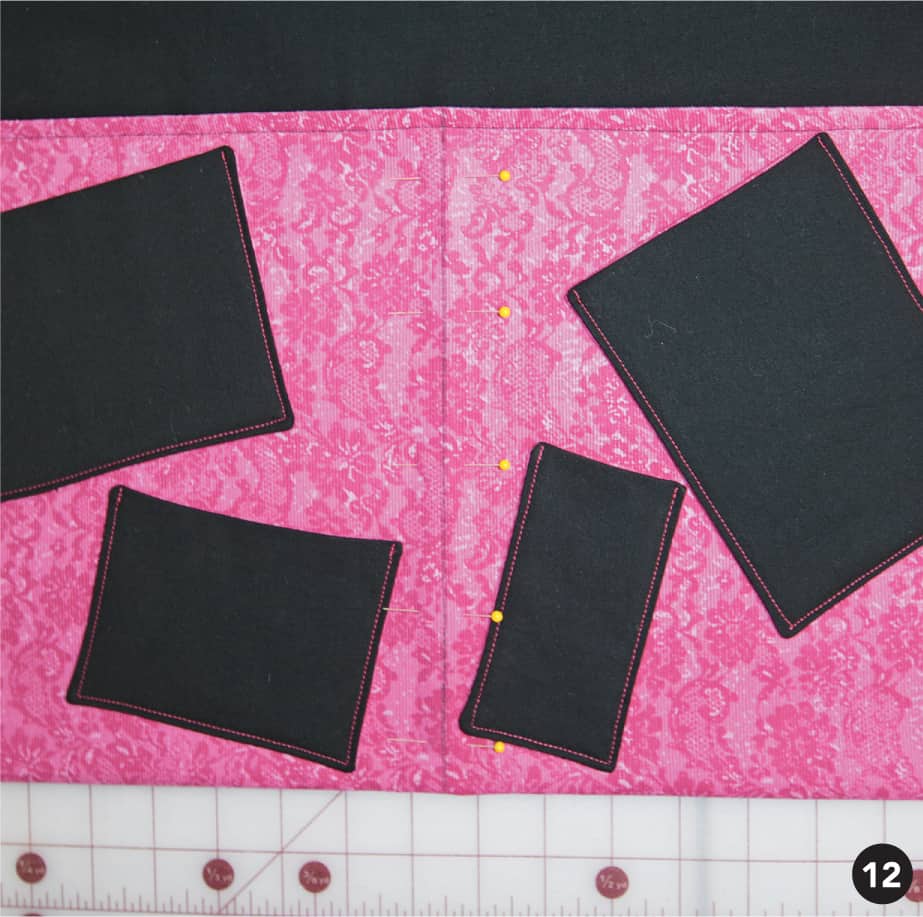
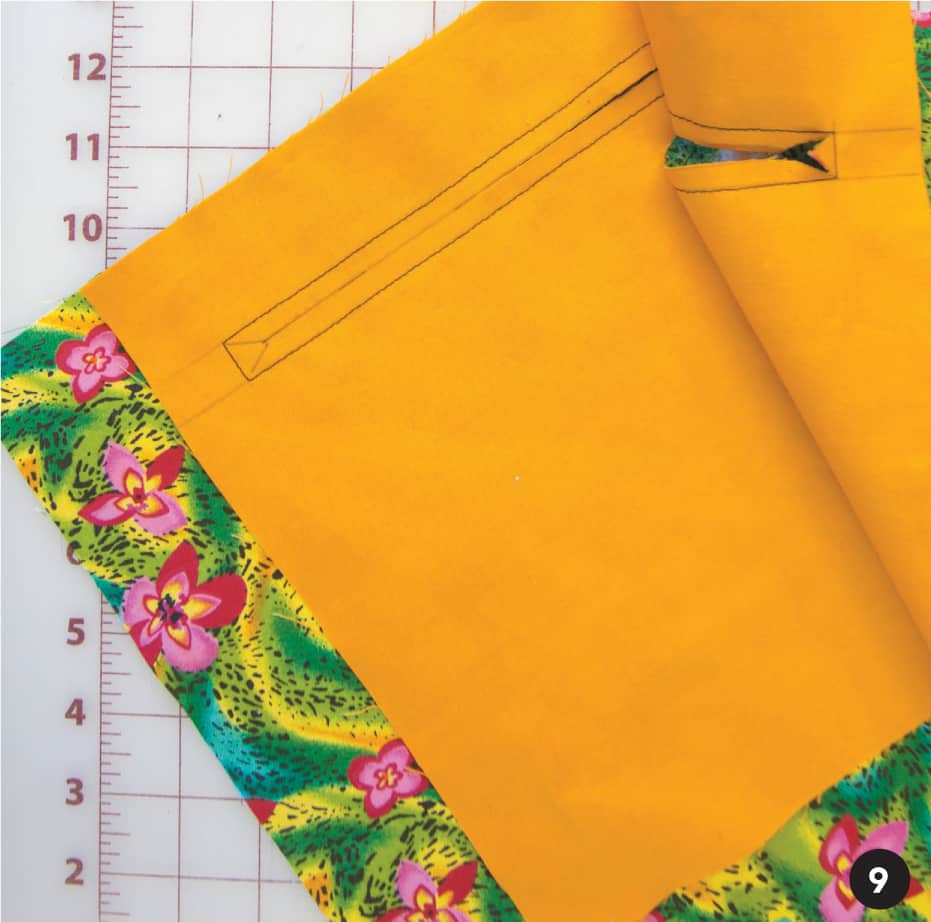
Struggling to find your book at night? Need a book light and don’t want to get up? Have a thought and want to write it down before you forget? Make a fabulous bedside organizer and have everything at your fingertips! This project is easy to make and easy to modify to your specific needs. Use these techniques to design a locker organizer. Try an appliqué on the pockets! Directions Notes: Seam allowances: ½" (1.3 cm) for body of organizer; ¼ (6 mm) for pockets Choose a sturdy fabric for this to give it the body and strength it will need to hold up to use.
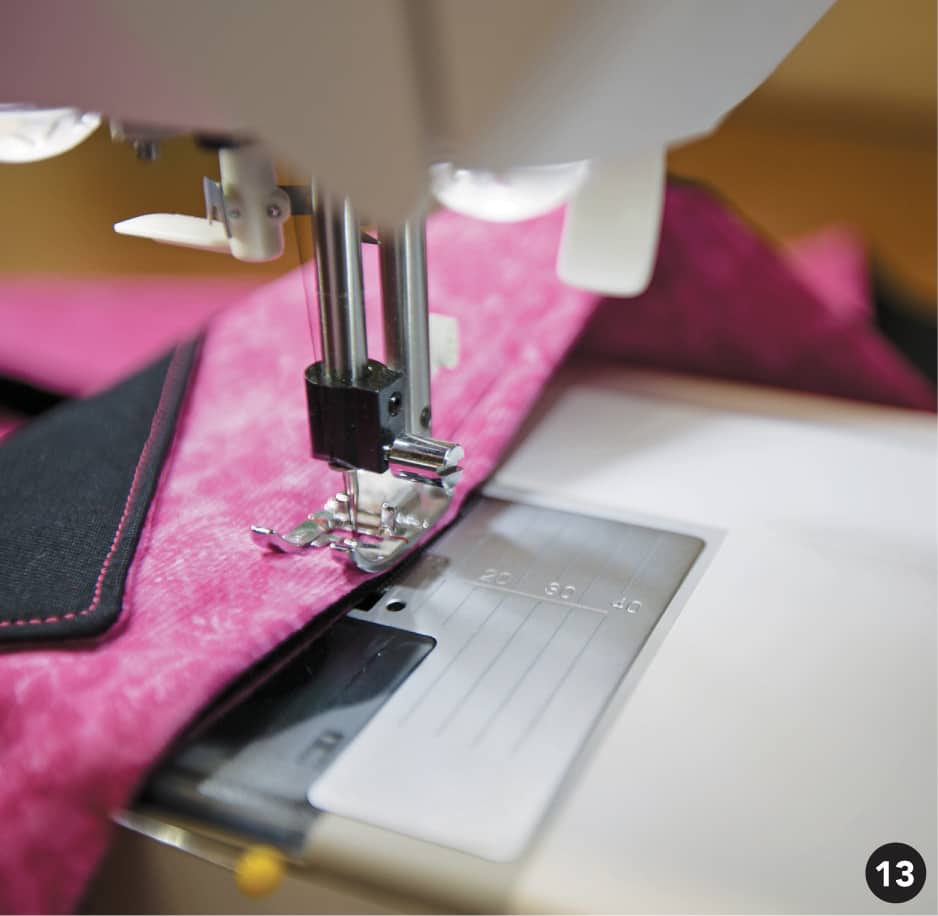
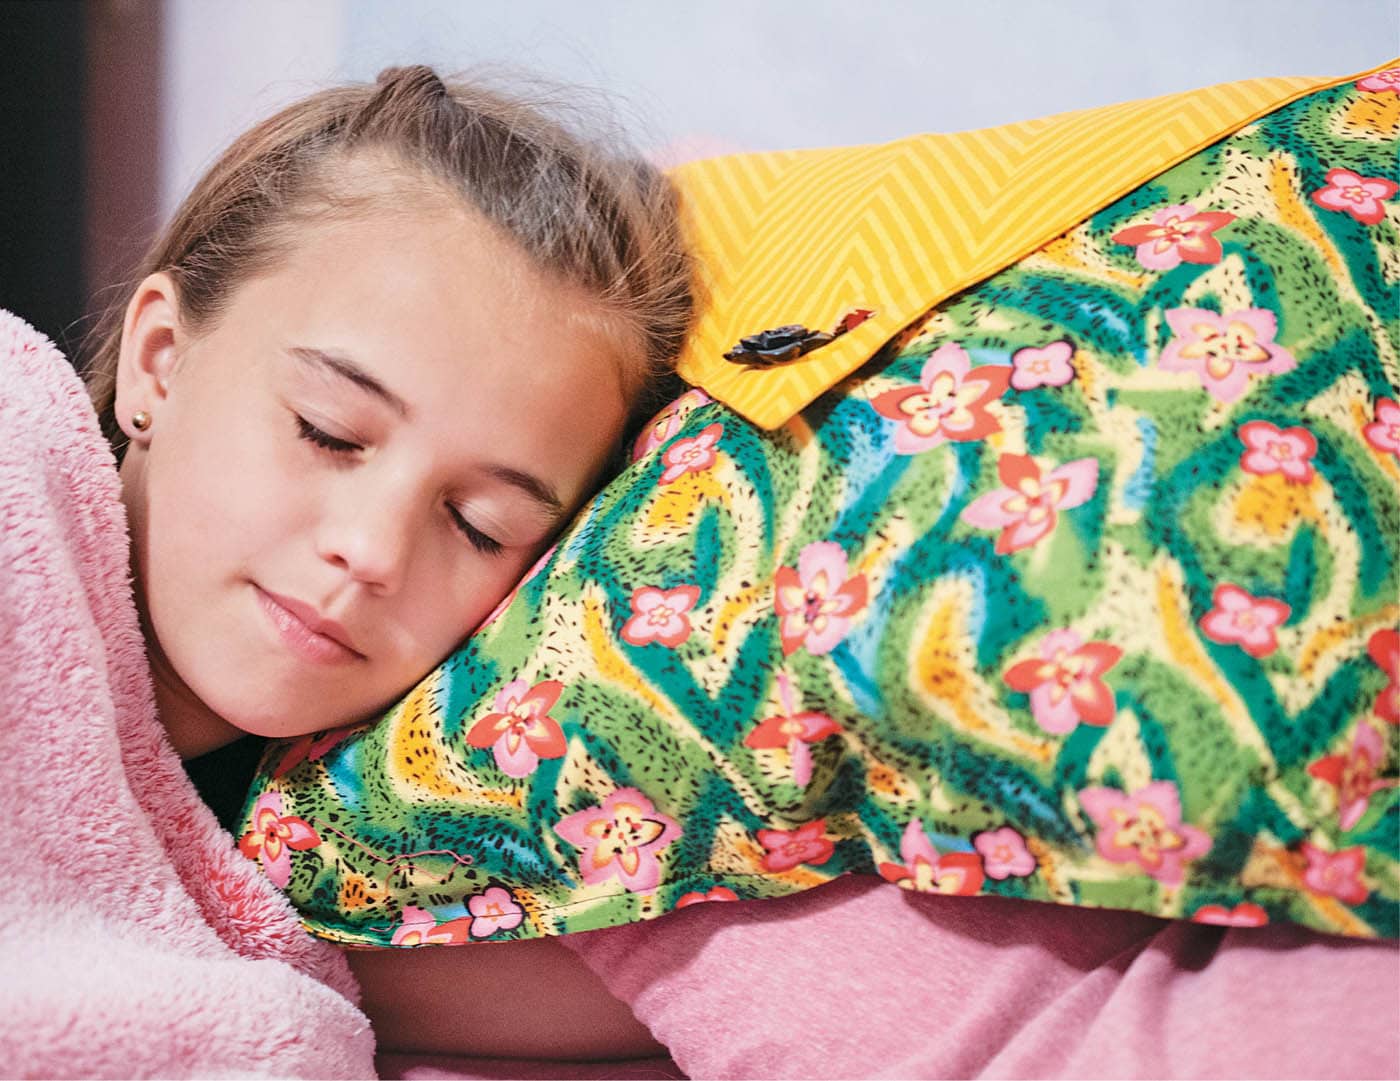
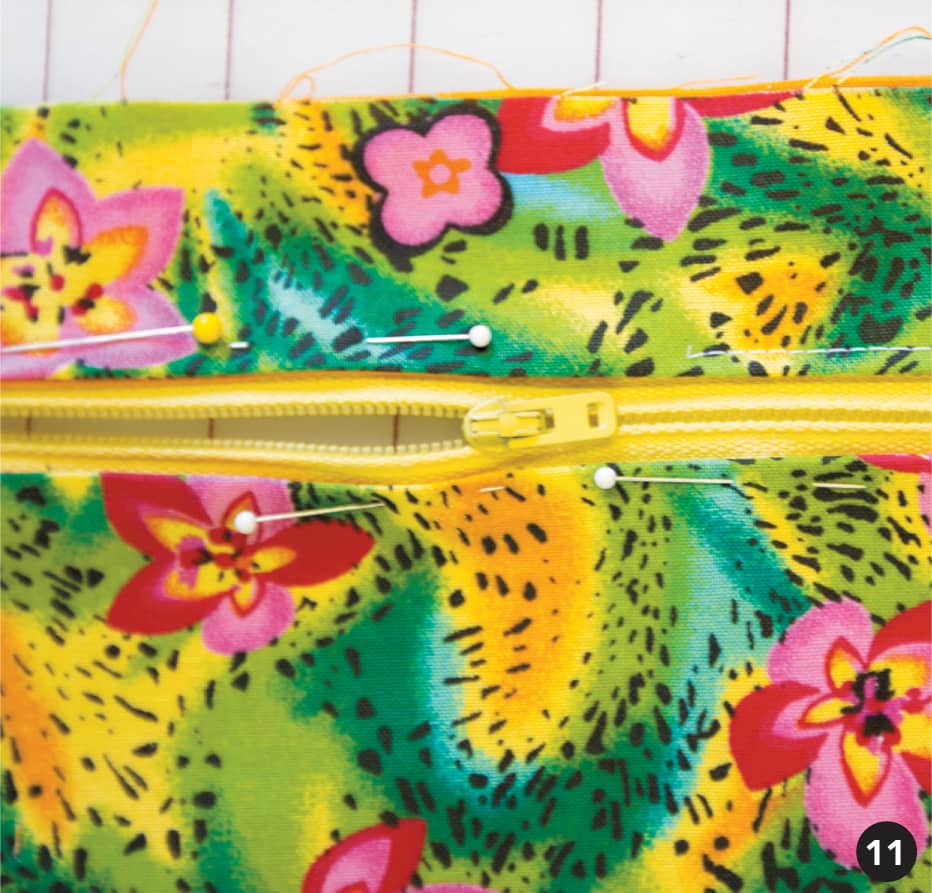
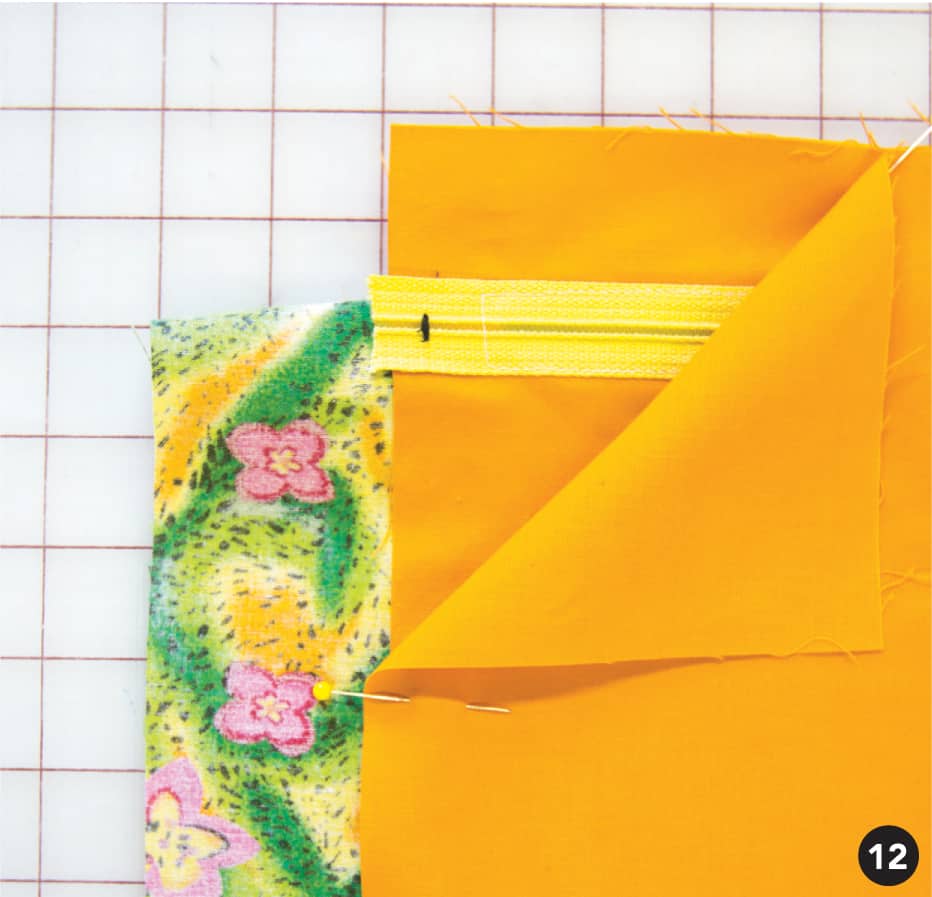
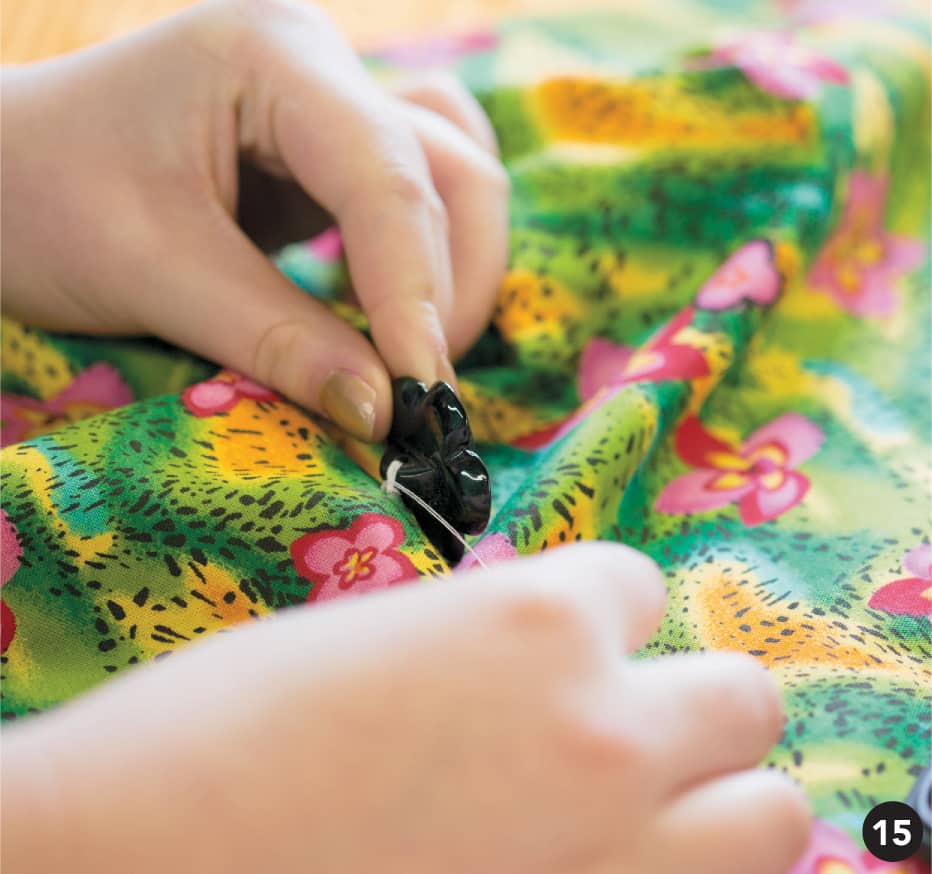
It’s a pillow with a secret zipper pocket. Or it’s a messenger bag or laptop bag with a zipper pocket—just add a strap. There are many ways to personalize it: add a big button for a closure, add some appliqués, or sew fringe around the flap.
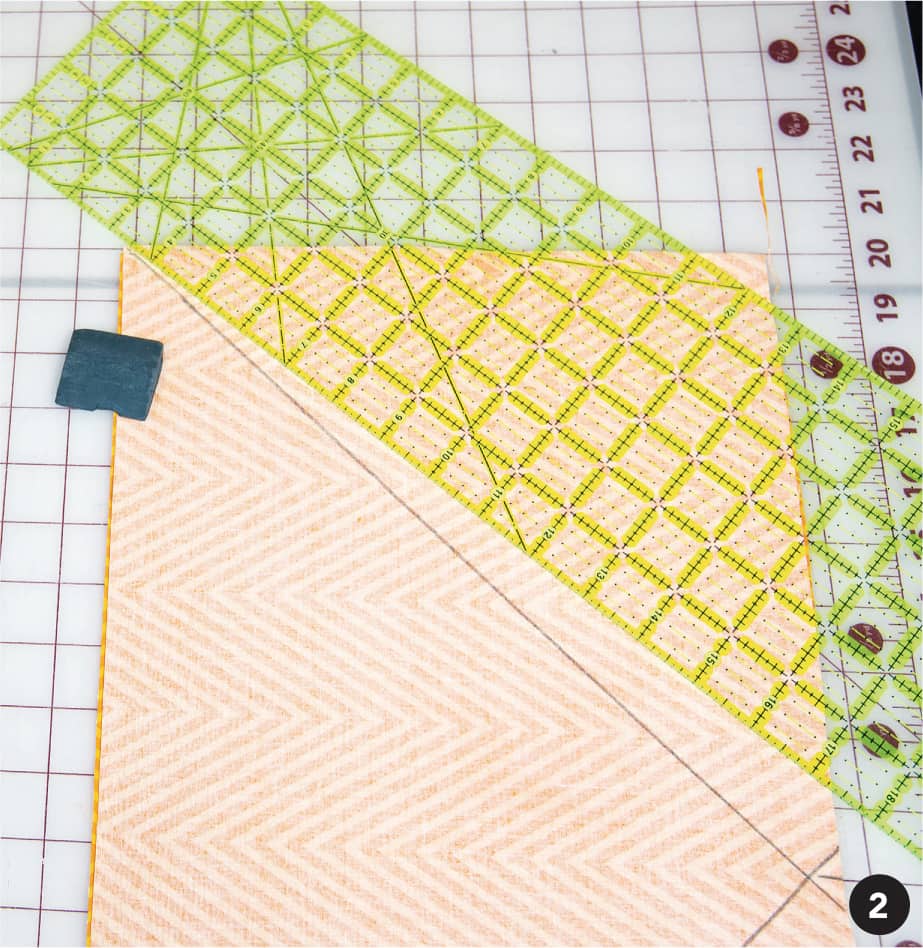
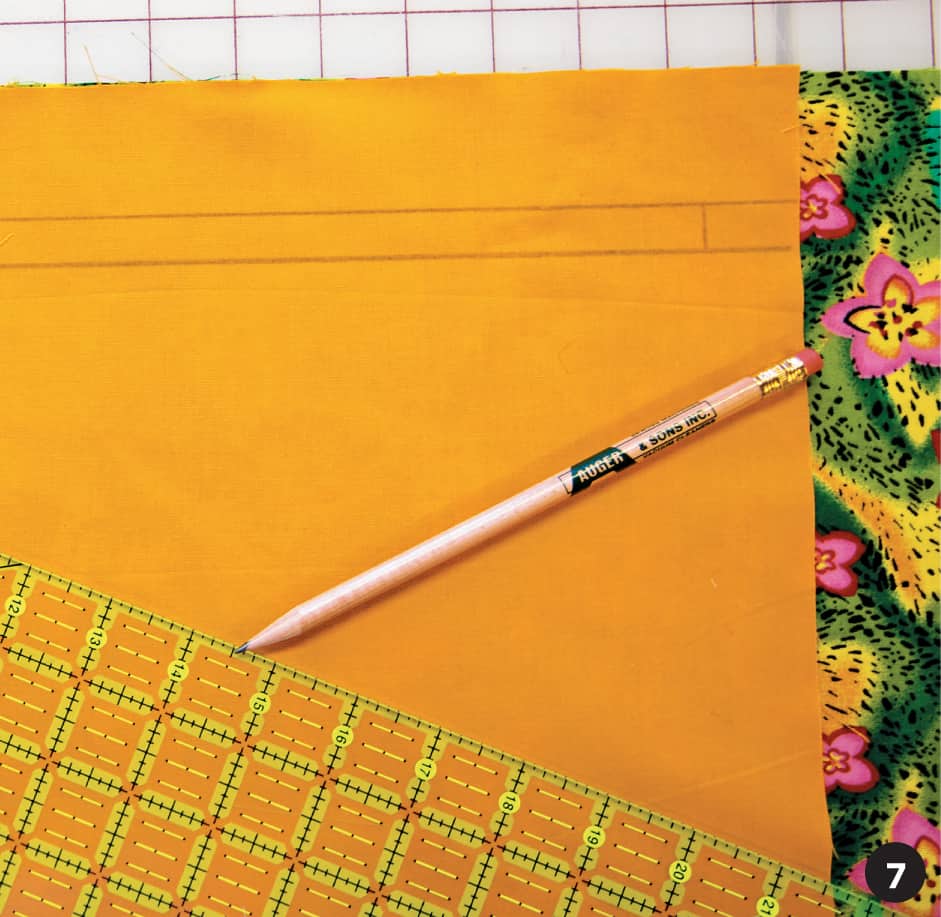
Directions Notes: Seam allowance: ½" (1.3 cm) Launder your fabric to preshrink it. Note You can design another shape for the flap—curved or straight—if you prefer.
Please copy at 200% Please copy at 200% Please copy at 200%Techniques
Paper Stitching Practice
Dry Run
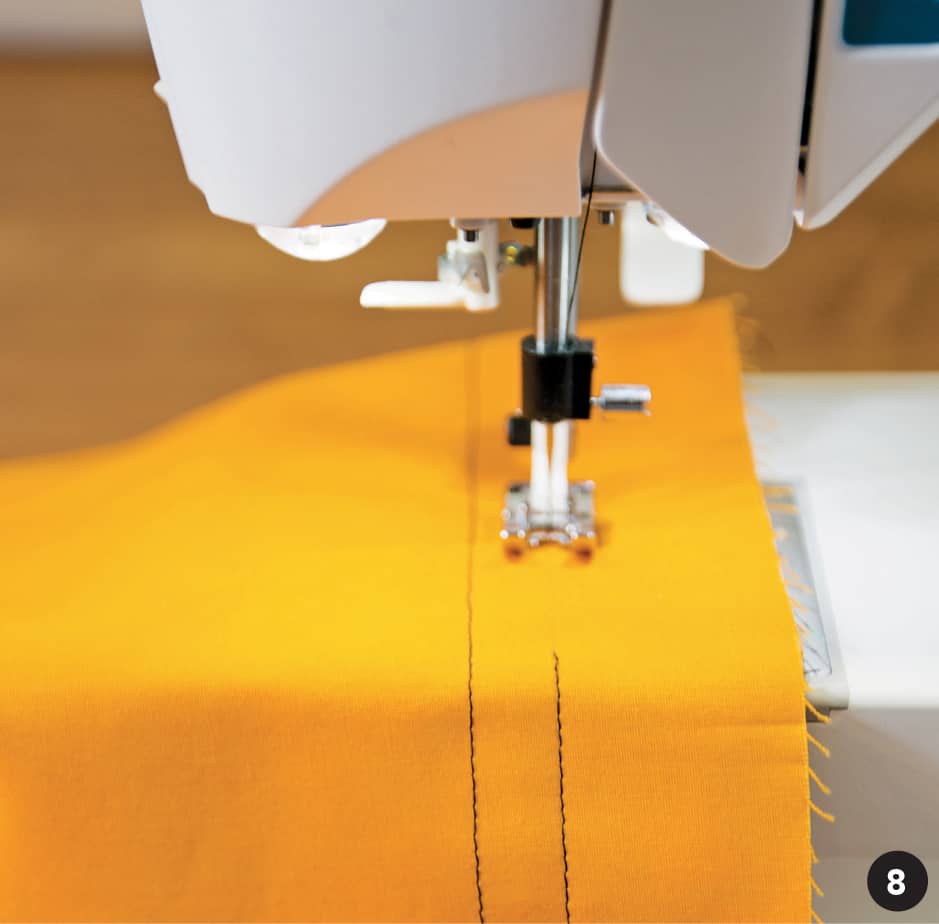
Straight Stitching
Seam Allowances


Pivot

Stitching Curves


projects
Scrappy Cards


Keep It Close Bed Organizer
Main piece:
20" x 36" (51 x 91 cm)
Pockets:
6½" x 5" (16.5 x 12.5 cm)
5" x 6½" (12.5 x 16.5 cm)
5" x 3" (12.5 x 7.5 cm)
4" x 5" (10 x 12.5 cm)
Secret Pocket Pillow


four 14" x 20" (35.6 x 51 cm) pieces from main fabric
two 11" x 20" (28 x 51 cm) pieces from flap fabric (you design how much flap you want and the shape of the flap)
two 10" x 16" (25.5 x 40.5 cm) pieces from pocket fabric


Templates
Straight Stitch
Template
Pivot Template
Slow Curve
Template