
Chapter 5
Introduction to Text Editors
Learn Enough Text Editor to Be Dangerous (https://www.learnenough.com/text-editor)—Part II of Learn Enough Developer Tools to Be Dangerous—is designed to help you learn to use what is arguably the most important item in the aspiring computer magician’s bag of tricks (Box 1.1): a text editor (Figure 5.1). Learning how to use a text editor is an essential component of technical sophistication.
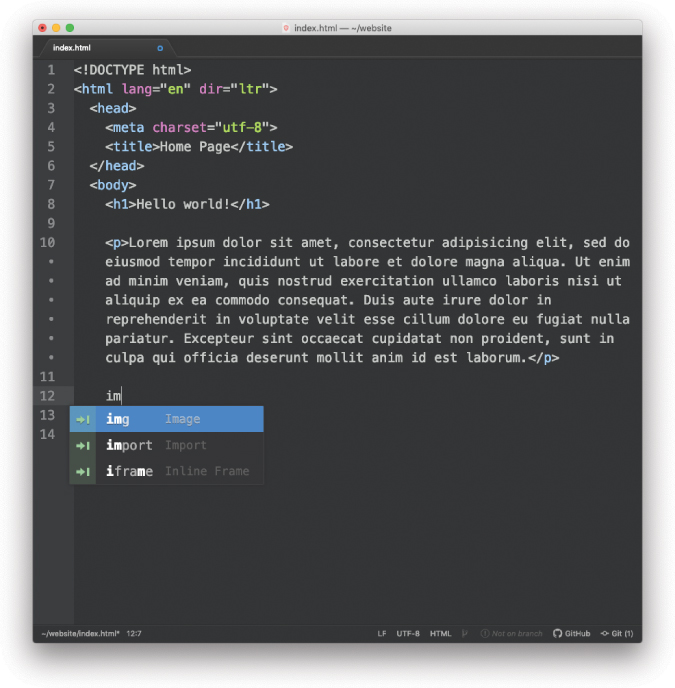
Figure 5.1: A text editor.
Unlike other text editor tutorials, which are typically tied to a specific editor, Part II of Learn Enough Developer Tools to Be Dangerous is designed to introduce the entire category of application—a category many people don’t even know exists.1 Moreover, editor-specific tutorials tend to be aimed at professional developers, and generally assume years of experience, but Learn Enough Text Editor to Be Dangerous doesn’t even assume you know what a “text editor” is. Its only prerequisite is a basic understanding of the Unix command line, such as that provided by Part I.2
1. This is why we refer to this part of Learn Enough Developer Tools to Be Dangerous as “Learn Enough Text Editor” rather than “Learn Enough Text Editors”—saying “text editor” in the singular emphasizes that we are discussing the general category and not just a series of specific editors.
2. This is required both because we’ll be launching text editors from the command line and because some of the examples involve customizing and extending the shell program in which the command line runs.
Unlike most programs used to produce written documents, such as word processors and email clients, a text editor is an application specifically designed to edit plain text (often called just “text” for short). Learning to use a text editor is important because text is ubiquitous in modern computing—it’s used for code, markup, configuration files, and many other things.3 (Indeed, I’m using plain text to write this very document.) Although it’s surprisingly difficult to define exactly what “plain text” is, from a practical perspective it means that the text itself doesn’t have any formatting, or at least none that matters. There’s no notion of emphasized or boldface text, the font size and typeface don’t matter, etc.—the only thing that does matter is the content. For example, although the previous sentence contains formatted output like this, its source is plain text, and appears as in Listing 5.1.4
3. For more on the power of text, see the insightful post “always bet on text” (https://graydon2.dreamwidth.org/193447.html?HN2).
4. Technically, the em dash “—” appears as a raw Unicode character rather than as —, but the latter is equivalent and is easier to notice in a code listing. For similar reasons, Listing 5.1 uses regular quotes in place of fancier “curly” quotes. (On most browsers, setting Unicode to display properly requires a full HTML document with the proper headers. These sorts of considerations are covered in Learn Enough HTML to Be Dangerous (https://www.learnenough.com/html).)
Listing 5.1: The HTML source of a sentence in this tutorial.
There's no notion of <em>emphasized</em> or <strong>boldface</strong> text, the <small>font size</small> and <code>typeface</code> don't matter, etc.—the only thing that does matter is the <em>content</em>.
In Listing 5.1, the desired formatting options are indicated with special tags (such as the HTML emphasis tag <em>…</em>) rather than by changing the appearance of the text itself.5 This is the main reason why the more familiar word processor programs such as Word aren’t well-suited to editing plain text, and a different sort of tool is needed (Box 5.1).
5. It is up to the individual application to determine how to display the formatting. For example, HTML is designed to be rendered and displayed by web browsers like Chrome and Safari, which typically display emphasized text using italics.
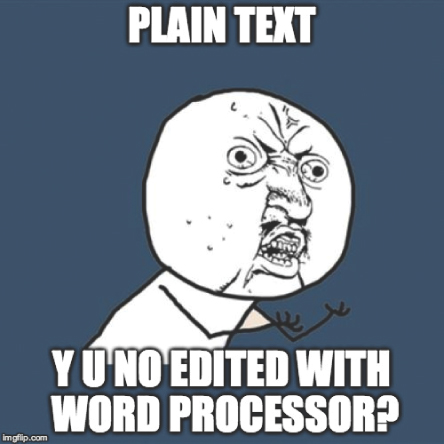
Figure 5.2: Why not edit plain text with Microsoft Word?
Building on the material developed in Part I, Part II starts by covering the important Vim editor (Section 5.1), which can be run at the command line directly inside a terminal window. Vim will give us a chance to see our first examples of the most important functions of a text editor, but because Vim can be forbiddingly complex for a beginner, in this tutorial we will cover only the bare minimum necessary to make basic edits. The rest of the tutorial will expand on the themes developed in this chapter 5 by describing some of the many powerful features required in any programmer-grade text editor, with examples drawn principally from Atom, an open-source cross-platform editor,6 with concepts applicable to the closely related Sublime Text and Visual Studio Code editors and to Cloud9, a cloud IDE.7
6. In the blog post “Sunsetting Atom” (published in June 2022), GitHub announced plans to archive the Atom project. See Section 6.1 for more details.
7. Some developers use an integrated development environment, or IDE, for their day-to-day programming, but every IDE includes an integrated text editor, so the lessons in this tutorial still apply.
As with Learn Enough Command Line to Be Dangerous (https://www.learnenough.com/command-line), this tutorial is part of the Unix tradition, which includes virtually every operating system you’ve ever heard of (macOS, iOS, Android, Linux, etc.) except Microsoft Windows. Although all the editors we’ll discuss do run under Windows, using a non-Unix OS introduces friction into the process, so Microsoft Windows users are encouraged to set up a Linux-compatible development environment by following the steps in Section A.3.3 or by using the Linux-based cloud IDE discussed in Section A.2.
The focus throughout Learn Enough Text Editor to Be Dangerous is on general principles, so no matter which editor you end up using, you will have a good mental checklist of the kinds of tasks you should rely on your editor to perform. In addition, because the details vary by particular text editor and by system, this tutorial presents an ideal opportunity to continue developing your technical sophistication (Box 5.2). Finally, don’t feel any pressure to master everything at once. You can be productive with even a small subset of what’s included in this tutorial. Because technically sophisticated people use text editors practically every day, you’ll keep learning new tricks in perpetuity.
5.1 Minimum Viable Vim
The vi (pronounced “vee-eye”) editor dates back to the earliest days of Unix, and Vim (pronounced “vim”) is an updated version that stands for “Vi IMproved”. Vim is absolutely a full-strength text editor, and many developers use it for their daily editing needs, but the barrier to Vim mastery is high, and it requires substantial customization and technical sophistication (Box 5.2) to reach its full potential. Vim also has a large and often obscure set of commands, which rarely correspond to native keybindings (keyboard shortcuts), making Vim challenging to learn and remember. As a result, I generally recommend beginners learn a “modern” editor (Chapter 6) for everyday use. Nevertheless, I consider a minimal proficiency with Vim to be essential, simply because Vim is utterly ubiquitous—it’s present on virtually every Unix-like system in the known universe, which means that if you ssh into some random server halfway ’round the globe, Vim will probably be there.
This chapter includes only Minimum Viable Vim—just enough to use Vim to do things like edit small configuration files or Git commits.8 It’s not even really enough to be dangerous. But it’s worth noting that even mastering Minimum Viable Vim puts you in elite company—because Vim is so difficult, even a little Vim knowledge is the sort of thing that can impress your friends (or a job interviewer).
8. See Part III for more details.
Note: If you’re using macOS, you should follow the instructions in Box 2.3 at this time.
5.2 Starting Vim
Unlike most of the modern editors discussed starting in Chapter 6, Vim can be run directly inside a terminal window, and requires no graphical interface.9 All you do is type vim at the prompt:
9. Vim thus dovetails nicely with a command-line tutorial like Learn Enough Command Line to Be Dangerous (Part I).
$ vimTypical results of running the vim command appear in Listing 5.2 and Figure 5.4. In both cases, the tildes (~) are not characters in the file but rather represent lines that have yet to be defined.
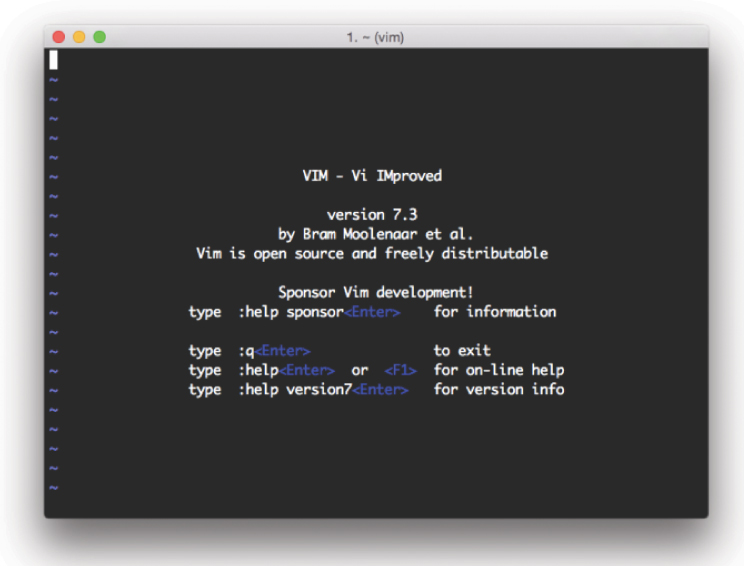
Figure 5.4: Vim running in a terminal window.
Listing 5.2: A textual representation of a Vim window (message and versions may differ).
~
~
~
~
~
~                           VIM - Vi IMproved
~
~                              version 7.3
~                        by Bram Moolenaar et al.
~              Vim is open source and freely distributable
~
~                     Help poor children in Uganda!
~             type  :help iccf<Enter>       for information
~
~             type  :q<Enter>               to exit
~             type  :help<Enter>            or <F1> for on-line help
~             type  :help version7<Enter>   for version info
If starting Vim is easy, learning to use it, at least at first, can be incredibly hard. This is mostly due to Vim being a modal editor, which is probably unlike anything you have used before (Box 5.3). Vim has two principal modes, known as normal mode and insertion mode. Normal mode is for doing things like moving around the file, deleting content, or finding and replacing text, whereas insertion mode is for inserting text.
Going back and forth between these two modes can cause a lot of confusion, especially since virtually all other programs that edit text (including word processors, email clients, and most text editors) have only insertion mode. Part of what makes Vim particularly confusing is that it starts in normal mode, which means that, if you try entering text immediately after starting Vim (as in Listing 5.2), the result will be chaos.
Because confusion is the likeliest result if you’re not used to Vim’s modal editing, we’re going to start our study of Vim with the Most Important Vim Command ™. One of my college friends, who was a huge partisan of vi’s (and hence Vim’s) historical rival Emacs (Box 5.4), claimed the Most Important Vim Command™ was the only one he ever wanted to learn. Here it is:
ESC:q!<return>This command means “Press the Escape key, then type ‘colon q exclamation-point’, then press the return key.” We’ll learn in a moment what this does and why, but for now we’ll start by practicing it a couple of times in the exercises.
5.2.1 Exercises
Start Vim in a terminal, then run the Most Important Vim Command™.
Restart Vim in a terminal. Before typing anything else, type the string “This is a Vim document.” What happened? Confusing, right?
Use the Most Important Vim Command™ to recover from the previous exercise and return to the normal command-line prompt.
5.3 Editing Small Files
Now that we know the Most Important Vim Command™, we’ll start learning how to use Vim for real by opening and editing a small file. In Section 5.2, we started by running vim by itself, but it’s more common to use a filename as an argument. Let’s navigate to the home directory of our system and then run such a command, which will either open the corresponding file (if it exists) or create it (if it doesn’t):11
11. Technically, the file isn’t actually created until you save it (Section 5.4), but you get the idea.
$ cd
$ vim .bashrc
Here .bashrc is a standard configuration file for Bash.12
12. See this Stack Overflow thread (https://stackoverflow.com/questions/902946/about-bash-profile-bashrc-and-where-should-alias-be-written-in) if you’re curious about where the “rc” comes from.
As noted above, the vim .bashrc command will automatically create the corresponding .bashrc file if it doesn’t already exist on your system. This important file is used to configure the shell, which is the program that supplies a command line—in this case, Bash, which is a pseudo-acronym that stands for Bourne Again SHell (also written as “Bourne-again shell”).13 (Recall from Box 2.3 that the default on macOS is now Zsh, so if you’re on a Mac you should follow the instructions there to switch to Bash if you haven’t already.)
13. The first program in the sequence was the Bourne shell; in line with the Unix tradition of terrible puns, its successor is called the “Bourne again” (as in “born again”) shell.
As is common on Unix-based systems, the configuration file for Bash begins with a dot, indicating (as noted in Section 2.2) that the file is hidden. That is, it doesn’t show up by default when listing directory contents with ls, or even when viewing the directory using a graphical file browser.
We’ll learn in Section 5.4 how to save changes to this file, but for now we’re just going to add some dummy content so that we can practice moving around. In Section 5.2, we learned that Vim starts in normal mode, which means that we can change location, delete text, etc. Let’s go into insertion mode to add some content. The first step is to press the i key to insert text. Then, type a few lines (separated by returns), as shown in Listing 5.3.14 (There may be other existing content, which you should simply ignore.)
14. Recall from Section 4.1 that a tilde ~ is used to indicate the home directory, so ~/.bashrc in the Listing 5.3 caption refers to the Bash configuration file in the home directory.
Listing 5.3: Adding some text after typing i to insert.~/.bashrc
1 lorem ipsum
2 dolor sit amet
3 foo bar baz
4 I've made this longer than usual because I haven't had time to make it shorter.
After entering the text in Listing 5.3, press ESC (the escape key) to switch from insertion mode back to normal mode.
Now that we have some text on a few lines, we can learn some commands for moving around small files. (We’ll cover some commands for navigating large files in Section 5.6.) The easiest way to move around is to use arrow keys—up, down, left, right—which is what I recommend.15 Vim has literally jillions of ways of moving around, and if you decide to use Vim as your primary text editor I recommend learning them, but for our purposes the arrow keys are fine. The only two additional commands I feel are essential are the ones to move to the beginning and end of the line, which are 0 and $, respectively.16
15. Vim purists will tell you that there’s a better way, namely, to use the h, j, k, l to move around, but it takes a lot of practice for this to become intuitive, and it’s certainly not necessary to be dangerous.
16. These are not native keybindings (on macOS they would be Command–left arrow and Command–right arrow), which as noted in the introduction to Chapter 5 makes it harder to learn them. This is just one of many reasons I don’t generally recommend beginners use Vim as their primary editor.
5.3.1 Exercises
Use the arrow keys to navigate to line 4 in the file from Listing 5.3.
Use the arrow keys to go to the end and then the beginning of line 4. Cumbersome, eh?
Go to the beginning of line 4 by using the command mentioned in the text.
Go to the end of line 4 using the command mentioned in the text.
5.4 Saving and Quitting Files
Having learned a little about moving around and inserting text, now we’re going to learn how to save a file. Our specific example will involve making a useful new Bash command, but first we have to deal with the current state of the Bash profile file. The text we added in Listing 5.3 is gibberish (at least from Bash’s perspective), so what we’d like to do is quit the file without saving any changes. For historical reasons, some Vim commands (especially those having to do with file manipulation) start with a colon :, and the normal way to quit a file is with :q<return>, but that only works when there are no changes to save. In the present case, we get the error message “No write since last change (add ! to override)”, as shown in Figure 5.6.

Figure 5.6: Trying to quit a file with unsaved changes.
Following the message’s advice, we can type :q!<return> to force Vim to quit without saving any changes (Figure 5.7), which returns us to the command line.
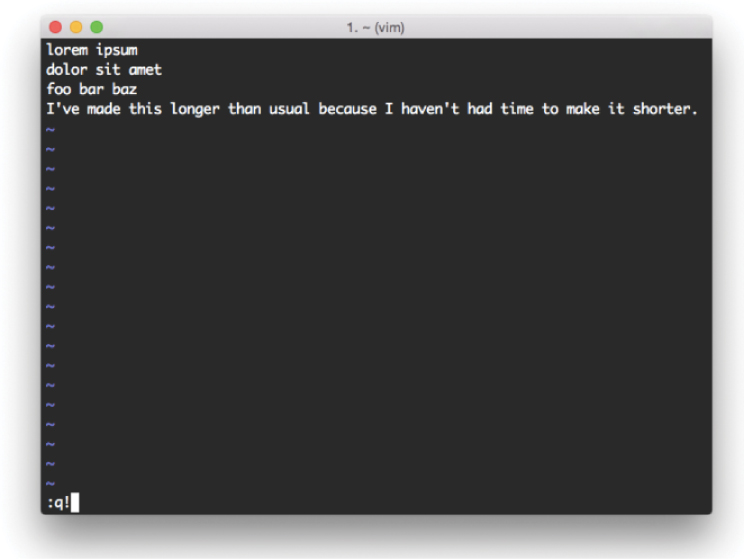
Figure 5.7: Forcing Vim to quit.
You may have noticed that we’re now in a position to understand the Most Important Vim Command™ introduced in Section 5.2: No matter what terrible things you might have done to a file, as long as you type ESC (to get out of insertion mode if necessary)17 followed by :q!<return> (to force-quit) you are guaranteed not to do any damage.
17. Hitting ESC while in normal mode does no harm, so it’s a good idea to include this step in any case.
Of course, Vim is only really useful if we can save our edits, so let’s add some useful text and then write out the result. As in Section 5.3, we’ll work on the .bashrc file, and the edit we’ll make will add an alias to our shell. In a computing context, an alias is simply a synonym for a command or set of commands. The main use for Bash aliases is defining shorter commands for commonly used combinations.18
18. To learn how to write aliases using Zsh, see “Using Z Shell on Macs with the Learn Enough Tutorials” (https://news.learnenough.com/macos-bash-zshell). TL;DR: The syntax is identical; the only difference is that you edit a file called .zshrc instead of .bashrc. (Indeed, in Bash you can actually edit a file called .bashrc instead, which makes the parallel even clearer.)
In this case, we’ll define the command lr (short for “list reverse”) as an alias for ls -hartl, which is the command to list files and directories using human-readable values for the sizes (e.g., 29K instead of 29592 for a 29-kilobyte file), including all of them (even hidden ones), ordered by reverse time, long form. This command, which as you may recognize from an exercise in Section 3.1.1, is useful for seeing which files and directories have recently changed (as well as being, for obvious reasons, one of my personal favorites). After defining the alias, we’ll be able to replace the more verbose
$ ls -hartlwith the pithier
$ lrThe steps appear as follows:
Press
ito enter insertion mode.Enter the contents shown in Listing 5.4. (On some systems, the
.bashrcfile may include some pre-existing content, which you can simply leave in place.)Press
ESCto exit insertion mode.Write the file using
:w<return>.Quit Vim by typing
:q<return>.
Note: If you make any mistakes, you can type ESC followed by u to undo any of the previous steps. (Most programs use Command-Z or Ctrl-Z to undo things, yet another example of the non-native keybindings used by Vim. In contrast, the editors discussed starting in Chapter 6 all support native keybindings.)
Listing 5.4: Defining a Bash alias.
~/.bashrcalias lr='ls -hartl'
After adding the lr alias to .bashrc, writing the file, and quitting, you may be surprised to find that the command doesn’t yet work:
$ lr
-bash: lr: command not found
This is because we need to tell the shell about the updated Bash profile file by “sourcing” it using the source command, as shown in Listing 5.5.19
19. Incidentally, a bare “dot” is a shorthand for source, so in fact you can type . .bashrc to obtain the same result. (This usage is unrelated to the use of a dot to refer to the current directory (Section 4.3).)
Listing 5.5: Activating the alias by sourcing the Bash profile.
$ source .bashrc
With that, the lr command should work as advertised:
$ lr
.
.
.
drwx------+  15 mhartl   staff   510B Sep   4 18:58 Desktop
-rw-------    1 mhartl   staff    13K Sep   4 19:13 .viminfo
-rw-r--r--    1 mhartl   staff    46B Sep   4 19:14 .bashrc
drwxr-xr-x+ 117 mhartl   staff   3.9K Sep   4 19:14 .
By the way, the .bashrc file is sourced automatically when we open a new terminal tab or window, so explicit sourcing is necessary only when we want a change to be reflected in the current terminal.
5.4.1 Exercises
Define an alias
gfor the commonly used case-insensitive grepgrep -i. What happens if, after making your changes and hittingESC, you issue the command:wqinstead of:wand:qseparately?You may recall the
curlcommand from Section 3.1, which lets us interact with URLs via the command line. Definegetas an alias forcurl -OL, which is the command to download a file to the local disk (while following any redirects encountered along the way).Use the alias from the previous exercise to execute the command shown in Listing 5.6, which downloads a longer text file for use in Section 5.6.
Listing 5.6: Downloading a longer text file for use in a future section.
$ get cdn.learnenough.com/sonnets.txt5.5 Deleting Content
As with every category of text manipulation, Vim has an enormous number of commands for deleting content, but in this section we’re just going to cover the absolute minimum. We’ll start with deleting single characters, which we can do in normal mode using the x command:
Open
.bashrcand insert the misspelled wordaliaes.Get back to normal mode by pressing
ESC.Move the cursor over the
einaliaes(Figure 5.8) and pressx.
Figure 5.8: Preparing to delete a letter using
x.
There are lots of fancy ways to delete text, but by repeatedly pressing x it’s easy (if a bit cumbersome) to delete entire words or even entire lines. On the other hand, deleting lines is enough of a special case to merit inclusion. Let’s get rid of the extra alias we added by pressing dd to delete the line. Voilà ! It should be gone (Figure 5.9). To get it back, you can press p to “put” the line, which also allows you to simulate copying and pasting one line at a time. (Again, this is a minimal subset of Vim; if you decide to get good at it, you’ll learn lots of better ways to do things.)
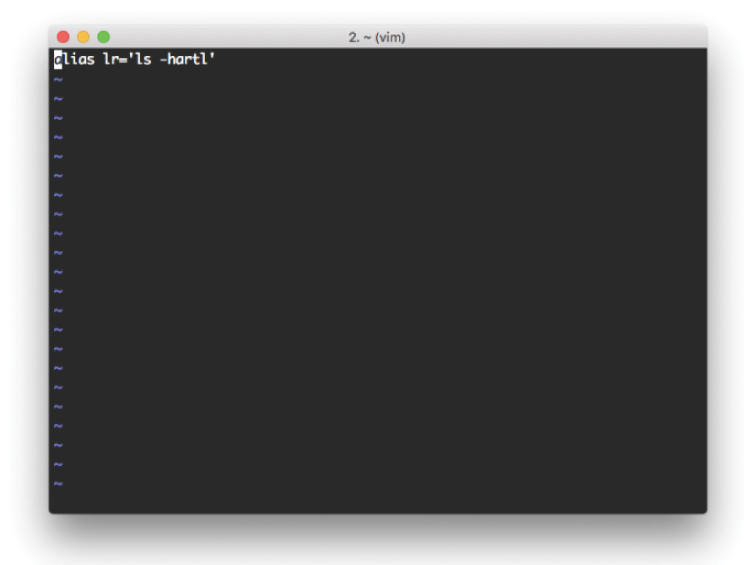
Figure 5.9: The result of deleting a line with dd.
5.5.1 Exercises
Using Vim, open a new file called
foo.txt.Insert the string “A leopard can’t change it’s spots.” (Figure 5.10).20
20. Image courtesy of apoplexia/123rf.com.

Figure 5.10: This animal’s spot-changing abilities are frequently questioned.
Using the
xkey, delete the character necessary to correct the mistake in the line you just entered. (If you can’t find the error, refer to Table 5.1.)Use
ddto delete the line, then usepto paste it repeatedly into the document.Save the document and quit using a single command. Hint: See the first exercise in Section 5.4.1.
5.6 Editing Large Files
The final skills needed for your Minimum Viable Vim involve navigating large files. If you didn’t download sonnets.txt in the exercises from Section 5.4, you should so do now (Listing 5.7).21
21. If you completed the exercises in Section 6.7.1, you can use your own custom get alias in place of curl -OL.
Listing 5.7: Downloading Shakespeare’s Sonnets.
$ curl -OL https://cdn.learnenough.com/sonnets.txtThe resulting file contains the full text of Shakespeare’s Sonnets, which is 2620 lines, 17670 words, and 95635 characters long, which we can verify using the word count command wc (Section 3.2.1):
$ wc sonnets.txt
   2620   17670   95635 sonnets.txt
On many systems, Vim shows some of the same basic stats upon opening the file:
$ vim sonnets.txtThe result on my system appears in Figure 5.11. Because of its length, this file is far too long to navigate conveniently by hand.
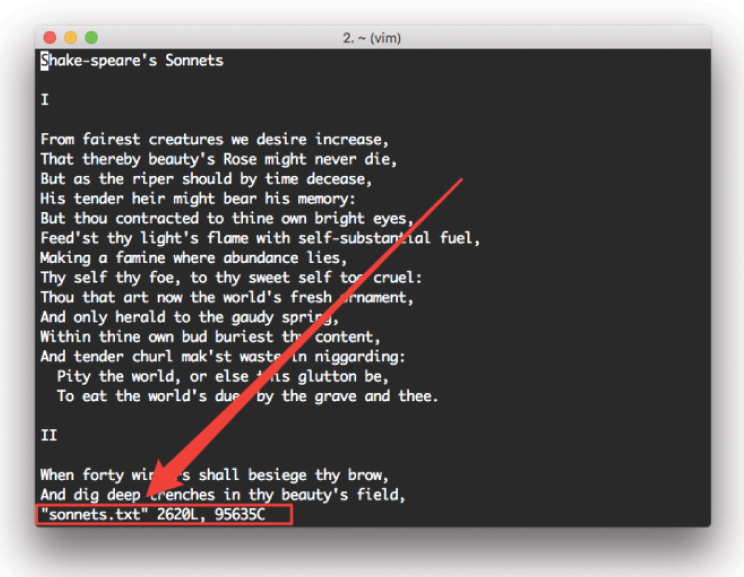
Figure 5.11: Some file stats displayed upon starting Vim.
As before, there are lots of commands for moving around, but I find that the most useful ones involve moving a screen at a time, moving to the beginning or end, or searching. The commands to move one screen at a time are Ctrl-F (Forward) and Ctrl-B (Backward). To move to the end of the file, we can use G, and to move to the beginning we can use 1G. Finally, perhaps the most powerful navigation command is search, which involves typing slash / followed by the string you want to find. The trick is to type /<string> followed by return, and then press n to go to the next match (if any).
This might all sound a little familiar, because it’s the same as the interface to the less program (Section 3.3).22 This is one of the advantages of learning basic Unix commands: Many of the patterns recur in many different contexts.
22. Depending on your system, there may be minor differences between the Vim and less interfaces. For example, on my system the slash operator is case-sensitive when used with less and case-insensitive when used with Vim. As usual, use your technical sophistication (Box 5.2) to resolve any discrepancies.
5.6.1 Exercises
With
sonnets.txtopen in Vim, move down three screens and then back up three screens.Go to the end of the file. What is the last line of the final sonnet?
Navigate back to the top to change the old-style name “Shake-speare” on line 1 of
sonnets.txtto the more modern “Shakespeare”, and save the result.Use Vim’s search feature to discover which sonnet contains references to Cupid, the Roman god of love.
Confirm that
18Ggoes to the final line of the first sonnet. What do you suppose that command does? Hint: Recall that1Ggoes to the beginning of the file, i.e., line 1.
5.7 Summary
Important commands from this chapter are summarized in Table 5.1. If you’re interested in learning more about Vim, dropping “learn vim” into a search engine is a good bet. The Interactive Vim tutorial (https://www.openvim.com/) is especially recommended.
Table 5.1: Important Vim commands from Chapter 5.
Command | Description |
|---|---|
| The Most Important Vim Command™ |
| Exit normal mode, enter insertion mode |
| Exit insertion mode, enter normal mode |
Arrow keys | Move around |
| Go to beginning of line |
| Go to end of line |
| Save (write) a file |
| Quit a file (must be saved) |
| Write and quit a file |
| Force-quit a file, discarding any changes |
| Undo |
| Delete the character under the cursor |
| Delete a line |
| Put (paste) deleted text |
| No, you mean |
| Go forward one screen |
| Go backward one screen |
| Go to last line |
| Go to first line |
| Search for |
5.7.1 Exercises
Open
sonnets.txt.Go to the last line.
Go to the end of the last line.
Make a new line that says “That’s all, folks! Bard out. <drops mic>”. Make sure to move the cursor one space to the right so you don’t drag the final period along.
Write out the file.
Undo your changes.
Write out and quit the file.
Reopen the file and type
2620dd.Realize that you just deleted the entire file contents, and apply the Most Important Vim Command™ to ensure that no damage is done.