
The AppExchange marketplace comprises a suite of apps, Lightning components, and consulting resources. Salesforce customers can install add-on applications to their Salesforce organization. You can search across thousands of apps to find prebuilt solutions for business needs. The marketplace is also the place to search across thousands of registered Salesforce consultants (shown in Figure 4-1).
Figure 4-1
Blaze new trails with the AppExchange
Apps
Increase productivity by installing prebuilt packages, called apps, which provide custom solutions for every role and industry. Visit the AppExchange web site at
http://appexchange.salesforce.com
. Here you can sort and filter in numerous ways including by popularity and rating.
To pick the right app, we recommend identifying your business challenges, budget, and time frame.
Discover the AppExchange Marketplace
You should take the time to explore the business app store in Salesforce, otherwise known as the AppExchange marketplace. There are more than 3,000 apps and components that can be used to extend the power of Salesforce. Follow these steps:
- 1.From the App Launcher, click Visit AppExchange, as shown in Figure 4-2. Or, from Setup, search for AppExchange marketplace in the Quick Find area.
 Figure 4-2Visit the AppExchange from the App Launcher
 - 2.Click AppExchange Website , as shown in Figure 4-3.
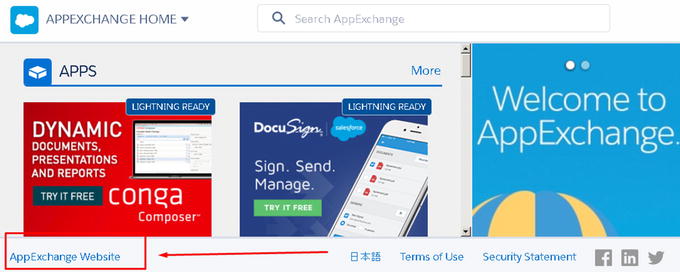 Figure 4-3Click AppExchange Website to navigate to the complete database of apps and components
This marketplace contains apps and components for end users to install and download into their Salesforce organization. In addition, you have access to thousands of reviews about these apps, components, and consultants. It’s complete transparency at your fingertips.
On your home page, shown in Figure 4-4, apps can be searched and filtered by various categories. You’ll find a wide array of apps! They range from point solutions to full-blown integration and automation. There are free apps, and there are paid apps. The good news is that Salesforce makes it easy to find what you are looking for.
Figure 4-4
The AppExchange home page
Choose an App
Choosing
the right app can seem overwhelming with the number of solutions available. So, it’s important to have a strategy in this decision-making process.
- 1.Start by defining your business challenges. Identify your company goals and objectives. Once you’ve determined what they are, search and review a handful of solution options in the Salesforce marketplace.
- 2.Once you’ve narrowed down a handful of prospective solutions, evaluate the solutions and vendors. Consider the ease of use, support options, total cost, reviews, the ease of administration, and solution match. Use this information to help make a decision.
- 3.If available, request a demo or trial, or install the app into your sandbox for user testing and acceptance.
Price
One important factor is cost. There are apps in Salesforce that are free, but there are others that have a cost associated with them. While some apps display their total cost, others require you to contact them to find out the price. Some of these payment options can be monthly, annually, per user, or per organization.
Compatibility
Make sure to check the compatibility
of the solution. You can find the compatibility information in the details section of the app under Requirements and Other System Requirements (shown in Figure 4-5).
Figure 4-5
Requirements and Other System Requirements sections in the app details
App Home Page
The home page of an app provides an overview, details, reviews, and provider information (shown in Figure 4-6).
Figure 4-6
Home page of an application
The page also contains this information
:
- Highlights: The highlights bar located at the top of the application page, shown in Figure 4-7, displays key components of the app. This typically includes Lightning readiness, organization compatibility, and limitations.
 Figure 4-7Highlights bar
 - Cost: The cost is located on the left side of the home page. If the app is free, the app will state Free. If there is a cost associated with the app, it will state Paid.
- Overview: Click the Overview tab shown in Figure 4-8 for a brief description of the app. Some apps contain links to their web site or include video demos here. It is recommended that you watch any videos for further insight into the app’s capabilities. You can also find detailed pricing information, the release date, and screenshots in this area.
 Figure 4-8Overview tab for app
 - Details: Click the Details tab shown in Figure 4-9 to gather more insightful details. This typically includes any technical specifics, software requirements, a supported feature list, data sheets, and security-related information.
To reach the app provider directly, contact information is displayed at the top-right corner of the page.
Tip
For an app that requires extensive setup, consider the support options available for each app.

Figure 4-9
Details tab
At the bottom of the Details tab are documents including data sheets, customization guides, case studies, and customer testimonials provided by the app company, as shown in Figure 4-10.
Figure 4-10
Important information
stored about the app including data sheets, guides, case studies, and testimonials
Reviews
Every app is rated using a five-star scoring method and includes written customer reviews. These reviews are also split between positive reviews and critical reviews. Use this information to help determine the success of the app. Navigate to the reviews section on the Reviews tab to read customer feedback (shown in Figure 4-11).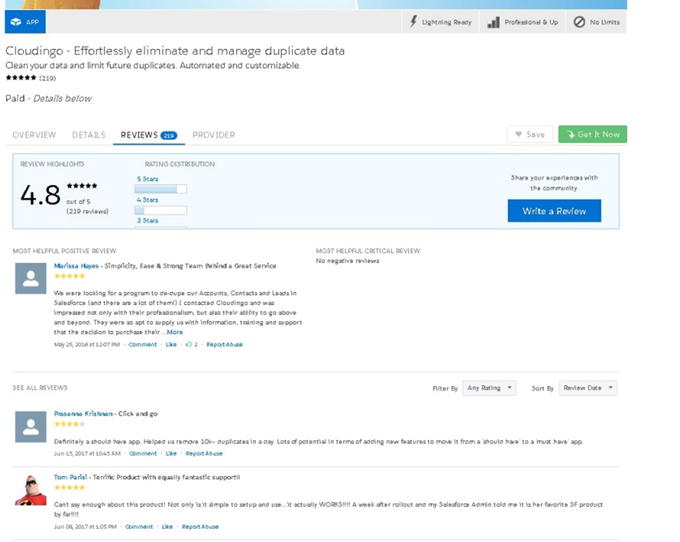
Figure 4-11
The Reviews tab includes positive and critical reviews
To write a review, a user must be authenticated. To write a review, click Write a Review in the Review Highlights section, as shown in Figure 4-12.
Figure 4-12
Click this button to write a review
Next, give your review a title. Provide comments in the Comments section shown in Figure 4-13. Scroll your mouse over the stars to select the appropriate rating. Click Post Review when finished. Note that it may take up to an hour for your review to post.
Figure 4-13
Information to include in your app review
Note
Come back to this page to write a positive or critical review of an app you have installed. This brings more value to the Salesforce community.
Provider
This tab holds more details about the app provider. Find out additional apps the provider has created that may be relevant to your business needs. Additional details include headquarter location, web site, employee count, and year founded, as shown in Figure 4-14.
Figure 4-14
Provider tab
Install an App
Apps can be installed directly into your production or sandbox environment. Production environments are where your active users are using Salesforce with live data. The sandbox is your testing environment. These can be production or development environments used for testing applications. It is recommended that you install here first to see how it will interact with your existing setup.
An app can also be installed for a specific group of users or all users.
To install an app, follow these steps:
- 1.Do some research and select the app to be installed.
- 2.Click the Get It Now button, as shown in Figure 4-15.
 Figure 4-15Get It Now button on the home page
 - 3.Log in using your Salesforce credentials.
- 4.Select the appropriate installation method, as shown in Figure 4-16.
- Click “Install in production” to install into a live, production environment.
- Click Install in Sandbox to install into the sandbox test environment.
 Figure 4-16Choosing to install into production or the sandbox
 - 5.Review the package components, version, expiration, and subscription cost for the app that will be installed. Review the terms and conditions.
- 6.Select “I have read and agreed to the terms and conditions,” as shown in Figure 4-17. Click Confirm and Install.
 Figure 4-17Last step before installing
 - 7.Identify the users who should have access to this app. Select the appropriate option from the following list: Install to Admins Only, All Users, or Specific Profiles.Note You can open access to this app to other users after the install.
- 8.Click Install, as shown in Figure 4-18.
 Figure 4-18Selecting which users to install to
 - 9.Click Done and you will be directed to the Installed Packages section once the app has completed installation (see Figure 4-19).
 Figure 4-19Details on installed and uninstalled packages
Installed Packages
Installed apps create a package of components and dependencies. This includes custom objects, Visualforce pages, and Apex classes and code. The installed app can come in the form of a managed or unmanaged package.
- A managed package contains restrictions to the components installed.
- An unmanaged package has more flexibility and allows development on top of any components installed.
To uninstall an app, navigate to the Installed Packages area in Setup and click Uninstall.
To find details on any installed apps, including all components and dependencies, click the name of the package, as shown in Figure 4-20. The details will appear, as shown in Figure 4-21.
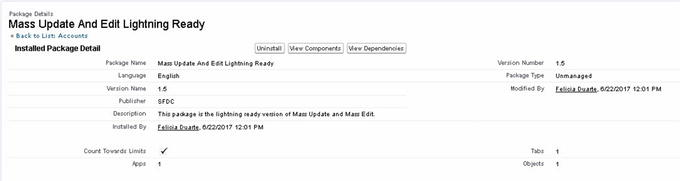
Figure 4-20
Package name
Figure 4-21
Package details
Click View Components for the complete breakdown, by type, of everything installed, as shown in Figure 4-22.
Figure 4-22
Viewing your package components
- Visualforce page: A Visualforce page is a custom-built page made up of Apex classes and code, used to create a custom look and feel.
- Apex class: An Apex class is part of a unique Salesforce programming language that gives developers and app builders the capability to create business logic.
- Custom object: This is used to store or build custom information. Custom objects can be used to link information to standard objects.
Lightning Component
Lightning components
are reusable containers of prebuilt tools and elements. These components can be added to your pages to ramp up the productiveness of your end users. As mentioned earlier in the book, components can easily be dragged and dropped into your desired page. Salesforce makes this easy to do without a developer and without code. Discover these tools by searching through the marketplace, as shown in Figure 4-23.
Figure 4-23
Lightning Components search page
To download a component, follow the same steps used to download an app.
Find a Consultant
Consultants are registered and often certified Salesforce partners. They help make up the Salesforce ecosystem by providing custom Salesforce solutions and implementations. Consultants typically provide Salesforce training, implementation solutions, quick-start packages, data migration, and more.
Your Salesforce account executive will often recommend a Salesforce consulting partner. Typically a discovery or scoping call with a consultant follows, and a quote with timeframe, deliverables, and cost is provided.
Similar to app browsing, browse through a list of consultants
and sort by the type of service, specialization, tier, territory, and more.
- 1.Select Consultants from the top of the page, as shown in Figure 4-24.
 Figure 4-24Consultants tab
 - 2.
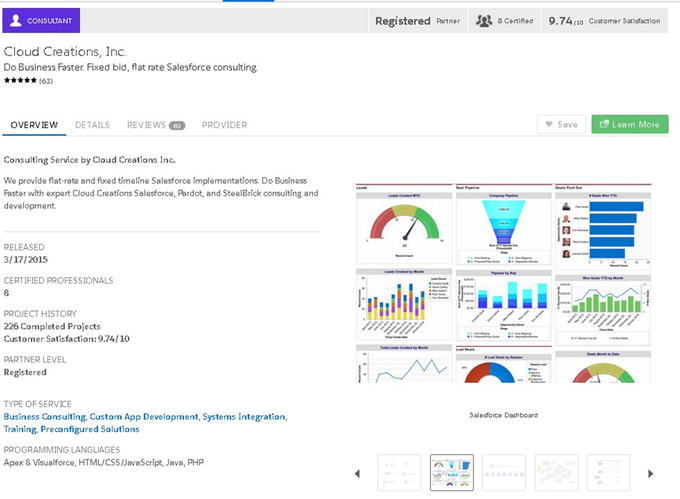
- 3.Find more details about this prospective consultant, including the number of projects completed, satisfactory ratings, geographic focus, and more on this page (shown in Figure 4-27). You can also find the consultant’s contact information here to contact them for services.
- 4.Contact the consultant and request a quote.
 Figure 4-27Details section on consultant

Tip
Consultants often employ a mix of project managers, business analysts, developers, and specialists. Hourly rates vary widely and typically include a scoping call to identify the right solution for your business. The more detail you can give your potential consultant, the more accurate the cost estimate will be.
Summary
The AppExchange marketplace consists of the Salesforce ecosystem of app partners and consultants. It is a growing market and is expected to make big changes in the near future. Visit the AppExchange marketplace to maximize your Salesforce setup.