
We have the HTML done, but we need to do the CSS bit. Let's go ahead and open up app.css and if we take a look at the template, we'll have to start with the core styles.
Now we will notice that by default, the buttons and the links are blue. We actually want to change that to red. We'll put a tag, let's write color and that's going to be a value of ec2c2f, which will give it the red color. Now we also want the buttons to have a background color of red. Let's say, we also want to give the buttons a little border at the bottom. So, we'll use border-bottom: 3px #333solid;.
Now when we hover over the buttons, you'll see it turns blue, same thing with the links:

To fix this, let's use the following code:
a{
    color: #ec2c2f;
}

a:hover{
    color: #333;
}

.button{
    background:#ec2c2f;
    border-bottom: 3px #333 solid;
}

.button:hover{
    background:#333;
}
Let's save the file and reload the page. This is what you will now see with the buttons and links in red even when you hover over them:

Let's now take care of the positions of the Home, About, and Services links. We want them to be at the top-right of the page. Here's the code to do this with some font size modifications:
header .main-nav{
    float:right;
    margin-top: 30px;
    font-size: 18px;
}

header .main-nav li{
    padding-right:20px;
}
Let's reload the page and see the changes:

Let's also give a little margin to the header on the bottom:
header{
    margin-bottom: 20px;
}
Reload the page and this is what you should see:

Next, let's do the showcase area. For this, use the following code:
.showcase .callout{
    text-align: center;
    padding: 30px;
    margin-bottom: 20px;
}
Here's what you will see now:

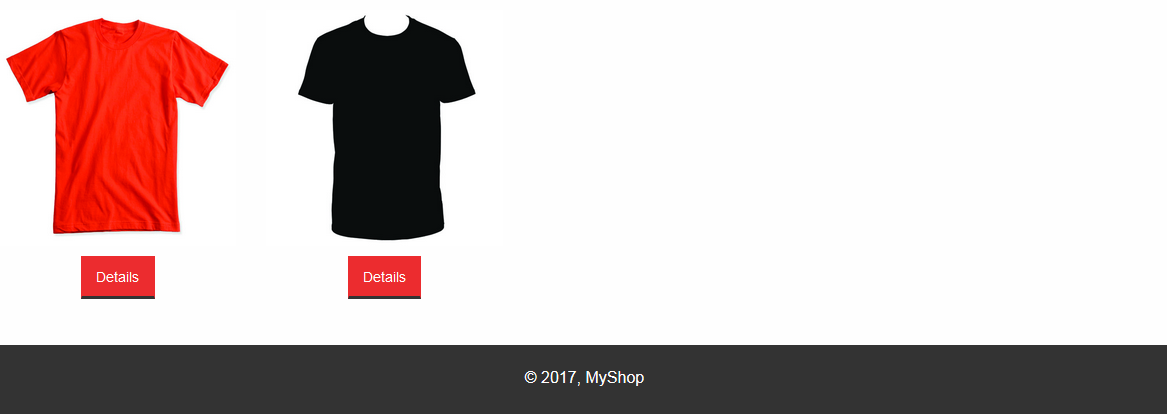
Now for the products area, we'll write products .columns, we're just going to add a margin-bottom and let's do product, singular, and for that we want to text-align to the center. Let's see, so for the button we want to add a little margin to the top, so let's write product .buttonmargin-top and let's use 10px:
.products .columns{
    margin-bottom: 40px;
}

.product{
    text-align: center;
}

.product .button{
    margin-top: 10px;
}
Let's save that and reload the page:

Now for the menu on the right-hand side of our webpage (Categories), we will add a border underneath each list item. However, we don't want to have a border for the last list item. Type the following code to execute this:
.vertical li{
    border-bottom: 1px #ccc solid;
}

.vertical li:last-child{
    border-bottom: none;
}
Save that and reload the page:

Lastly, let's add the footer. We'll set some properties and display the footer on the page using the following code:
footer{
    background: #333;
    color: #fff;
    text-align: center;
    margin-top: 30px;
    padding-top: 20px;
    height: 70px;
}
Save that and reload the page:
Let's take a look at Details and About page on our webpage. You will see that the Details page looks good; however, the About page has the content center-aligned. To fix this, go to the about.html file and remove product end from the 12-column div. Reload the page, and the About page should look perfectly fine.
In the next section, we'll jump into WordPress and we'll start to create a WordPress theme based on this design.