
After having got an understanding of what is Bluemix from the previous chapter, let us now take the plunge. In this chapter, you will learn a few other important aspects of working with IBM Bluemix. You will be introduced to the Cloud Foundry command-line utility, which is a key component to work your way through the Bluemix platform. You will also learn how to use the command-line utility to deploy a hello world application that you will develop using the example in this chapter. This chapter will further discuss on how you can develop a hello world application using the web IDE on the Bluemix platform and how you can deploy changes to the application in an automated fashion using the DevOps services on Bluemix. Sounds exciting? Yes? Let us get started.
In this chapter, we will be looking at following topics:
- Cloud Foundary command line utility
- Log in to Bluemix using cf cli
- Building your first Hello World application and deploying it on Bluemix
- Updating your application on Bluemix
Bluemix is a PaaS platform, which is based on open standards. Bluemix at its core is Cloud Foundry, which is an open source community-based project of open standards-based platform as-a-service offering.
Note
To know more about Cloud Foundry, you can go to https://www.cloudfoundry.org/learn/features/ .
Cloud Foundry command line utility (cf cli) is an interface for the user to interact and work with the Cloud Foundry platform, since Bluemix at its heart is Cloud Foundry, the cf cli can be used to work with the Bluemix platform.
You can step through the following procedure to install the cf cli on your workstation or desktop:
- Go to https://github.com/cloudfoundry/cli#downloads to download the latest version of cf cli installable for your operating system.
cf cli installable is available for Mac OS X, Linux, and Windows operating systems. For updates on versions and support for operating systems, please make sure to check https://github.com/cloudfoundry/cli#downloads .
- Follow the install instructions provided at http://docs.cloudfoundry.org/cf-cli/install-go-cli.html, for your operating system.
For example, installing from the
.pkgfile on your Mac OS X would show the following window on successful installation:
- Make sure you check your installation by opening the command prompt (if Windows) or the terminal window (if Mac OS X) and typing the following command:
cf - If installed successfully, you will see the help contents displayed, as shown here, for example, when the command is run on a terminal window of Mac OS X:
Last login: Mon Apr 18 12:19:04 on console
xXXXX-MacBook-Pro:~ xxxxx$ cf
NAME:
   cf - A command line tool to interact with Cloud Foundry
USAGE:
   cf [global options] command [arguments...] [command options]
VERSION:
   6.17.0+5d0be0a-2016-04-15
GETTING STARTED:
   help                                   Show help
   version                                Print the version
   login                                  Log user in
   logout                                 Log user out
   passwd                                 Change user password
   target                                 Set or view the targeted org
                                              or space
...........
...........
xXXXX-MacBook-Pro:~ xXXXX$
After having installed cf cli, let us now learn how to log in to your Bluemix account using the cf cli. In this chapter, we will use a terminal window to explain how to use cf cli; the cf commands and steps explained are similar even if you were to use cf cli on Windows command prompt or Linux terminal.
Follow the steps given to log in to your Bluemix account:
- Open the terminal window and enter the following command:
cf login - On hitting
Enter
, you will see that you will be prompted to enter an API endpoint; this is required if you want to log in to a specific region. The API endpoints are based on the regions where public Bluemix is available:
- The API endpoint for Dallas, US region is
https://api.ng.bluemix.net - The API endpoint for London, UK region is
https://api.eu-gb.bluemix.net - The API endpoint for Sydney, Australia region is
https://api.au-syd.bluemix.net
Since the account you have created in Chapter 1, Saying Hello to IBM Bluemix, is in the Sydney, Australia region, we will provide the API endpoint as
https://api.au-syd.bluemix.net:
- The API endpoint for Dallas, US region is
- Next, you will be prompted to enter your e-mail address, which is also your log in username, and your password. Once you provide these and hit
Enter
, your authentication details will be validated. Once authenticated, you will see that you will be logged in to your default target organization. You will then be provided with options on the Space you would like to work with, within your Bluemix organization:

- Select the Space you want to work with by keying in 1 or 2 (from the options shown). Hit Enter and you will be successfully logged in to your space within your organization on Bluemix where you can deploy your applications or work with service instances or your applications. This completes your login to your Bluemix account from cf cli, as shown in the following screenshot:

You can log in to any region where you have Space created for your organization, by using the API endpoint. It can so happen that using
cf loginmay default to the API endpoint you have used earlier. To override this option, you can use the following command to log in:cf login -a https://api.ng.bluemix.netThe following screenshot shows the output of the preceding command:

Here you see that since there is only one space in the organization for the user in the US region, the login command defaults the user to that Space, mydev.
There are a whole lot of operations you can do with cf cli, however we will learn more about using cf cli in our subsequent sections, where we will look at building a hello world application and deploying it on Bluemix.
In our first Hello World example we shall look at how easy it is to get started with a Hello World application using Bluemix. For this we will use the Bluemix dashboard to work with the platform. In the subsequent section we will look at using the same Hello World application and we will learn to use cf cli to deploy the application on Bluemix.
Before you start creating the Hello World application, there are a few aspects of the Bluemix dashboard that need understanding. Log in to your Bluemix account by going to https://console.au-syd.bluemix.net. You will be taken to the dashboard, as shown in the following screenshot:

You will see that from your dashboard you can work with applications and services. Applications are deployable code that can be run on a compute environment on the Bluemix platform. Applications are what you build and deploy.
Services are IBM, third-party or community software that is provided on the Bluemix platform. Users can create service instances and can bind them to the applications they develop and deploy on Bluemix. By doing this, their applications can leverage the functionality of the software offered as services on the Bluemix platform. An example of a service would be a database, which is a bare bones requirement for any modern or legacy applications, that deal with data.
Note
Virtual Servers or VMs, Containers, and OpenWhisk are compute environments that provide options for users where they can deploy their applications. Cloud Foundry is the default compute environment for the Bluemix platform. At the time of writing this book the Sydney region does not have support for Containers and OpenWhisk.
The following screenshot shows the compute environments that we discussed, available in the US region:

Runtimes is the execution environment for your application code. For example, if you are developing a Java Spring-based web application then the execution environment for your application would require a web server or an application server that can run Java code additionally you would also need the execution environment to have the necessary libraries for the Spring framework, so that your application code can execute. This is typically what a runtime would be.
The runtime options available can be seen by clicking on CATALOG option on the Bluemix dashboard. At the time of writing this book the runtimes available are as shown in the following screenshot:
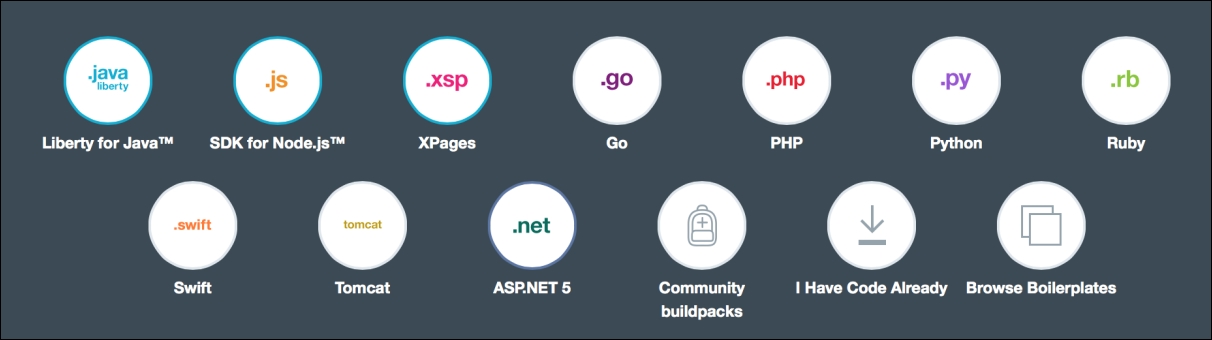
Buildpacks are a mechanism to define runtime environment along with dependencies to Cloud Foundry. Specifying a buildpack when deploying your application will make sure that Cloud Foundry can get the necessary dependencies to build your execution environment. Buildpack is an important mechanism of bringing in support for programming languages and frameworks that are not claimed to be supported out of the box on the Bluemix platform. We will learn more about it, later in this book. Community Buildpacks, shown in the following screenshot, explains how and where to get the Cloud Foundry-compatible buildpacks, so that you can deploy applications written in programming languages or frameworks that are not supported out of the box on the Bluemix platform:

The steps to deploy an application using Community buildpacks would be as follows:
- Look up for a Cloud Foundry-compatible buildpack for your programming language or framework from https://github.com/cloudfoundry-community/cf-docs-contrib/wiki/Buildpacks.
- Copy the GitHub URL for the buildpack you want to use.
- Use cf cli to log in to your Bluemix account, organization, and Space, where you would want to deploy your application.
- Execute the following
cfcommand:cf push {$APP_NAME} -b {$GIT_REPO_URL}An example command would be :
cf push timeticker -b https://github.com/spiegela/cf-buildpack-erlang
Bluemix is an evolving platform and it is important to note that the screenshots may look different with the updates to Bluemix platform. The preceding screenshots on the runtimes supported are from the classic view of Bluemix console. At the time of writing this book, we have a newer version of the console that is available, which can be used by switching to it. Click the Try the new Bluemix link, to work with the newer Bluemix console:

The runtimes for Cloud Foundry-based applications on Bluemix, as shown in the following screenshot, is the newer version of the console:

Boilerplates are application development patterns, which have been standardized across categories and have been provided as templates for Bluemix user. The use of these boilerplates to create an application expedites the application development by seamlessly creating the necessary service instances and application stub with execution environment. Let us understand this further by looking at one of the boilerplate example from the list of supported boilerplate templates available on Bluemix, which is shown in the following screenshot. This screenshot is from the newer Bluemix console:

Clicking one of the preceding boilerplates, say the Java Cloud Web Starter boilerplate, would bring up the details related to this boilerplate as shown in the following screenshot:

Here you will notice that the boilerplate consists of a runtime for Java applications, which is the IBM Liberty for Java application server; the boilerplate also contains the Cloudant NoSQL DB as a service. Pricing plans are shown separately for the runtime and for the Cloudant service, which you can see by selecting the Cloudant NoSQL DB service. When a user selects this boilerplate to create an application, then the platform creates an execution environment for his web application by provisioning Liberty for Java. Additionally, a service instance of Cloudant NoSQL DB is created in the user space, an application stub in Java is created and deployed in Liberty runtime. The application stub will have minimalistic functions that involves talking to the Cloudant NoSQL DB service instance as well. What this provides is a great starting point for the user to build web applications that uses an application server and a database.
Similarly, you see that there are other boilerplates that allow you to get started with creating applications using different programming languages, frameworks, or services. We will be creating our first Hello World application using one of the boilerplates, and during this exercise you will learn the process of using boilerplates, editing application stub, and deploying and re-deploying application on Bluemix.
You can follow the steps given here to start creating your first application on Bluemix. We will use the boilerplate as our getting started mechanism. We will be using the newer Bluemix console for most of our screenshots in this section:
- Log in to the Bluemix console or dashboard, use your IBM ID to log in, as was explained in Chapter 1, Saying Hello to IBM Bluemix.
Note
At the time of writing this book, the URL to directly go to the new Bluemix console in Sydney region is https://new-console.au-syd.bluemix.net/.
- You will be taken to a landing page, as shown in the following screenshot:

- Click Compute, to be taken to the compute options available in your region. Since at the time of writing this book the only compute option available in the Sydney region is CF Applications, which is the Cloud Foundry-based compute environment for your applications. If we go to other regions, such as US and UK, you will see additional compute options such as Containers, OpenWhisk, and Virtual Servers. To build this application let us switch region to Dallas, US, as explained in Chapter 1, Saying Hello to IBM Bluemix, and then let us go to CF Applications under Compute:

- Click the icon next to Get started now, as shown in the preceding screenshot. You will be taken to the page which displays all the supported runtimes and available boilerplates:

- You can choose to start your application creation by choosing a runtime or by choosing a boilerplate. In this section we will look at creating the application by choosing a boilerplate. We will use the Personality Insights Java Web Starter boilerplate:

- You will be taken to the page which gives you more information on the boilerplate, such as the runtime and services that make up the boilerplate, as well as pricing metrics for them.
Note
During the running of this example, if your free trial account is valid, you do not have to concern yourself with the pricing yet, you will be within the free tier usage for the runtime and service. If you would like to use the application or service beyond the free trial period, then refer to the procedure of converting your trial Bluemix account to a paid account and gain access to services with powerful and feature rich services along with continued use of resources to keep your application live. You can refer to www.bluemix.net/pricing .
- As shown in the following screenshot, you will need to provide a unique name to your application in the App name: field, the Host name: field usually defaults to the App name: field. You can leave the rest of fields with their default values. Plans for runtime or service defines their respective charging metrics:

- This is how a filled out screen would look, for example:

- Click Create at the bottom, this will create the service instance of Personality Insights, an execution environment with IBM Liberty for Java application server, and an application stub in Java, that works with the Personality Insights service instance:

- The Create operation would take few seconds before it completes. Once this operation completes, you will see the following screenshot. You can see the status of your application stub, as highlighted:

- You can see in the preceding screenshot that you have three options on how you can work with your application stub. You are also provided inline instructions on how you can get started with each of the following options:
- Eclipse Tools for Bluemix
- Command-line interface
- Git
- You can also see tabs to work with your deployed application, you can look at application logs, monitor your application, look at the application's use of the runtime capacity, and so on, through the respective tabs provided in the preceding screenshot, such as:
- Overview: It gives a snapshot view of the application stats such as number of instances, memory usage, activity logs and so on, as shown in the following screenshot, which is for the application we created:

- Runtime: It gives the information on the usage of the runtime capacity, in our case, the memory allocated and used by the Java application as the runtime charge metrics is the memory used by the application, measured in GB Hour. This is shown in the Memory and Instances tab; this information is similar to what we see under Runtime in the preceding Overview screenshot. The Runtime tab also has two additional tabs, Environment Variables and Files. Environment Variables shows the information on variables used by the application to connect to external services, as shown in the following screenshot:

- Files: This tab shows the files relevant to buildpack (Liberty for Java in this case), application-related files, log files related to application staging and deployment on Bluemix, and so on, as shown in the following screenshot:

- Connections: It gives information on the services used by the application and the credentials and associated information to connect to the service instance:

- Logs: It gives the handle to logs that can be filtered based on the component it belongs to. The following screenshot shows the logs for the application, based on selection from the drop-down shown:

- Monitoring: It provides a visualization of the application availability stats, as shown, for the application created, in the following screenshot:

- Overview: It gives a snapshot view of the application stats such as number of instances, memory usage, activity logs and so on, as shown in the following screenshot, which is for the application we created:
Since your application status is Running, you will be able to launch your application by clicking on View App, as shown in the following screenshot:

This will take you to the application URL or Route, which is a public URL for your application, accessible over the Internet. In case of the application you have created, you will be taken to its route, which is http://java-pi-hw-01.mybluemix.net . The application brings up a UI that talks about the Personality Insights service and has a text box that allows your application user to enter any text, which can be analyzed for personality traits, leveraging the cognitive service of Personality Insights that you have used in your application. There is default text that prepopulates this text box. When you launch your application URL, when you hit on Analyze for this text, you will see the results of the personality traits derived from this text, as shown in the following screenshots:
Personality traits after analyzing the default text is shown as follows:

Details on the analysis and visualization is provided as a result, as well:

This application can be used to cognitively understand unstructured text and analyze it to look for personality traits to arrive at a view of personality data as derived from unstructured data related to a given personality. For example, you can search for Wikipedia text on any known personality, for example, in the following screenshots, we have demonstrated the personality traits of Swami Vivekananda as derived by using your application. The data on Swami Vivekananda we have input in the application is sourced from Wikipedia.
The results are as shown in the following screenshot:

Further analytics on the personality data is as shown in the following screenshot:

Note
You have successfully created your first application on Bluemix. Next, we will see how you can work with the source files to make changes to your first application. Though this application is more than just a Hello World application, we can call it a Hello World as this is as good as your starting point on creating and deploying applications on Bluemix.
In this section, we will look at two aspects of application update, one is the update to the application source, and the other is the update to the application deployment on Bluemix.
Follow these steps given to download the source files for your application:
- Go to the Getting Started tab, as shown in the following screenshot; here, select the option of using the command-line interface:

- On this page, you will find the steps to get started with your application code using the command line interface. Since we have already downloaded the cf cli, we will only be downloading the application code now. Click the DOWNLOAD STARTER CODE button, to download the source files for your application:

- Move the downloaded files to a folder on your local machine, for example, projects:

Note
It is important to understand the
manifest.ymlfile. This is the file where you can specify parameters to instruct cloud foundry at application deployment time. You can define the number of instances, memory for your application, services used, and so on, within themanifest.ymlfile. To know more about the manifest file, refer to https://docs.cloudfoundry.org/devguide/deploy-apps/manifest.html . - You can open the
manifest.ymlfile, to see the deployable artifact for your application. This is how the manifest file for your application looks:
- From the manifest file, you will notice that the deployable artifact for your application is the
webApp.warfile. - You can choose to make any change locally on the application file. For this example, we choose to change the default text input that appears on your application screen. We will do this by modifying the
en.txtfile, inside theWebContent/textfolder. We shall edit the contents on this text file to show text from Wikipedia on any other famous personality, for example, Adolf Hitler. Once we edit and save locally theen.txtfile, we need to locally build the application files, for which we will use ant:
Note
Instructions on installing ant on your local machine is beyond the scope of discussion here. You can refer to instructions here http://ant.apache.org/manual/install.html or to similar sites for information on installing ant on your local machine.
- Open a terminal window and change the directory to your project or application root folder, and log in to Bluemix using cf cli, as explained earlier. Now execute the following command to push your application changes or updates to Bluemix:
cf push java-pi-hw-01 - The results of execution of the command will be as shown in the following screenshot:

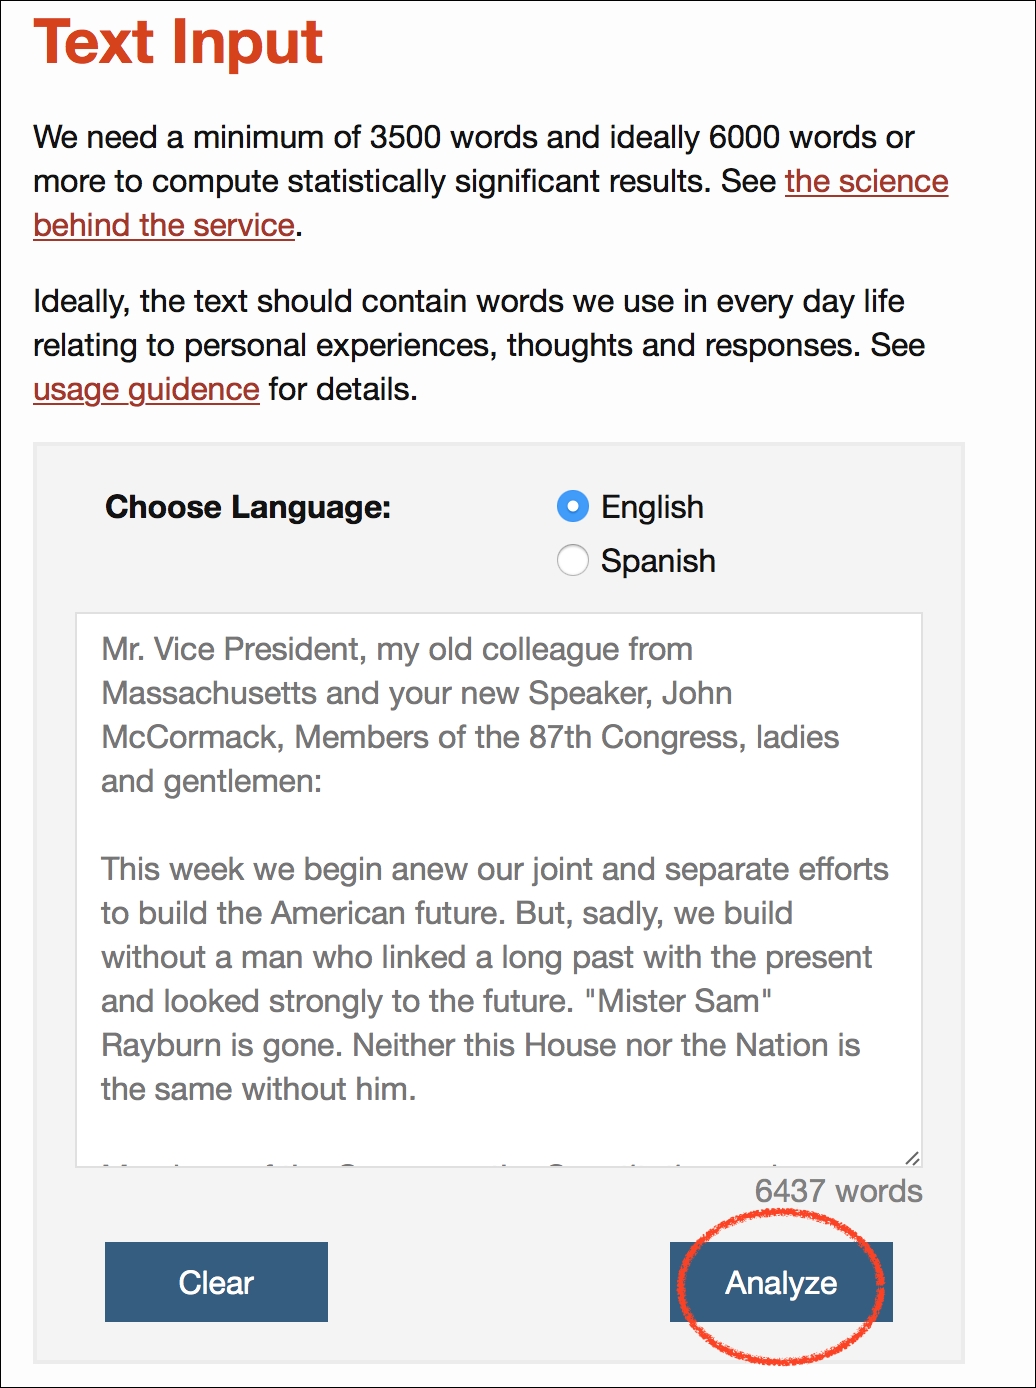
- Once your application update is completed, you can go to the application route or URL, to check if your update is reflected. In the following screenshot, you will see that the default Text Input is now changed to the text that we updated in the
en.txtfile, from the application files:
In this chapter, we learned about installing and using the Cloud Foundry command-line utility to work with Bluemix. Further, we learned about various concepts, such as services, runtimes, boilerplates, and so on, related to the Bluemix platform. We took the first step in application development and deployment by creating a starter or a Hello World application using boilerplate on Bluemix. In this chapter, you also learned how to get the starter code for your Hello World application and how to make changes to it locally, and how to push the updated application to Bluemix; we used cf cli to demonstrate this. In the next chapter, you will learn more ways and techniques to work with Bluemix and your applications. We will see how by learning how to extend existing applications.