
Having gained an understanding of what Bluemix is and what it offers from the previous chapters, and now having gained an understanding of the microservices pattern, you will be able to get a perspective on why Bluemix is a platform that is suitable for microservices-based application development. Let us immediately get into discussing an application use case that we will illustrate in this section, which will also help to bring forth the concept of microservices and help with your understanding of this.
In this section, we will build an application leveraging concepts and applications that we have developed and learned in previous chapters. We will be using the application we developed in
Chapter 4
, Leveraging On-Premise Software for Applications on Bluemix in which we retrieved a certain Twitter feed, translated it into French, did some sentiment analysis on it, and then persisted it in a MongoDB database that existed locally on your workstation. This will form one application, or microservice, for us. Next, we will build another application, which will retrieve persisted negative tweets from MongoDB (which is updated by our first microservice). We will augment the tweets retrieved by first translating them back to English, and then we will use the cognitive function of tone analysis to find the social tone scores for each of the retrieved tweets. We will then create a formatted output of the tweets with their social tone scores, which will be obtained by a user sending an HTTP request. At the same time, we will have this application call out to an OpenWhisk trigger, which we created in
Chapter 7
, Compute Options on Bluemix. This application will be our microservice 2, and the OpenWhisk trigger, which will execute a configured action, will be our microservice 3. All of these microservices together will form our microservices based application. As we can see, each of the three microservices in our example are independent deployable units, can be scaled individually, can run without dependencies on each other, and each of them runs on its own infrastructure units.
Let us now go step by step and build our microservices-based application.
The first microservice for this illustration is the application you built in Chapter 4 , Leveraging On-Premise Software for Applications on Bluemix. We will not be going over the steps for building this application again in this section. If you followed Chapter 4 , Leveraging On-Premise Software for Applications on Bluemix, before reaching here, then you will already have this application deployed in your Bluemix account. If not, please go back to Chapter 4 , Leveraging On-Premise Software for Applications on Bluemix, follow the steps to create the application that retrieves tweets from the configured Twitter stream, analyzes the tweet sentiment, separates out the negative-sentiment tweets, and persists them in MongoDB, which is configured on a local system.
Let us now proceed to the next section, assuming you have this step completed and microservice 1 is available to you.
Before going into the development of microservice 2, let us make sure we have microservice 3 available. If you followed
Chapter 7
, Compute Options on Bluemix, before reaching here, you will already have created the OpenWhisk Cloudant trigger, any action that needs to occur when the trigger occurs, and finally, the rule that associates the trigger and the action.
In the action, we will make a small modification for this example, since the Cloudant trigger that will invoke this action will not be returning an _id, which we used to print in the action when we executed it in the example in
Chapter 7
, Compute Options on Bluemix. We will modify the action to just print a string to indicate that the trigger, called from our microservice 2, has executed the action code.
The action code from Chapter 7 , Compute Options on Bluemix, will be as shown in the following screenshot:

We will be modifying it to look like the following screenshot. Click Make it Live once you have edited the action code:

Let us go into the next part of this illustration, which is to create microservice 2.
Please follow the steps in this section only after you have completed the sections on microservice 1 and microservice 3.
Let us now create a new application that will act as microservice 2 in our illustration of a microservices-based application. Follow the steps given here to create the application:
- Log in to Bluemix and on the welcome page, click Compute:

- Click on the icon highlighted in the following screenshot to take you to the options available on Bluemix to create a Cloud Foundry application:

- Select the Node-RED Starter boilerplate, as shown in the following screenshot:

- Give your application a name, review the plans for the services that come with the boilerplate, and click Create:

- Once your application is created and has started successfully, you will see it in the dashboard, as shown in the following screenshot. Click Open URL to go to the Node-RED editor, from where you can start wiring your application functionality:

- Click Go to your Node-RED flow editor:

- Start wiring your application on the editor using the nodes from the palette on the left.
- We will first wire the flow with the nodes that we need. Then we will learn to configure each of these nodes individually. The flow we will wire for this application is as shown in the following screenshot:

Let us learn to wire and configure the flow:
- Drag and drop an http input node from the nodes palette onto your empty editor pane:

- Double-click on the http node to configure it, then give the node a name and a URL, which will be used by the application user to trigger the flow we will be wiring in the application. Ensure the HTTP method is selected as GET:

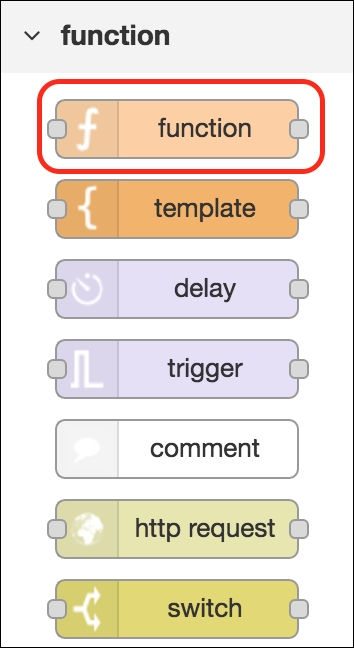
- Next, drag and drop a function node from the nodes palette:
- Double-click the function node to configure it. Give the node a name, such as
Query MongoDB, as this is the node where we will be defining some of the parameters that are necessary to build the query to retrieve stored records from MongoDB. As seen in the following screenshot, we are restricting the number of records returned by the query by definingmsg.limit. Here, we have limited it to30records. Next, we want the query to fetch the last few records each time it is run, so we will ensure this happens by definingmsg.sort. We can also choose to just get the payload field from the query and can ignore the other fields by definingmsg.projection, as shown in the following screenshot:
- Wire the http and function nodes together. Next, drag and drop the mongodb node from the palette, shown in the following screenshot:

- Double-click on the mongodb node to configure it. Since this node is going to query MongoDB to fetch data, make sure you set the Operation field as find. Provide the Server and Collection information as configured in Chapter 4, Leveraging On-Premise Software for Applications on Bluemix, when configuring the MongoDB node in the application:

- Your server configuration should look like that shown in the following screenshot, similar to how we had configured it in Chapter 4, Leveraging On-Premise Software for Applications on Bluemix, when configuring the mongodb node. Make sure you are selecting the same database that was used in the application (microservice 1) to persist translated tweets:

- Now wire the configured mongodb node to the function node, as shown in the following screenshot:

- If you deploy and run the flow we have created so far, we will get an output such as that shown here, which is the payload field for 30 documents from MongoDB:
[ { "payload": "Ce clown a manifestementjamaisentenduparler del' expression "vide clang plus les navires" https://t.co/YTM6brhVSQ" }, { "payload": "@revieweroPeut-êtreelleestmelo-dramatizing pour son incapacité à effectueren raison de problèmesd'aptitude sur ce jour @narendramodi" }, { "payload": "RT @PMOIndia: attristépar la perte de vies due à un séismeenItalie. Condoléances aux famillesendeuillées&prières avec les blessés: PM @nar ..." }, { "payload": "@14Mohjas RT: JungleRaj Au Gujarat @narendramodisivous ne pouvez pas contrôler les troubles sociauxdanstoutel'Indevousdevezvolunteerlydémissionner." }, { "payload": "@daveakash2 RT: aucune accusation de sédition sur @narendramodi n @manoharparrikar??? #NavyInfoLeaksParrikarSleeps" }, { "payload": "@HemantNoida2015 RT: @yadavakhileshacheteursjaha Sir ye #kaisaPradeshUttar Pradesh# korahehaiaurpilleraucune action de côtéur. Https:/ ..." }, { "payload": "@narendramodi l ....] - You will notice that we are indeed getting the tweets in French from our MongoDB (inserted into the database by microservice 1). Let us proceed further with our application (microservice 2) and try to format the results in such a way that we can do more augmentation on the data retrieved. Continuing with our application build, let us drag and drop another function node to the editor. Double-click on it to write the code that will format the results:

The code entered in the preceding function node is provided as follows:
varstr=""; for (var j = 1; j <msg.payload.length; j++){ str+=msg.payload[j].payload+"~"; } msg.payload=str; return msg; - You will now see the post execution of the flow, the output being one string with all the tweets separated by
"~"(which was set in the code), as shown in the following screenshot of the debug console:
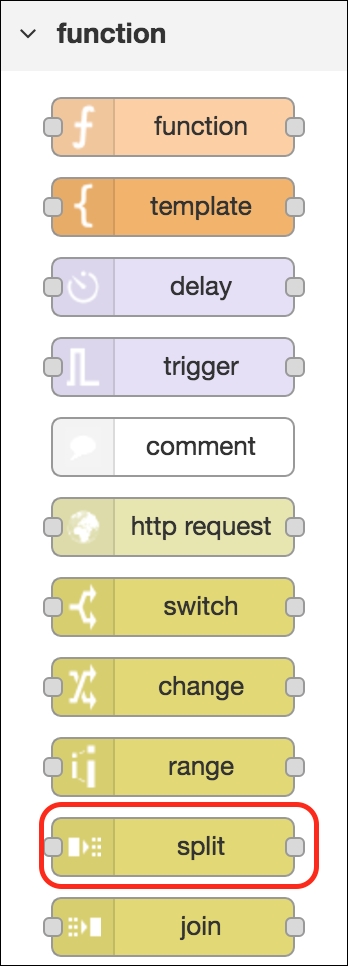
- Now to be able to do any kind of analysis or augmentation of the results, we will need to split the results into individual tweets. For this, drag and drop the split node to the editor and wire it to the function node we created in the previous step:
- You will now see the post execution of the flow, the output being individual tweets set as a string onto
msg.payload, in the flow:
Note
Now we will make use of value-added services from Bluemix, which in their own capacity can be considered as additional microservices that would make up this application. For the sake of this discussion, we will just call them Bluemix services. So, in this application, we want to convert the tweet text back to English, so we will use the language translation node, such as the one we used in Chapter 4 , Leveraging On-Premise Software for Applications on Bluemix, for our microservice 1 application. Here, the assumption is that you already have the Watson Language Translation service added to your Bluemix account, which you would have done in Chapter 4 , Leveraging On-Premise Software for Applications on Bluemix.
- Drag and drop the language translation node to the current flow, double-click on the node to configure it, use the credentials from the service in your Bluemix account, and choose English as Target and French as Source:

- Wire the language translation node to the split node. Deploy and execute the flow by hitting the http GET URL of the http input node, you will see the following output in the debug console:

Next let us update the application flow to augment the results we would want to return to the user. We will use the Watson category service on Bluemix, Tone Analyzer, to analyze the tone of each of the tweet retrieved, and we will then display the tweet, along with the social tone score, for each of them.
Follow the steps given to first add the Tone Analyzer service instance to your Bluemix account so that you get the credentials required to configure the service in your application flow:
- From the Bluemix welcome page, click Watson and then click Tone Analyzer from the catalog of services under the Watson category:

- Give the service instance a name, review the plan details, and click Create:

- You will see the following service instances created on your dashboard, under the Watson category:

- Click the Tone Analyzer tile to view the details. Go to the Service Credentials tab, click View Credentials on the credentials for the service, and make a note of the username and password, as shown in the following screenshot:

- Go back to the Node-RED editor for your application and drag and drop the tone analyzer v3 node from the palette:

- Double-click the node to configure it. Give the node a name and select the values as shown in the following screenshot for Tones, Sentences, and Content Type. Configure the Username and Password options with values obtained from the service credentials, as obtained in the previous step:

- Wire the tone analyzer v3 node to the language translation node. Execute the flow to see the output from the tone analyzer v3 node. You will see that the output from this node is returned in
msg.response, as shown in the following screenshot:
- Now that we have processed each tweet retrieved, and have obtained the social tones for them, let us now format the result in such a way that we can create a display for each tweet against its social tone in a tabular format. Drag and drop a function node to the flow editor and double-click on it to add the code that will format the results, such as that shown here. The results of the execution of the flow are as shown in the debug console, as shown in the following screenshot:
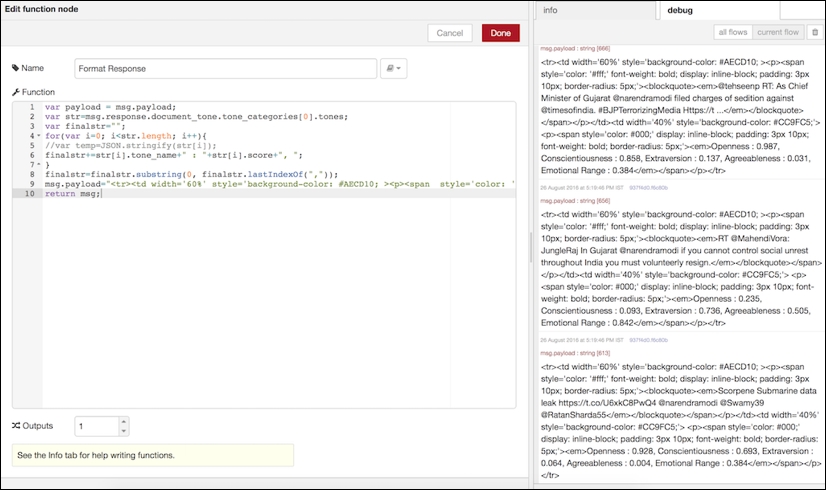
The code entered in the function node is as follows:
var payload = msg.payload; varstr = msg.response.document_tone.tone_categories[0].tones; varfinalstr = ""; for (vari = 0; i < str.length; i++) { finalstr += str[i].tone_name + " : " + str[i].score + ", "; } finalstr = finalstr.substring(0, finalstr.lastIndexOf(",")); msg.payload = "<tr><td width='60%' style='background-color: #AECD10;> <p><span style='color: '#fff;' font-weight: bold; display: inline-block; padding: 3px 10px; border-radius: 5px;'> <blockquote><em>" + payload + "</em></blockquote></span></p></td> <td width='40%' style='background-color: #CC9FC5;'><p> <span style='color: #000;' display: inline-block; padding: 3px 10px; font-weight: bold; border-radius: 5px;'> <em>" + finalstr + "</em></span></p></tr>"; return msg; - You can add a delay node to introduce a small wait time till all the individual messages are available. This is optional:

- Next we will need to add a join node so that we can club the individual
msg.payloadinto onemsg.payload:
- Double-click on the join node to configure it, as shown in the following screenshot. Choose the Mode option to be Manual, configure Combine each to msg.payload and to create to a String:

- To embed the msg.payload option from the join node into an HTML page, you can drag and drop a template node to your flow. This is where you will write the HTML for your page containing the results:

- Double-click on the template node to configure it. This is where you will add the following code:
      <style type="text/css">
        .tg  {border-collapse:collapse;border-spacing:0;
           border-color:#aaa;margin:0px auto;}
        .tg td{font-family:Arial, sans-serif;font-size:14px;
           padding:10px 5px;border-style:solid;
           border-width:1px;overflow:hidden;word-break:normal;
           border-color:#aaa;color:#333;background-color:#fff;}
        .tgth{font-family:Arial, sans-serif;font-size:14px;
          font-weight:normal;
          padding:10px 5px;border-style:solid;border-width:1px;
          overflow:hidden;word-break:normal;border-color:#aaa;
          color:#fff;background-color:#f38630;}
        .tg .tg-huo9{font-size:15px;font-family:"Lucida Console",
          Monaco, monospace !important;;vertical-align:top}
        .tg .tg-fz6y{font-size:14px;font-family:"Lucida Console",
          Monaco,  monospace !important;;vertical-align:top}
        .tg .tg-yw4l{vertical-align:top}
         th.tg-sort-header::-moz-selection { background:transparent; }
         th.tg-sort-header::selection      { background:transparent; }
         th.tg-sort-header { cursor:pointer; }table th.tg-sort-header:after
         { content:''; float:right; margin-top:7px; border-width:0 4px 4px;
           border-style:solid;  border-color:#404040 transparent;
           visibility:hidden; }
         table th.tg-sort-header:hover:after { visibility:visible; }
         table th.tg-sort-desc:after,tableth.tg-sort-asc:after,
         tableth.tg-sort-asc:hover:after { visibility:visible;
           opacity:0.4; }
         table th.tg-sort-desc:after { border-bottom:none;
           border-width:4px 4px 0;}
         @media screen and (max-width: 767px)
           {.tg {width: auto !important;}
           .tg col {width: auto !important;}.tg-wrap {overflow-x: auto;
           -webkit-overflow-scrolling: touch;margin: auto 0px;}}
      </style>
      <div class="tg-wrap">
        <h2 style="color: #2e6c80;">Tweets analyzed for their
          social tones:</h2>
        <table>
          </thead>
          <table id="tg-FUkU8" class="tg">
            <thead>
              <tr>
               <td style='background-color: #33314B;'>
                 <center>
                   <h2><b><em><font color='#fff';>Tweets</font>
                     </em></b></h2>
                 </center>
               </td>
               <td style='background-color: #33314B;'>
                 <center>
                   <h2><b><em><font color='#fff';>Social Tones</font>
                     </em></b></h2>
                 </center>
              </td>
            </tr>
          </thead>
        {{{payload}}}
      </table>
    </div>
    <script type="text/javascript" charset="utf-8">
      varTgTableSort=window.TgTableSort||function(n,t)
    {"use strict";function r(n,t){for(var e=[],o=n.childNodes,i=0;
      i<o.length;++i)
    {var u=o[i];if("."==t.substring(0,1)){var a=t.substring(1);
      f(u,a)&&e.push(u)}
    else u.nodeName.toLowerCase()==t&&e.push(u);var c=r(u,t);e=e.concat(c)}
    return e}function e(n,t)
    {var e=[],o=r(n,"tr");return o.forEach(function(n)
    {var o=r(n,"td");t>=0&&t<o.length&&e.push(o[t])}),e}function o(n)
    {return n.textContent||n.innerText||""}function i(n)
    {return n.innerHTML||""}function u(n,t){var r=e(n,t);return r.map(o)}
    function a(n,t){var r=e(n,t);return r.map(i)}
    function c(n){var t=n.className||"";return t.match(/S+/g)||[]}
    function f(n,t){return-1!=c(n).indexOf(t)}function s(n,t)
      {f(n,t)||(n.className+=" "+t)}
    function d(n,t){if(f(n,t)){var r=c(n),e=r.indexOf(t);
      r.splice(e,1),n.className=r.join(" ")}}
    function v(n){d(n,L),d(n,E)}function l(n,t,e)
      {r(n,"."+E).map(v),r(n,"."+L).map(v),e==T?s(t,E):s(t,L)}
    function g(n) return function(t,r)
      {var e=n*t.str.localeCompare(r.str);
      return 0==e&&(e=t.index-r.index),e}}
    function h(n){return function(t,r)
      {var e=+t.str,o=+r.str;return e==o?t.index-r.index:n*(e-o)}}
    function m(n,t,r){var e=u(n,t),o=e.map(function(n,t)
      {return{str:n,index:t}}),i=e&&-1==e.map(isNaN).indexOf(!0),
      a=i?h(r):g(r);
      return o.sort(a),o.map(function(n){return n.index})}
        function p(n,t,r,o)
      {for(vari=f(o,E)?N:T,u=m(n,r,i),c=0;t>c;++c)
      {var s=e(n,c),d=a(n,c);
      s.forEach(function(n,t){n.innerHTML=d[u[t]]})}l(n,o,i)}
    function x(n,t){var r=t.length;t.forEach(function(t,e)
      {t.addEventListener("click",function(){p(n,r,e,t)}),
      s(t,"tg-sort-header")})}var T=1,N=-1,E="tg-sort-asc",
      L="tg-sort-desc";return function(t){var e=n.getElementById(t),
        o=r(e,"tr"),i=o.length>0?r(o[0],"td"):[];
        0==i.length&&(i=r(o[0],"th"));
      for(var u=1;u<o.length;++u){var a=r(o[u],"td");
      if(a.length!=i.length)return}x(e,i)}}
      (document);document.addEventListener("DOMContentLoaded",function(n)
      {TgTableSort("tg-FUkU8")});
      </script>
The payload from the previous node is embedded by means of
{{{payload}}}, highlighted in the preceding code. This is a mustache template form for extracting msg.payload from the node input. Specify three pairs of braces to ensure that the HTML content that is part of the incoming msg.payload is not ignored. - Next, we are ready to complete the flow by adding an http response node to the flow. This is required if the flow has an HTTP input node. Drag and drop an http response node from the palette:

The application is almost done, but there is one thing we still want to do, which is to leverage the functionality obtained by using the
OpenWhiskaction, which is our microservice 3. Follow the steps given to build this into your application: - Drag and drop the OpenWhisk node onto your flow editor:

- Double-click on the OpenWhisk node to configure your existing
OpenWhisktrigger. We will be using theB05307_07_CloudantTriggertrigger that we configured in Chapter 7, Compute Options on Bluemix. Click the pencil icon next to Service to configure the OpenWhisk service:
- The configuration screen for the OpenWhisk service is as shown in the following screenshot:

To get Auth Key for the OpenWhisk service, you can use the OpenWhisk CLI wsk, which was explained in Chapter 7 , Compute Options on Bluemix, to execute the following command:
wsk property get --authUse the whisk auth key that is returned to configure the auth key in the OpenWhisk node.
Tip
Refer to Chapter 7 , Compute Options on Bluemix, OpenWhisk section, for details on executing the
wskcommands.Similarly, to get the namespace, execute the following
wskcommand:wsk property get ---namespace - Wire the configured OpenWhisk node to the output of the template node in the flow. This completes our application. The complete flow is as shown in the following screenshot:

Now we have three applications, two Cloud Foundry applications and one OpenWhisk application, running as independent applications, with their own life cycle and DevOps.
As an application end user, we are giving our microservices-based end users an application URL they can hit to view negative tweets on a monitored Twitter handle, along with their scores against social tone. For this application to function as intended, we need our microservice 1 to be running, microservice 2 to be running, and eventually, to achieve any added value or extended functionality independent of microservices 1 and 2, we need our microservices 3 to be available and running. In the current scenario, microservice 3 does not add value to the existing use case, but it nevertheless provides a handle to implement any function without having to edit or update microservices 1 and 2. Follow the steps given here to see the results:
- Go to a browser and hit the application URL, which is
https://analyse-twitemotion-b05307.mybluemix.net/translatedtweetsin this case. - You will see a response on your browser, as shown in the following screenshot:

- Go to your Bluemix dashboard and navigate to OpenWhisk dashboard. You will see the activity log indicating the execution of your OpenWhisk action, triggered by microservice 2 triggering your
B05307_07_CloudantTriggertrigger:
This completes the illustration of microservices-based application development on Bluemix.