
11
The Component Lifecycle
In the beginning, we took a very simple view of components and what they do. As you learned more about React and did cooler and more involved things, you came to see that components aren’t all that simple. They help us deal with properties, state, and events, and often are responsible for the well-being of other components as well. Keeping track of everything components do sometimes can be tough.
To help with this, React provides us with lifecycle methods. Unsurprisingly, lifecycle methods are special methods that automatically get called as our component goes about its business. They notify us of important milestones in a component’s life, and we can use these notifications to simply pay attention or change what our component is about to do.
In this chapter, we look at these lifecycle methods and talk about what we can do with them.
Note: Changes Are a Foot Here!
There are proposed changes in this area that will change how lifecycle methods behave. What you see printed here is based on the latest guidance, but note that this information may change. Visit this link to be kept up-to-date: http://bit.ly/lifecycleChanges.
Meet the Lifecycle Methods
Lifecycle methods aren’t very complicated. You can think of them as glorified event handlers that get called at various points in a component’s life. As with event handlers, you can write some code to do things at those various points. Before we go further, it’s time for you to quickly meet our lifecycle methods:
![]()
componentWillMount
![]()
componentDidMount
![]()
componentWillUnmount
![]()
componentWillUpdate
![]()
componentDidUpdate
![]()
shouldComponentUpdate
![]()
componentWillReceiveProps
![]()
componentDidCatch
We aren’t quite done yet. We’re going to throw one other method into the mix even though it isn’t strictly a lifecycle method: the infamous render method.
Some of these names probably sound familiar to you, and some you’re probably seeing for the first time. Don’t worry. By the end of all this, you’ll be on a first-name basis with all of them! We’re going to look at these lifecycle methods from various angles, starting with some code.
See the Lifecycle Methods in Action
Learning about these lifecycle methods is about as exciting as memorizing names for foreign places you have no plans to visit. To make all of this more bearable, let’s play with them in a simple example before we get all academic and read about them.
To play with this example, go to the following URL: https://www.kirupa.com/react/ lifecycle_example.htm. When this page loads, you’ll see a variation of the counter example you saw earlier (see Figure 11.1).
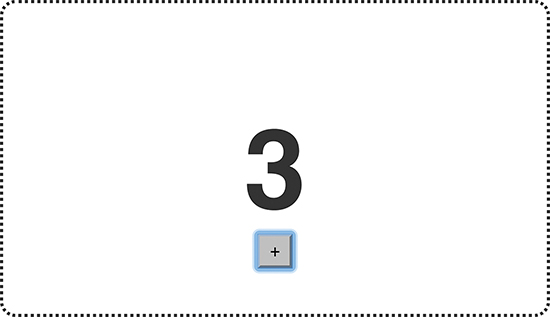
Figure 11.1 A variation on the counter example.
Don’t click the button or anything just yet. (If you’ve already clicked the button, just refresh the page to start the example from the beginning.) I’m saying this for a reason, and it isn’t because my OCD is acting up. You want to see this page as it is before you interact with it.
Now bring up your browser’s developer tools and take a look at the Console tab. In Chrome, you’ll see something that looks like Figure 11.2.
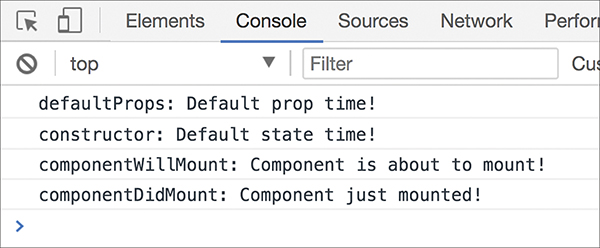
Figure 11.2 The Console view in Chrome.
Notice what you see printed. You see some messages, and these messages start with the name of what looks like a lifecycle method. If you click the plus button now, notice that your Console shows more lifecycle methods getting called (see Figure 11.3).

Figure 11.3 More lifecycle methods getting called.
Play with this example for a bit. You can see that it allows you to place all of these lifecycle methods in the context of a component that you’ve already seen. As you keep clicking the plus button, more lifecycle method entries show up. Eventually, when your counter approaches a value of 5, your example disappears and the following entry shows up in your console: componentWillUnmount: Component is about to be removed from the DOM! At this point, you’ve reached the end of this example. Of course, to start over, you can just refresh the page.
Now that you’ve seen the example, let’s take a quick look at the component that’s responsible for all of this (full source: https://github.com/kirupa/kirupa/blob/master/reactjs/lifecycle.htm):
constructor(props) {
super(props);
console.log("constructor: Default state time!");
this.state = {
count: 0
};
this.increase = this.increase.bind(this);
}
increase() {
this.setState({
count: this.state.count + 1
});
}
componentWillUpdate(newProps, newState) {
console.log("componentWillUpdate: Component is about to update!");
}
componentDidUpdate(currentProps, currentState) {
console.log("componentDidUpdate: Component just updated!");
}
componentWillMount() {
console.log("componentWillMount: Component is about to mount!");
}
componentDidMount() {
console.log("componentDidMount: Component just mounted!");
}
componentWillUnmount() {
console.log("componentWillUnmount: Component is about to be removed from the DOM!");
}
shouldComponentUpdate(newProps, newState) {
console.log("shouldComponentUpdate: Should component update?");
if (newState.count < 5) {
console.log("shouldComponentUpdate: Component should update!");
return true;
} else {
ReactDOM.unmountComponentAtNode(destination);
console.log("shouldComponentUpdate: Component should not update!");
return false;
}
}
componentWillReceiveProps(newProps) {
console.log("componentWillReceiveProps: Component will get new props!");
}
render() {
var backgroundStyle = {
padding: 50,
border: "#333 2px dotted",
width: 250,
height: 100,
borderRadius: 10,
textAlign: "center"
};
return (
<div style={backgroundStyle}>
<Counter display={this.state.count} />
<button onClick={this.increase}>
+
</button>
</div>
);
}
}
console.log("defaultProps: Default prop time!");
CounterParent.defaultProps = {
};
Take a few moments to understand what all this code does. It seems lengthy, but the bulk of it is just each lifecycle method listed with a console.log statement defined. After you’ve gone through this code, play with the example one more time. Trust me. The more time you spend in the example to figure out what’s going on, the more fun you’ll have. The following sections will be dreadfully boring when we look at each lifecycle method across the rendering, updating, and unmounting phases. Don’t say I didn’t warn you.
The Initial Rendering Phase
When your component is about to start its life and make its way to the DOM, the following lifecycle methods get called (see Figure 11.4).

Figure 11.4 The lifecycle methods called initially.
What you saw in your console when the example was loaded was a less colorful version of what you saw here. Now let’s go a bit further and see more about what each lifecycle methods does.
Getting the Default Props
This property on the component allows you to specify the default value of this.props. If we wanted to set a name property on our CounterParent component, it could look as follows:
name: "Iron Man"
};
This gets run before your component is even created or any props from parent components are passed in.
Getting the Default State
This step happens inside your component’s constructor. You get the chance to specify the default value of this.state as part of your component’s creation:
super(props);
console.log("constructor: Default state time!");
count: 0
};
this.increase = this.increase.bind(this);
}
Notice that we’re defining our state object and initializing it with a count property whose value is 0.
componentWillMount
This is the last method that gets called before your component gets rendered to the DOM. There’s an important point to note here: If you call setState inside this method, your component will not re-render.
render
This one should be very familiar to you by now. Every component must have this method defined, and it is responsible for returning some JSX. If you don’t want to render anything, simply return null or false.
componentDidMount
This method gets called immediately after your component renders and gets placed on the DOM. At this point, you can safely perform any DOM querying operations without worrying about whether your component has made it. If you have any code that depends on your component being ready, you can specify all of that code here as well.
With the exception of the render method, all of these lifecycle methods can fire only once. That’s quite different from the methods you see next.
The Updating Phase
After your components get added to the DOM, they can potentially update and re-render when a prop or state change occurs. During this time, a different collection of lifecycle methods gets called. Yawn. Sorry…
Dealing with State Changes
First, let’s look at a state change. As we mentioned earlier, when a state change occurs, your component calls its render method again. Any components that rely on the output of this component also get their render methods called. This is done to ensure that the component is always displaying the latest version of itself. All of that is true, but it’s only a partial representation of what happens.
When a state change happens, all the lifecycle methods in Figure 11.5 get called.
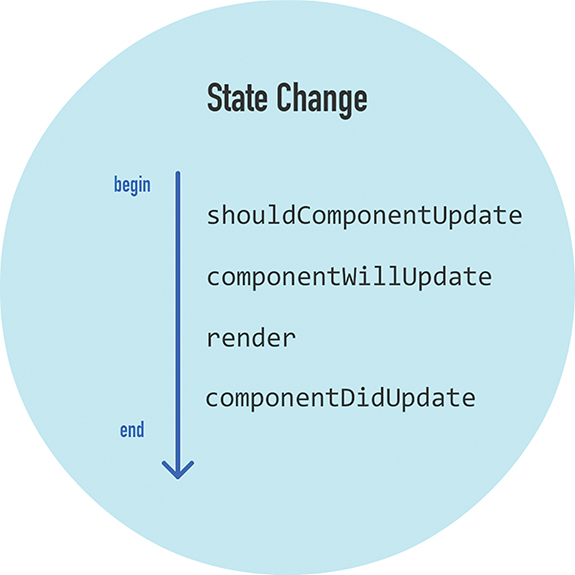
Figure 11.5 Lifecycle methods called when a state change happens.
Check out what these lifecycle methods do:
shouldComponentUpdate
Sometimes you don’t want your component to update when a state change occurs. This method allows you to control this updating behavior. If you use this method and return a true value, the component will update. If this method returns a false value, this component will skip updating.
That probably sounds a bit confusing, so take a look at a simple snippet:
console.log("shouldComponentUpdate: Should component update?");
if (newState.count < 5) {
console.log("shouldComponentUpdate: Component should update!");
return true;
} else {
ReactDOM.unmountComponentAtNode(destination);
console.log("shouldComponentUpdate: Component should not update!");
return false;
}
}
This method gets called with two arguments, which we named newProps and newState. In this snippet of code, we check whether the new value of our id state property is less than or equal to 2. If the value is less than or equal to 2, we return true to indicate that this component should update. If the value is not less than or equal to 2, we return false to indicate that this component should not update.
componentWillUpdate
This method gets called just before your component is about to update. Nothing too exciting happens here. One point to note is that you can’t change your state by calling this.setState from this method.
render
If you didn’t override the update via shouldComponentUpdate, the code inside render gets called again to ensure that your component displays itself properly.
componentDidUpdate
This method gets called after your component updates and the render method has been called. If you need to execute any code after the update takes place, this is the place to stash it.
Dealing with Prop Changes
The other time your component updates is when its prop value changes after it has been rendered into the DOM. In this scenario, the lifecycle methods in Figure 11.6 get called.

Figure 11.6 Lifecycle methods when the component’s prop value changes.
The only new method here is componentWillReceiveProps. This method receives one argument, and this argument contains the new prop value that is about to be assigned to it.
You saw the rest of the lifecycle methods when looking at state changes, so let’s not revisit them. Their behavior is identical when dealing with a prop change.
The Unmounting Phase
The last phase to look at is when your component is about to be destroyed and removed from the DOM (see Figure 11.7).
Only one lifecycle method is active here, and that is componentWillUnmount. You perform cleanup-related tasks here, such as removing event listeners and stopping timers. After this method gets called, your component is removed from the DOM and you can say goodbye to it.
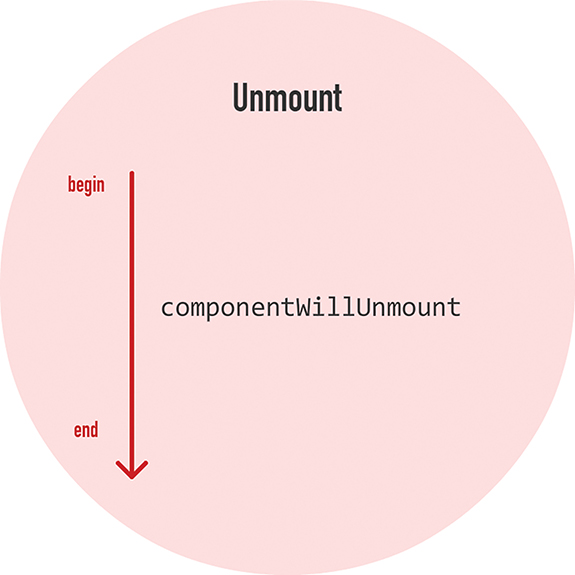
Figure 11.7 Only one lifecycle method is active when your component is about to be destroyed and removed from the DOM.
Conclusion
Components are fascinating little things. On the surface, they seem like they don’t have much going on. As in a good documentary about the oceans, when we look a little deeper and closer, it’s almost like seeing a whole other world. As it turns out, React is constantly watching and notifying your component every time something interesting happens. All of this is done via the (extremely boring) lifecycle methods that we spent this entire tutorial looking at. Now, I want to reassure you that knowing what each lifecycle method does and when it gets called will come in handy one day. All that you’ve learned isn’t just trivial knowledge, although your friends will be impressed if you can describe every lifecycle method from memory. Go ahead and try it the next time you see them.
Note: If you run into any issues, ask!
If you have any questions or your code isn’t running like you expect, don’t hesitate to ask! Post on the forums at https://forum.kirupa.com and get help from some of the friendliest and most knowledgeable people the Internet has ever brought together!