
Hand Stitching: Baseball Stitch
Named for the traditional stitch pattern on baseballs, this stitch joins two abutting edges of leather and lies flat. Elastic and flexible, the baseball stitch is well suited for wrapping around cylinders and for sewing leather into place on objects.
Materials
Leather
Waxed thread
Tools
Edge beveler
Stitching groover
Pricking iron
2 harness needles, #00
Thread snips
Needle-nose pliers

Techniques Used
Edge Finishing: Edge Beveling
Hand Stitching: Using a Stitch Groover
Hand Stitching: Using a Pricking Iron
1 Prepare the edges. Using the edge beveler, bevel the front and back sides of both leather pieces. This allows for a tight connection that lays flat.

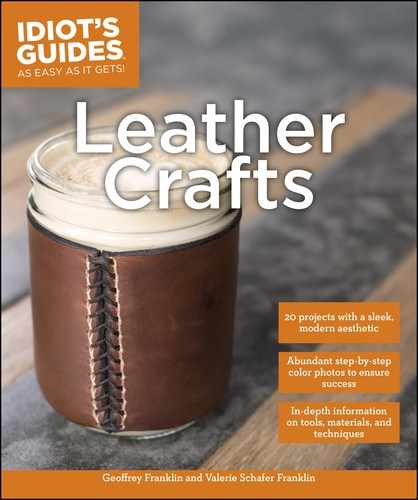
2 Prepare for stitching. Cut a stitching groove on the abutting sides of the leather to be stitched, and punch stitch holes along it.

3 Cut the thread. Cut a length of thread approximately eight times the length of the span to be stitched.

4 Thread the needles. Insert one end of the thread through the eye of one needle. Insert the opposite end of thread through the eye of the second needle, so you have needles on both ends of the thread.

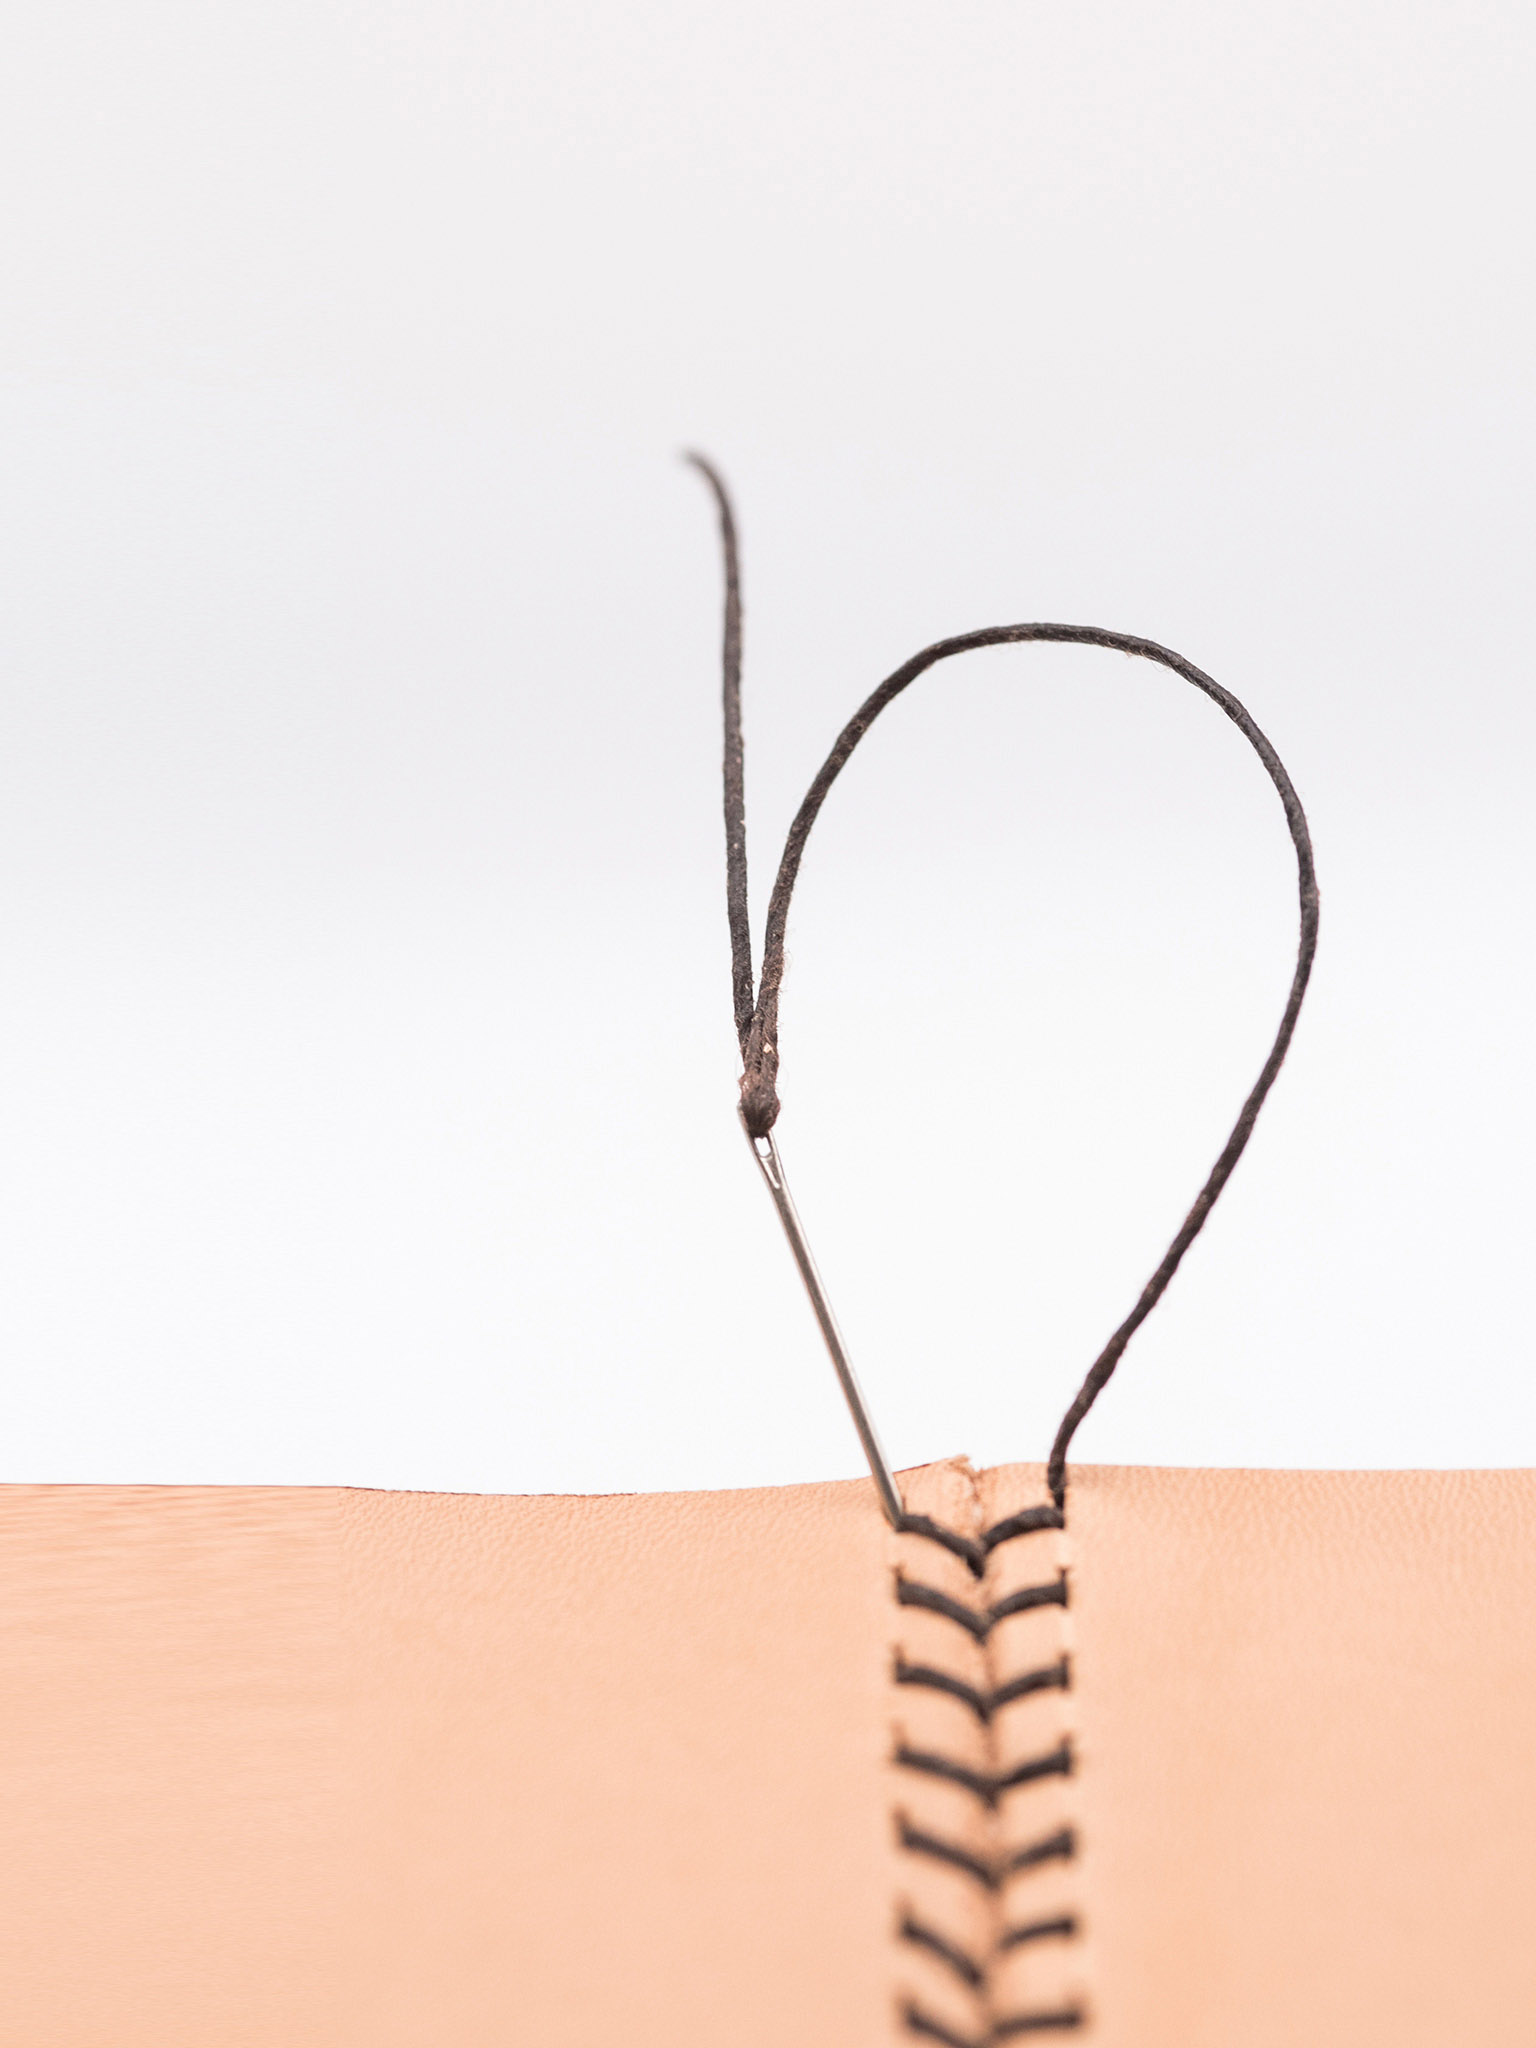
5 Pull thread evenly through the first holes. Pull the threaded needles from front to back through the first row of holes, one on each abutting side of the leather. Adjust as needed to ensure each side has the same amount of slack.

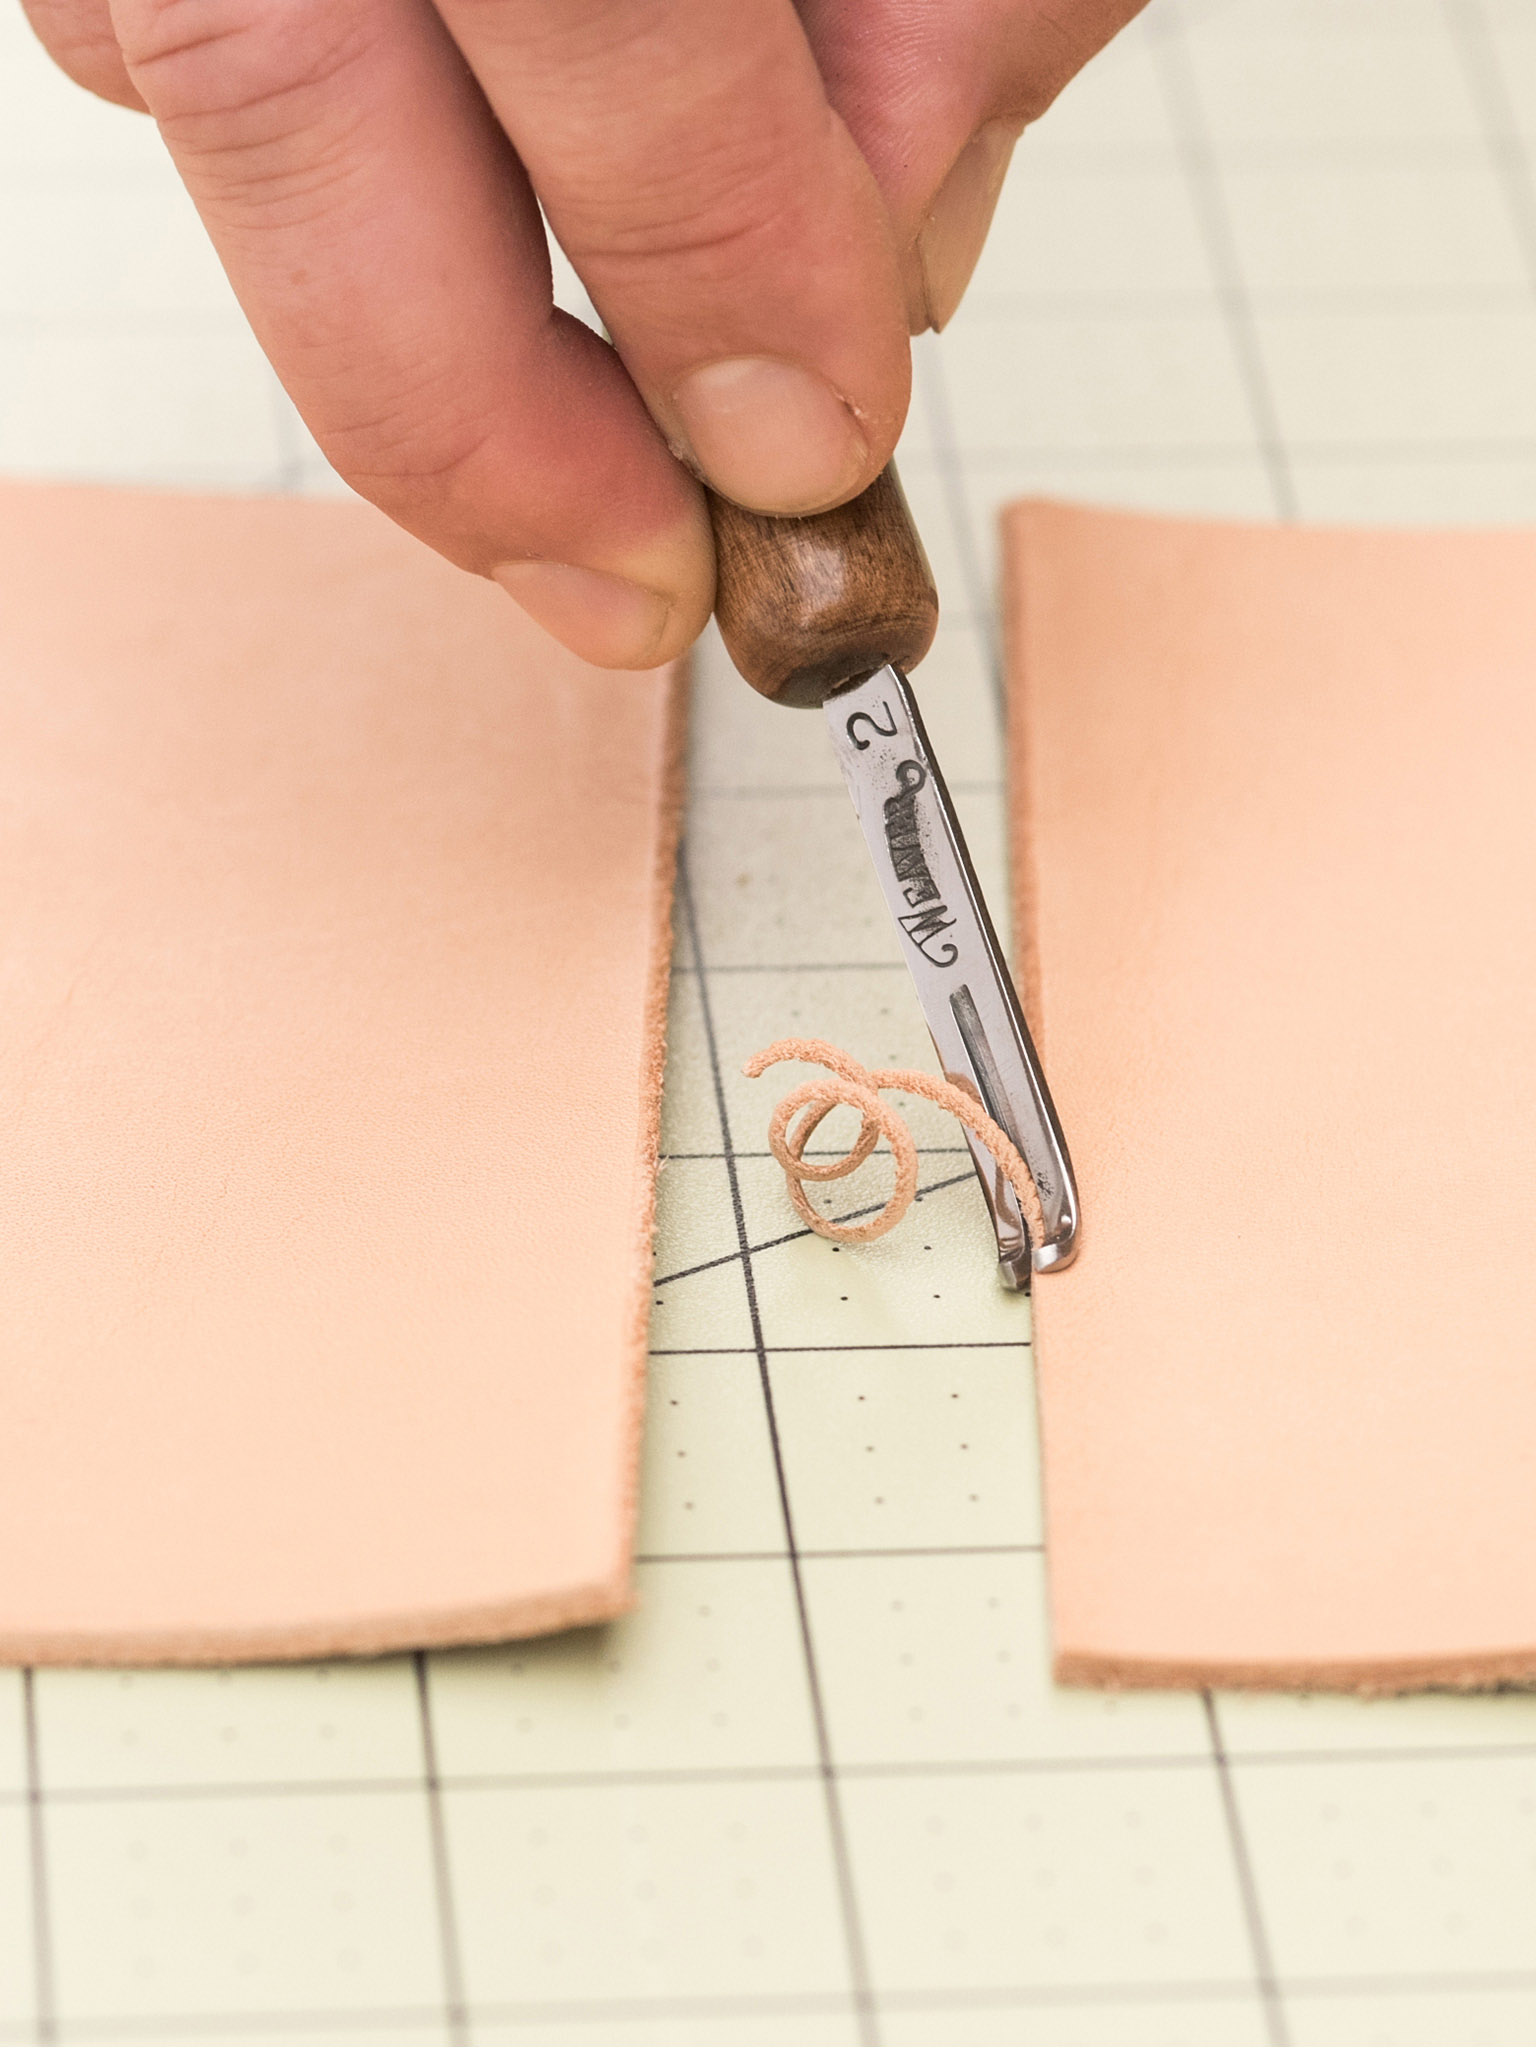
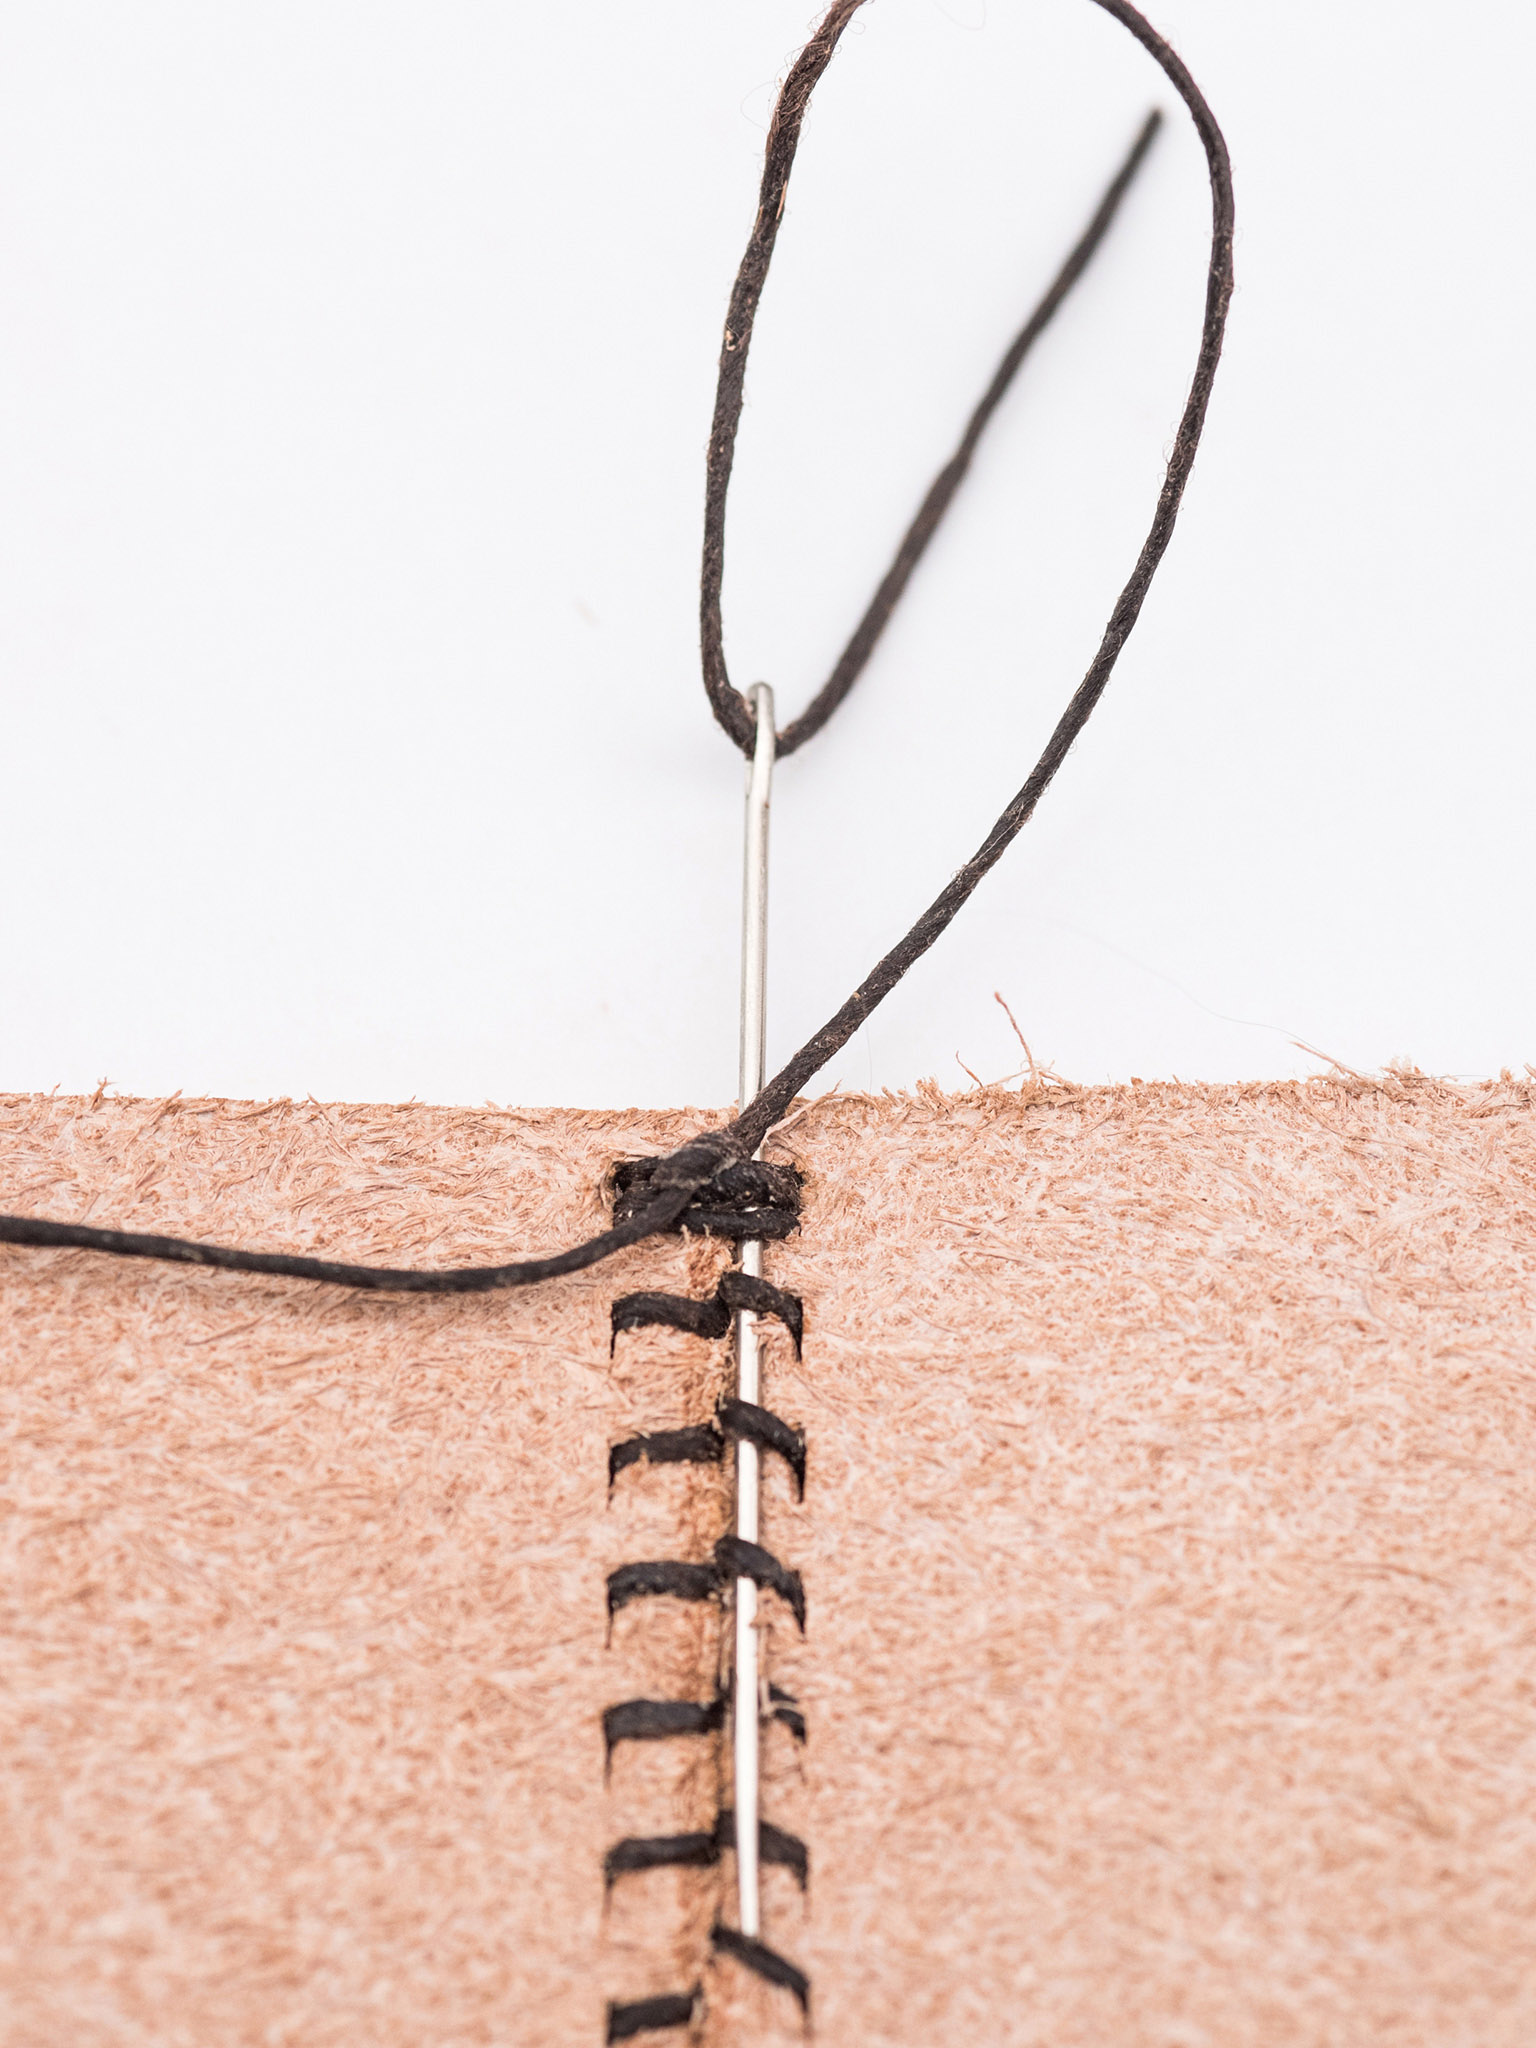
6 Anchor down with a double loop. Taking one needle, loop around the back side to the opposite hole and pull it through to the front. Continue to loop over and through the first hole it was brought through from front to back. This loop will anchor the stitching in place.

7 Make the first stitch. Pull one needle up through the seam in the middle from the back to the front, and go through the next stitch hole down on the opposite side, pulling the needle through from front to back.

8 Make the second stitch. Repeat Step 7 on the opposite side of the leather to complete the first row: pull the other needle up through the seam in the middle from back to front, and through the next stitch hole down on the opposite side, pulling the needle through from front to back.

9 Continue stitching to the last hole. Continue stitching in this pattern, one row at a time, pulling the needles from the back up through the seam in the middle to the next stitch hole down on the opposite side, from front to back.
10 Finish with a double loop. Loop either needle around the back to the opposite hole and pull it through to the front. Continue to loop over and through the first hole from front to back, making a loop to anchor the ends in place.
11 Tie off. With the needles both now on the backside, tie a standard knot twice with both ends.
12 Secure the ends. Run the needles behind a few of the stitches to secure the ends. Needle-nose pliers may help pull the needle through.

13 Cut the thread. Cut off both ends of the remaining thread.
