
Shaping Leather: Folding with a Channel
When folding thick, stiff leather, it can be helpful to cut a channel from the back. Removing a thin strip of leather helps create a clean fold line. This technique introduces a new tool, the adjustable U-gouge.
Materials
Leather
Tools
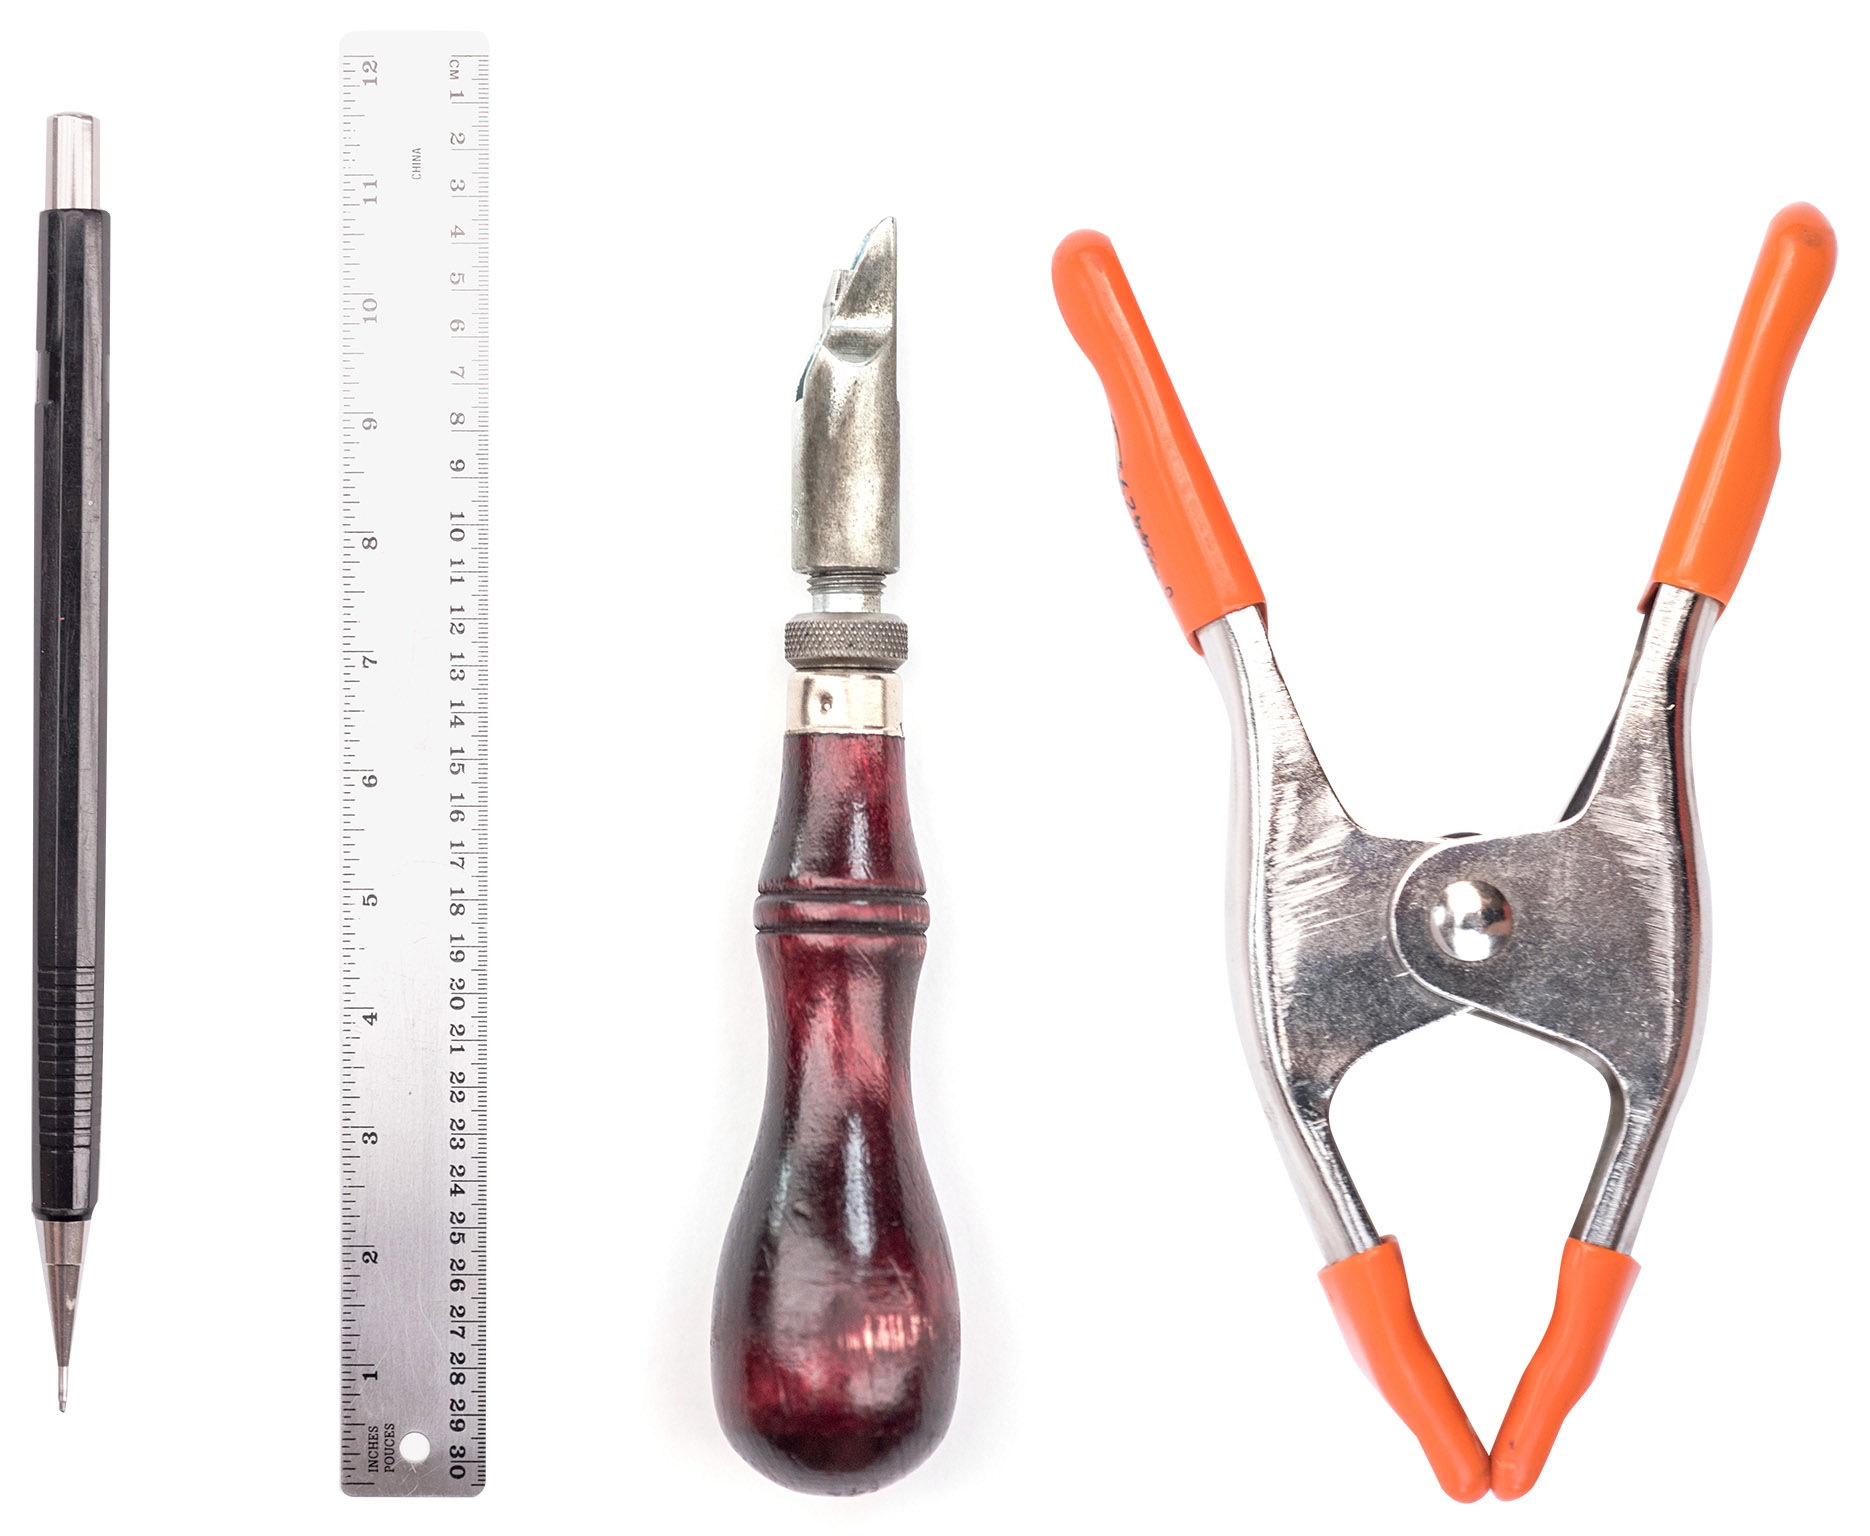
Mechanical pencil
Straightedge
Adjustable U-gouge
Clamps

1 Set the depth of the gouge. For a clean fold line, set the depth of the U-gouge to about half the thickness of the leather. To adjust, turn the barrel adjuster clockwise or counter-clockwise to depth.
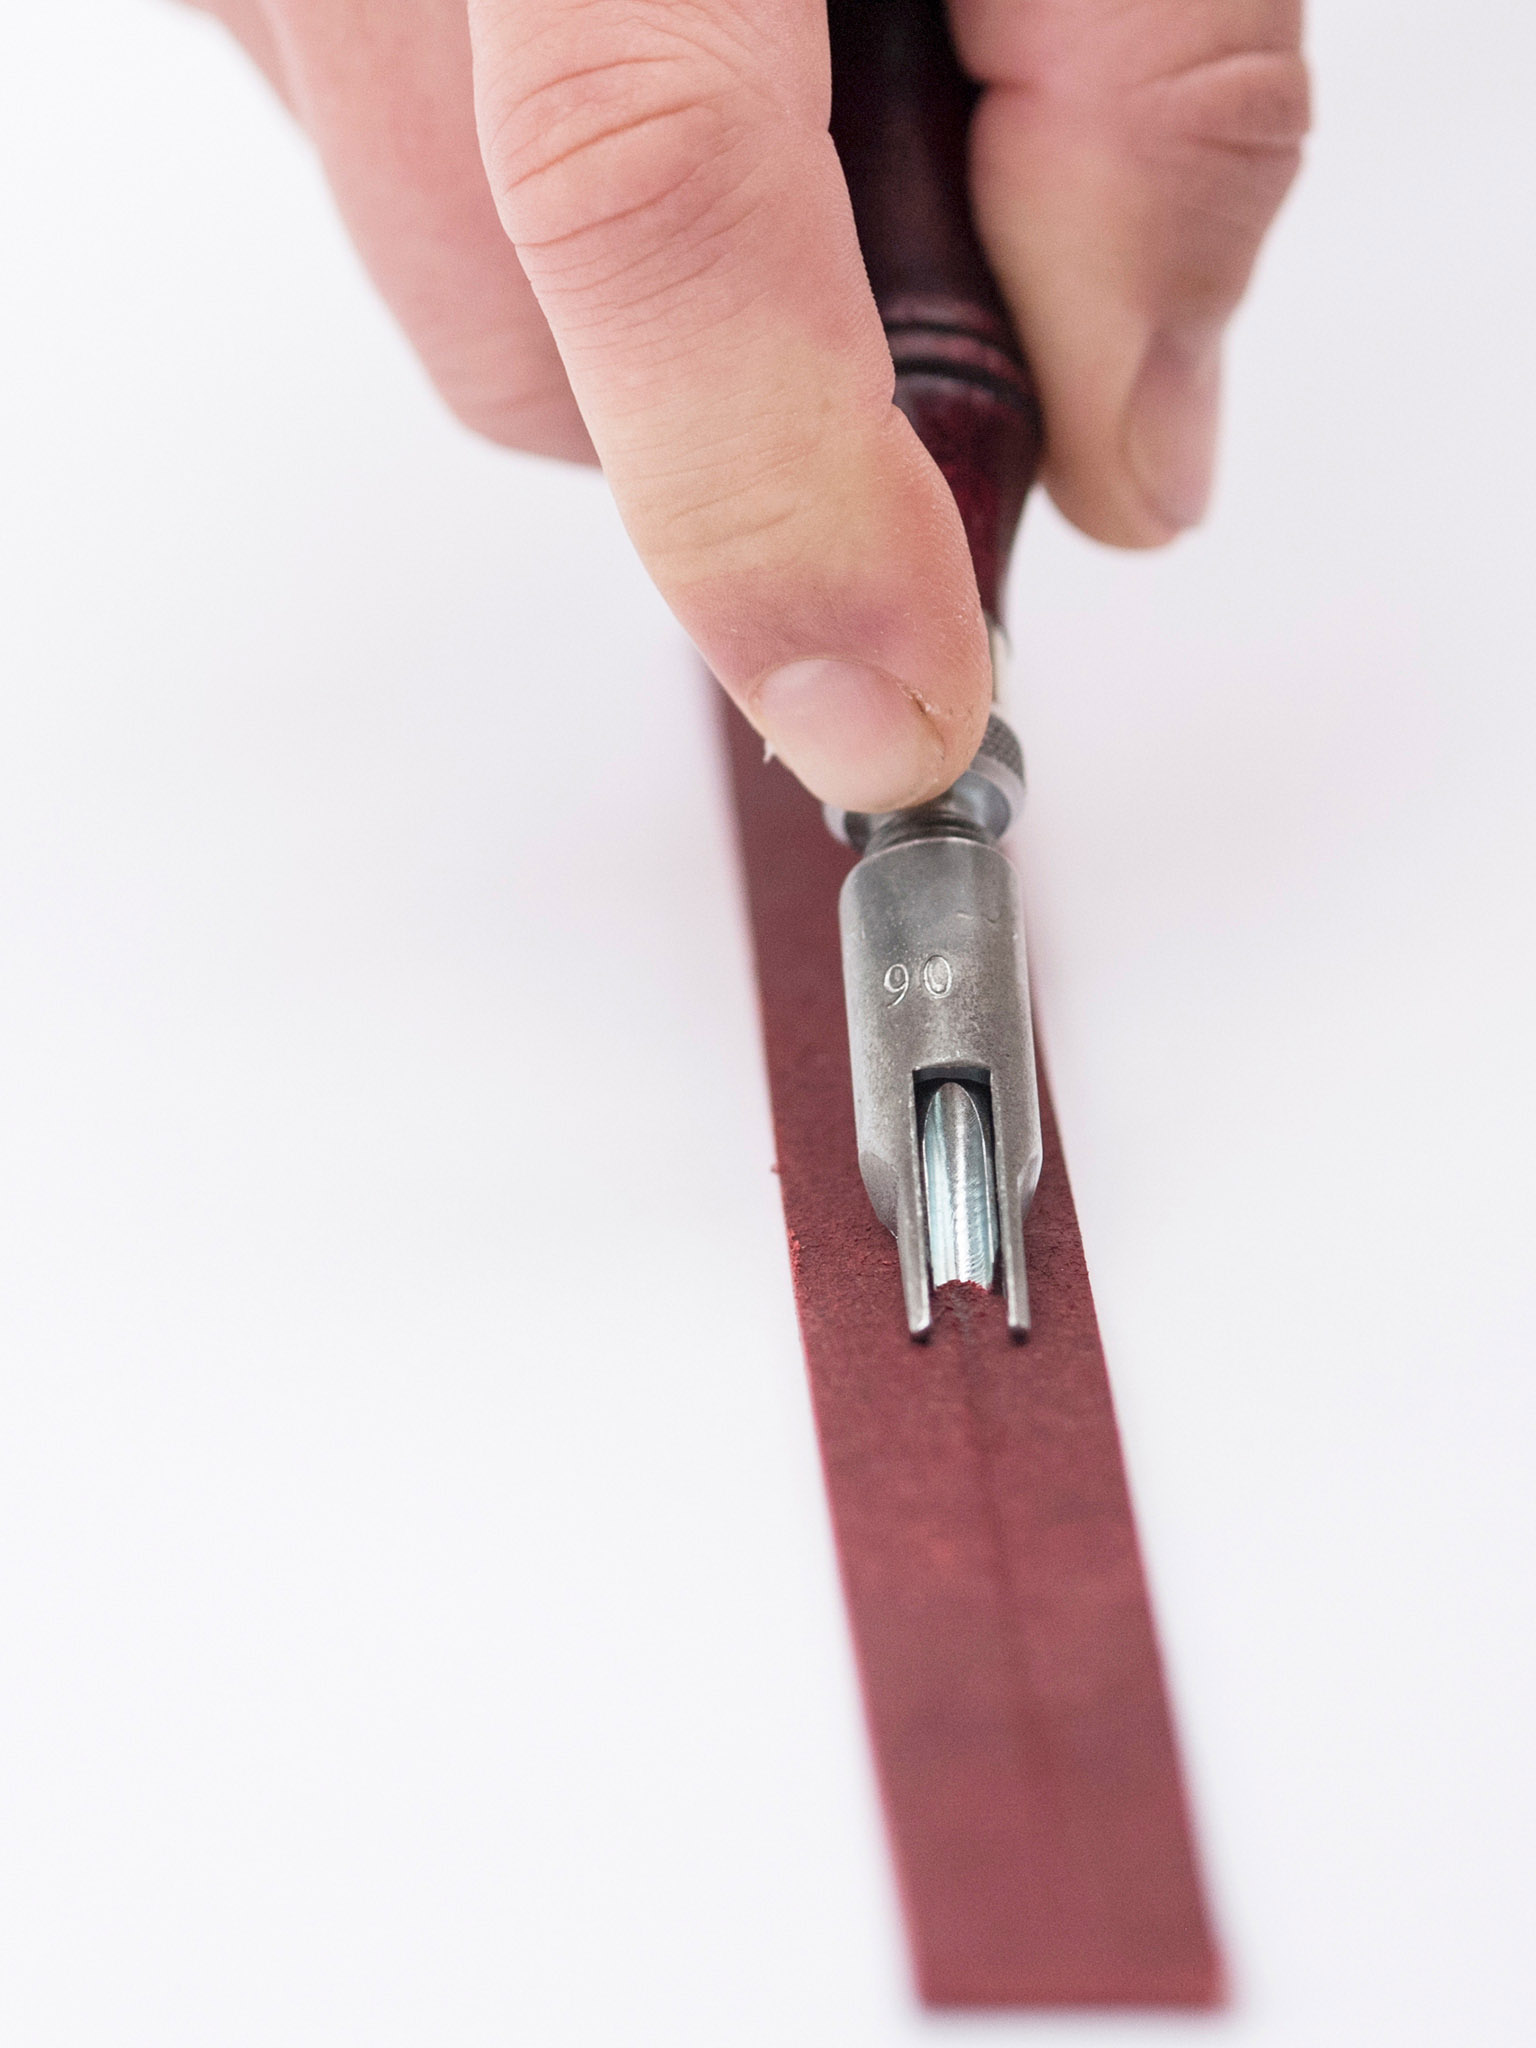
2 Position the gouge. Use a piece of scrap leather for testing. Hold the gouge handle in the palm of your hand and lay your forefinger on the top of the gouge for guiding. Position the gouge so the guide is parallel with the surface of the leather.
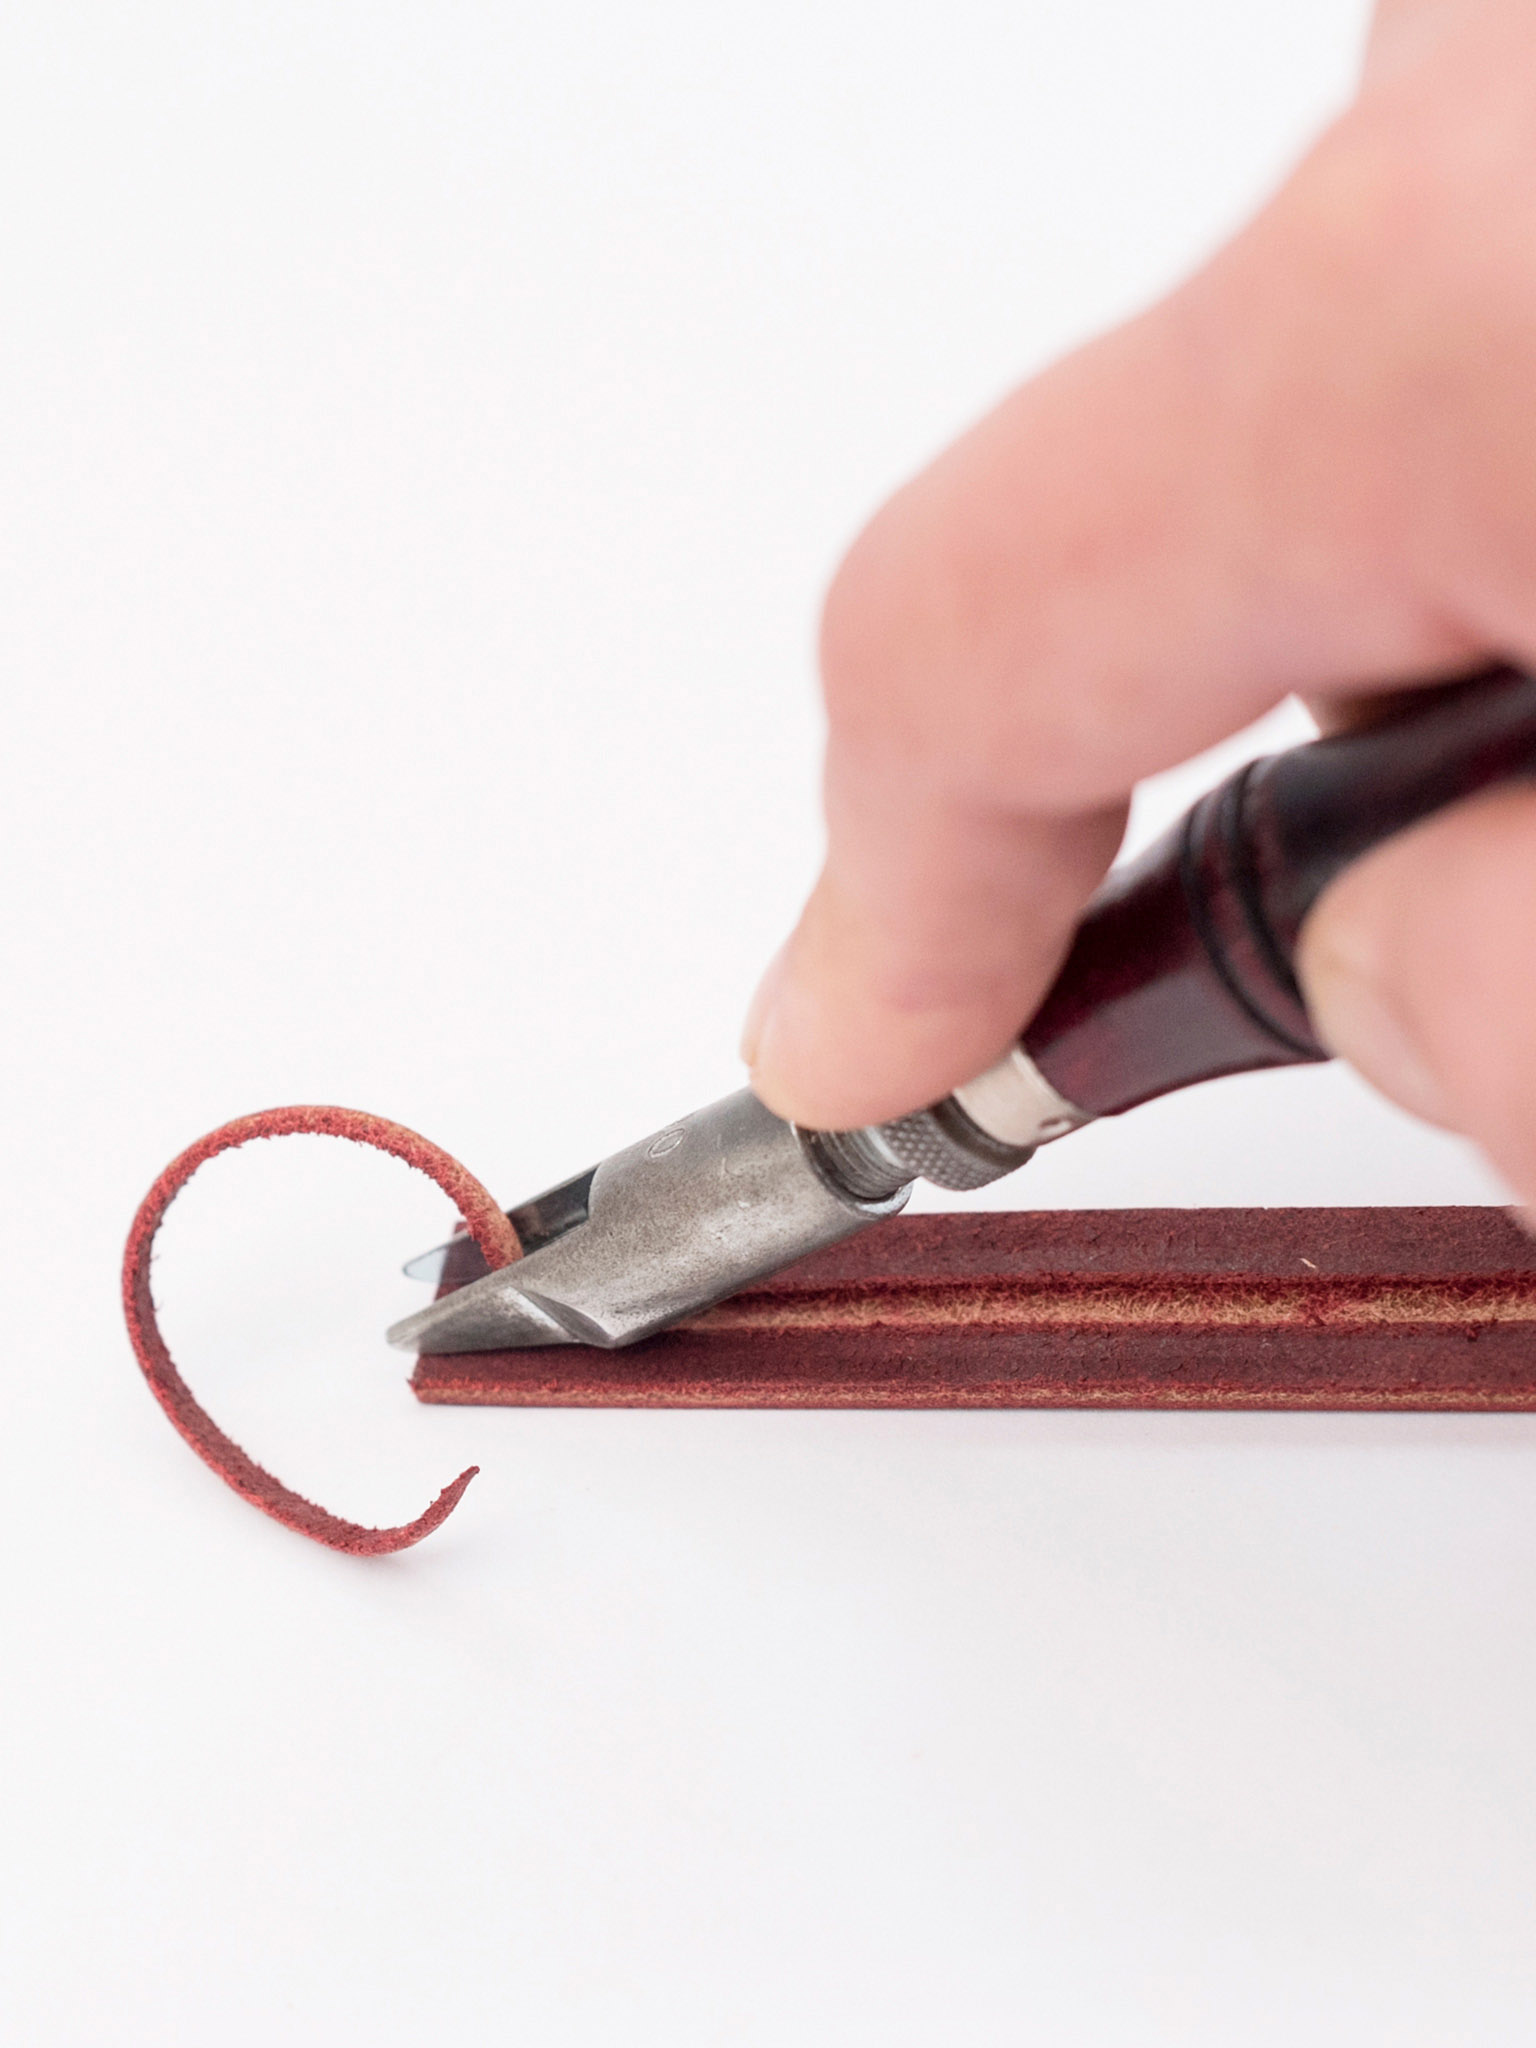
3 Test the depth. Check the depth of your gouge on the scrap leather before using the gouge on your project by cutting a test line. Push, don’t pull, the gouge away from you. If necessary, re-adjust and re-test the depth until it is about half the thickness of the leather.

4 Clamp down and mark the fold line. Holding the leather securely is key for successful gouging. Use a clamp (or two) to keep the leather in place on your work surface. Mark the fold line on the project using the mechanical pencil and straightedge according to the project instructions.
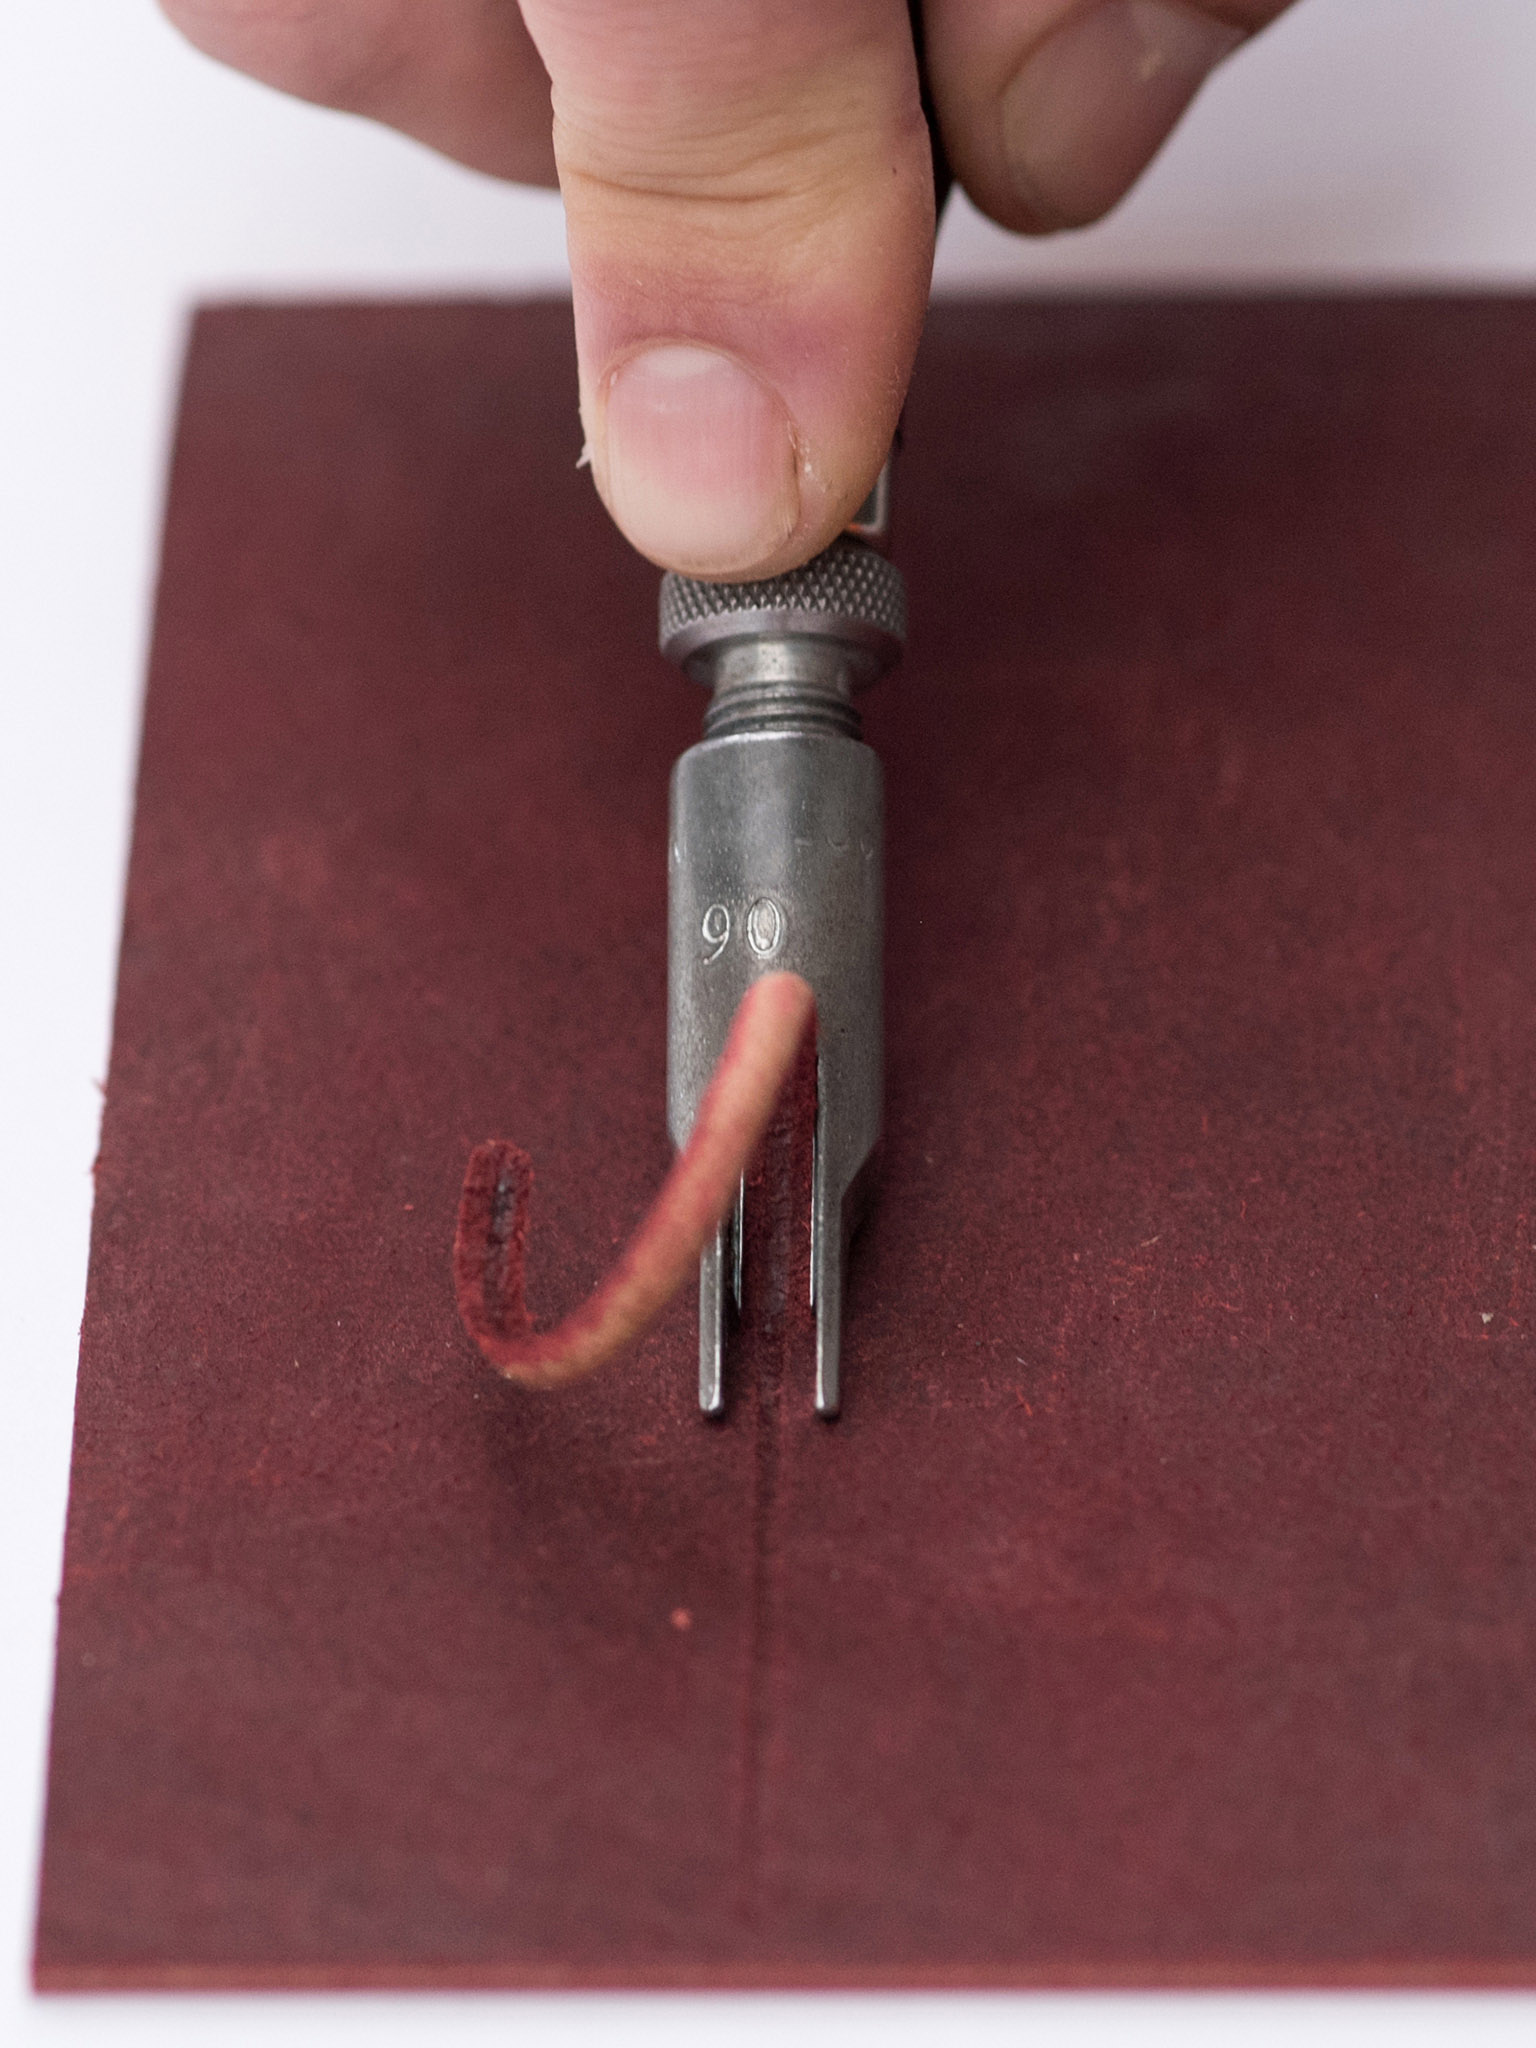
5 Cut the channel. Push the U-gouge along the fold line to create the channel.
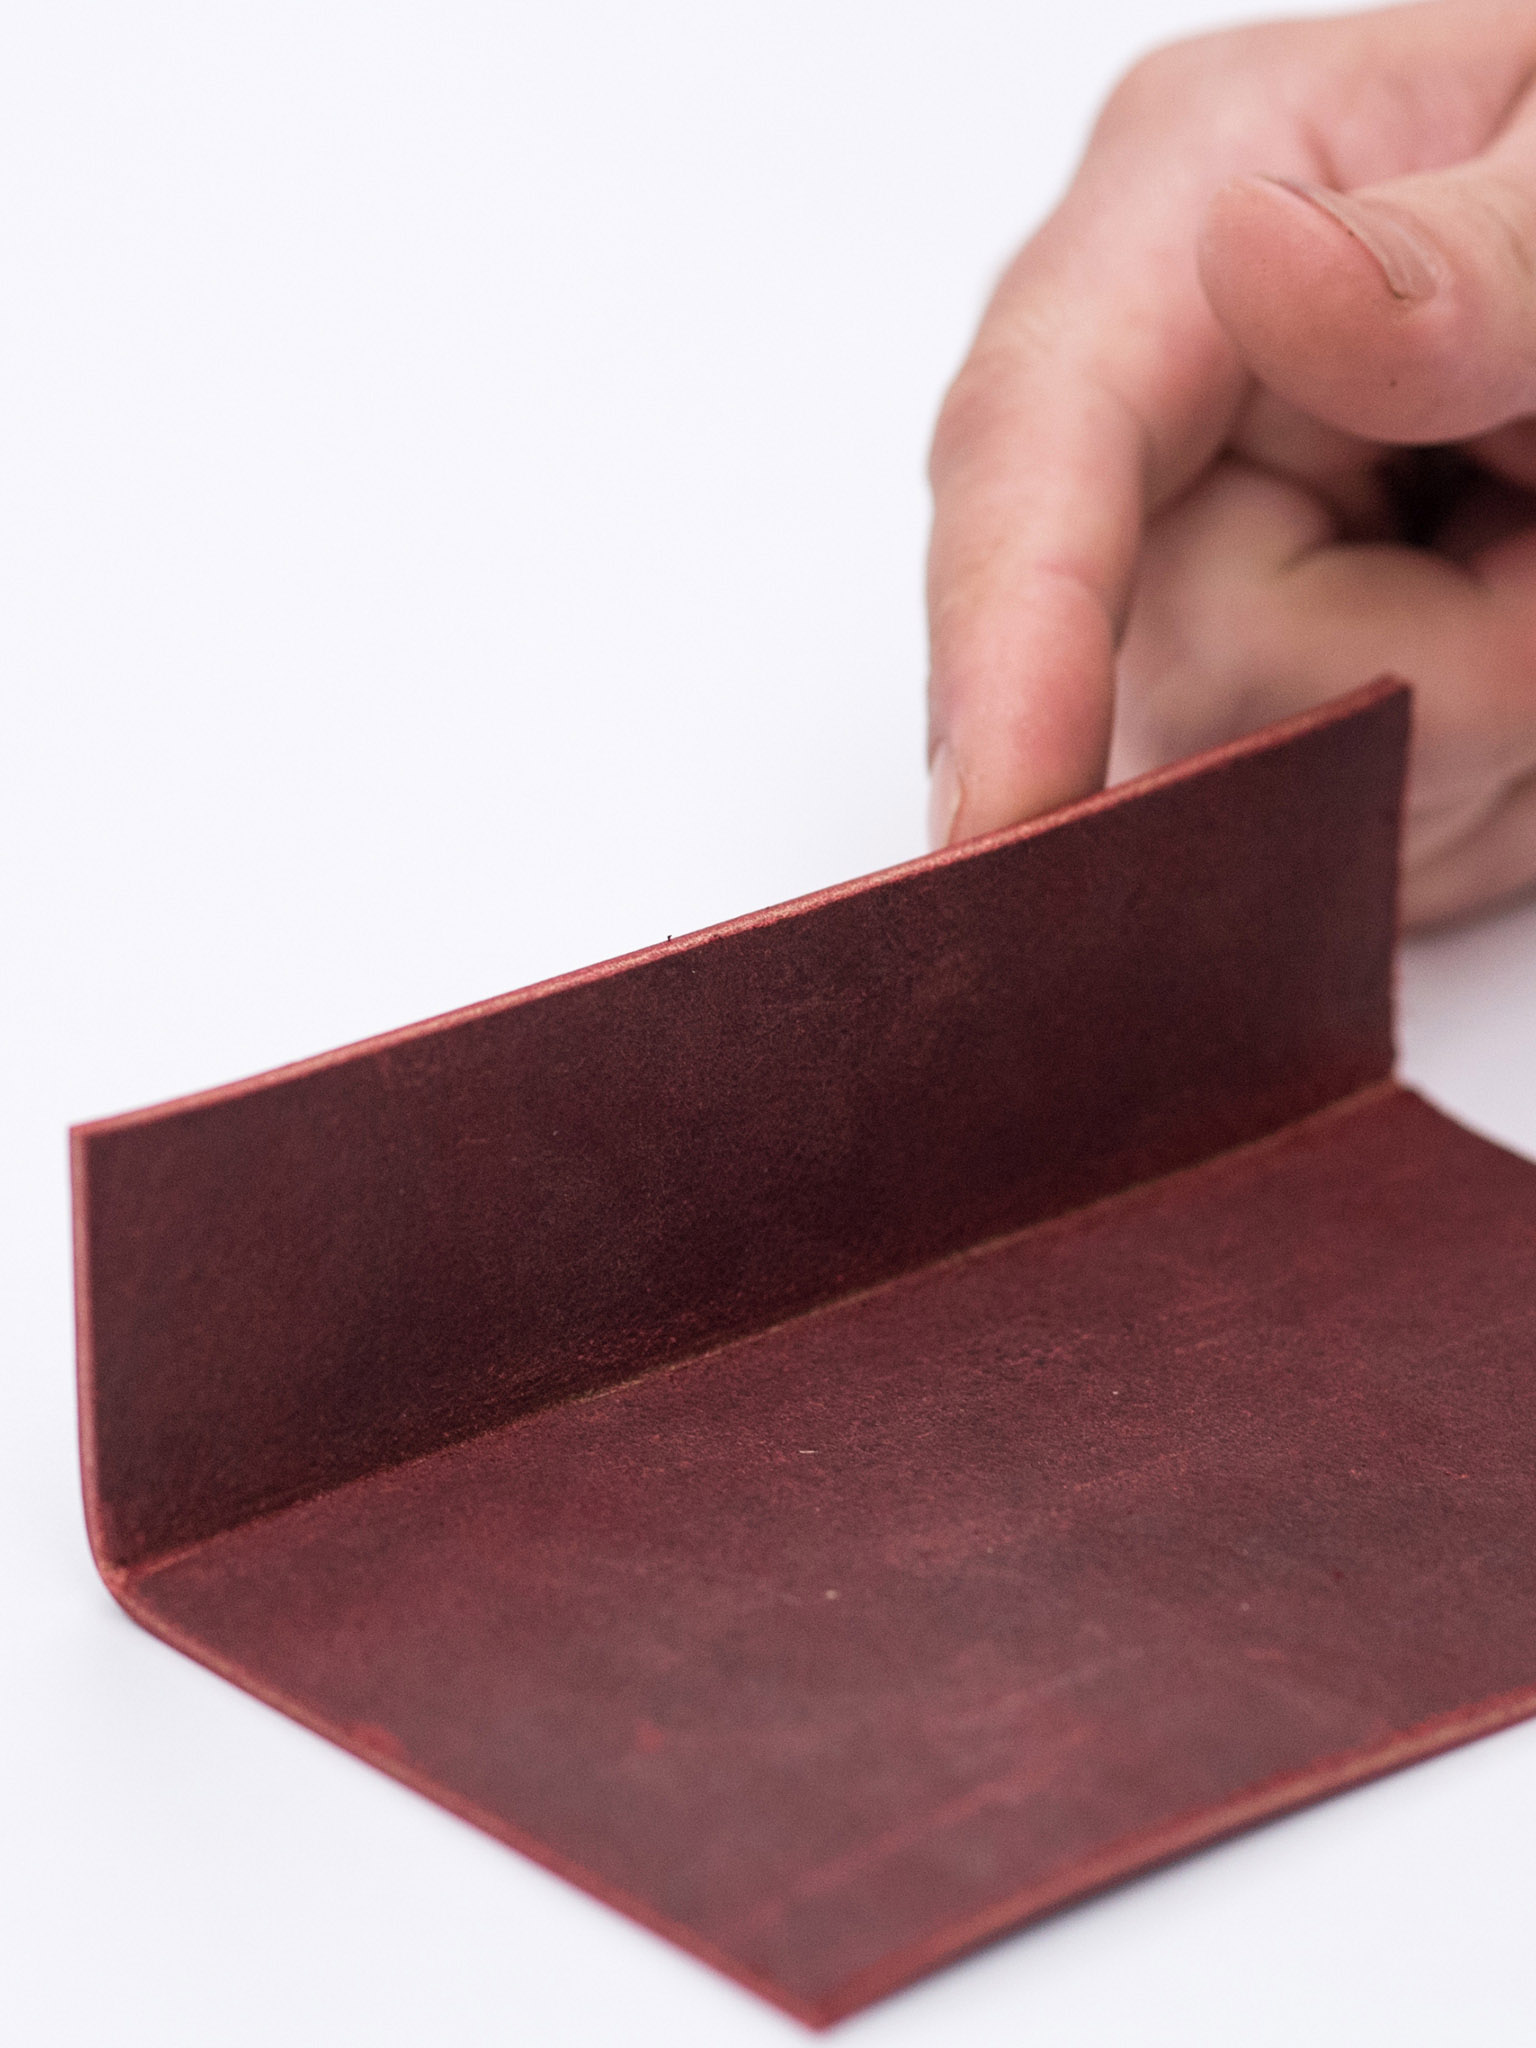
6 Test the fold. The channel should create a clean, square corner. Fold the leather with your hands to test it. If the corner isn’t sharp enough, the channel isn’t deep enough. Adjust the depth of the gouge and cut again, this time going a little more deeply.
Rocking the gouge ever so gently back and forth can help push the gouge through tough leather.