Wine Tote
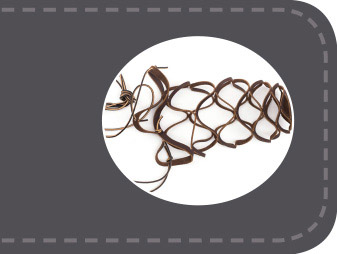
This clever labyrinth pattern turns a small round of leather into a compact wine tote. The wine tote is a terrific project for practicing your freehand cutting technique. This design also makes a great display for hanging decorative objects, like your favorite fern or glass sea floats.

Finished size
8 inches (20.5cm) in diameter
Materials
1 piece garment leather, 8×8 inches (20.5×20.5cm), for the body
1 piece 6–7 ounce (2.4–2.8 mm) vegetable-tanned leather, 1×1 inch (2.5×2.5cm), for the cord stop
2 pieces leather cord, 50 inches (125cm) each, for the cord handle
Template
Wine Tote (idiotsguides.com/leather)
Tools
Hole punch, #2
Hole punch, #7
Hole punch, 1 inch (4cm)
Precision knife
Masking tape
Adhesive label paper (optional)
Techniques Used
Working with Templates
Punching: Using Hole Punches
Cutting: Using a Precision Knife Freehand
1 Cut leather down to size. Roughly cut a piece of leather into a shape slightly larger than the paper template.
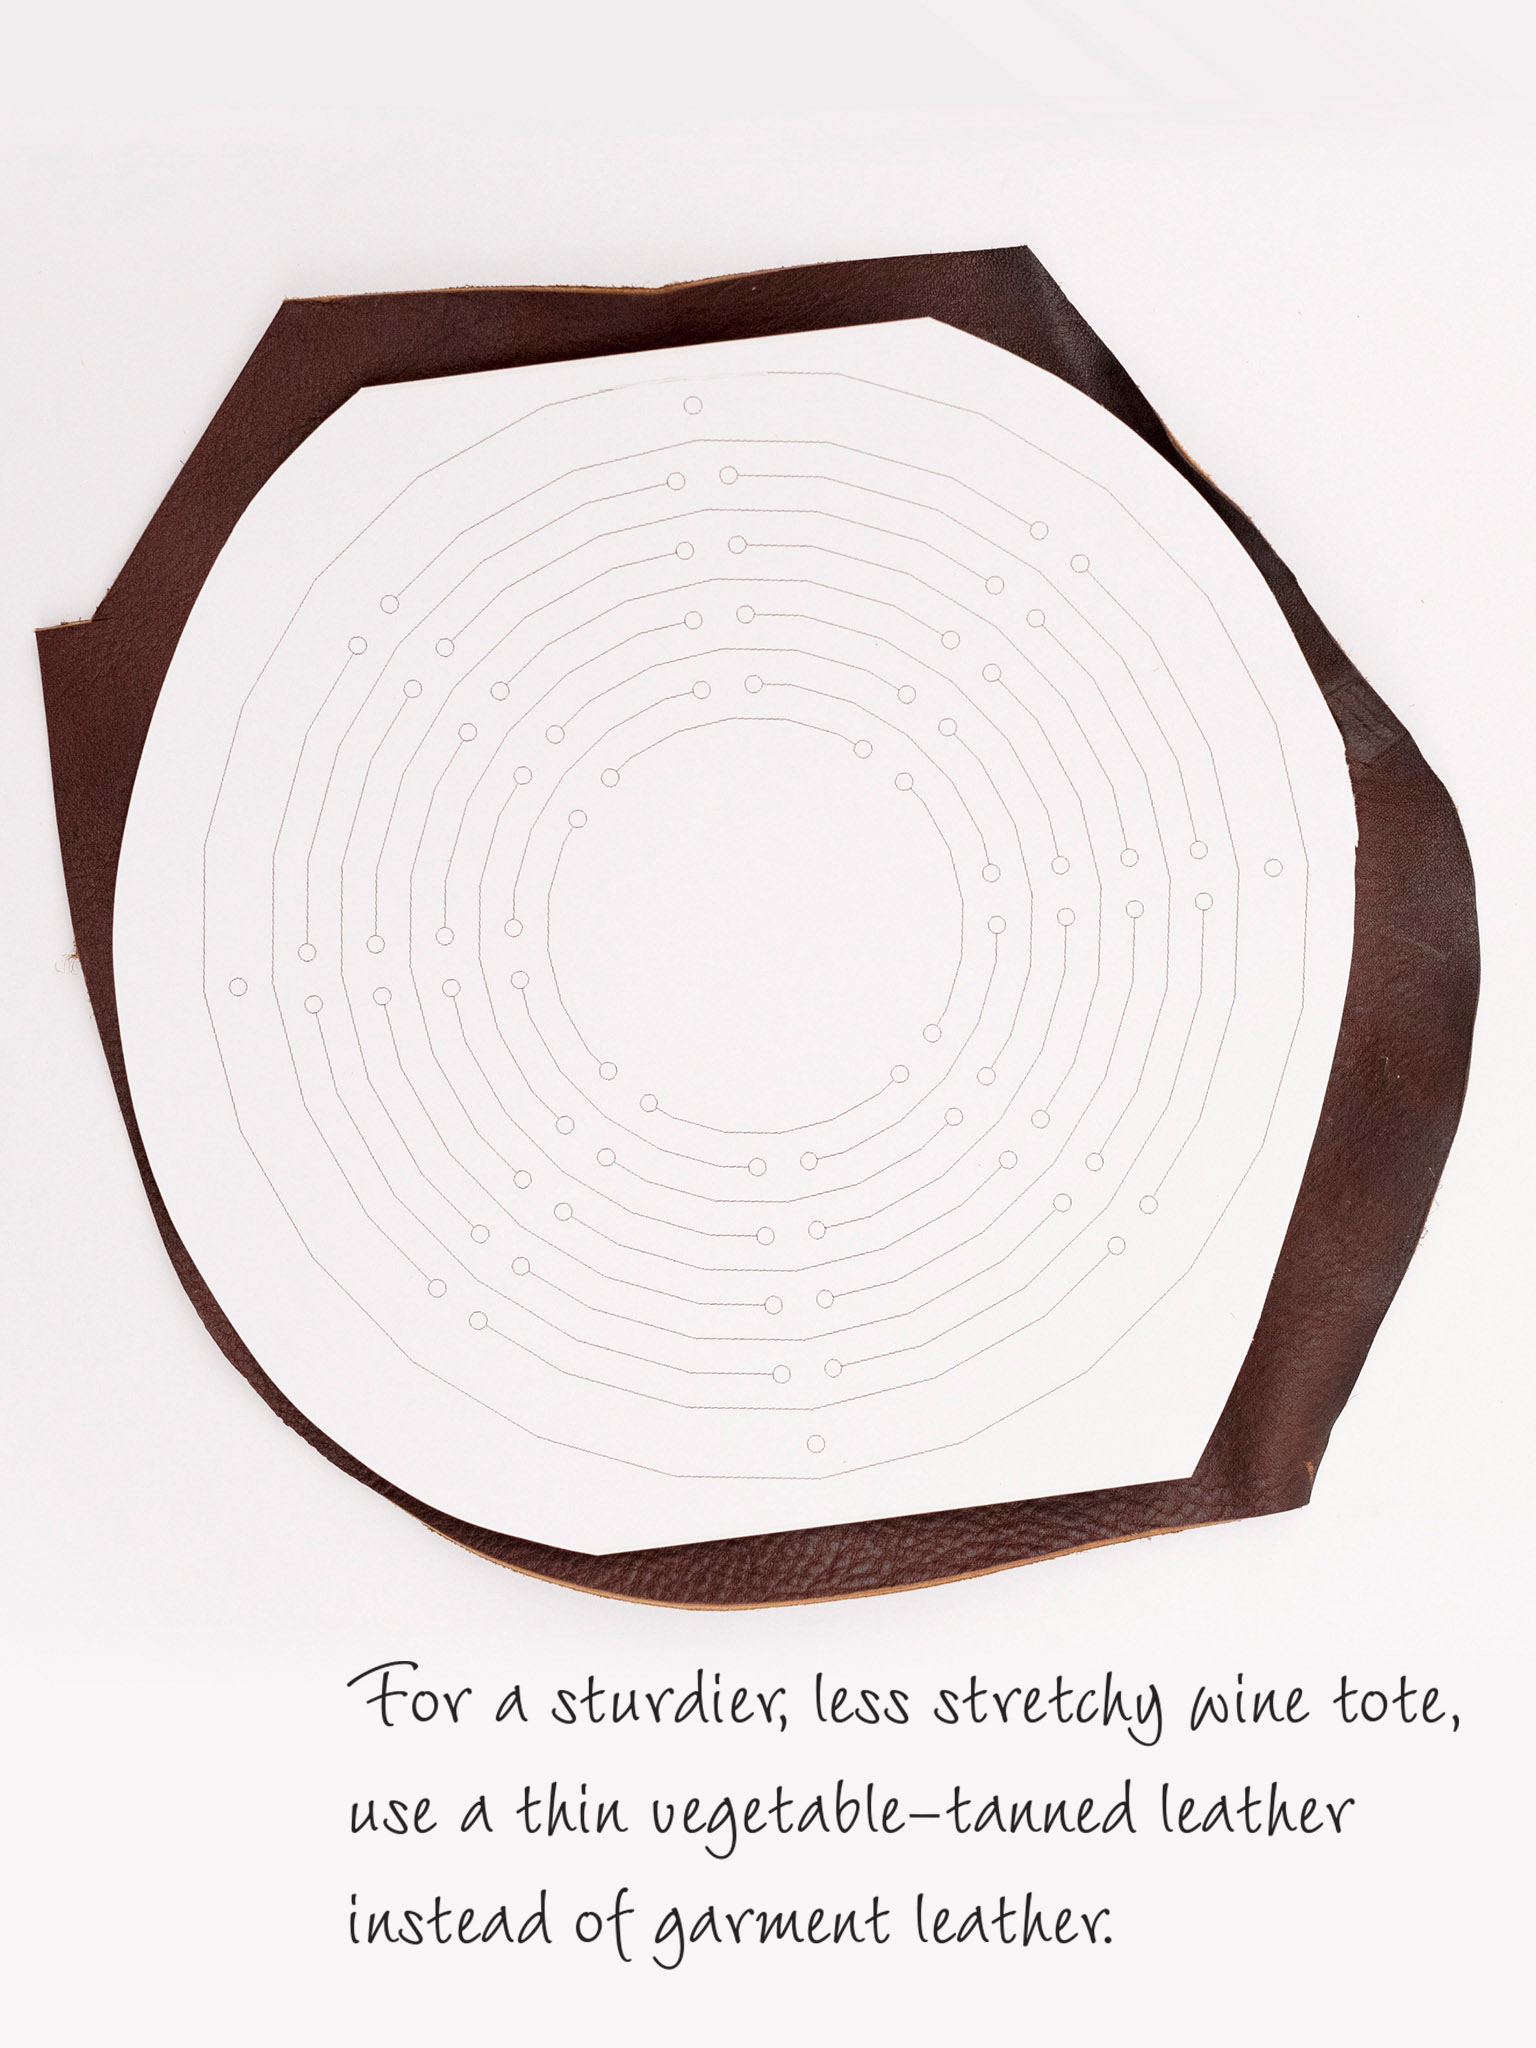
2 Cut the leather circle. Secure the edges of the template to the leather with masking tape, and using a precision knife, cut out only the exterior circle marked on the template.
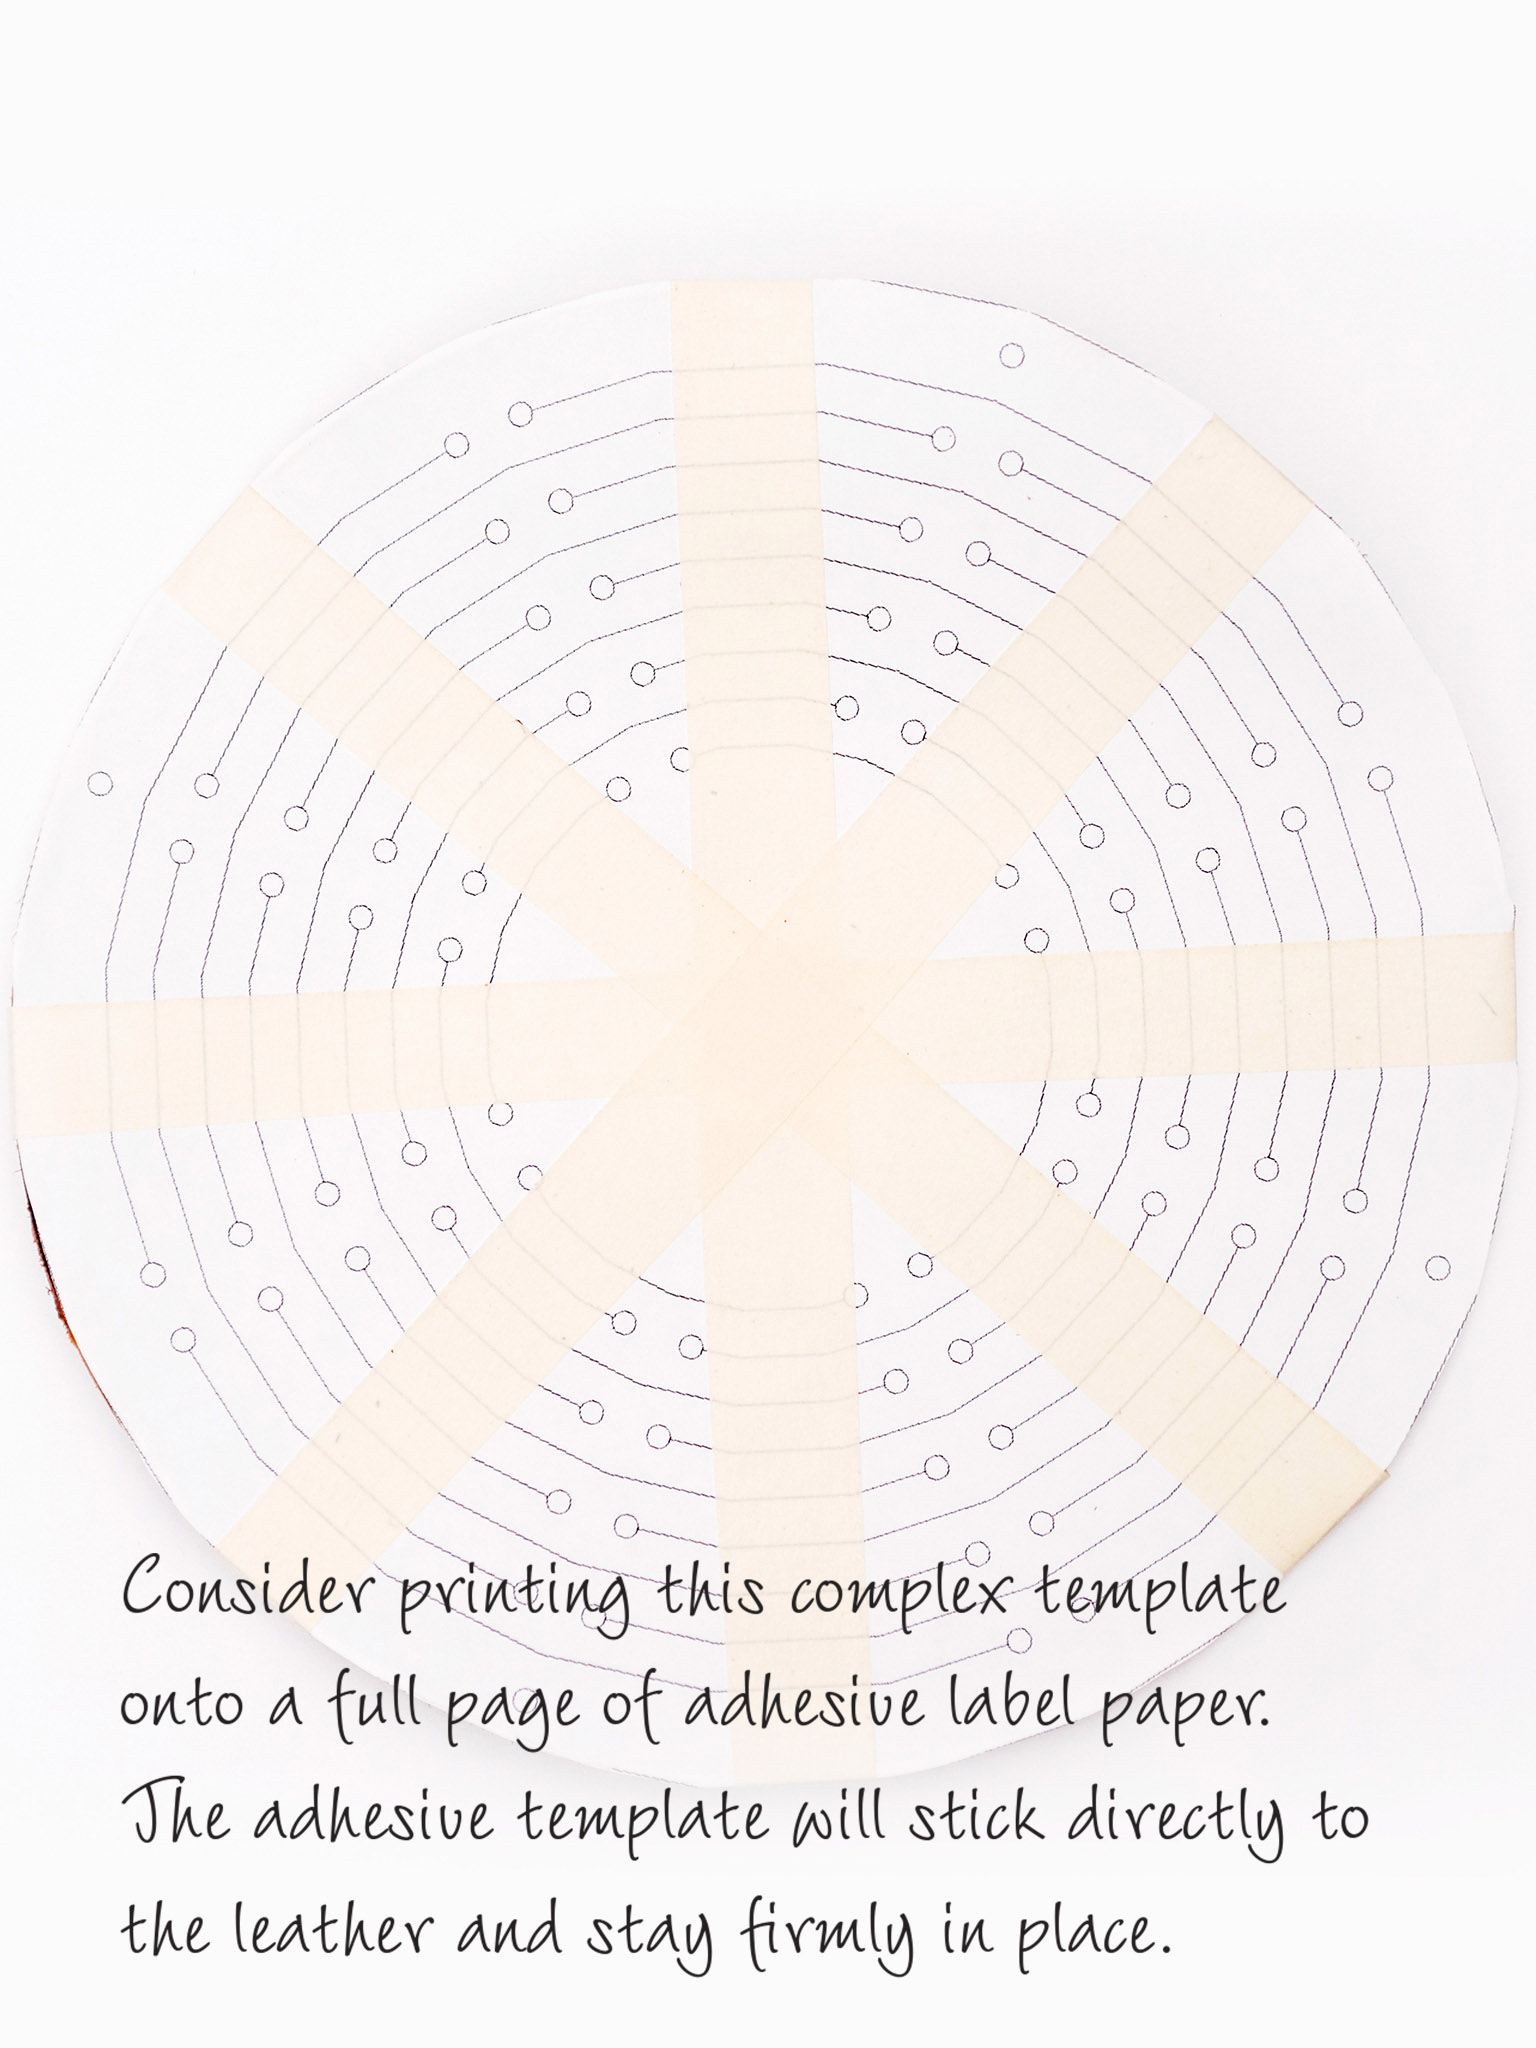
3 Tape the template to the leather. Secure the template to the leather by applying masking tape in an asterisk shape.
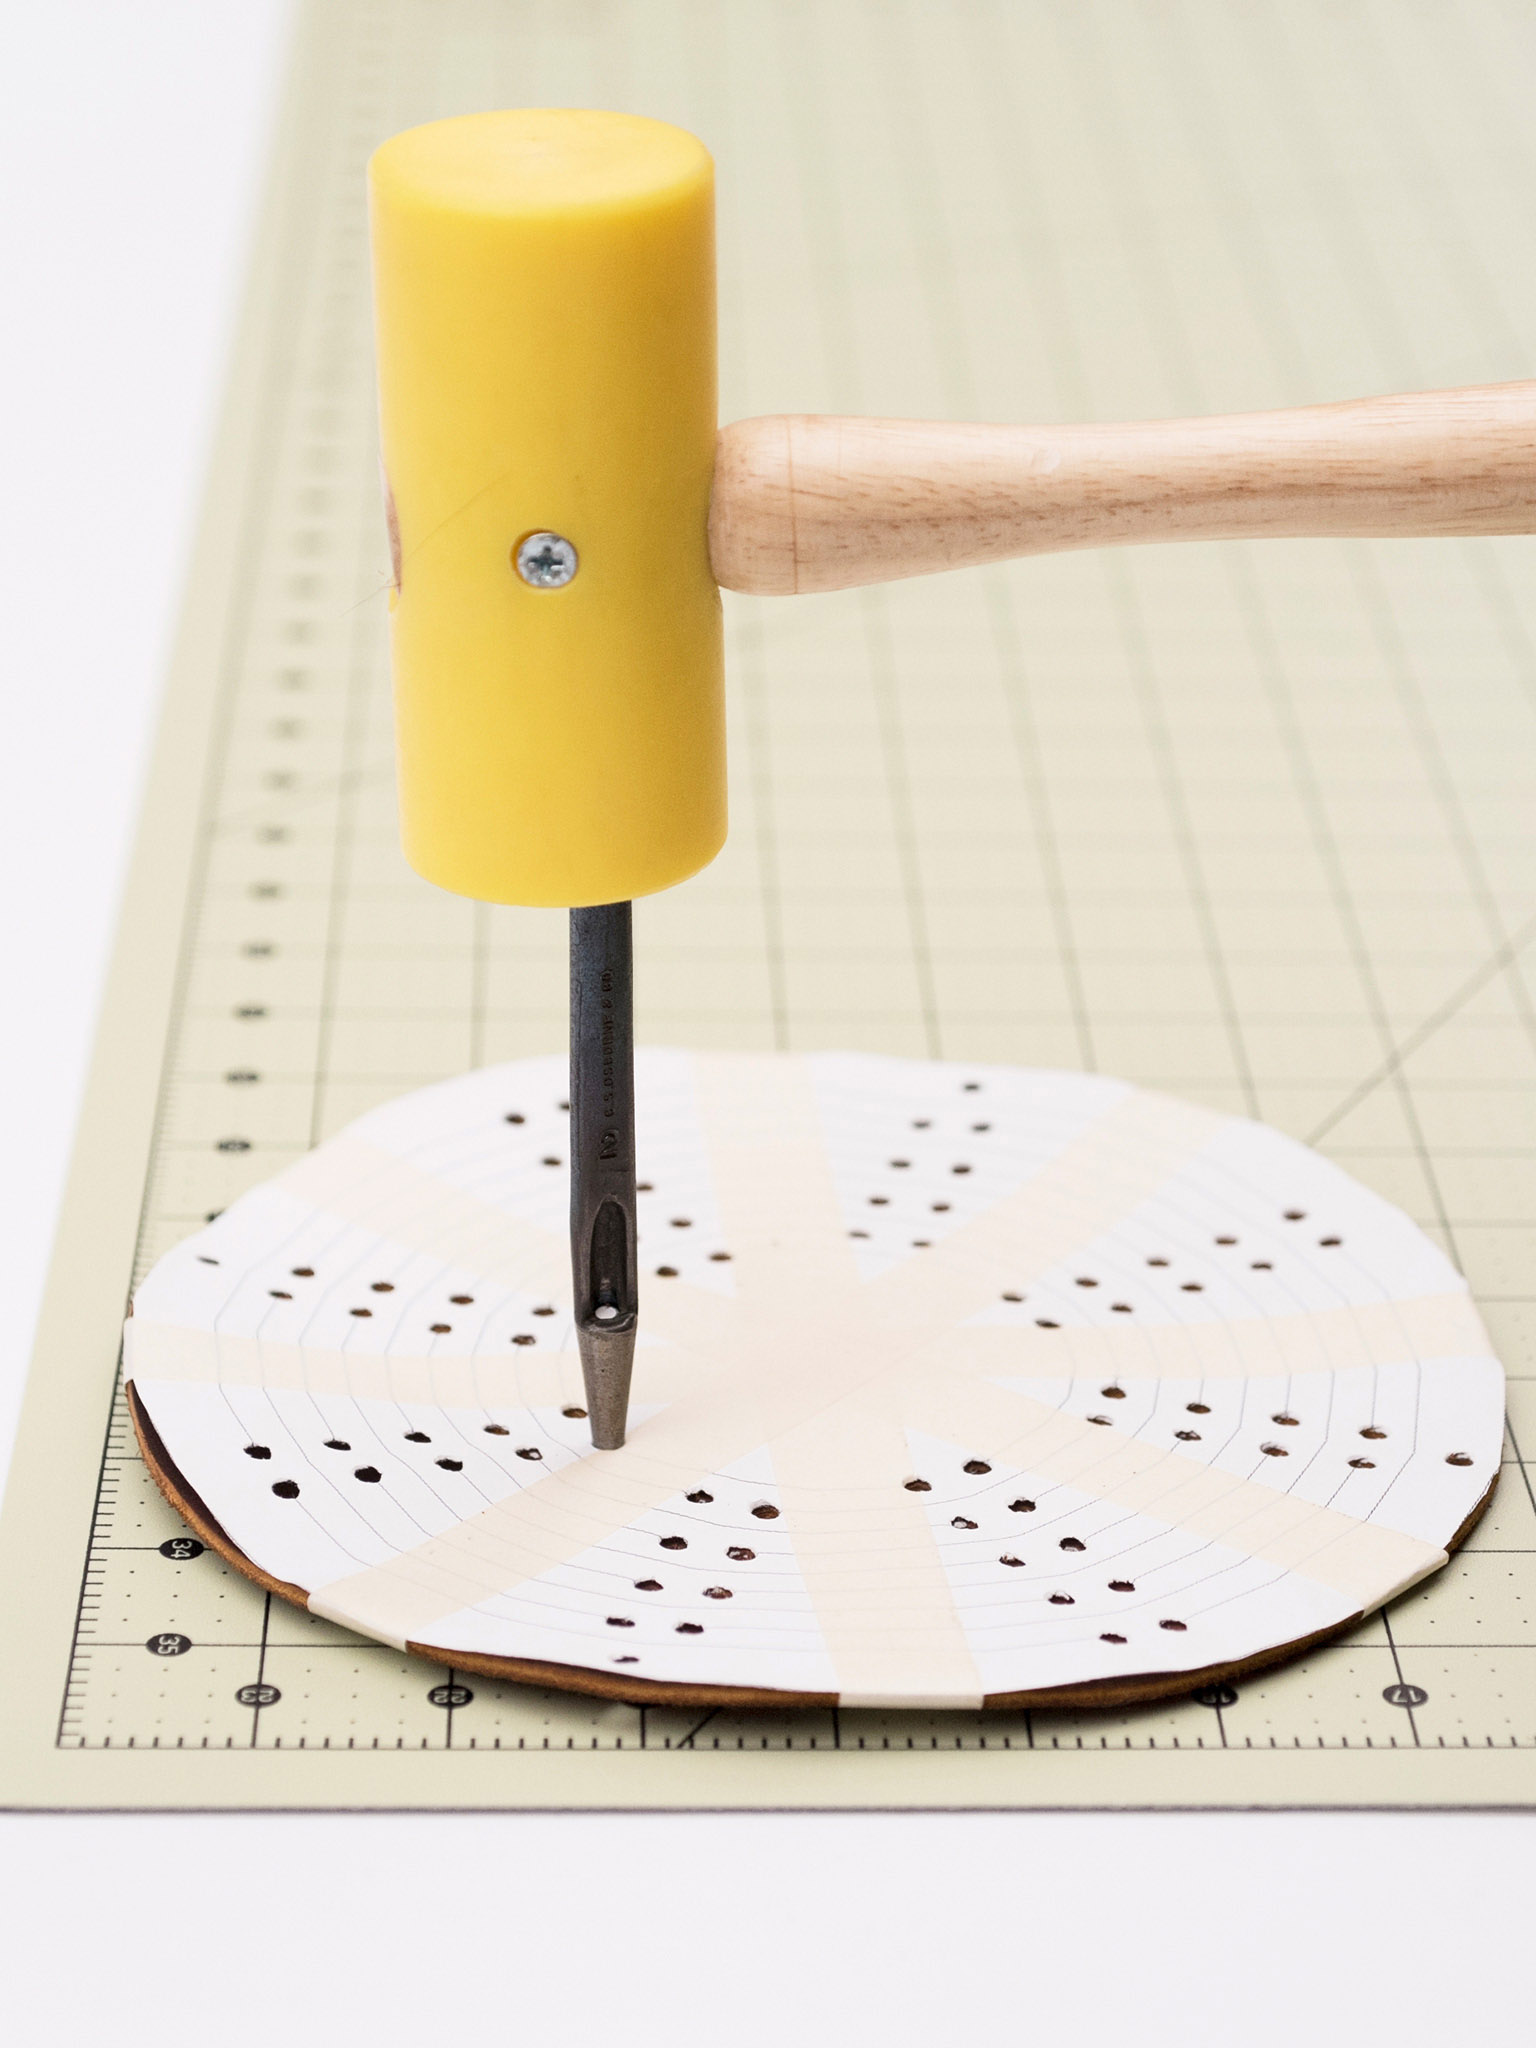
4 Punch holes. Using a mallet and a #2 hole punch, punch the holes where marked on the template.
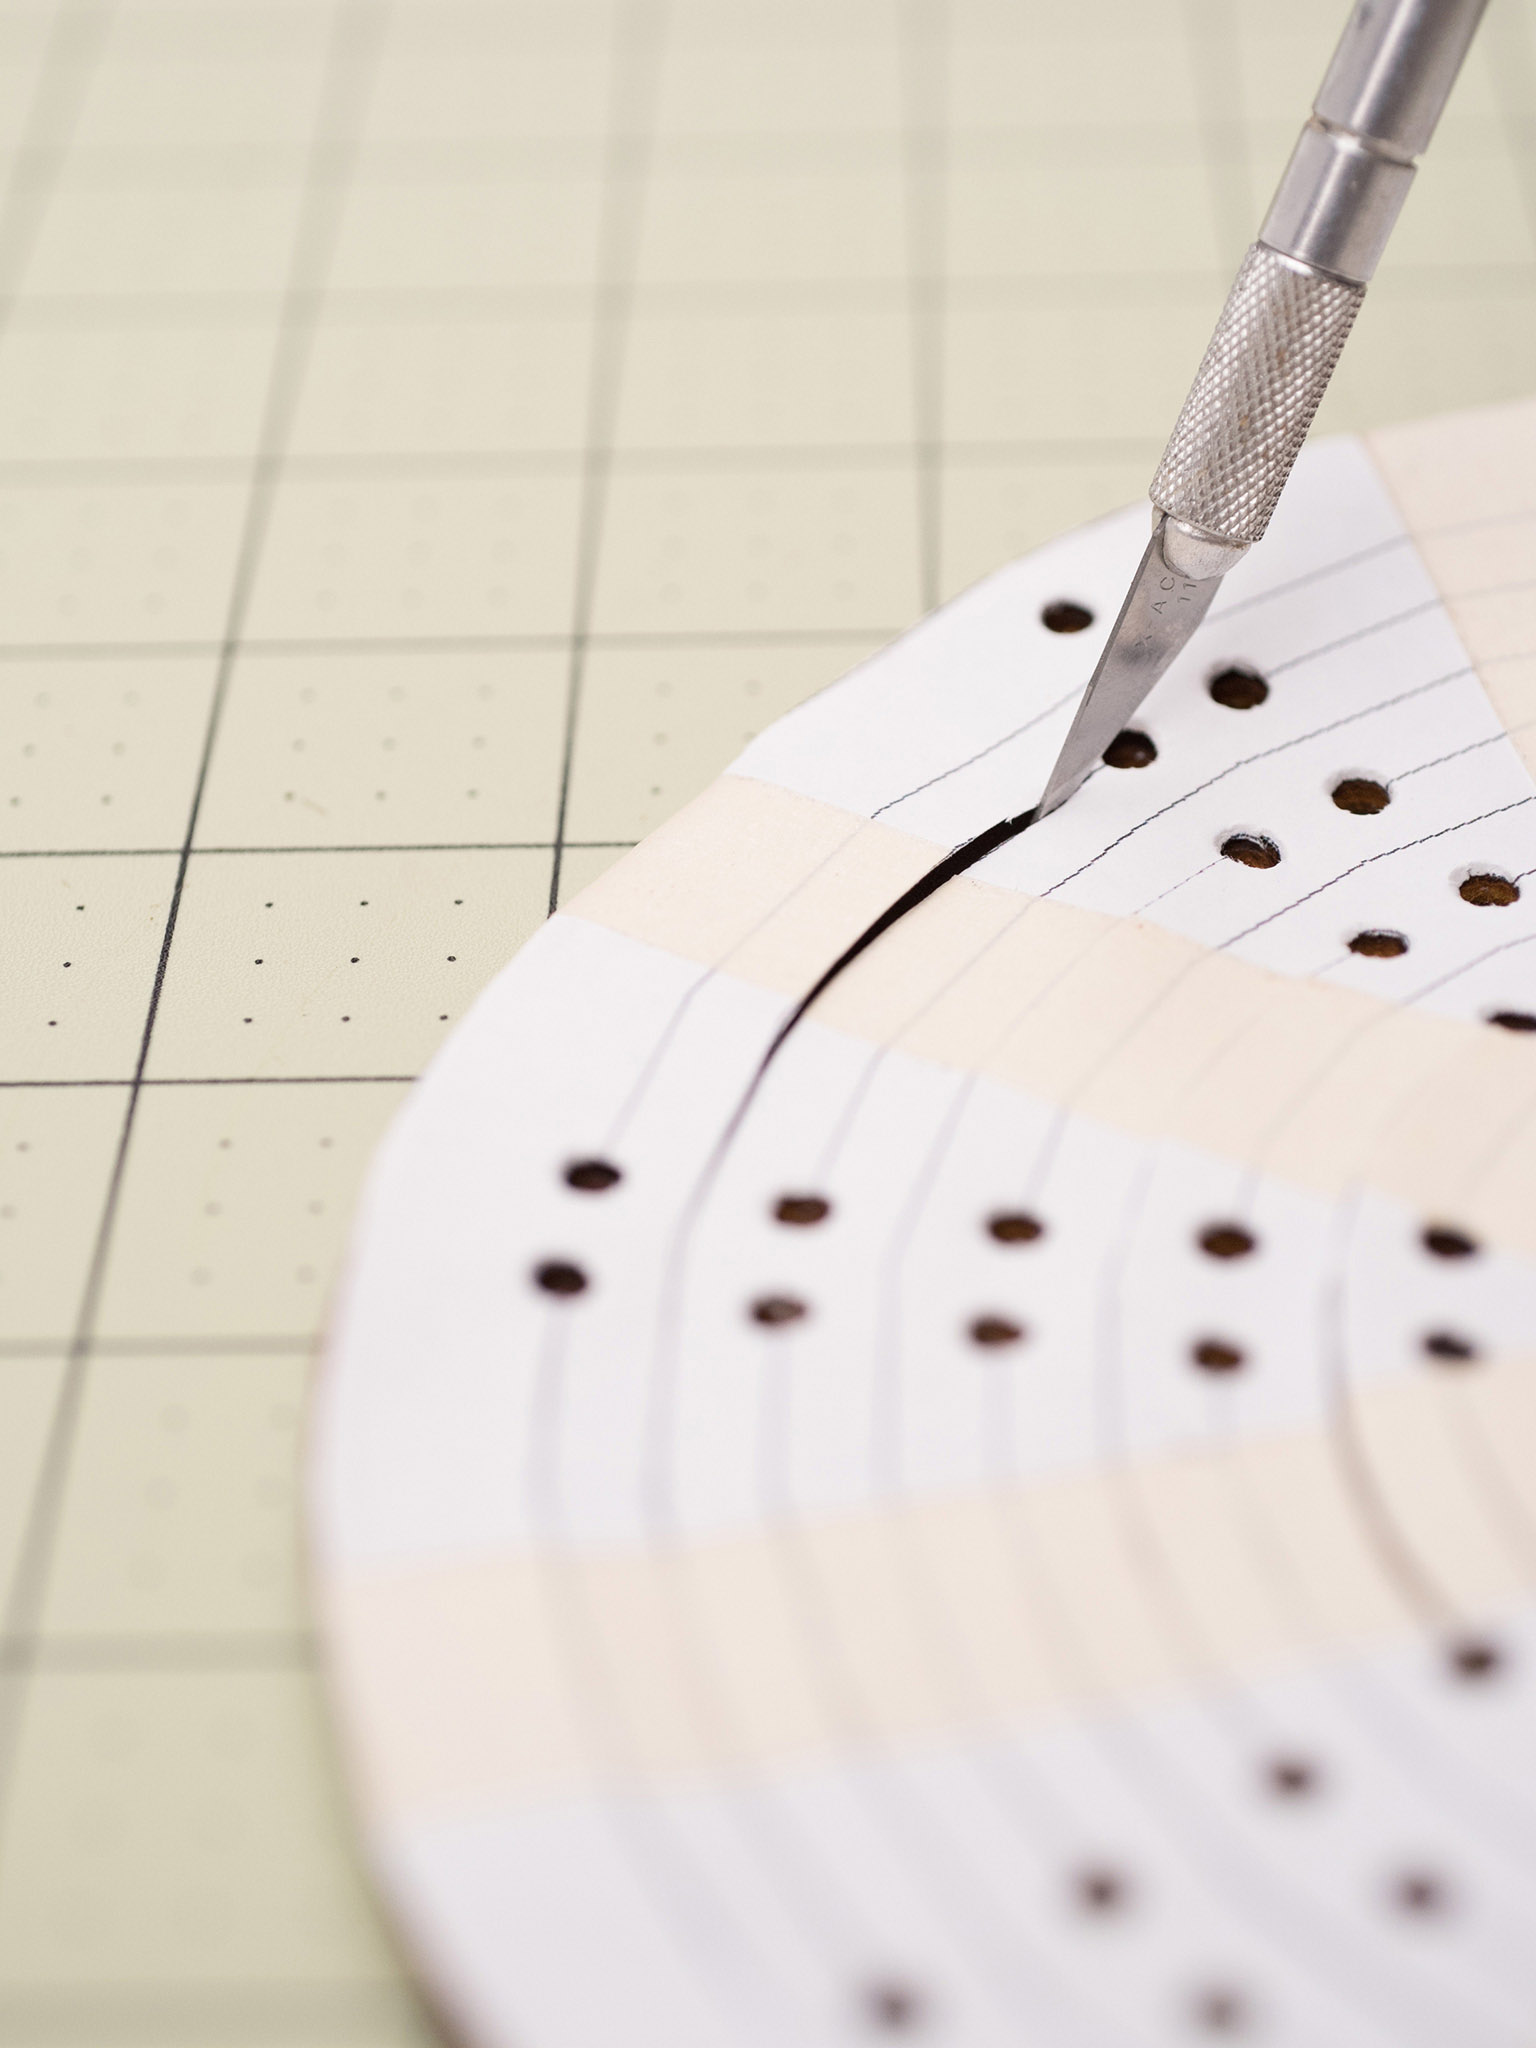
5 Partially cut through the lines. Using the precision knife freehand, cut through the paper template along all the lines starting from one hole and cutting almost to the next hole, but not quite. This will produce a clean finish and prevents you from accidentally cutting past the holes. Go slowly and take your time.

6 Remove paper template and finish the cuts. Remove the paper template and finish each cut to connect with the holes. This expandable shape comprises the tote.
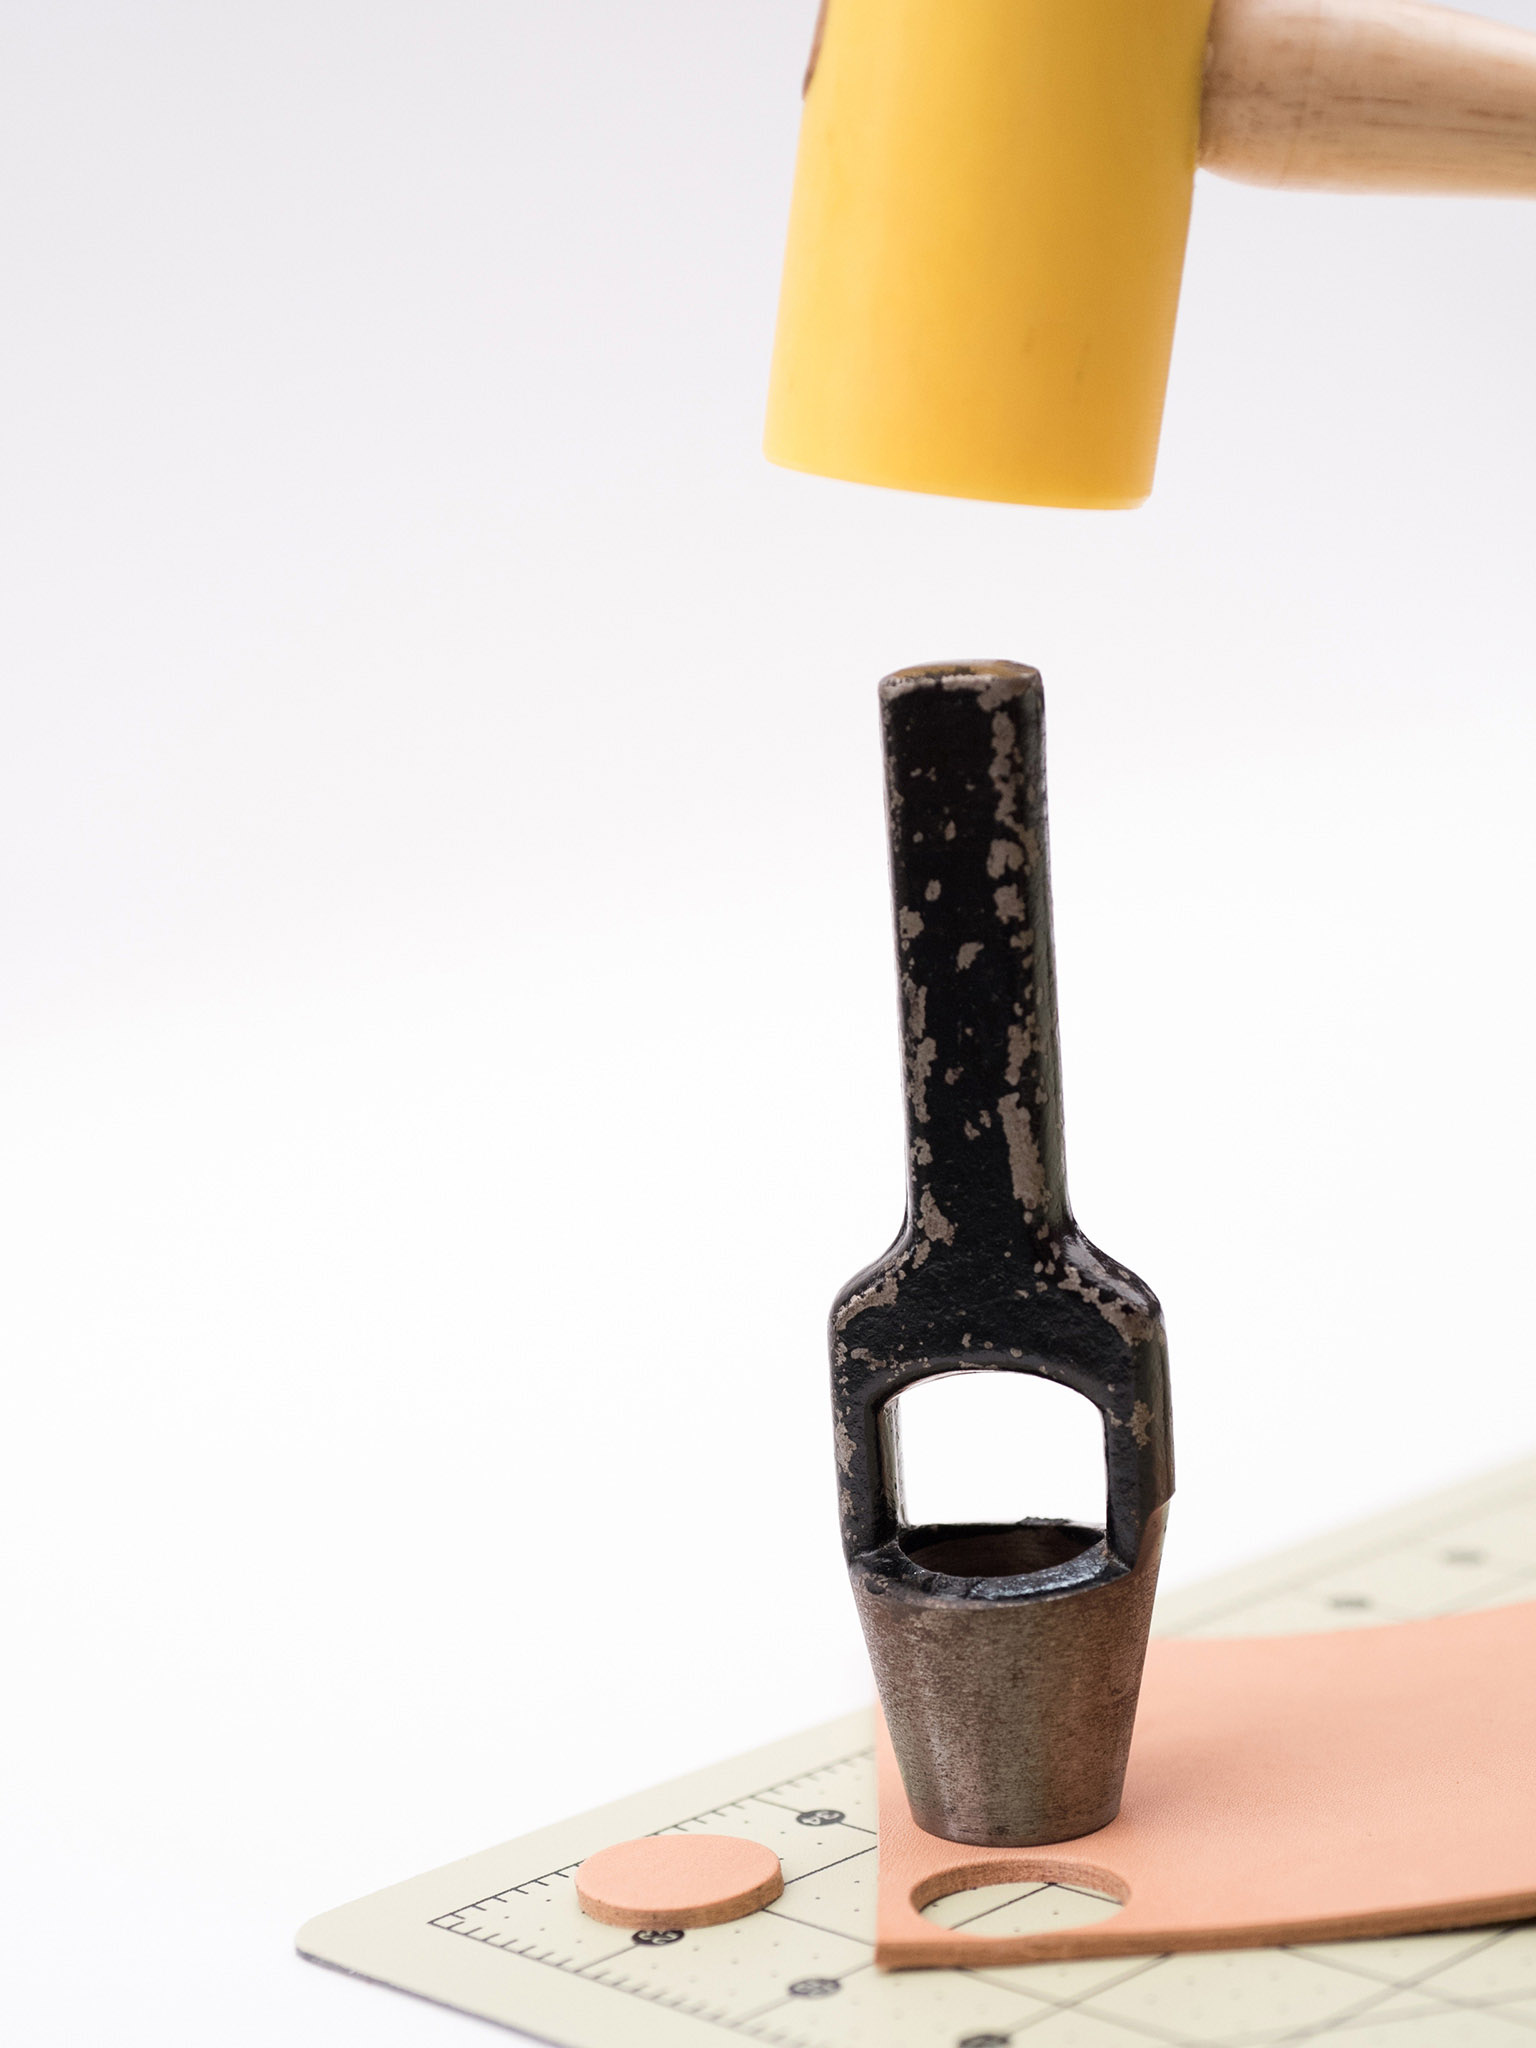
7 Punch the cord stop. Cut a 1-inch (4cm) round of vegetable-tanned leather using a mallet and the 1-inch (4cm) hole punch.
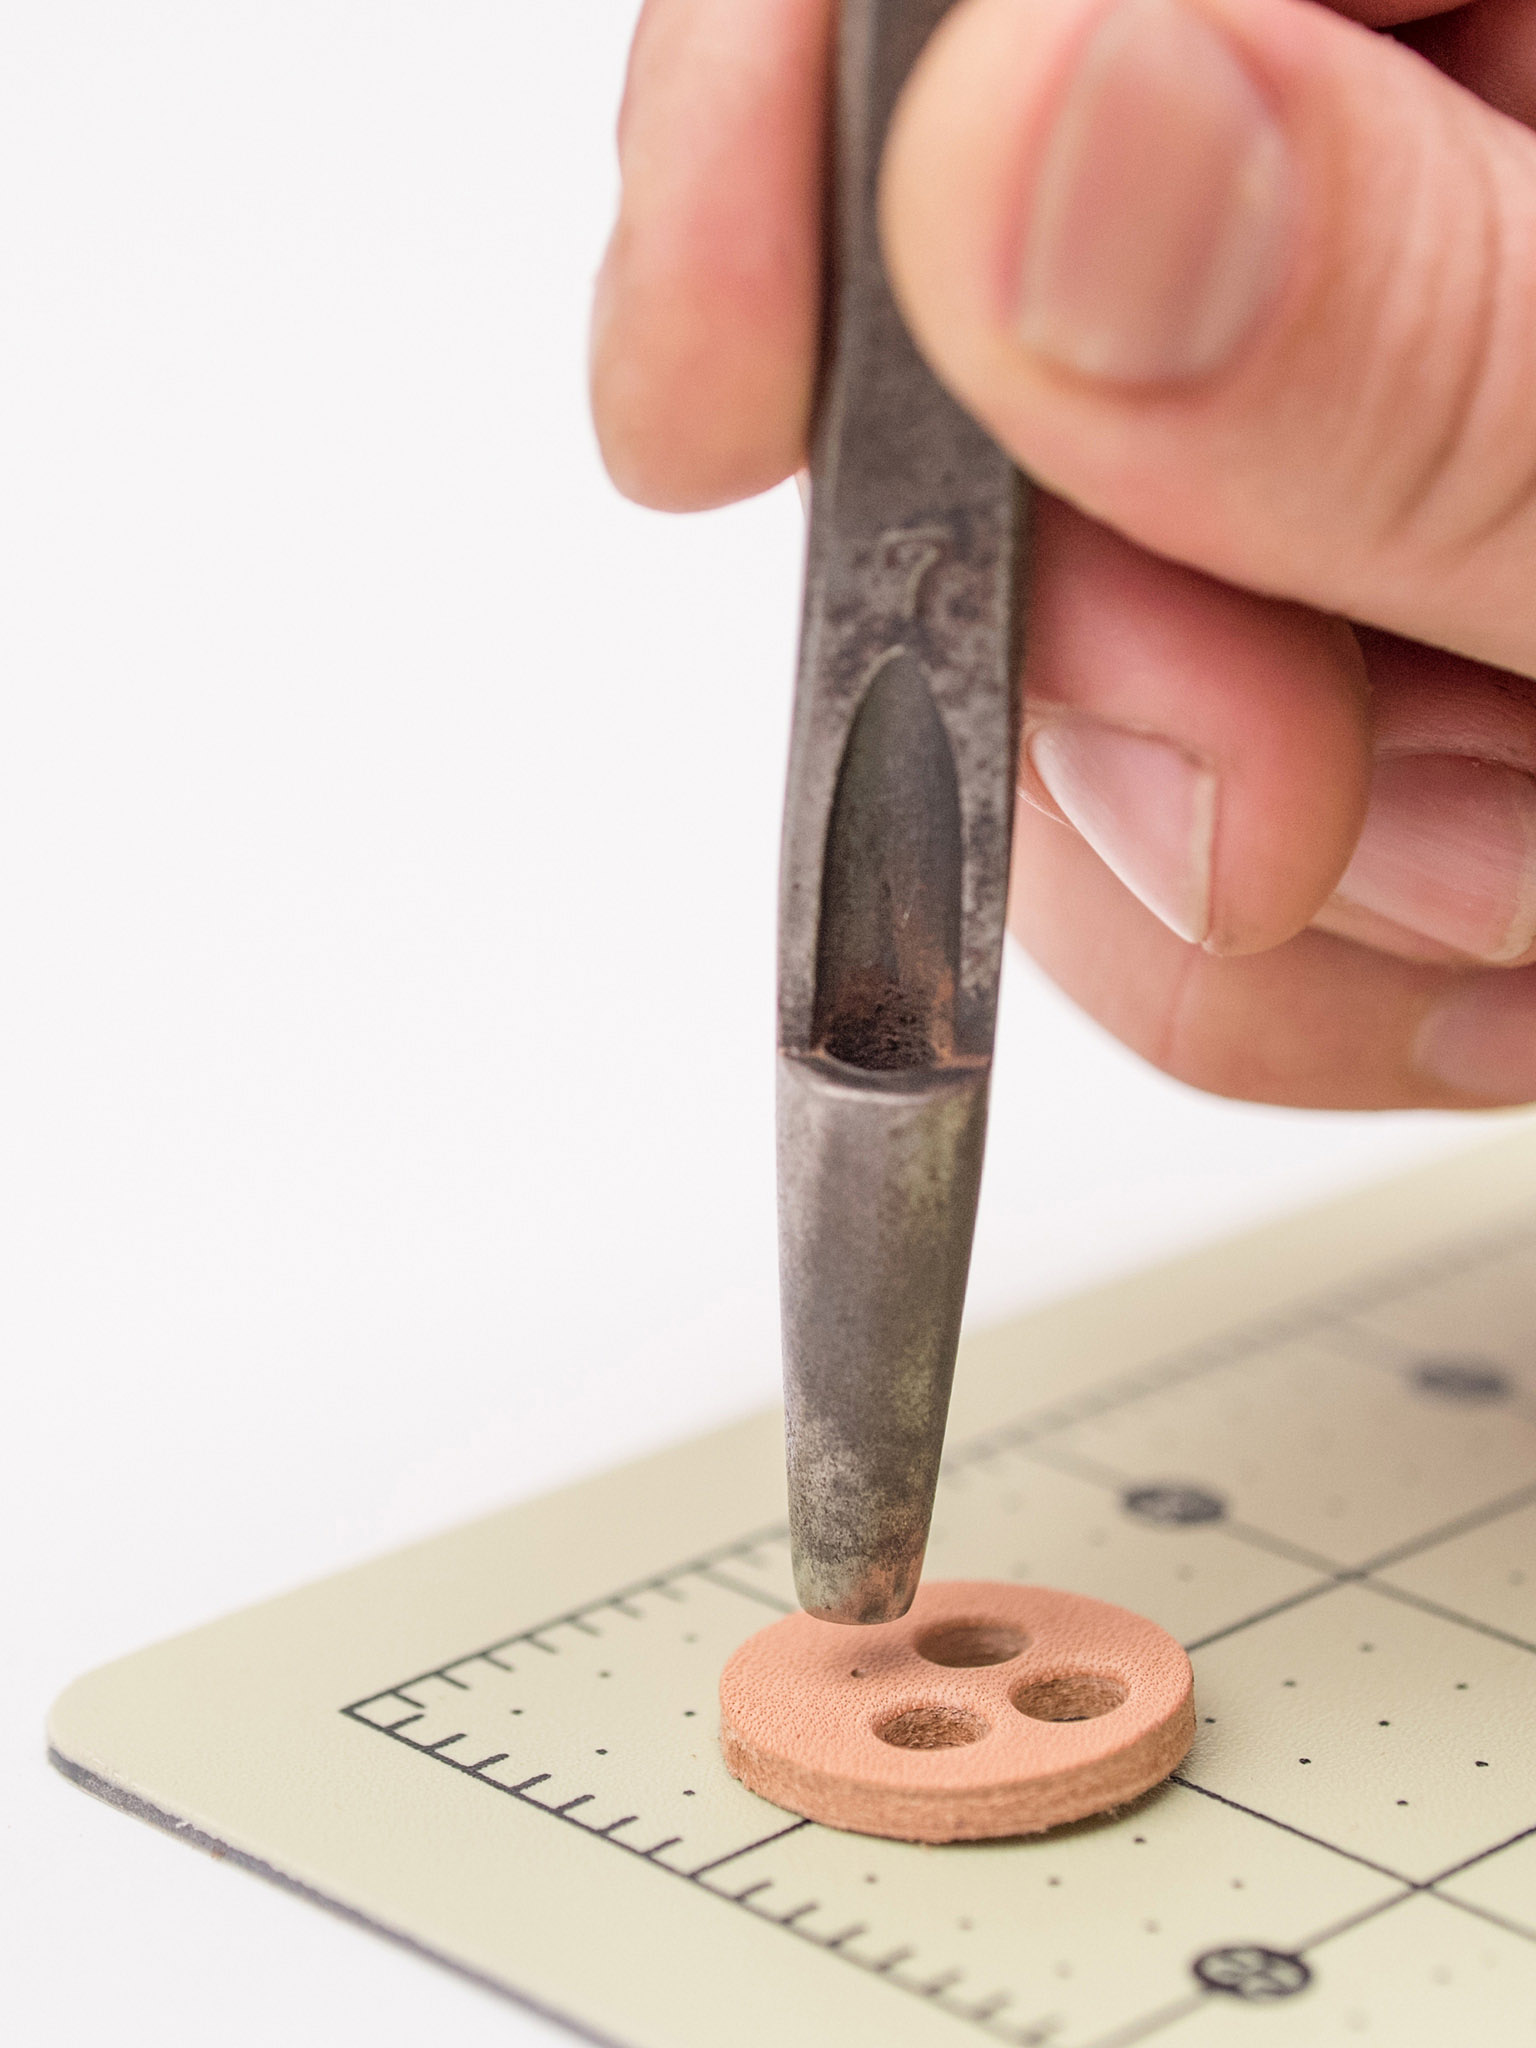
8 Punch cord holes in the stop. Punch four cord holes in the 1-inch (4cm) round using a mallet and the #7 hole punch.
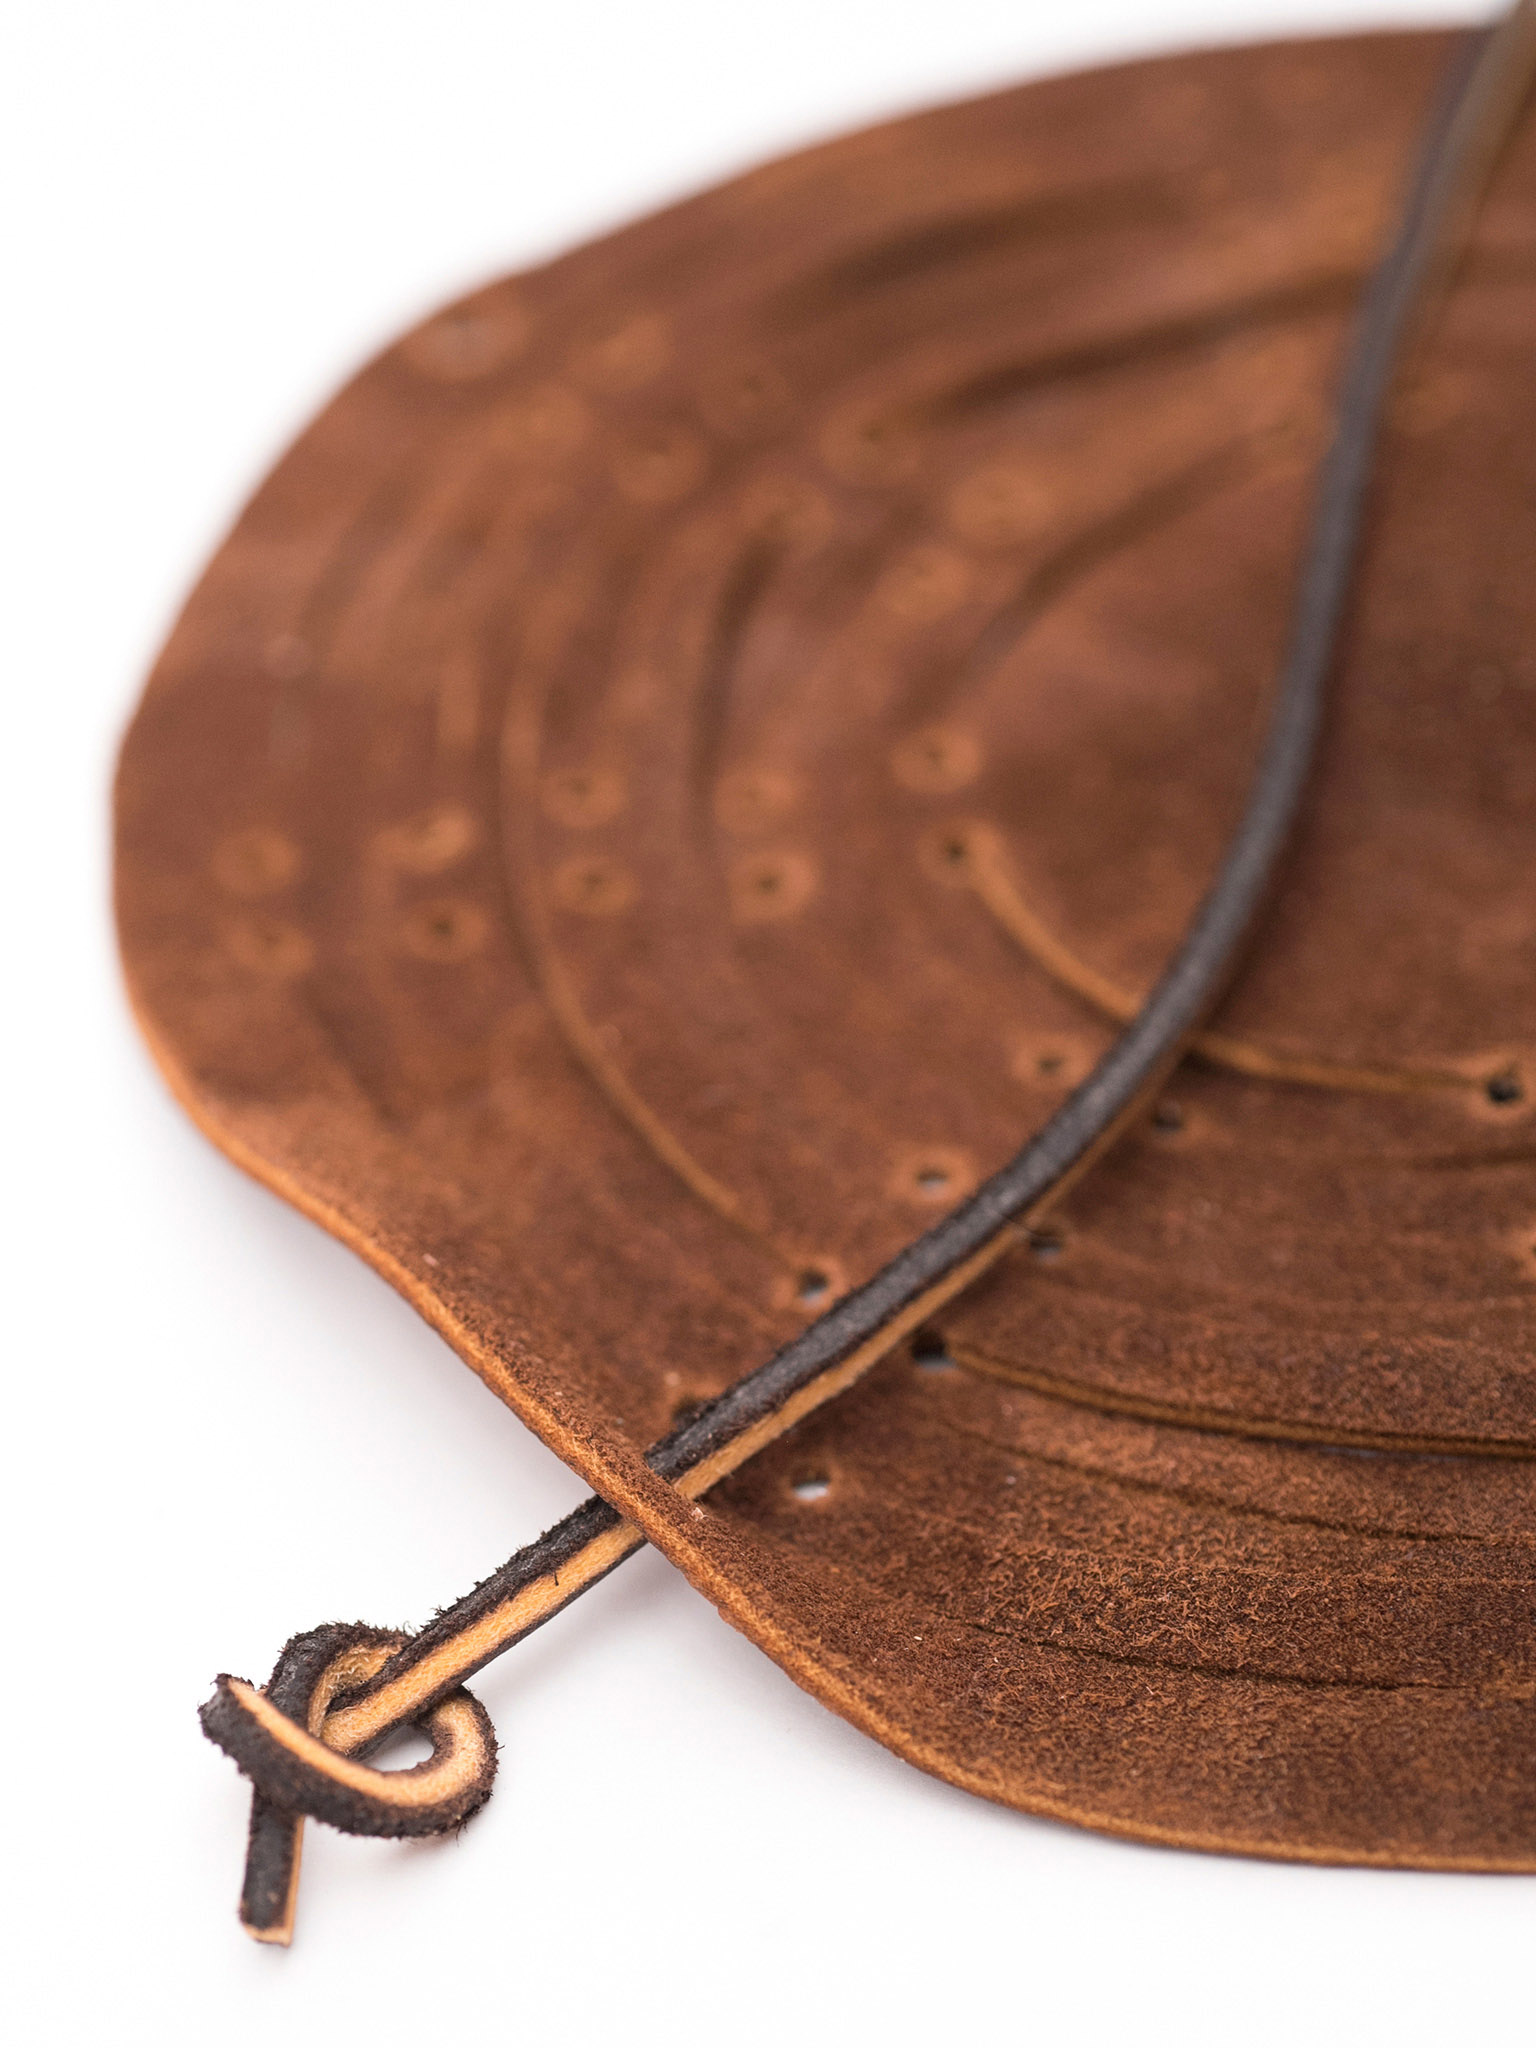
9 Attach first cord handle to tote. Tie one end of one of the cords in a standard double overhand knot and feed the cord through one of the four holes on the outermost ring from front to back. The knot will anchor the cord in place.
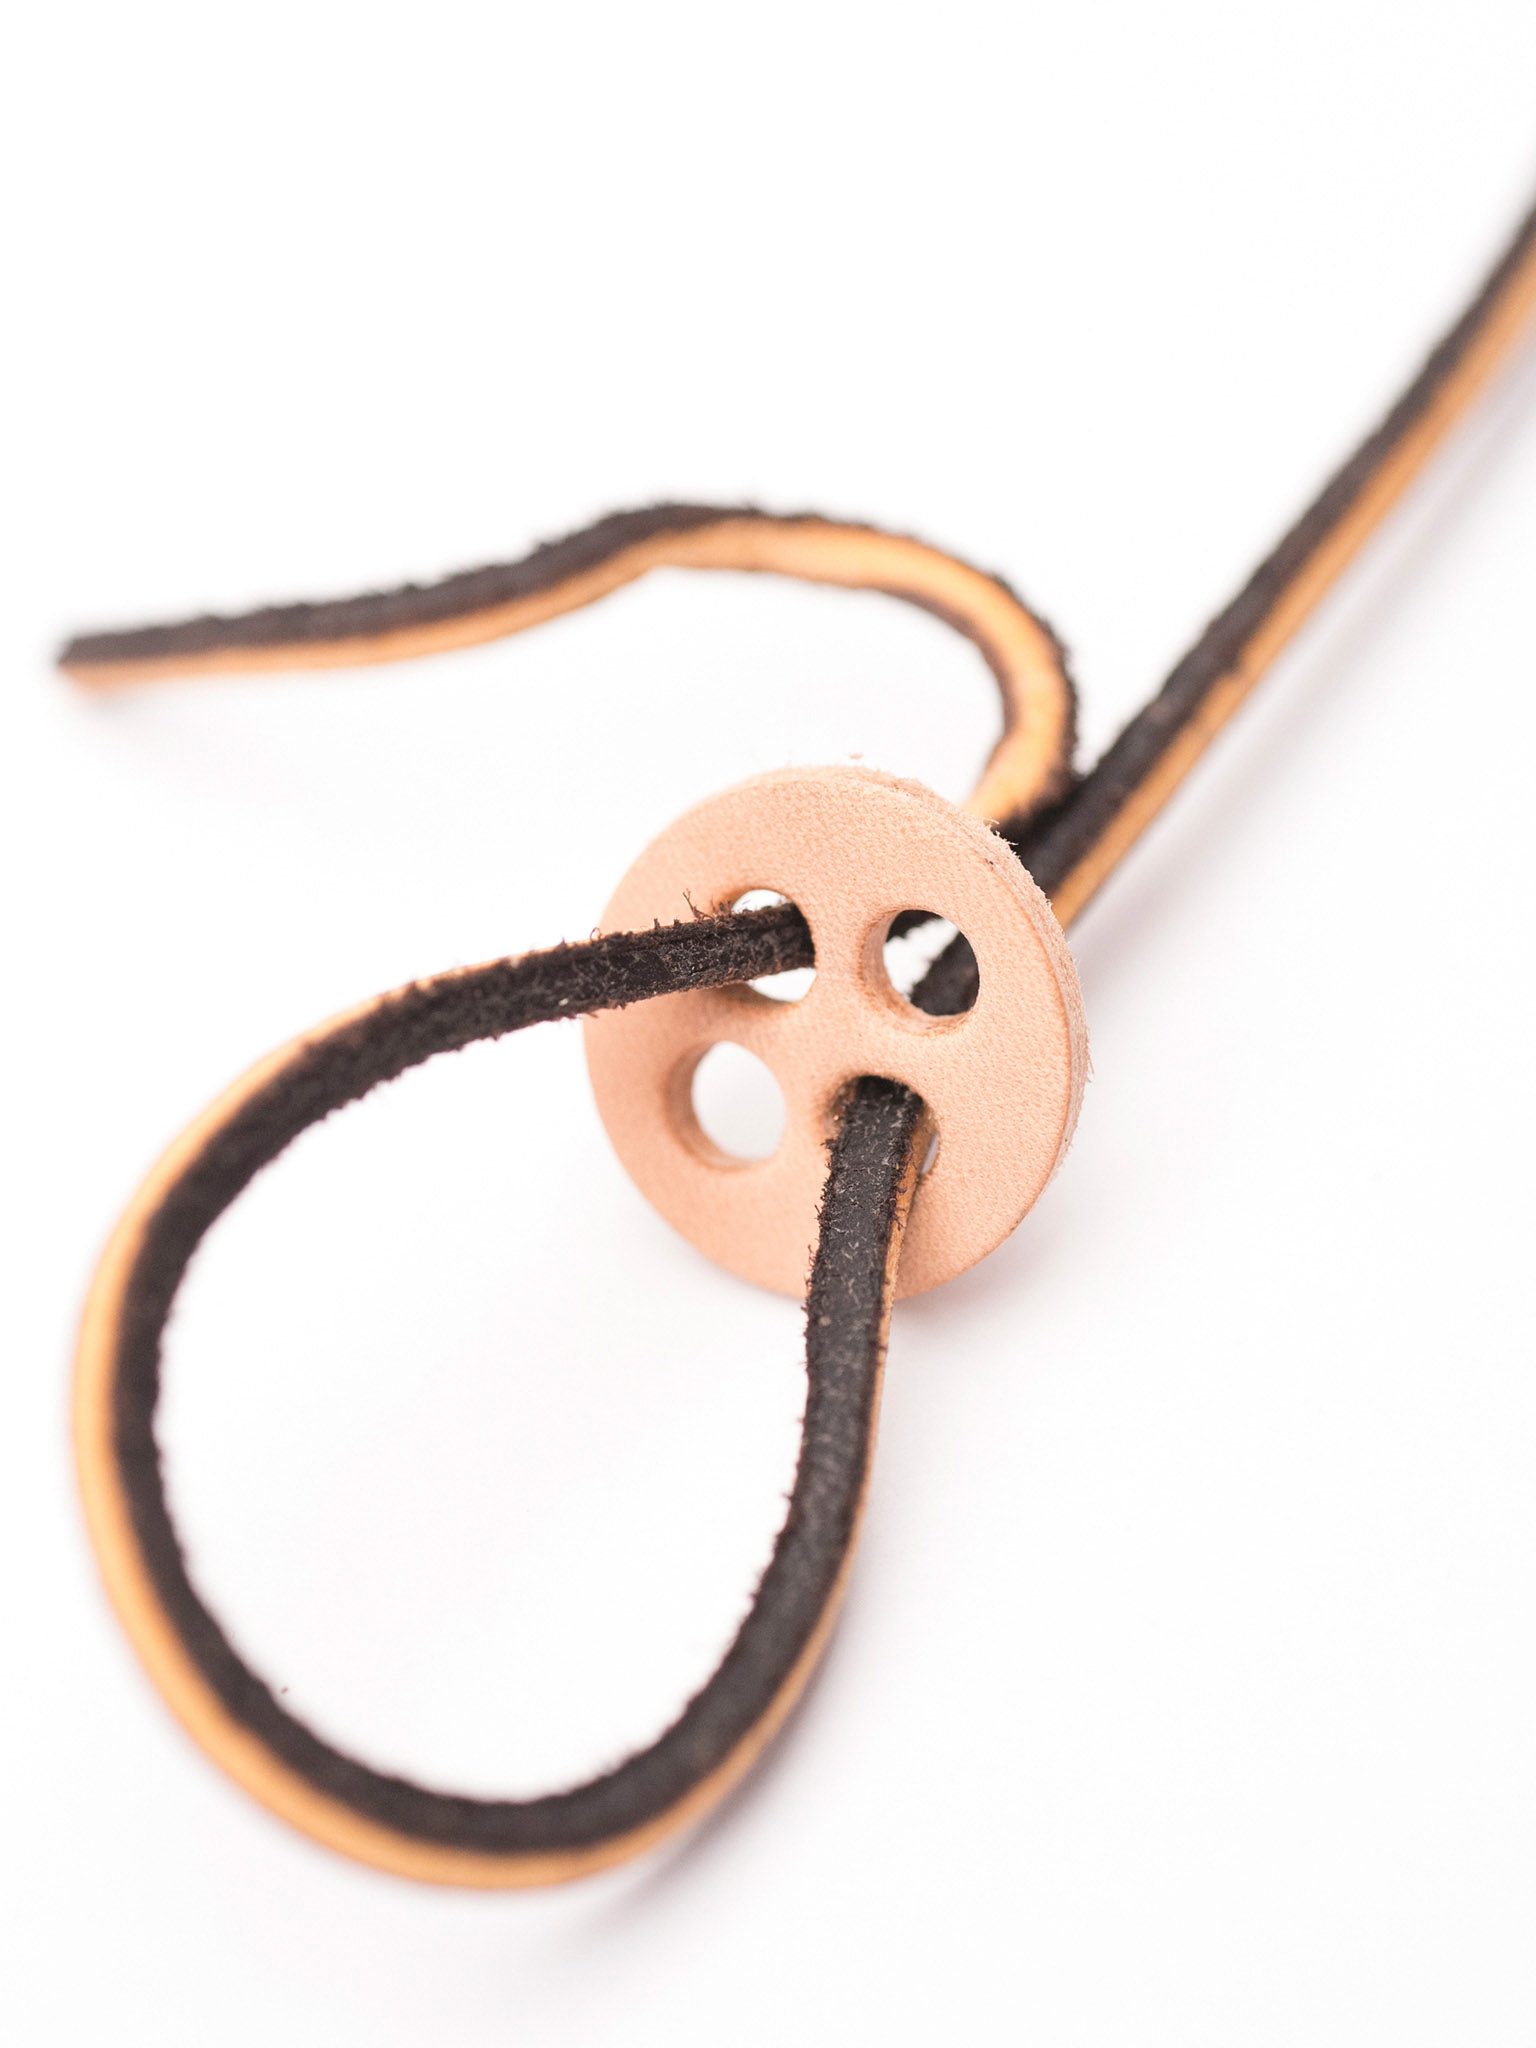
10 Attach cord stop. Take the unknotted end of the cord from Step 9, and feed the end through one of the holes in the stop made in Step 8, from back to front. Double the cord back through the hole on the opposite side of the stop, from front to back.

11 Finish attaching first cord handle. Repeating Step 9, attach the end of the cord to the opposite side of the tote. Feed the cord through the outermost hole on the side opposite the first knot, from back to front. Tie a standard overhand knot to anchor the other end of the cord in place.
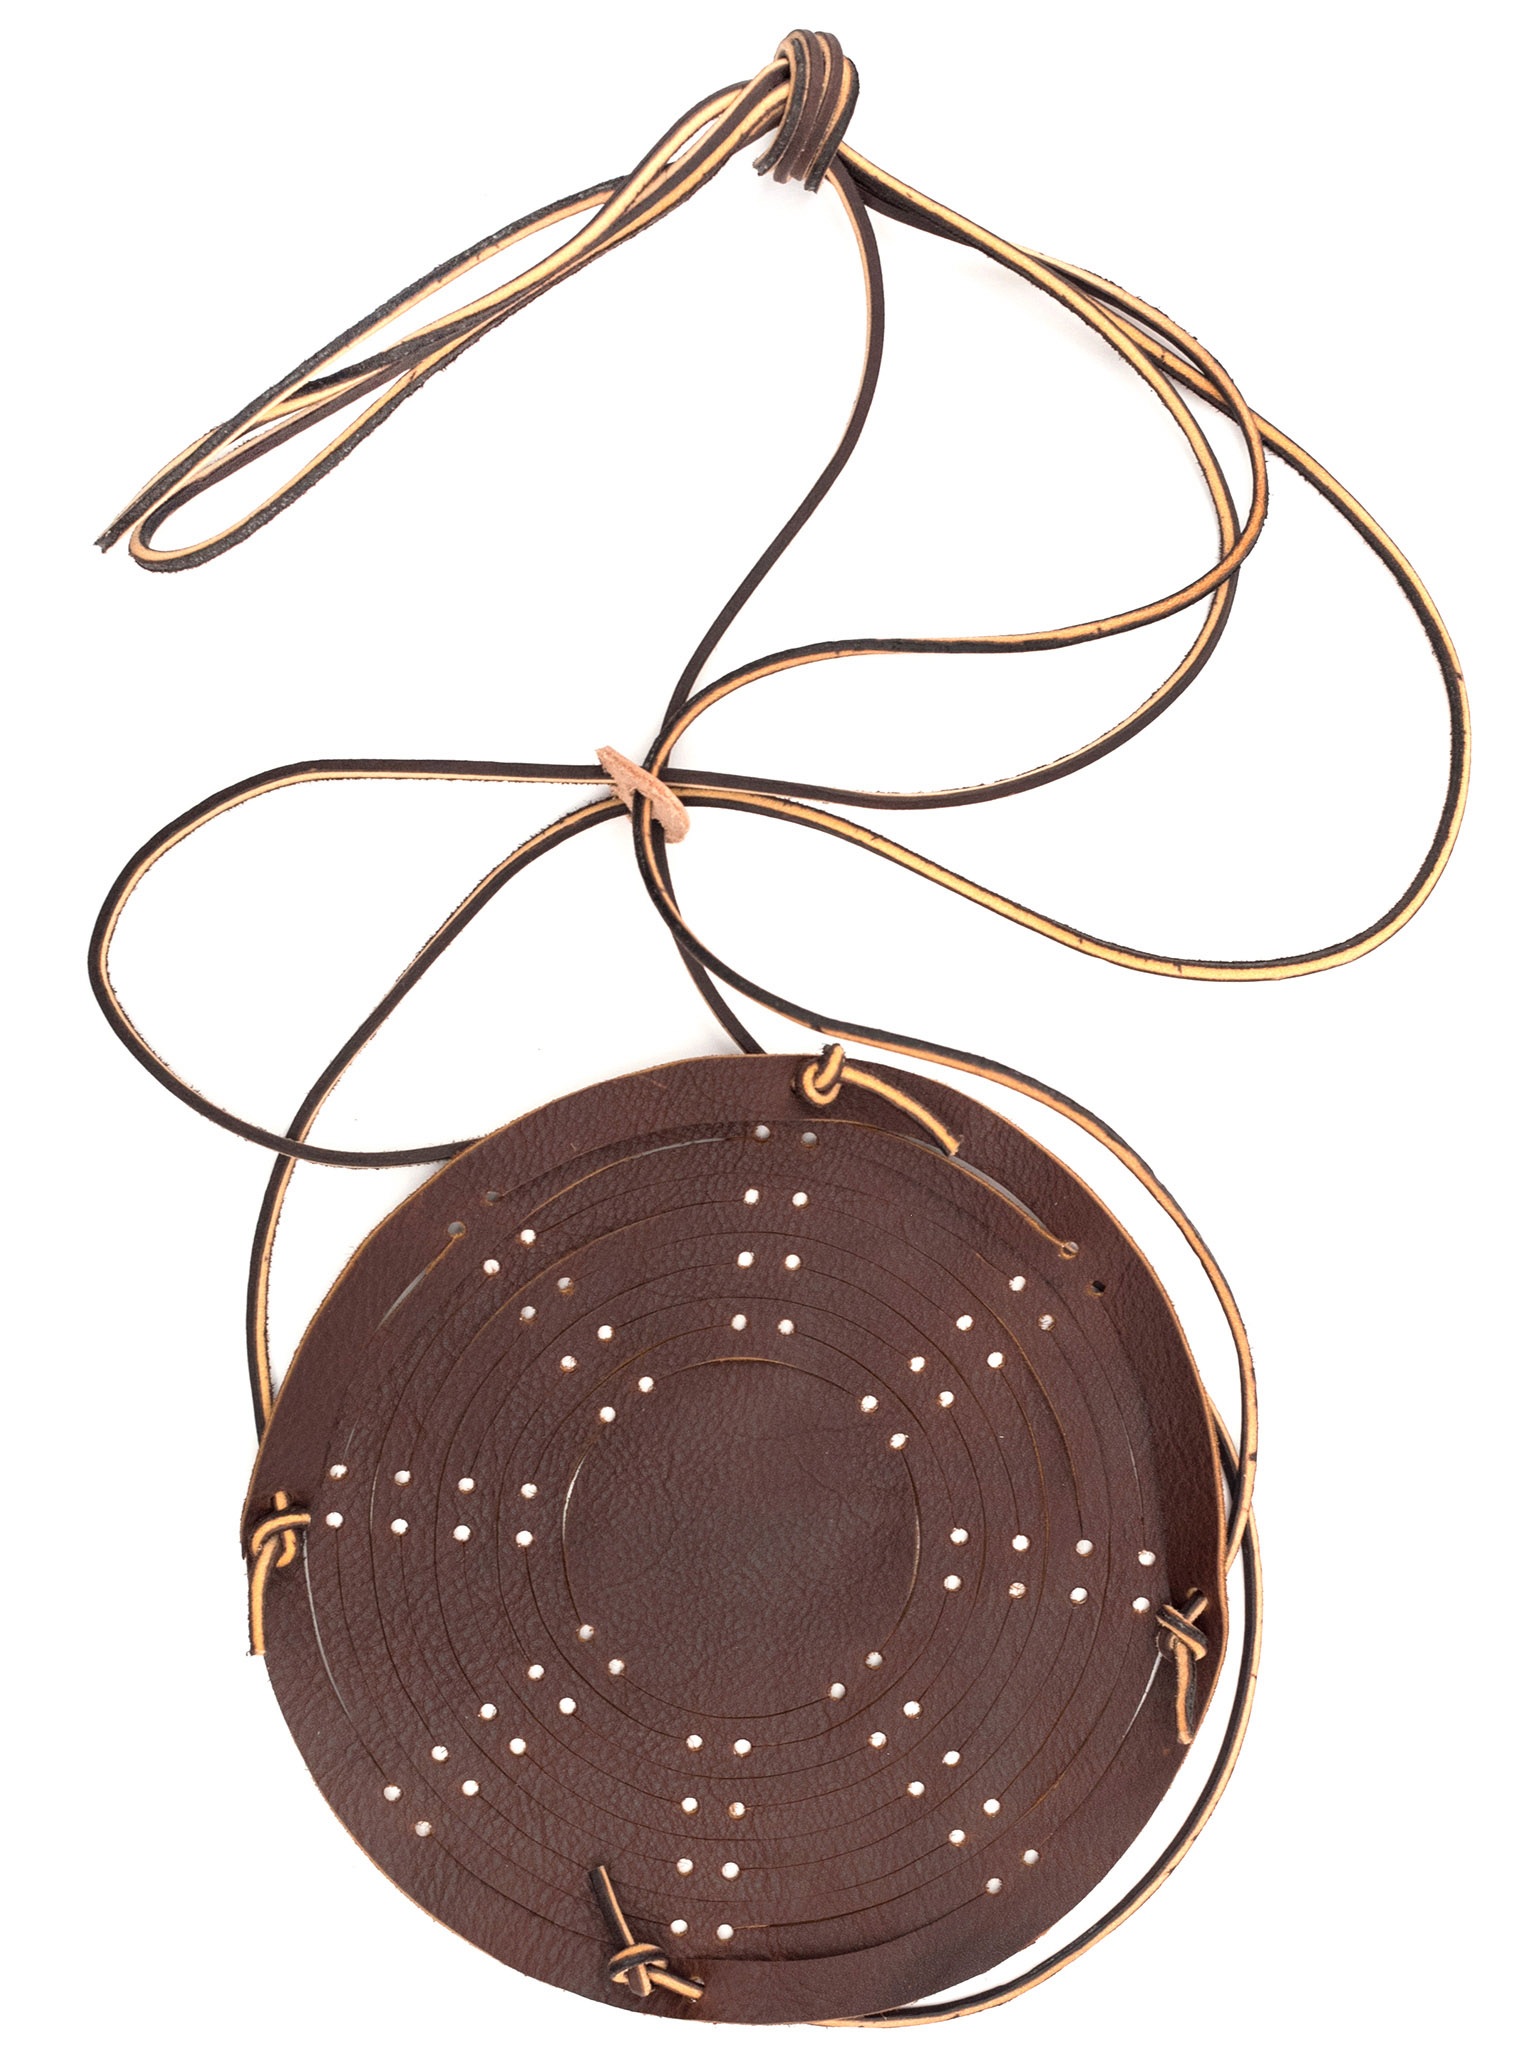
12 Attach second cord handle. Repeat Steps 9 to 11 with the second cord, threading it through the last two open holes of the stop and the tote. Knot the two loops of cord handle together at the top.
