
We've laid the groundwork for our project. You have your directories set up, and you're itching to start animating. Well, there's one more thing we need—something to animate! In this chapter, you're going to learn the basics of modeling in the 3D virtual space. Any modeling software can be used. The principles will be the same, but the buttons may be located in slightly different areas. The bonus is, once you know how to model, it doesn't matter what software you use; the process is the exact same. For this chapter, we're going to use Maya 2012. Again, this is not a book on 3D modeling; however, to truly understand 3D animation, a good foundation in modeling is a must. This chapter is a high-level overview of the principals and techniques on 3D modeling, not specific to a single 3D modeling software.
Primitive modeling is exactly what it sounds like. We're going to use primitive shapes (sphere, box, pyramid, torus, and cylinder) to make a more complex object.
Let's start with a cylinder to create the body of our salt shaker. In the following screenshot, you'll see that we're in the middle of creating our cylinder. You'll also notice that it looks more like an octagon than a round cylinder. That's what we're going for. You can create a hexagon, a perfectly round cylinder, and so on, by changing one parameter.
On the left side of the following screenshot, under the Create setting, we've changed our Axis Divisions to 8. This is what has made our object octagonal. If we had set it to a higher number (such as 32 or 64), we would have ended up with a much more round object. All 3D modelers have this feature; you may just have to look for it:
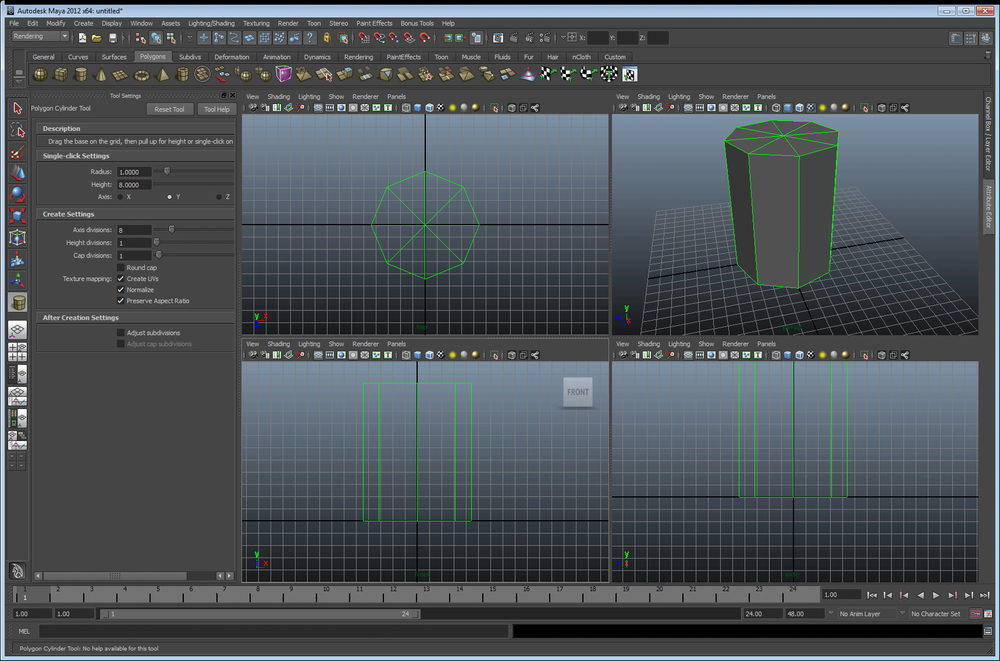
Making octagonal cylinder in Maya
Now that we've made the shell for our salt shaker, let's make it hollow (to hold some salt). When performing 3D modeling, it's actually important to change your mindset a bit. Instead of thinking of an object as a picture to draw, think of it as a ball of clay to mold. If you wanted to turn the octagonal cylinder into a container, you could use a tool to scoop sections of it out. If it were an object that is easy to vaporize (such as foam), you could use another object (such as a metal cylinder), heat it up, and burn it out. This is very similar to what we're about to do.
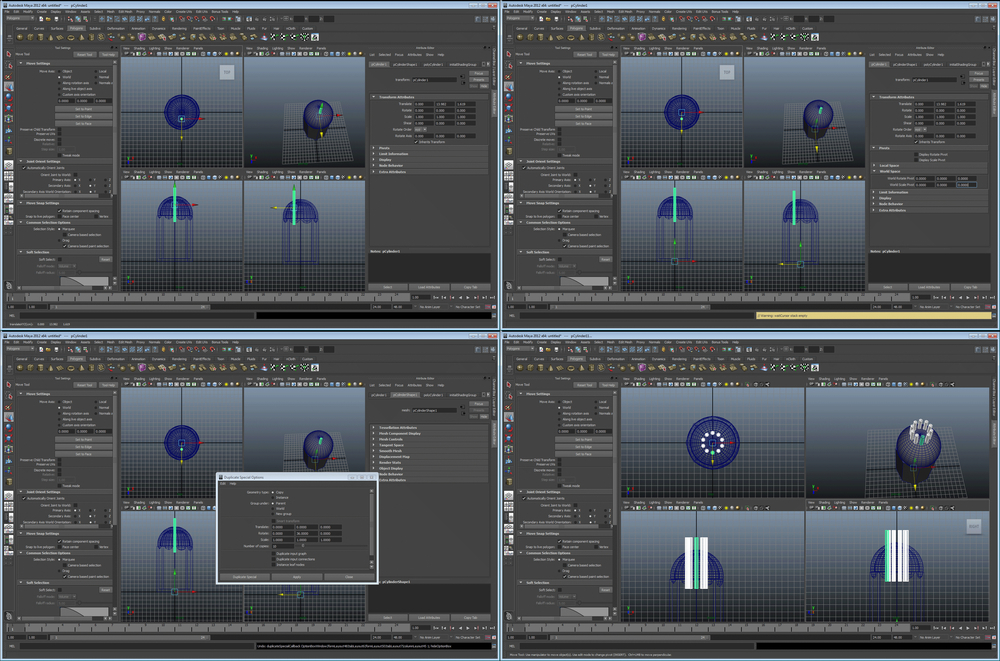
If you're a programmer, you think of Booleans as either a true or false value. This is a completely different Boolean campared to an operation in 3D modeling. Simply put, a Boolean is a relationship between one object and another. There are four basic Boolean operations that you will find in any 3D modeling software. These are add, subtract, union, and difference. First, let's create another set of geometry to Boolean with our salt shaker. Duplicate your octagon (in Maya, simply use Ctrl + D). Scale the octagon so it's smaller in its depth and width but taller than our original geometry, and move it up slightly, as shown in following screenshot:
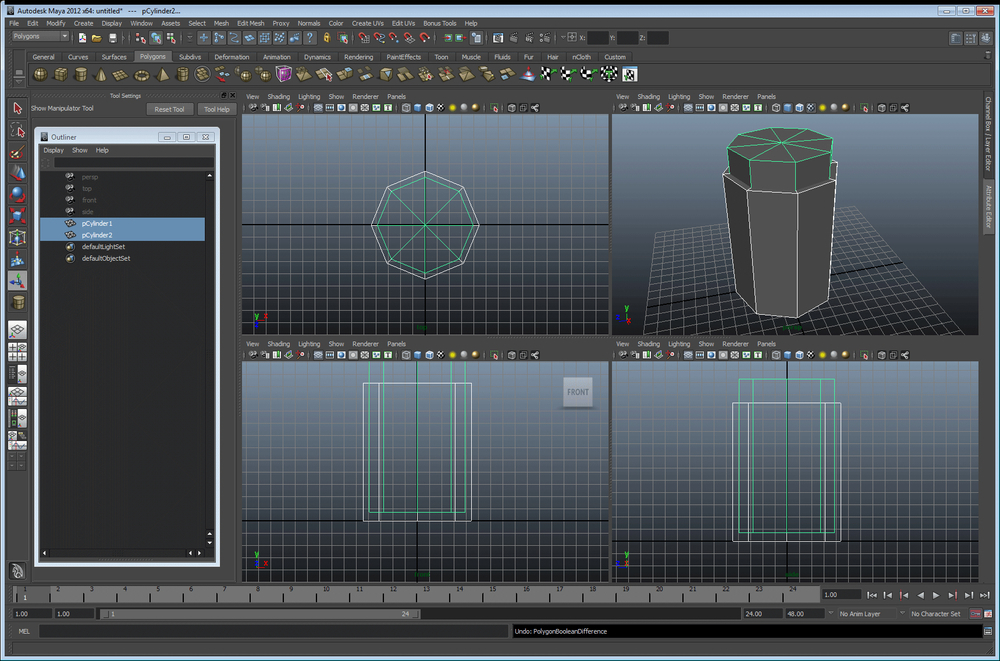
Setting up for your first Boolean
Although the results may look somewhat similar between some of the Boolean operations, notice what happens to the wireframes in the following screenshot. They are vastly different. Let's cover these one at a time:
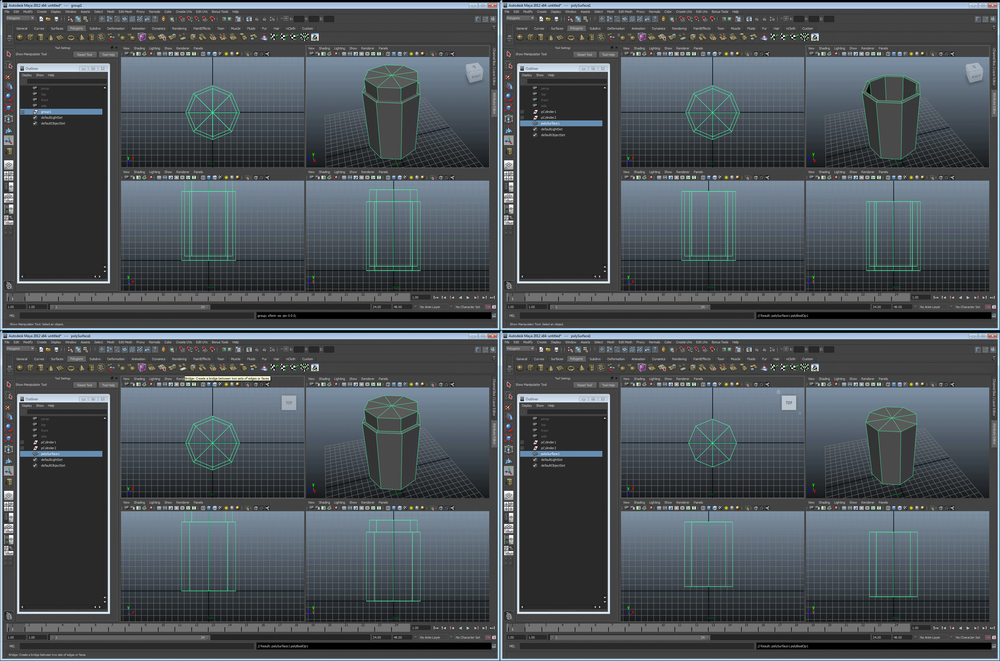
The four basic Boolean types. Top-left: add, Top-right: subtract, Bottom-left: union, Bottom-right: difference
Believe it or not, this feature does not exist in Maya. There is a reason for this—using a Boolean add is like using the group tool. It simply adds all the geometry together. No actual changes are made; it simply makes one object created out of two objects. The result looks like the top-left part of the preceding screenshot. All points and polygons remain intact; they are all now just part of one object instead of two objects.
A subtract operation is a lot like the vaporization tool that we mentioned previously. With this tool, you use one object to cut a shape out of another—a stencil, if you will. In some software, the original cutting tool disappears after the operation completes (as seen in Maya). The top right image of the preceding screenshot is the result of a subtract operation. This is what you will use to make the body of your salt shaker hollow (don't do this yet, we still need it whole to make our shaker top).
The union operation is similar to add with one major difference. The resulting object may look the same on the outside, but all of the unseen polygons and points have been removed. Now, you are left with one object, which is the result of joining two objects perfectly. In the preceding screenshot, the lower left image is the result of the union operation.
A difference operation is the complete inverse of subtract. When performing the difference operation, the resulting object is only the intersection between the two objects. On the lower-right section of the preceding screenshot, you can see the result of the difference operation. Instead of cutting out the center of our octagon, we're left with an object that would plug the hole perfectly from our subtract operation.
Now that you're an expert on Boolean operations, let's use them some more to create our shaker top. Create a spheroid that envelopes the top of the shaker. The result should look something like the following screenshot:
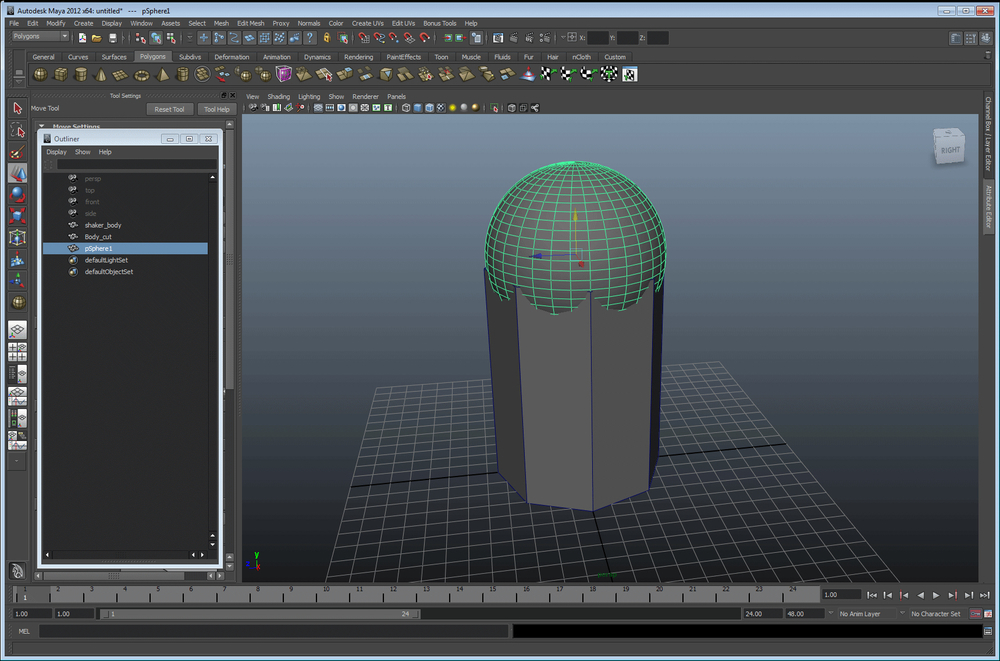
The process to create the shaker top
Let's perform the following steps that are similar to our shaker body:
- Create a slightly smaller sphere to hollow out our top.
- Duplicate this sphere.
- Scale it down slightly (as shown in top-right of the preceding screenshot).
- Now, use this sphere to perform the subtract operation on the larger sphere. (In Maya, select the larger sphere first, then the smaller sphere, and navigate to Mesh | Booleans | Difference.)
- Now you have a hollow sphere. Next, duplicate the main shaker body shell, and use that to perform the subtract operation on the hollow sphere.
Now, let's finalize our main Boolean procedures. Go ahead and select the main shaker shell and the smaller octagon, and perform another subtract operation. If you're using Maya as your modeler, make sure you delete all your history now (by navigating to Edit | Delete all by type | history). The result should look like the following screenshot:

The results of our major Boolean operations
Okay! Our shaker looks pretty basic but it's starting to take shape. Let's put some holes on the top section using Booleans and another tool called array.
So, it's pretty obvious that if we want to create holes, we're going to be using Booleans. However, how do we get a nice, even hole pattern? Well, we're going to create a bunch of cylinders for our cutting pattern using a tool called array. Let's start with a basic cylinder for our first hole. Create one that looks like the one in the top-left section of the following screenshot:
Creating the cutting tool for the holes in our shaker top