
Before you can really get started with texturing your objects, they need to be sent to Element 3D. Let's start with the lamp (as that's the most complex object that we've made so far). The lamp has several objects that we want to be able to move independently. For example, if the table gets bumped, we'd like the shades to rock a little to add some more realism to your motion.
Element 3D simply won't recognize that your shapes are objects that are separate from your lamp (because of the export/import process). The way Element 3D breaks objects up from one file into several items is done through surfaces (textures, shaders, or materials).
First, make sure that all of your lampshades are centered over your light sockets. The exact procedure covered here differs slightly from 3D package to 3D package, but the principles are the same. For each object and each different surface, assign a unique shader.
The colors that you use in your modeling software are irrelevant to Element 3D; we're going to use primary colors so that we can keep track of what's what.
Let's start with lamp shades. We may want to put some patterns on them later (we're making a kind of Tiffany style lamp here). So, we want to create what's called a UV pattern for any images we paste to the object that follow.
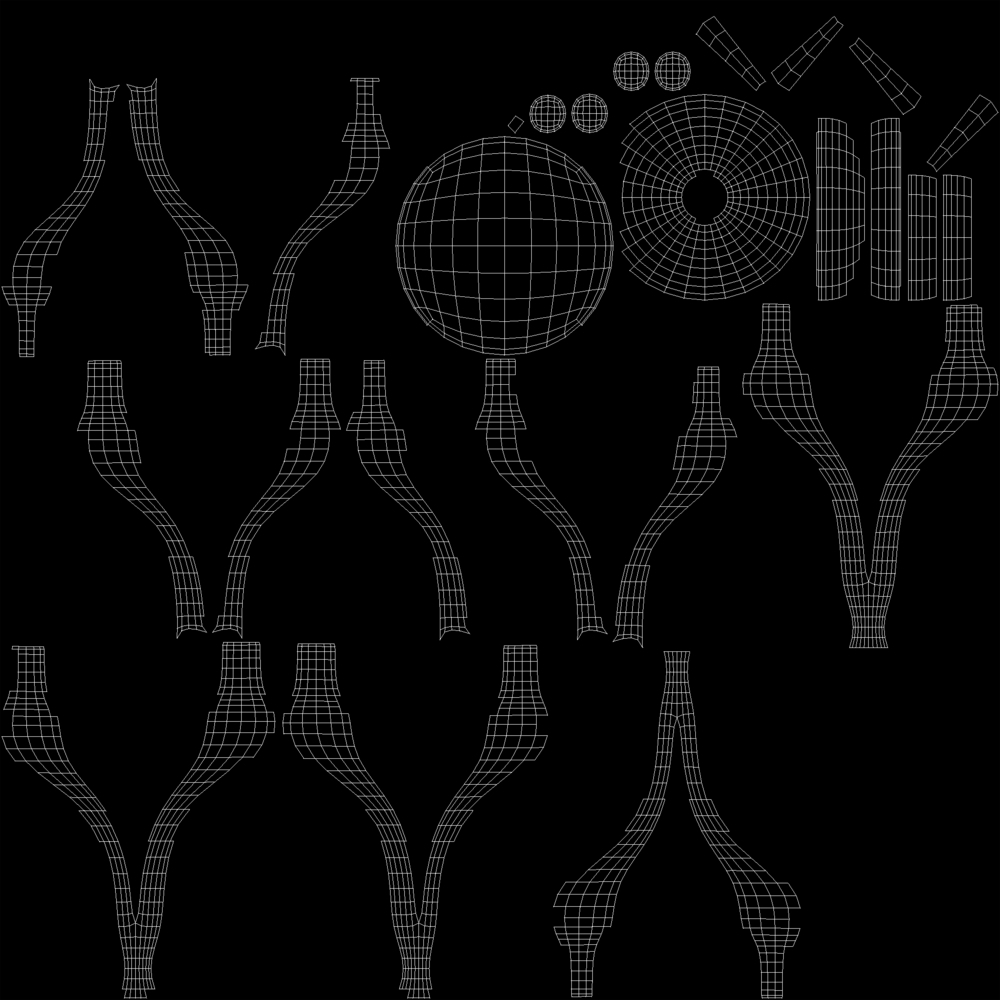
UV mapping would make a lot more sense if it were called XY mapping. However, x and y are already in reference to world coordinates. U is a horizontal axis in reference to a polygon, and V is the vertical of that polygon. If you image an object wrapped like a Christmas present, the world XYZ orientation of the UV map changes from polygon to polygon, and therefore, the map wraps around an object just like a wrapping paper. Generating an exact UV map tells the software how you want the paper (texture) wrapped around the present (object). The following screenshot shows you an example of a UV map for the lamp base object:
These maps can be highly customizable and can be remapped to the creator's desires. UV maps were revolutionary when they were introduced (compared to simple planar, spherical, cubical, or cylindrical mapping). As Element 3D uses UVs (primarily), let's just move on.
Any time we're thinking of using images to wrap around an object in any way, UVs should be generated to remove all of the guesswork. As our lampshades are nothing more than tapered hollow cylinders, we can simply generate a cylindrical UV map. In Maya, this is done by selecting the object and navigating to Create UVs | Cylindrical Mapping in the menu.
Congratulations, you've created your first UV map!

Now, repeat this procedure for each individual lamp shade. Do not do this to all at the same time or your UV mapping will look odd. You'll want one image mapped on each lampshade, not one for all of them.
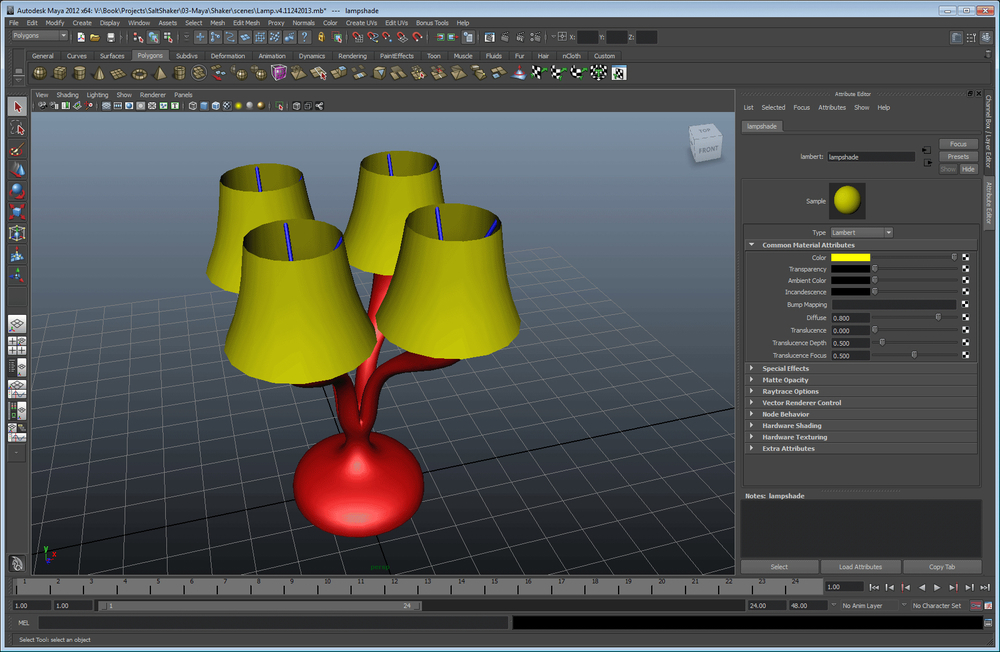
Remember, we can separate all of the components of our object in Element 3D using the polygons that are assigned to textures, so it's time to start making some materials. Create three new materials in your shading editor—one for the lampshades, one for the sticks, and one for the base. If you like to make things a bit easier on the eyes, you can combine (boolean) each lampshade's sticks to the lampshade. However, don't forget to delete all of your history after you do (if using Maya). When you're done, your lamp should look like the following screenshot:
Element 3D works very well with the open framework of the Wavefront OBJ format. Fortunately, so does every other piece of 3D software that is worth its salt. This export option is readily obvious in packages such as Cinema 4D and 3DS Max. In Maya, it's also easy to do once that feature is activated. To activate the export feature, go to the plugin manager (Window | Settings/Preferences | Plug-In manager) and activate (check load and auto load) the objExport.mll plugin. Now, export your object (File | Export All) and use the objExport option with all the default settings. Save your file in OBJ format to Project�1-AEXElement3DAssetsOBJimports.
Now, just repeat this process for all the other objects that we've created (the salt shaker and table), with the exception of the wine bottle. Remember to break up the components (such as the top of the shaker). Now, let's work with the wine bottle and set it up so that we can put a label on it!
Let's put the standard wine label scheme on the bottle (a ring around the shaft, and a label on the front of the base.)
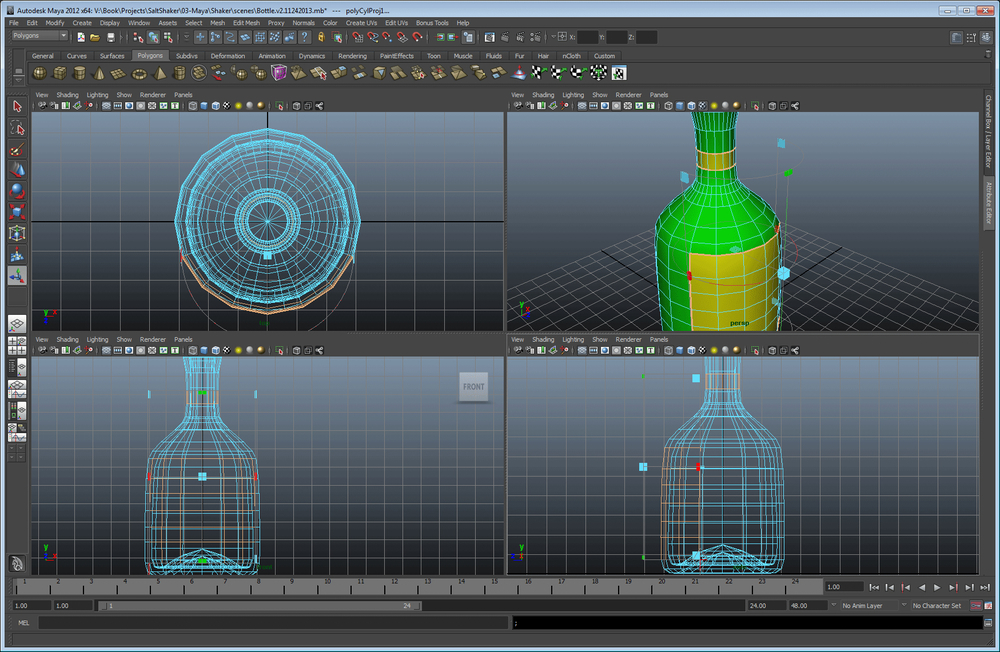
First, create a new shader. Select the polygons on the base that you'd like to make your label from, and select a ring on the shaft. Now apply your new shader to the label polygons, and create a cylindrical UV map the same way that you created for the lampshades (with the polygons still selected). In Maya, you can generate a PSD network (a Photoshop image assigned to the texture that will have the built-in wireframe). The result is a simple PSD that lets you see how the polygons are assigned, and now you can make an image that will get pasted perfectly to the bottle's label.
To create the PSD network in Maya, select the whole bottle; then, in the menu, navigate to Textures | Create PSD Network. Finally, select the wine label's texture and color to go to the PSD network, check Open in Photoshop, and then create the network. Now you can create your own label (as shown in the following screenshot):

Final wine bottle label
The left part of the preceding screenshot shows you the applied label. The right part shows you the PSD network generated by Maya, complete with a layer that shows you the wireframe representation of the object's UV surfaces.
Before you finish in Photoshop, not only should you save the image you worked with from Maya (and reload it into Maya to make sure it lines up alright), but you should also save a JPG of the highest quality to your Element 3D assets directory (Project�1-AEXElement3DAssetsTextureImages) for use in Element 3D. Make sure you turn off the top layer (the wireframe) first. Now, you can export your wine bottle to an OBJ file.
The same process can be used to create bump maps, reflection/refraction maps, specular maps, and a whole host of other image-based maps. These maps will all need to be saved as other files (that is wineBottleBump.jpg and so on) for use in Element 3D. Go ahead and play around with it. Using the same method as the one used for the wine bottle, create a PSD network using as many attributes as you like for the lampshade, and we'll use them in Element 3D! In the following screenshot, you can see the individual maps created for the lampshades. We'll cover what each of these does and what they are while applying them in the sections to come. The color layer has a slightly transparent opacity on the color squares (saved as a 24-bit PNG) so we can adjust them (remember, the shade is stained glass):
