Now that we've seen the limitations of Element 3D, let's take a look at its greatest strength. Element 3D was originally designed to work with 3D particles to create very cool and sometimes, really abstract imagery.
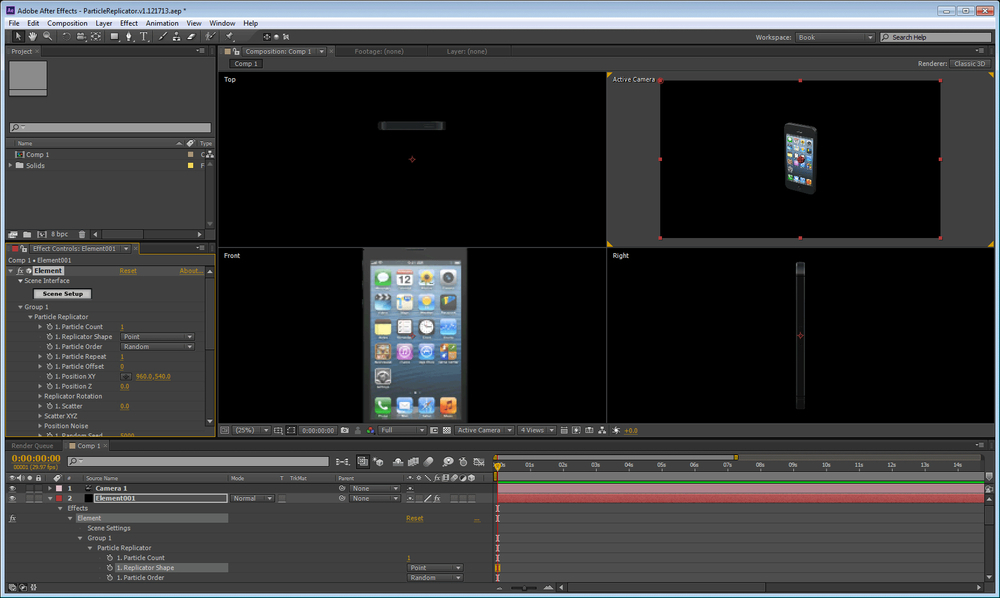
Let's say we got really lucky and Apple hired us to do an iPhone ad; but we needed to have it done, like, today. It's pretty easy with Element 3D. First, there just happens to be a free iPhone 5 model for E3D available on Video Copilot's website http://video9.videocopilot.net/efc5e19e65fe9ca2cbd9818d45ac92a1/videotutorials/projects/134.zip. First things first:
- Go get this model and install it in your E3D content directory (the same place we created the
BookModelsdirectory previously). - Now, create a new project (1080p, 29.97) and create a new solid layer (named
Element001). - Load up the iPhone in Group 1 of an Element plugin.
- Finally, create a camera with all the goodies just as we did before.
Your scene should look like the following screenshot:
Just to make things interesting, let's load in some music. If you've downloaded the content, look in the sound directory for iPhoneSong.wav. It's just something we whipped up in Pro Tools (the Pro Tools project is included in case you want to play with it). Now we have something to make our phones dance to.
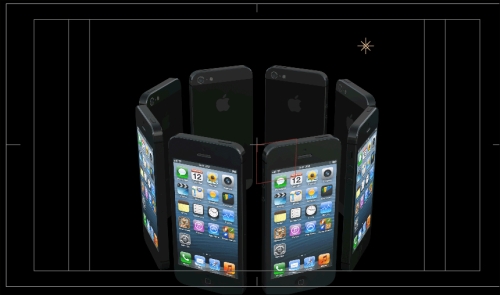
We want a whole troop of dancing iPhones, so let's replicate it by performing the following steps:
- In the Particle Replicator section for Group 1, change the Replicator Shape to Ring.
- Also, set the Particle Count to
8. The replicator shape can give you very different results. For instance, setting the shape to Sphere makes a ball of iPhones, and so on. We're using Ring for now to keep things simple, but things will get more interesting later. - Turn down your Particle Size in the Particle Look setting to
7.03. - Let's also set up the camera with a point of interest in the center of the iPhones (using the methods taught earlier).
- Turn on ambient occlusion and a single point light.
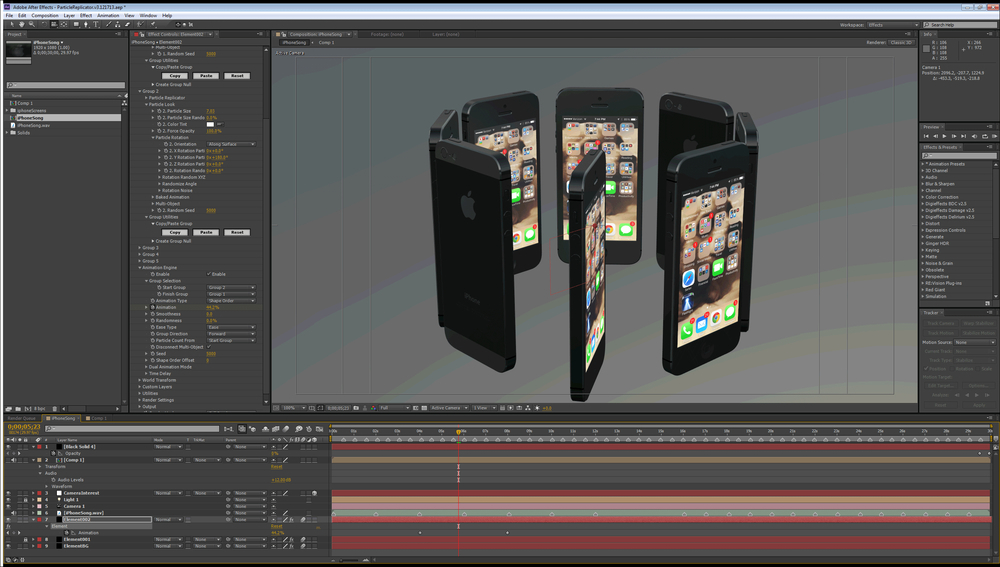
The result should look like the following screenshot:
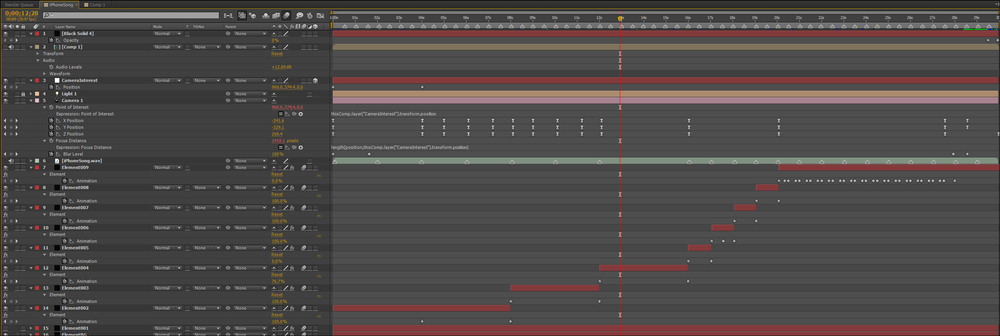
We've inserted our music into the composition. Let's create markers for every beat of the song on the main timeline. Preview the audio with ".", and as the beat sounds, hit "*" (both on the number pad). Then, mark major changes in the music on the music track itself as shown in the following screenshot. This will give us a good reference to time when we want things to happen.

We can use an AEX layer as a texture. So, create a 30-second movie (I created one in the sample composition named Comp 1) and bring it into our main composition on layer 1. Make sure you make it invisible (by clicking the eye ball on the left side of the layer window). For best results, set it to 640 x 1152 pixels. This will fit perfectly on the iPhone screen. For mine, I used screenshots and made mock-ups of certain screens (for example, FaceTime and the video camera).
Just so we have it, create an ElementBG layer and load in your Environment object from the Starter Pack. Size it up so that it envelops the whole scene with a lot left over. This is now our spherical backdrop.
- On your
Element001layer, in the effect controls, go to Custom Layers and then Custom Texture Maps. - On
Layer 1, select the composition layer for the movie you created. - Now, go into your Scene Setup, and as we did in the texturing section of this book, select the texture for the screen and replace the imagemap with your custom
Layer 1.
Now your movie plays on the screen of your iPhone. You can use this method to put any composition or layer on any texture. You can see the result in the following screenshot:

Since our music is set at 120 bpm (beats per minute), it makes things easy (one beat every 0.5 seconds). Whenever possible, if syncing to music, try to use music that is easily divisible by your time. All we really have to remember is to make keys either on :00 or :15.
Since our Element001 layer is set perfectly, duplicate it, turn off the original (click on the eyeball), and lock it just in case, as we don't want to recreate everything from scratch. Now we're working with Element002.
The Animation Engine (as we're about to use it) is really kind of a particle-morphing engine. With only two keyframes (and a few parameter adjustments), you can animate unlimited numbers of particles. If you use your imagination (for example, maybe use expressions with audio levels), you could create automated animations that will dazzle any psychedelic flashback imaginable as follows:
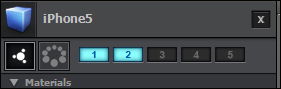
- Firstly, you will need to get into your Scene Setup and put the iPhone on both group 1 and group 2 (as shown in the following screenshot).
- Copy and paste the properties (using Group Utilities) from group 1 to group 2.
- On group 2, in Particle Look, you'll see Particle Rotation. In the Y Rotation Particle, enter the value
180. - Now you have one group of iPhones facing outwards and one group facing inwards.
They should be on top of each other, so it will really look like there are eight iPhones that are double sided. Don't worry, that will get fixed in the next step. What we've just done is created an original and a target. One group is how the iPhones will start, and the other group is what they'll morph into. They'll morph by changing whatever parameter has been changed as if it were keyframed and tweened on a per object basis.
Here we go…
- In the Animation Engine twirly, tick the box that says Enable. You should see group 2 disappear. We're going to reverse things a bit though.
- We want to start with the Apple logo facing outwards and make the iPhones spin around one by one. So, on the drop down that says Start Group (under Group Selection), select group 2, and under Finish Group, select group 1. Now you should see the phones flip around.
- Here's where things get fun. Under Animation Type, select Shape Order. This will now make the phones flip around one by one in a clockwise order.
- Move your time slider to
4:00and set a keyframe on the Animation parameter. - Now, move the slider to
8:00and change the Animation value to 100 percent. Again, the phones have flipped around. - Turn the Smoothness down to
0.
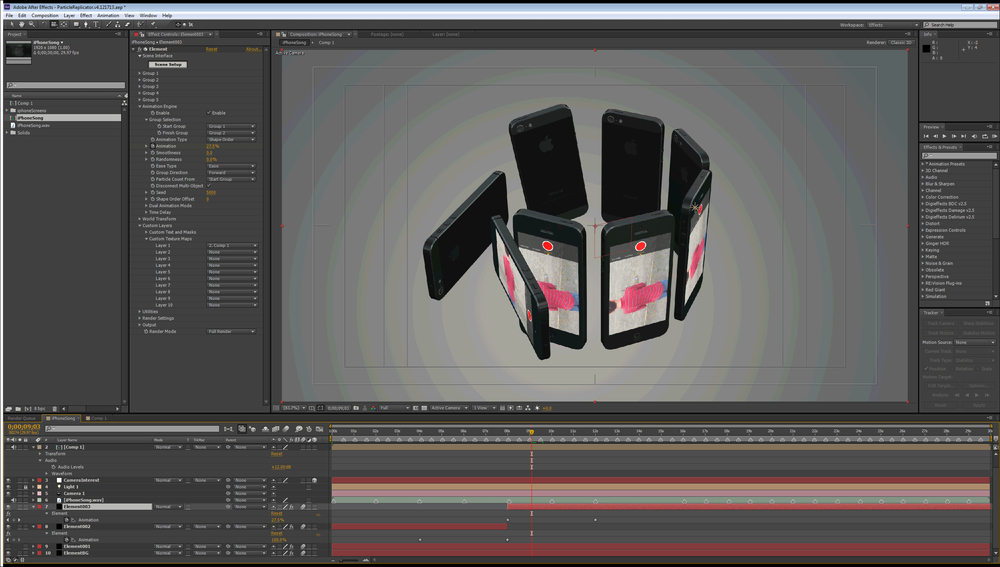
Now you can see why we made eight phones. Across 4 seconds (2 bars of music), there are 8 beats. With the smoothness turned down, a phone flips around on every beat of the music! The result should look something like the following screenshot:
By creating these morph targets and changing how we animate (from Shape Order, Uniform, to Directional, and so on), we can make very interesting particle array-based animations that look like geometric kaleidoscopes. But now that we've done it once, how do we keep doing it? Easy…
Move your time slider to 8:00 (the last keyframe). Split the layer (Ctrl + Shift + D). Now, you have a choice. You can keep animating as group 2, starting and then morphing to group 1, or reverse the order. Either way, you need your first keyframe to be the same as the last keyframe from Element002.
If we keep the order, we need to move both keyframes down the timeline. Snap them to the beginning of Element003. Now, we need to make group 2 a duplicate of group 1 (because our ending point for the last transformation needs to be our beginning point for the next). So, copy all of the group settings from group 1 (using Group Utility) and paste them to group 2.
Move your time slider to 12:00, and move the "animation" key that is set at 100 percent to this position. Now, you can transform group 2 to your liking. Check your work using the time slider to scrub back and forth. Make sure the iPhones aren't traveling through each other. I made the phones flop to landscape to show the video camera application.
This is the easier method. You can keep the keyframe at the beginning of Element003 right where it is, and move the other keyframe (earlier in the timeline than this layer actually appears) out to where you want this transformation to end (12:00). Then, just change Start Group to Group 1 and the Finish Group to Group 2. Now, all you have to do is edit group 2. The result should look like the following screenshot:
Repeat this process (using either method) for the length of the timeline. Every time you want a transformation, make a spliced clip, move the keyframes, and then transform a group. You may even try a pulsing transformation (several keyframes on the Animation parameter to make the objects pulse). You can then animate the camera to make some interesting moves (maybe orbit while the transformations are taking place). Try other methods also (Directional, Uniform, and so on). Play around. You get to be uber creative here! Don't forget to use the motion graph to control the motion of your camera. Make it cool. Your final timeline should look something like the following screenshot: