
Configuring Network Features
You need five main pieces of information to configure your Linux system to interact on a network:
The host address
The network subnet address
The default router (sometimes called gateway)
The system hostname
A Domain Name System (DNS) server address for resolving hostnames
There are three different ways to configure this information in Linux systems:
Manually editing network configuration files
Using a graphical tool included with your Linux distribution
Using command-line tools
The following sections walk through each of these methods.
Network Configuration Files
Every Linux distribution uses network configuration files to define the network settings required to communicate on the network. Unfortunately, there’s not a single standard configuration file that all distributions use.
Instead, different distributions use different configuration files to define the network settings. Table 8-1 shows the most common network configuration files that you’ll run into.
Table 8-1 Linux network configuration files.
| Distribution | Network Configuration Location |
|---|---|
| Debian based | /etc/network/interfaces file |
| Red Hat based | /etc/sysconfig/network-scripts directory |
| openSUSE | /etc/sysconfig/network file |
While each of the Linux distributions uses a different method of defining the network settings, they all have similar features. Most configuration files define each of the required network settings as separate values in the configuration file. LISTING 8-1 shows an example from a Debian-based Linux system.
The example shown in Listing 8-1 assigns both an IP and an IPv6 address to the wired network interface designated as eth0.
LISTING 8-2 shows how to define the IP network settings automatically using a DHCP server on the network.
If you just want to assign an IPv6 link local address, which uniquely identifies the device on the local network, but not retrieve an IPv6 address from a DHCP server, replace the inet6 line with this:
![]()
The auto attribute tells Linux to assign the link local address, which allows the Linux system to communicate with any other IPv6 device on the local network but not a global address.
For Red Hat–based systems, you’ll need to define the network settings in multiple files, one for each network interface. The format of each file is:
![]()
where interface is the device name for the network adapter, such as ifcfg-enp0s3. Listing 8-3 shows an example from a Rocky Linux system.
This configuration indicates that the workstation is using the DHCP process to automatically retrieve network information from a network server. For static IP addresses, you can set the IP address, default gateway, and subnet mask in the configuration file.
Most Linux distributions use the /etc/hostname file to store the local hostname of the system, however, some use /etc/HOSTNAME instead. You will also need to define a DNS server so that the system can resolve DNS hostnames. Fortunately, this is a standard that all Linux systems follow and is handled in the /etc/resolv.conf configuration file:

The domain entry defines the domain name assigned to the network. By default the system will append this domain name to any hostnames you specify. The search entry defines any additional domains used to search for hostnames. The nameserver entry is where you specify the DNS server assigned to your network. Some networks can have more than one DNS server; just add multiple nameserver entries in the file.
Using Graphical Tools
The Network Manager tool is a popular program used by many Linux distributions to provide a graphical interface for defining network connections. The Network Manager tool starts automatically at boot time and appears in the system tray area of the desktop as an icon.
If your system detects a wired network connection, the icon appears as a mini-network with blocks connected together. If your system detects a wireless network connection, the icon appears as an empty radio signal. When you click the icon, you’ll see a list of the available wireless networks detected by the network card (as shown in FIGURE 8-1).
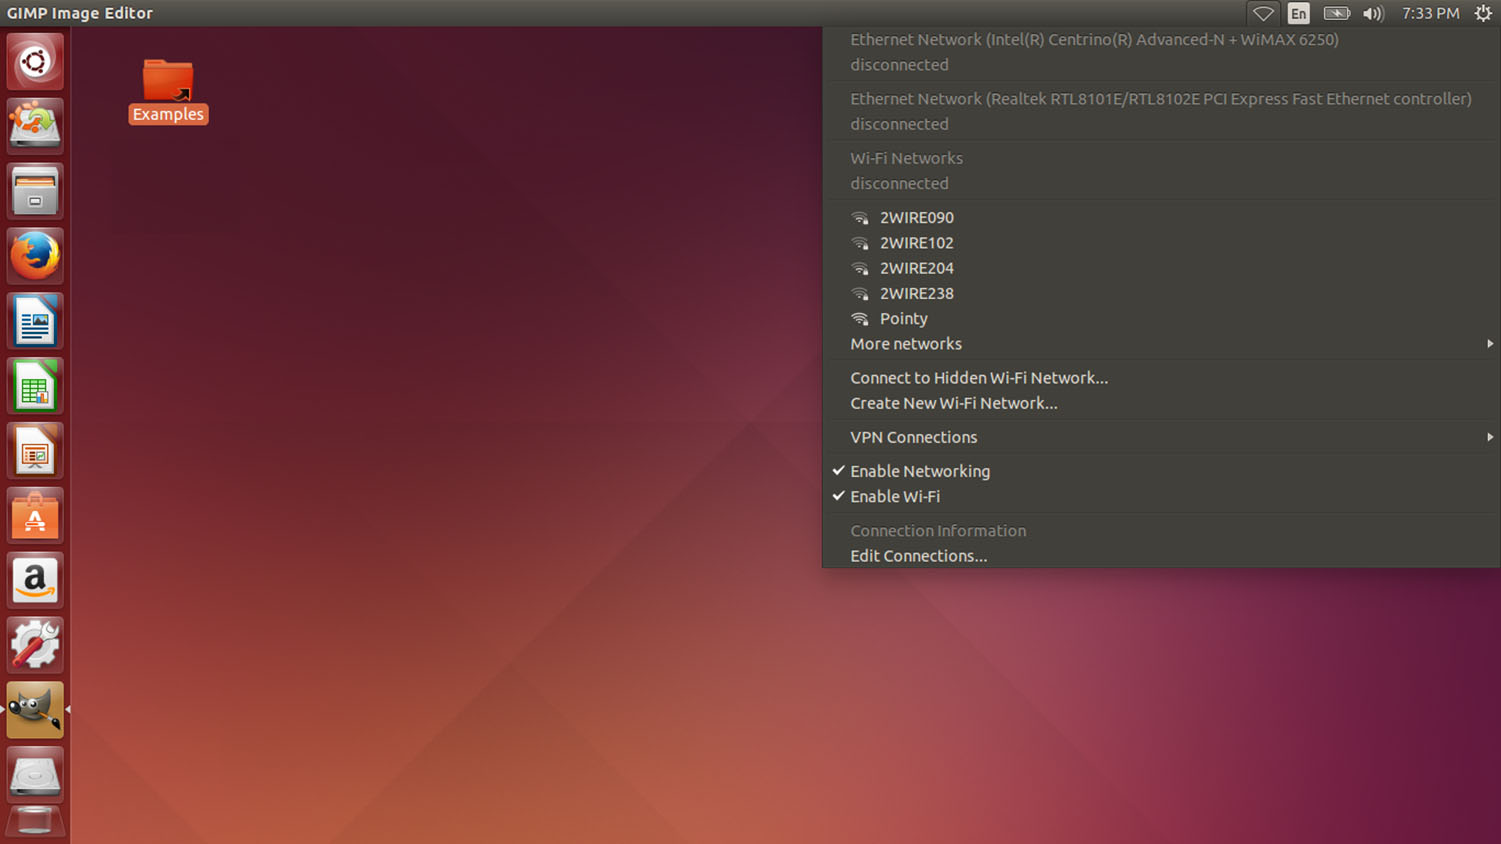
FIGURE 8-1 Network Manager showing a wireless network connection.Courtesy of Linux Foundation.
Courtesy of Linux Foundation.
Click your access point to select it from the list. If your access point is encrypted, you’ll be prompted to enter the password to gain access to the network.
Once your system is connected to a wireless access point, the icon appears as a radio signal. Click the icon, and then select Edit Connections to edit the network connection settings for the system, shown in FIGURE 8-2.

FIGURE 8-2 The Network Connections window.Courtesy of Linux Foundation.
Courtesy of Linux Foundation.
You can select the network connection to configure (either wireless or wired) and then click the Edit button to change the current configuration.
The Network Manager tool allows you to specify all four of the network configuration values by using the manual configuration option or to set the configuration to use DHCP to determine the settings. The Network Manager tool automatically updates the appropriate network configuration files with the updated settings.
Using Command-Line Tools
If you’re not working with a graphical desktop client environment, you’ll need to use the Linux command-line tools to set the network configuration information. Quite a few command-line tools are at your disposal. The following sections cover the ones you’re most likely to run into.
Network Manager Command-Line Tools
The Network Manager tool also provides two different types of command-line tools:
nmtui provides a simple text-based menu tool.
nmcli provides a text-only command-line tool.
Both tools help guide you through the process of setting the required network information for your Linux system. The nmtui tool displays a stripped-down version of the graphical tool where you can select a network interface and assign network properties to it, as shown in FIGURE 8-3.
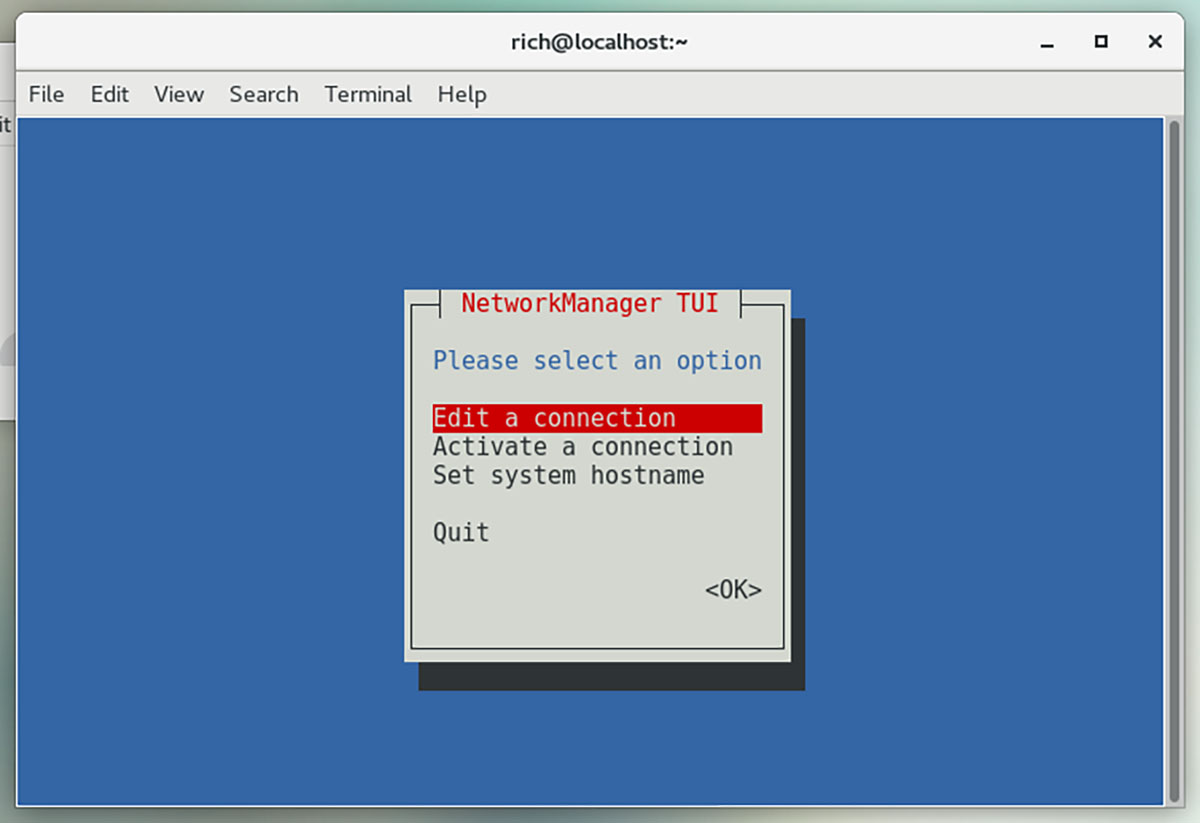
FIGURE 8-3 The Network Manager nmtui command-line tool.Courtesy of nmtui.
Courtesy of nmtui.
The nmcli tool doesn’t attempt to use any type of graphics capabilities; it just provides a command-line interface where you can view and change the network settings. By default, the command displays the current network devices and their settings, as shown in LISTING 8-4.
The nmcli command uses command-line options to allow you to set the network settings:

This allows you to set all of the necessary network configuration features in a single nmcli command.
The iproute2 Utilities
The iproute2 package is a newer open-source project that contains a set of command-line utilities for managing network connections. While the package contains several different programs, the ip program is the most used.
The ip command is the Swiss army knife of network programs and is becoming the more popular method for defining network settings from the command line. It uses several command options to display the current network settings or define new network settings. Table 8-2 shows these commands.
Table 8-2 The ip utility command options.
| Parameter | Description |
|---|---|
| address | Display or set the IPv4 or IPv6 address on the device. |
| addrlabel | Define configuration labels. |
| l2tp | Tunnel Ethernet over IP. |
| link | Define a network device. |
| maddress | Define a multicast address for the system to listen to. |
| monitor | Watch for netlink messages. |
| mroute | Define an entry in the multicast routing cache. |
| mrule | Define a rule in the multicast routing policy database. |
| neighbor | Manage ARP or NDISC cache entries. |
| netns | Manage network namespaces. |
| ntable | Manage the neighbor cache operation. |
| route | Manage the routing table. |
| rule | Manage entries in the routing policy database. |
| tcpmetrics | Mange TCP metrics on the interface. |
| token | Manage tokenized interface identifiers. |
| tunnel | Tunnel over IP. |
| tuntap | Manage TUN/TAP devices. |
| xfrm | Manage IPSec policies for secure connections. |
Each command option utilizes parameters to define what to do, such as display network settings or modify existing network settings. LISTING 8-5 demonstrates how to display the current network settings using the show parameter.
This example shows two network interfaces on the Linux system:
lo is the local loopback interface.
enp0s3 is a wired network interface.
The local loopback interface is a special virtual network interface. Any local program can use it to communicate with other programs on the system just as if they were across a network. That can simplify transferring data between programs.
The enp0s3 network interface is the wired network connection for the Linux system. The ip command shows the IP address assigned to the interface (there’s both an IP and an IPv6 link local address assigned), the netmask value, and some basic statistics about the packets on the interface.
If the output doesn’t show a network address assigned to the interface, you can use the ip command to specify the host address and netmask values for the interface:
![]()
Then use the ip command with the route option to set the default router for the network interface:
![]()
Then finally, make the network interface active by using the link option:
![]()
With the single ip command you can manage just about everything you need for your network connections.
The net-tools Legacy Tool
If you need to work on an older Linux distribution, the net-tools package may be all you have to work with. The net-tools package was the original method in Linux for managing individual aspects of the network configuration. You need to use four main command-line tools:
ethtool displays Ethernet settings for a network interface.
ifconfig displays or sets the IP address and netmask values for a network interface.
iwconfig sets the SSID and encryption key for a wireless interface.
route sets the default router address.
The ethtool command allows you to peek inside the network interface card Ethernet settings and change any properties that you may need to communicate with a network device, such as a switch.
By default, the ethtool command displays the current configuration settings for the network interface, as shown in LISTING 8-6.
You can change features such as speed, duplex, and whether or not the network interface attempts to auto-negotiate features with the switch.
The ifconfig command is a legacy command that allows you to set the network address and subnet mask for a network interface:
![]()
You can also use the ifconfig command to view the current statistics for a network interface, as shown in LISTING 8-7.
Using the ifconfig command you can see the link status of a network interface, whether it is receiving or transmitting packets and whether there were any dropped packets or collisions. This can be a handy network troubleshooting tool.
With the net-tools package you must set the default router using the separate route command:
![]()
You can also use the route command by itself to view the current default router configured for the system.


The default router defined for the Linux system is 192.168.1.254 and is available from the enp0s3 network interface. The output also shows that to get to the 192.168.1.0 network, you don’t need a gateway because that’s the local network the Linux system is connected to.
If your network is connected to multiple networks via multiple routers, you can manually create the routing table in the system by using the add or del command-line option for the route command. The format for that is
![]()
where target is the target host or network and gateway is the router address.
If you’re working with a wireless network card, you must assign the wireless SSID and encryption key values using the iwconfig command:

The essid parameter specifies the access point SSID name, and the key parameter specifies the encryption key required to connect to it. Notice that the encryption key is preceded by an s:. That allows you to specify the encryption key in ASCII text characters; otherwise you’ll need to specify the key using hexadecimal values.
If you don’t know the name of a local wireless connection, you can use the iwlist command to display all of the wireless signals your wireless card detects. Just specify the name of the wireless device and use the scan option:
![]()
Once you’ve set the wireless network card configuration, you can proceed to assign it an IP address and default route the same as you would a wired network card.
Additional Network Features
If your network uses Dynamic Host Configuration Protocol (DHCP), you’ll need to ensure that a proper DHCP client program is running on your Linux system. The DHCP client program communicates with the network DHCP server in the background and assigns the necessary Internet Protocol (IP) address settings as directed by the DHCP server. Three common DHCP programs are available for Linux systems:
dhcpcd
dhclient
pump
The dhcpcd program is becoming the most popular of the three, but you’ll still see the other two used in some Linux distributions.
When you use your Linux system’s software package manager utility to install the DHCP client program, it sets the program to automatically launch at boot time and handle the IP address configuration needed to interact on the network.