MobileMe provides a centralized place on the Web to manage and synchronize e-mail, contacts, calendar, photo albums, and documents that you can access from a Mac, PC, iPhone, or iPod touch. Synchronization is the process of keeping information updated in multiple places. When you make changes on one computer or device, your changes are automatically updated on other synchronized computers or devices so you always have up-to-date information where ever you go. For example, if you create and send e-mail in Mail, create a contact in Address Book, or schedule a meeting in iCal on your main Mac, the changes you make are synchronized with MobileMe (Mail, Contacts, and Calendar) and then synchronized with other computers and devices, such as your iPhone.
In addition to keeping information up-to-date, you can also use MobileMe to store documents and create photo albums that you can share with others on the Web. For example, if you have a large file that you can’t send in an e-mail, you can use a virtual hard drive, known as an iDisk, available with MobileMe to store the file so you or someone else can access it from another computer or device. If you take a lot photos, you can create an online photo album that that others can access on the Web.
You can join the MobileMe community on a trial basis, and receive some limited features; however, if you want to utilize the full power of MobileMe, you’ll need to purchase a subscription, which runs about a hundred dollars a year. While that may seem like a substantial chunk of change, the benefits of the services are great and if you do the math, it breaks down to about eight dollars a month.
When you join the MobileMe community, you’re immediately connected with thousands of other happy Macintosh users. Not only does a subscription to MobileMe give you access to all kinds of cool stuff, it also gives you access to web-based e-mail, contacts, calendar, and disk storage that you can synchronize with a Mac, PC, iPhone, or iPod touch. Joining the MobileMe community is quick and simple. If you’re not sure whether to join, you can try it out first. If you want to join, you’ll need a credit card to complete the online purchase.
 Open your browser, and then go to www.apple.com/mobileme/.
 Click the Free Trial or Join Now button.
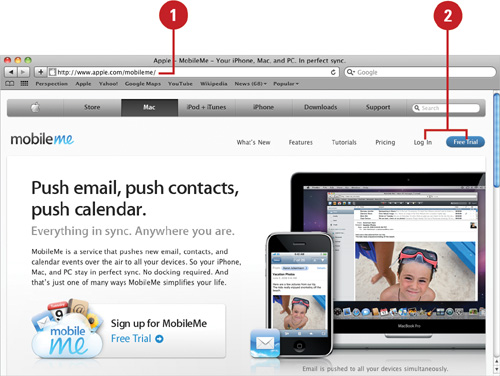
 Fill out the registration information screens.
 Click Submit, and then follow any additional online instructions.
Once you’ve filled out all the information on the registration form, and then clicked Submit, you now have instant access to the full power of the MobileMe community and the Web. The good news is that you can access your account from any computer, anywhere, at any time of the day or night. You might say that the MobileMe community never sleeps. Your MobileMe account is not measured by time spent online. Once you pay your subscription fee, you can use the account as often as you want. The process of signing on is simple and painless; in fact, you could create a bookmark in your browser, and automate the entire process.
- Open your browser, and then go to www.mobileme.com.
- Type your MobileMe member name and password.
- Click Log In.
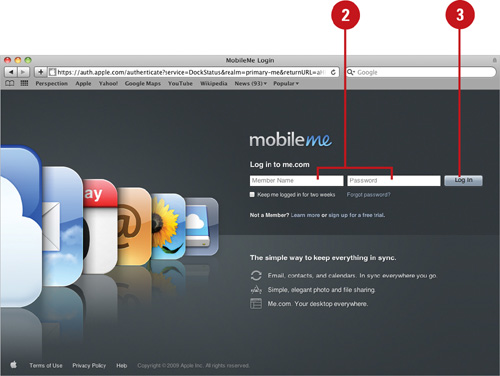
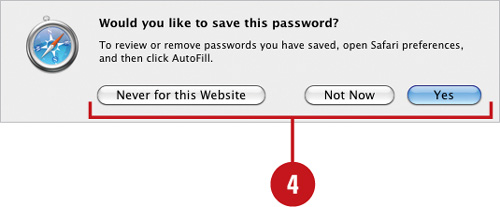
- A message appears asking you if you’d like to save your password. Click an option:
Never For This Website
Not Now
Yes
You are now signed in and ready to begin.
 To get help using MobileMe, click the Help button (with the question mark icon) on the right side of the MobileMe toolbar.
 When you’re done, click logout on the right side of the MobileMe toolbar.
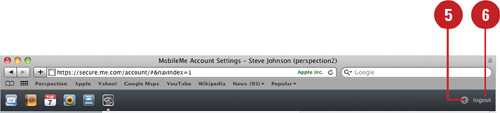
Once you’re registered as a user, all of the advantages of the MobileMe site become instantly available; including the ability to read and send e-mail from your new mail account, manage contacts and a calendar, store and share your photos online, manage and backup files online, and synchronize MobileMe content across multiple computers and devices. You can access your MobileMe account settings from MobileMe preferences in System Preferences or online at the MobileMe Web site. When you login in to your online MobileMe account, you can set account preferences in the following areas: personal information, account options, billing info, password and storage settings, personal domain, security certificate, and Find My iPhone.
- Click the System Preferences icon in the Dock, and then click the MobileMe icon.
If prompted, type your MobileMe member name and password, and then click Sign In.
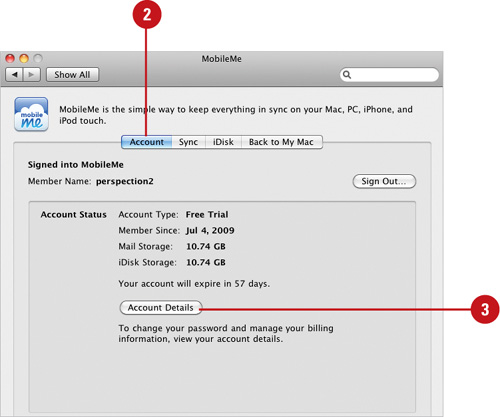
- Click Account tab.
A quick summary of account details appears in MobileMe preferences. You can get more account details online.
- Click Account Details.
- Type your MobileMe member name and password, and then click Log In.
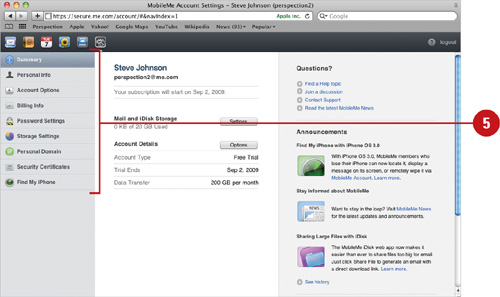
MobileMe Account Settings Web page appears, displaying a summary of your account.
- Click one of the category buttons in the left column to view your current settings.
- Open your browser, and sign onto your MobileMe account.
You can access MobileMe log in at www.mobileme.com.
- Click the Account Settings button.
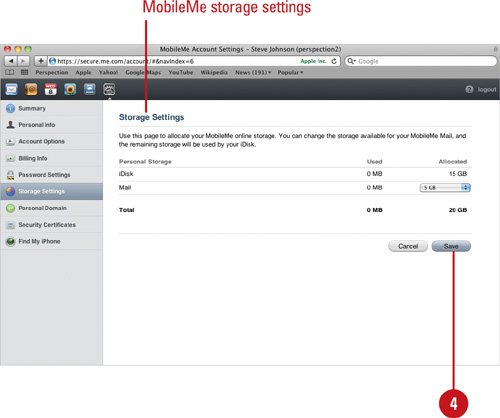
- Select from the following online MobileMe account options, and then change the options you want:
Summary Info. Displays your account name and e-mail address, current disk usage, account details, help, and announcements.
Personal Info. Sets account name and e-mail address, language and time, and update notifications.
Account Options. Sets account subscription options.
Billing Info. Accepts credit card information.
Password Settings. Changes account password and sets security information.
Storage Settings. Allocates online storage for iDisk and Mail.
Personal Domain. Adds a Web domain so you can host a Web site using MobileMe.
Security Certificates. Creates a certificate to keep your iChat information secure online.
Find My iPhone. Helps you find your iPhone or iPod touch in case it gets lost.

- Click Save, if needed.
The MobileMe Mail service gives you a way to keep in touch with friends, family, and clients at home, or wherever you travel. And you don’t even have to have your own computer. You can access, read, and save your e-mail using a Web browser on any computer, anywhere, through the www.mobileme.com Web site. After you setup or sign-in to a MobileMe account, you are now ready to receive and send e-mail to other MobileMe members, or to anyone with an Internet e-mail address. MobileMe Mail work in a similar way as Mac OS X Mail. MobileMe Mail also provides preferences, so you can customize the way it works.
- Open your browser and sign onto your MobileMe account.
You can access MobileMe log in at www.mobileme.com.
- Click the Mail button.
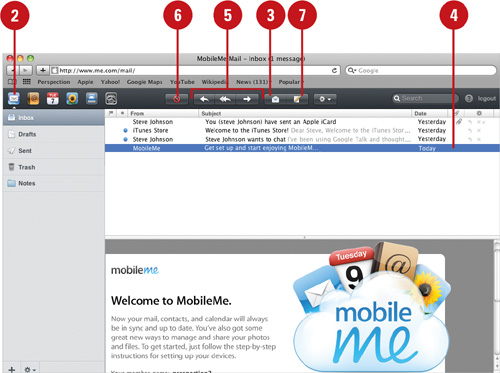
- Click the Get New Mail button to check for e-mail.
- Click on an e-mail in your Inbox to open and read it in the preview pane below.
- If you want, click the Reply, Reply All or Forward button to respond to an e-mail, and then click the Send button.
- To put selected e-mail in the Trash folder, click the Delete button.
 To create a new e-mail, click the New Message button to write an e-mail, and then click the Send button.
Click the Add Contacts button to use contacts from the Address Book.
Click the Spelling button to check spelling in the e-mail.
If you’re not finished with an e-mail, you can click the Save Draft button to store it in the Drafts folder for use later.

- Open your browser and sign onto your MobileMe account.
- Click the Mail button.
- Click the Actions button, and then click Preferences.
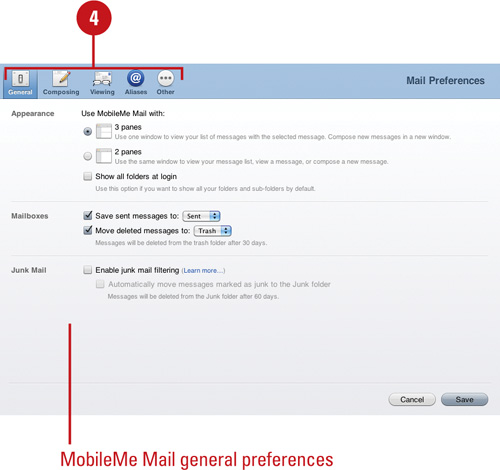
- Select any of the following preference categories:
General. Sets appearance, mailbox, and junk mail options.
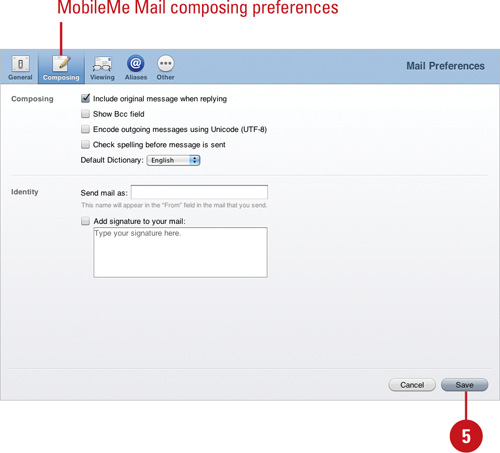
Composing. Sets options to customize new e-mail, check spelling, and add a signature.
Viewing. Sets options to view e-mail from your Inbox and folders.
Aliases. Creates alias e-mail addresses to keep your MobileMe one protected against unwanted e-mails.
Other. Sets options to check mail from an external POP account, forward e-mail to another e-mail account, and automatically reply to e-mail.
- Click Save.
Did You Know?
You can empty the Trash folder. In MobileMe Mail, click the Trash folder, click the Actions button, click Empty Folder, and then click Empty Folder.
You can view mail disk use by folder. In MobileMe Mail, click the Actions button, click Manage Folders to view the information, and then click Done.
Your MobileMe Address Book lets you store personal and business information on all your friends, relatives, and contacts, in one safe place. In truth, you might actually have two or three other places where this same information is stored, maybe Safari, the Address Book application that comes bundled with the Snow Leopard operating system, or even your iPod. The MobileMe address book is used to maintain your mailing lists and e-mail contacts. However, before you despair of having to type in all those contacts again, Macintosh gives you a way to Sync all of the contacts and keep them up-to-date, no matter what application performed the changes.
- Open your browser and sign onto your MobileMe account.
You can access MobileMe log in at www.mobileme.com.
- Click the Contacts button.
- To create a group for contacts, New Group button, type a name, and then press Return.
To add a contact to a group, select the group and create a new contact or drag it to the group name.
- To create a new contact, click New Contact, enter information, and then click Save.
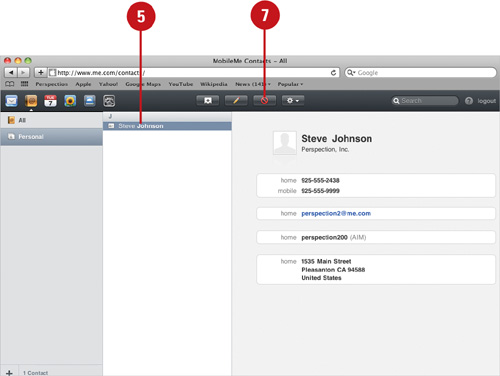
- To display contact information, click the contact name.
- To modify the contact info, select the contact, click the Edit Contact button, and then click Save.
- To remove a contact from the list, select the contact, click the Delete Contact button, and then click Delete.
 To generate an e-mail for the selected contact, click the Actions button, and then click Email Contact.
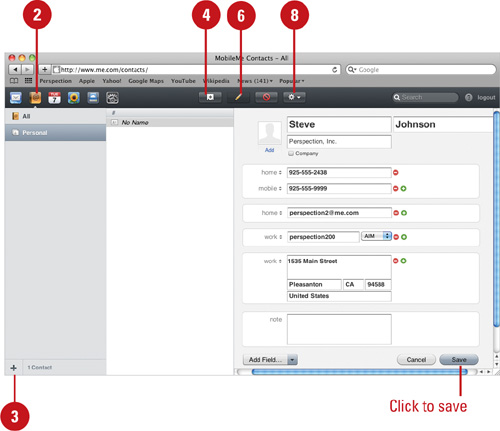
- Open your browser and sign onto your MobileMe account.
- Click the Contacts button.
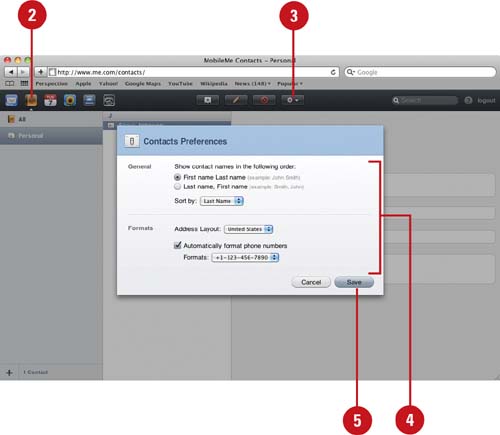
- Click the Actions button, and then click Preferences.
- Select from the following MobileMe Address Book options:
Show contact names like this. Select the option you want: First name Last name or Last name, First name.
Sort by. Click the pop-up, and then select the option you want.
Address Layout. Click the pop-up, and then select a language.
Format phone numbers. Select the Automatically format phone numbers check box to have MobileMe do it for you, click the pop-up, and then select a format.
- Click Save.
With MobileMe Calendar, you can keep track of all your activities, either work or personal. You can create separate calendars for different people, such as your family, or a team, or different types of activities. MobileMe Calendar gives you the ability to add new events or modify existing events directly in the Calendar window just like iCal. In fact, MobileMe Calendar works in a similar way as Mac OS X iCal. MobileMe Calendar also provides preferences, so you can customize the way it works.
- Open your browser and sign onto your MobileMe account.
You can access MobileMe log in at www.mobileme.com.
- Click the Calendar button.
- To add a calendar or calendar group, click the Add (+) button, click New Calendar or New Calendar Group, type a name for the calendar, and then press Return.
- Click a view button to find a date.
Today. Click to display the current day.
Day, Week, and Month. Click to display a day, week, or month at a glance. Use the Left or Right Arrows to move by the selected view.
Mini-Month. Click a day or use the Left or Right Arrows. Click the Show/Hide Mini-Month button to show or hide the mini-month calendar.

- Click the Calendar button.
- Click the calendar you want to add an event.
- Click a view button to find the date to add.
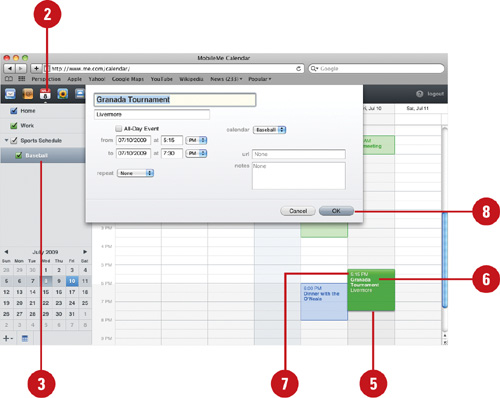
- Drag a time interval on the day you want to add an event.
- Type a title for the event.
- To adjust the time and day, drag the top or bottom edge of the event item, or drag the title to a new location.
- To edit event details, double-click the event, make changes, and then click OK.
- Open your browser and sign onto your MobileMe account.
- Click the Calendar button.
- Click the Actions button, and then click Preferences.
- Select any of the following preference categories:
General. Sets appearance and format options.
Advanced. Sets options for time zone support and whether to hide or delete past events and to do items.
- Click Save.

With MobileMe Gallery, you can create and manage an online gallery of photos and movies that you can share with other people from any computer, iPhone, iPod touch, or Apple TV. If you have iLife 08 or Aperture 2 on your Mac, you can create and publish photos to MobileMe. You can use .JPG, .PNG, or .GIF photo formats and the .MOV movie format in your gallery. However, you cannot directly use RAW images; you need to use Aperture 2 or later. When you share a gallery with MobileMe, you can set options to allow visitors to upload or download photos, add photos via e-mail, or see photo titles or the Gallery e-mail address.
- Open your browser and sign onto your MobileMe account.
You can access MobileMe log in at www.mobileme.com.
- Click the Gallery button.
- To add a calendar, click the Add (+) button, type a name for the gallery, and then press Return.
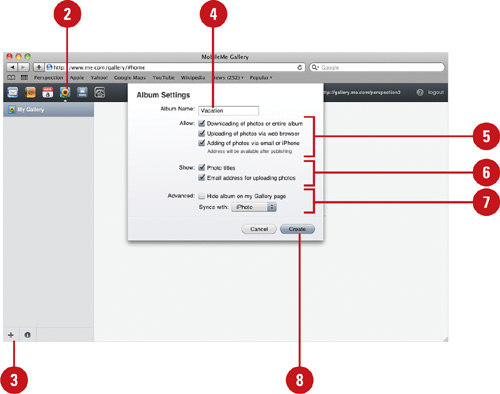
- Type a name for your album.
- Select the check boxes you want to allow visitors to download photos, upload photos via the Web, or add photos via e-mail or iPhone.
- Select the check boxes you want to show photo titles or the e-mail for uploading photos.
- Select the Advanced options you want to hide the album or syncs with iPhoto or Aperture.
- Click Create.
 Click the Upload button, and then select the photos or video clips you want to add.
 Click Choose, select the files that you want to add, and then click Select.
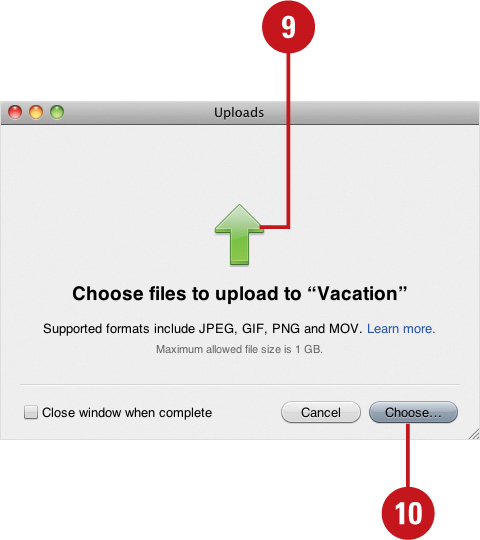
 Click Done.
- Open your browser and sign onto your MobileMe account.
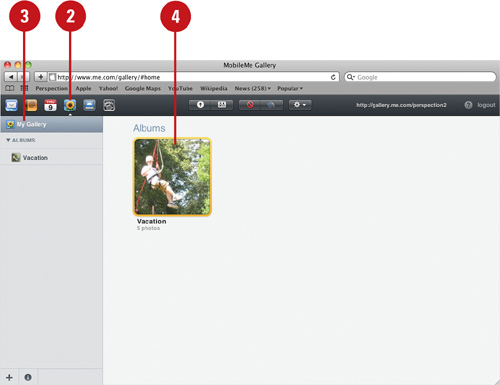
- Click the Gallery button.
- Click My Gallery, if necessary to display the available albums.
- Double-click the album you want to edit.
To quickly view the images in the album, move your pointer in the album thumbnail in My Gallery.
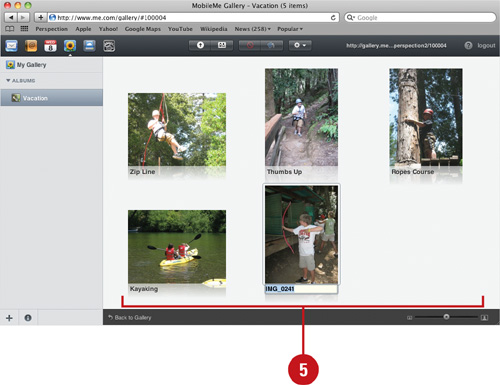
- Edit the album using any of the following:
Edit Item Title. Click the title, edit the text, and then press Return.
Arrange Items. Drag the items to another position.
Delete Items. Select the items, and then click the Delete button.
Rotate Items. Select the items, and then click the Rotate Clockwise button.
Settings. Click the Setting button, change the options you want, and then click Publish.
Did You Know?
You can add photos from your iPhone to a gallery. In iPhone, setup a MobileMe account, select the photo you want in Camera or Photos, tap the Send Photo button, tap Send To MobileMe, tap the Gallery album to which you want to add a photo, type a title for the photo in the subject of the e-mail, and then tap the Send button.
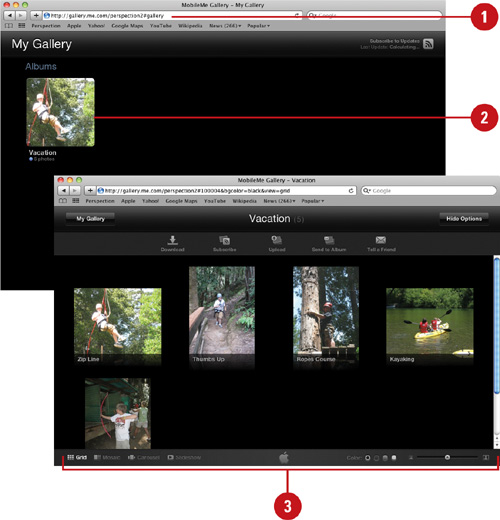
You can view your MobileMe gallery using a browser on your computer, either Mac or PC, iPhone, iPod touch, or on Apple TV. When you view a MobileMe gallery, you can change view options to display it as a grid, mosaic, carousel, or slideshow; select color options to change the background; or drag the Zoom slider to change the view size. Depending on your gallery settings, you can allows visitors to download the entire gallery or an individual photos or movies, subscribe to the RSS gallery feed, upload photos or movies, upload the gallery by mobile phone or e-mail, or send an e-mail with a link to this gallery. A blue dot in an album indicates an album change.
- Access a MobileMe gallery using any of the following methods:
Computer. Open your browser (Mac or PC) and go to http://gallery.me.com/membername.
iPhone or iPod touch. Open Safari, and then go to http://gallery.me.com/membername.
Apple TV. Select Photos from the main menu, and then click MobileMe. Click Add MobileMe Gallery, and then type your MobileMe member name, and then select an album or movie to view it.
- Click the album you want to view.
- Use any of the following viewing options:
View. Click Grid, Mosaic, or Carousel to view the album.
Color. Click a color option to change the background.
Zoom. Drag the Zoom slider to change the view percentage.
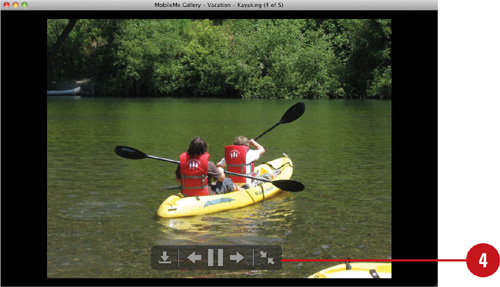
- To view a slide show, click Slideshow to play a slide show, move your mouse to display playback controls, and then click buttons to pause, play, and exit full screen.
- Open your browser and go to http://gallery.me.com/membername.
- Click the album you want to view.
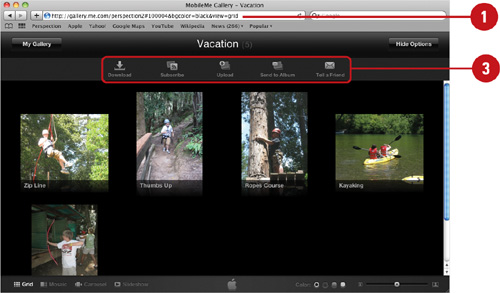
- Use any of the following options:
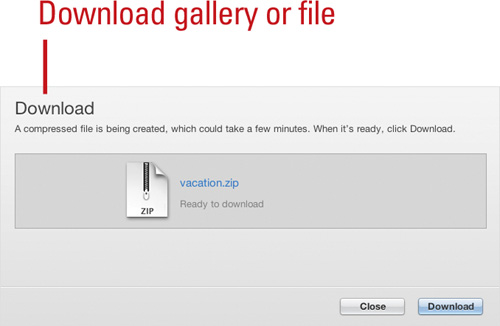
Download. To download the entire gallery, deselect all items, click Download, click Download. To download a photo, click the photo, click the Download button.
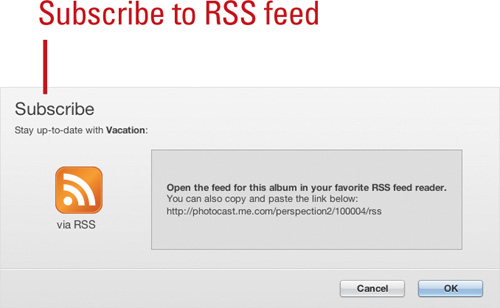
Subscribe. To open the feed for the selected album in your RSS feed reader, click Subscribe, and then click OK.
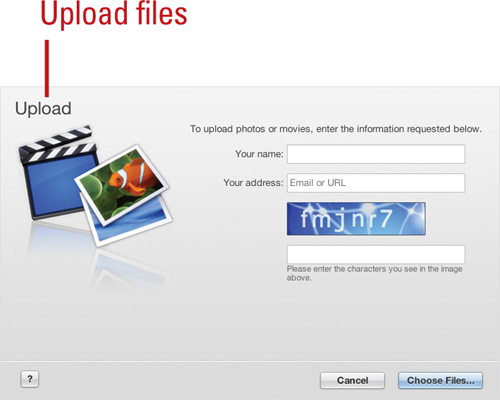
Upload. To upload photos or movie, click Upload, type your name and address, type security characters, click Choose Files, select the files you want, and then click Select.
Send to Album. To upload to the selected album by mobile phone or e-mail, send photos or movies to a Web address, click Send to Album, write down the Web address, and then click OK.

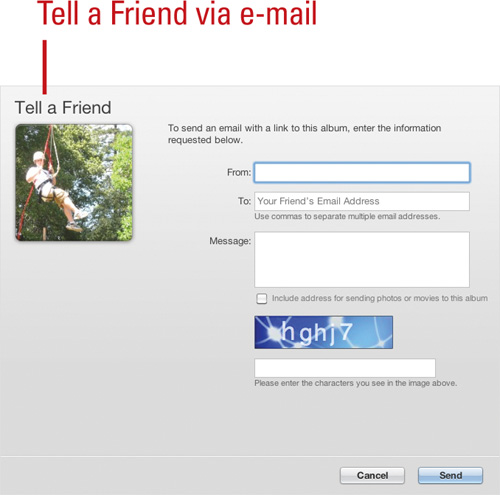
Tell a Friend. To send an e-mail with a link to the selected album, click Tell a Friend, type your name, friend’s e-mail address, and message, type security characters, and then click Send.
Did You Know?
You can add photos from your mobile phone to a gallery. Send an e-mail with a photo attached to your gallery address. (http://gallery.me.com/yourmembername).
Probably one of the coolest, and most-used features of a MobileMe account is iDisk. The iDisk service is like having up to 20 GB hard drive available to you anytime and anywhere you can plug into the Internet. The iDisk is perfect for performing off-site backups, or for storing large files for later use. For example, you could place large files in your iDisk (files that are too big to e-mail), and then download them when you get to your destination. Or if you have a high-speed Internet connection, you could simply use it as a secondary storage device. In addition, if you need more room, you can always upgrade and purchase more space. The good news is that once iDisk is open, you can treat it just like any other storage device on your computer. In fact, the Public folder located in your iDisk can be accessed by anyone owning a MobileMe account. This is the perfect place for placing a document that needs to be distributed to co-workers, or as a place to store photos for other MobileMe users to see.
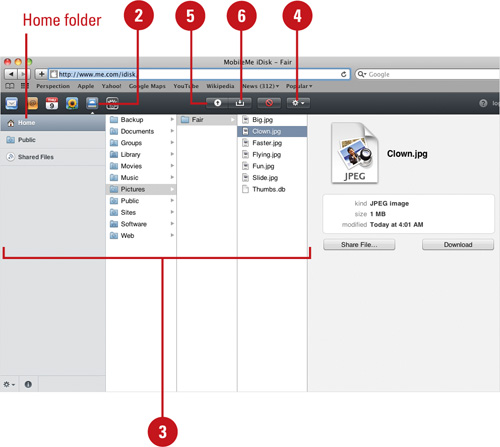
- Click the iDisk button.
You can access the iDisk Home folder at http://idisk.me.com/membername.
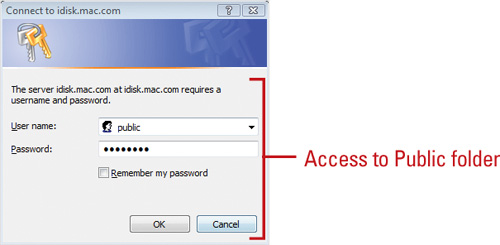
You can access the iDisk Public folder at http://public.me.com/membername. If prompted, type public for the user name, and then type the password.
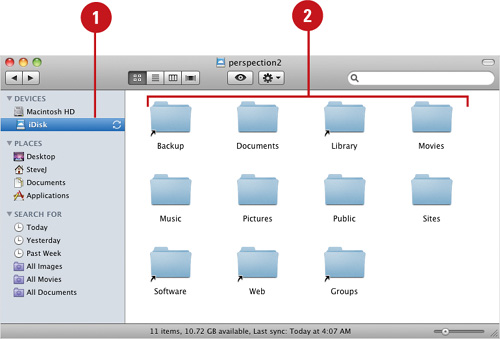
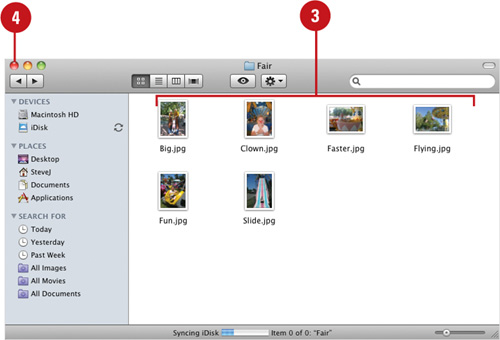
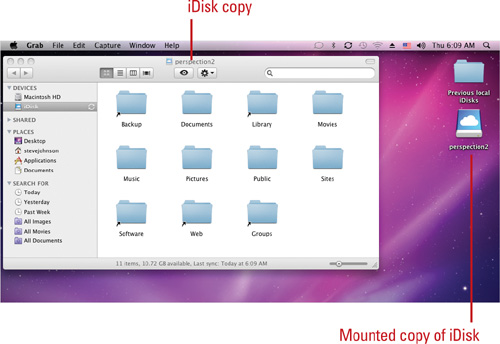
The MobileMe iDisk window opens, displaying a file hierarchy of the iDisk hard disk online.
- Click the Home or Public folder, and then click folders to navigate to the location with the files you want to display from iDisk.
All the files you copied into the iDisk folders on your Mac now appear in MobileMe iDisk.
- To create a new folder, select a folder location, click the Actions button, click New Folder, type a name, and then press Return.
- To upload a file from your computer to iDisk (say from another computer), click the Upload button, click Choose, select the file, and then click Select.
- To download a file or folder to the Downloads folder on your computer, select the file or folder, click the Downloads buttons, and then click Download.
If you’re not connected to the Internet, you can create a local copy of your iDisk on your computer, so you can make changes to it at any time. The next time you connect to the Internet, the local changes you made on your computer are synchronized with your iDisk online. If you need more iDisk space online, you can add more space for iDisk and MobileMe mail storage. You can find out current iDisk storage usage information on the iDisk tab in MobileMe Preferences. If you change the size of your iDisk storage, your local iDisk storage is automatically changed. If you are away from your computer, you can access your iDisk public folder online. The Web address is http://public.me.com/membername. The public folder is available to anyone who knows how to access it unless you add password protection, which you can set in the MobileMe Preferences.
- Click the System Preferences icon in the Dock, and then click the MobileMe icon.
- Click the iDisk tab.
- Click Start.
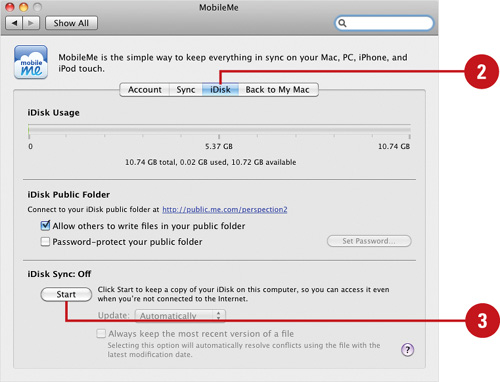
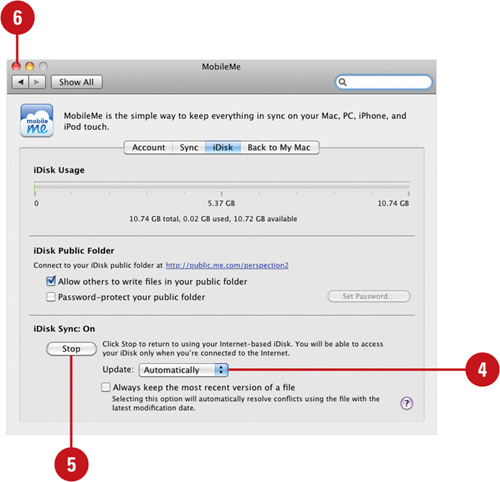
- Click the Update pop-up, and then click Automatically or Manually to sync the content the next time you get online.
- To stop the iDisk local sync, click Stop.
- Click the Close button.
Did You Know?
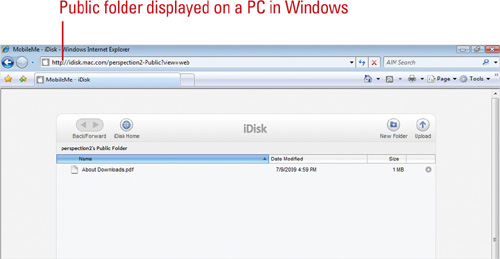
You can access iDisk Public folder using Windows. For Windows 7 or Vista, create a mapped drive to the following address: http://public.me.com/membername. For Windows XP, download the iDisk Utility for Windows at www.apple.com/mobileme.
- Click the System Preferences icon in the Dock, and then click the MobileMe icon.
- Click the iDisk tab.
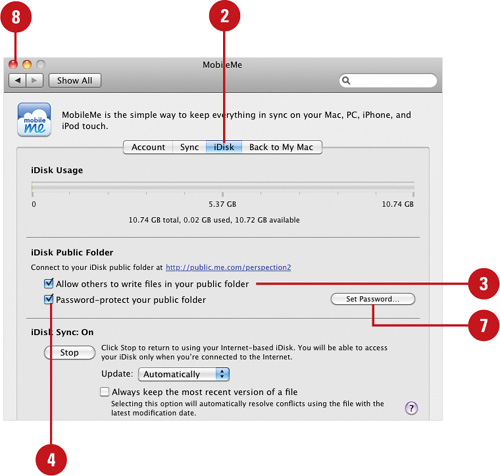
- Select the Allow others to write files in your public folder check box or clear it to allow read only access.
If you selected the Read and Write option, it’s important to set a password.
- Select the Password-protect your public folder check box.
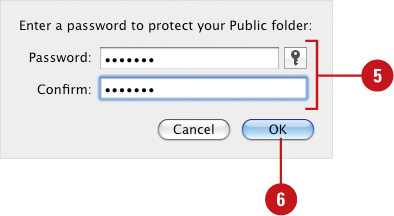
- Type a password 6 to 8 characters, and then type it again to confirm it.
- Click OK.
- To change the password, click Set Password, type a new password, confirm it, and then click OK.
- Click the Close button.
MobileMe iDisk makes it easy to share files with other people. You can share files by using the Public folder or the Share File command. The Public folder in MobileMe iDisk is available to anyone who knows how to access it unless you add password protection, which you can set in the MobileMe preferences. You can access a public folder at http://public.me.com/membername. If prompted, type public for the user name, and then type the password. You can share a folder or file by simply copying it to your Public folder on your Mac or in MobileMe iDisk. If you want to share a file to a specific person, you can use the Share File command to send an access link to the file via e-mail.
- Open your browser and sign on to your MobileMe account.
- Click the iDisk button.
You can access the iDisk Home folder at http://idisk.me.com/membername.
- To create a new folder, select a folder location in the Public folder, click the Actions button, click New Folder, type a name, and then press Return.
- Drag folders or files to the Public folder on iDisk to copy them over.
- To upload a file from your computer to iDisk, select the Public folder, click the Upload button, click Choose, select the file, and then click Select.
- To rename a folder or file, click it, edit the name, and then press Return.
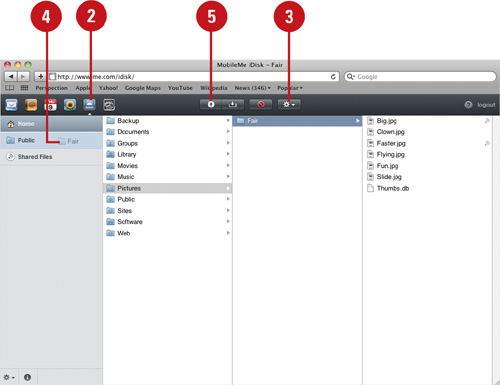
- Click the iDisk button.
You can access the iDisk Home folder at http://idisk.me.com/membername.
You can access the iDisk Public folder at http://public.me.com/membername. If prompted, type public for the user name, and then type the password.
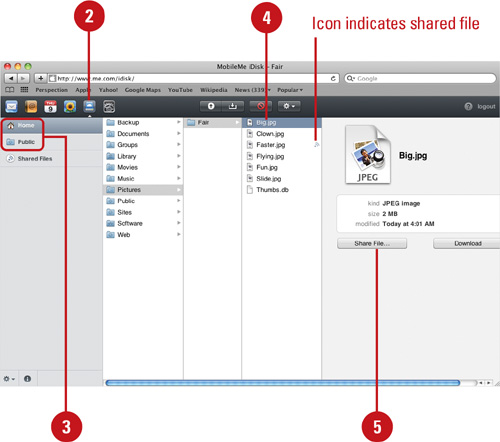
- Click the Home or Public folder, and then click folders to navigate to display the files from iDisk you want to share.
- Select the file you want to share.
- Click Share File.
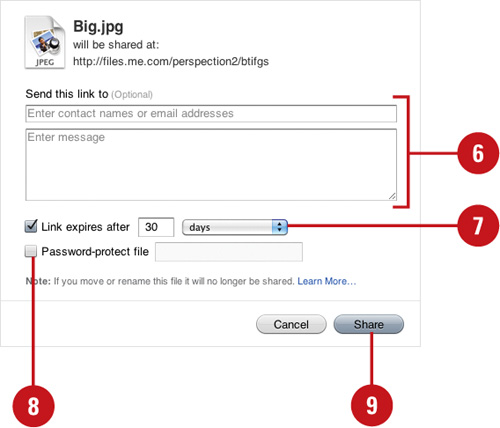
- Type contact names or e-mail address, and a message.
- To add an expiration date, select the Link expires after X check box, click the pop-up, and then select a duration.
- To add a password, select the Password-protect file check box, and then type a password.
- Click Share.
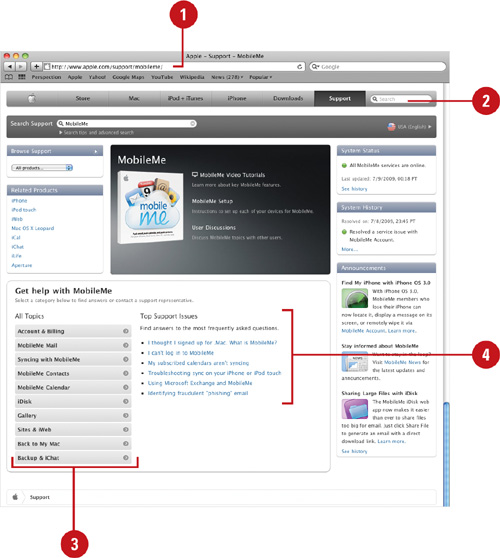
Having difficulty working with MobileMe? Not sure what to do. Don’t worry, Apple’s online support system is available to help you find answers to your nagging questions or contact a support representative. You can find answers by browsing through MobileMe help categories or frequently asked questions, or by performing a search. Apple’s support system is constantly being updated to reflect the state of the current Macintosh software and hardware so finding the information you need isn’t too far away.
- Open your browser and go to www.apple.com/support/mobileme.
- If you want to find specific information, click in the Search Support field, type what you want, and then press Return.
- Click the specific Help links for information on:
Account & Billing.
MobileMe Mail.
Syncing with MobileMe.
MobileMe Contacts.
MobileMe Calendar.
iDisk.
Gallery.
Sites & iWeb.
Back to My Mac.
Backup & iChat.
- Click a link under Top Support Issues to find answers to the most frequently asked questions.