
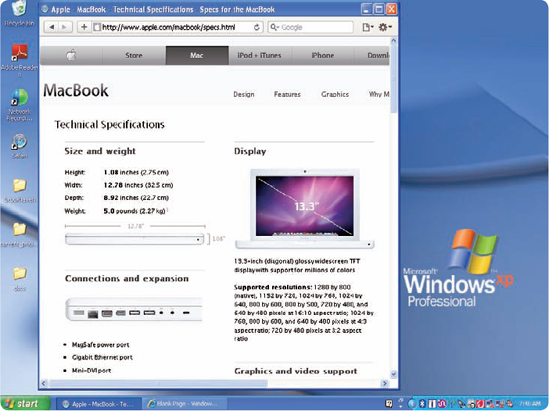
Some of us live in two worlds. One is the Mac world we know and love. The other world is that of Windows computers. For Mac fans, Windows isn't the operating system of choice for many reasons. However, Windows computers do dominate certain areas, particularly midsize and large organizations, and there are a number of applications that run on Windows only. The good news is that with your MacBook, you can run the Mac OS and Windows on the same computer, which means you really do have the best of both worlds.
Choosing a Windows Option
Using Boot Camp to Run Windows
Running Windows Virtually
When the Mac platform switched to Intel processors, two options for running Windows on Macs became available: Boot Camp and virtualization. Each method has its advantages and disadvantages. More good news is that you can use both of these methods when you need to.
Boot Camp. Boot Camp is the Apple technology that transforms Mac hardware into a fully capable Windows PC. You can choose to boot up your MacBook in the Mac OS or in Windows. When you boot up in Windows, you have a fully functional Windows PC on your hands.
The strengths of Boot Camp include great performance (your MacBook can outperform many laptops designed to run Windows only), maximum compatibility for hardware and software, and a lower cost because your only expense is a copy of Windows. A minor downside is that it can be a bit more complicated to share data between the two operating systems because they can't be running at the same time. And you have to restart your computer to switch between the operating systems.
Virtualization. Under virtualization, an application provides a virtual environment (also called a virtual machine) in which you install and run Windows. You install the virtualization application and then install a version of Windows in a virtual machine. When you want to run Windows, you launch the virtualization application, and within its windows you run Windows and Windows applications.
The virtual approach has a number of benefits, including being able to run Windows and the Mac OS at the same time because the virtualization software is just another application running on your MacBook, good performance (it isn't noticeably slower than running it under Boot Camp), and easy data sharing because the Mac OS and Windows are running at the same time.
Virtualization does have two points against it. One is the cost of the virtualization software (the Parallels Desktop for Mac application that I recommend for this is currently about $80). The other is that a virtual approach might not be compatible with all the hardware and software you want to run.
While I've explained Boot Camp and virtualization as two distinct options, if you choose the virtualization application I recommend (Parallels Desktop for Mac), you can use both options and switch between them easily.
To get Windows running under Boot Camp, use the Boot Camp Assistant, which creates a partition on your hard drive for your Windows installation. Once the Assistant is done with its work, you install Windows in the partition it creates. Finally, use the Mac OS X Installation DVD to add drivers for your MacBook hardware.
Once the installation is complete, you can run Windows at any time.
Running the Boot Camp Assistant is mostly a matter of following the on-screen steps to work through the assistant and then using the Windows installer. The next set of steps demonstrates how to install Windows XP; if you install Windows Vista or Windows 7, the details might be slightly different, but the overall process is the same.
Launch the Boot Camp Assistant application located in the Utilities folder in the Applications folder. You see the first screen of the assistant.
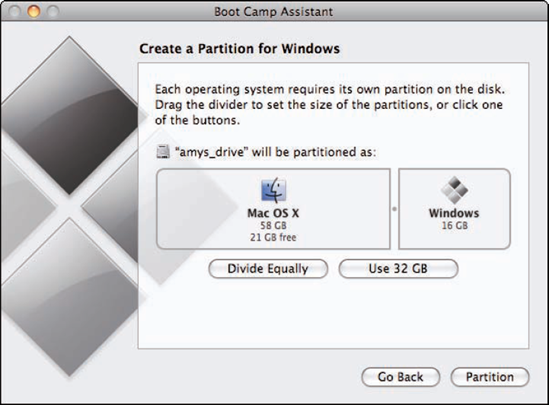
Click Continue. You see the Create a Partition for Windows screen. On the left, you see the partition for Mac OS X, while on the right you see the partition for Windows, which is a minimum of 5GB.
Set the size of the Windows partition by doing one of the following:
Drag the Resize handle (the dot) between the two partitions to the left to increase the size of the Windows partition (see figure 15.1). You can set the partition to be any size you want. I recommend that you allocate at least 10GB to Windows.
Click Divide Equally to divide the drive into two equally sized partitions. I don't recommend this option, as it significantly reduces the amount of space available to you under Mac OS X.
Click Use 32 GB to set the Windows partition at 32GB. The 32GB option is a reasonable size for many Windows environments, and this option is a good choice if your MacBook's hard drive has plenty of free space.
Click Partition. When the process is complete, you're prompted to insert your Windows installation disc.
Insert the Windows installation disc.
After it is mounted on your MacBook, click Start Installation. The Mac restarts and boots from the Windows installation disc. The installation application starts installing files; you see the progress at the bottom of the blue Windows Setup screen.
When the Welcome To Setup screen appears, press the Return key (which is equivalent to the Enter key in Windows).
Press F8 to agree to the Windows license information.
Select the BOOTCAMP partition and press the Return key.
Warning
Make sure you select the correct partition to install Windows on. If you don't, you might overwrite a partition with Mac OS X or your data on it, in which case that data is lost.
Select either the FAT (Quick) or NTFS (Quick) format option. Choose NTFS if you want Windows to be more secure and reliable. Choose FAT if you want to be able to save files to the Windows partition while using Mac OS X.
Double-check to make sure you have the BOOTCAMP partition selected and press F8. When the format process is complete, the MacBook restarts, running Windows instead of Mac OS X. The Windows Setup Wizard runs.
Work through the various screens of the Setup Wizard to configure Windows. For example, you need to type the Windows product key, set time and date, name the computer, and configure how you'll connect to the Internet. You can expect this process to take 30 or 40 minutes. When the process is complete, the Mac restarts. This time, it starts up in Windows and you see the Windows Setup application.
Follow the on-screen prompts to do some basic configuration, including selecting security settings and creating one or more user accounts.
When you complete the Setup application, click Finish. The Windows Desktop appears.
Eject the Windows installation disc.
Insert the Mac OS X installation disc.
Follow the on-screen instructions to complete the installation of various drivers that Windows needs to work with the MacBook hardware.
At the prompt, restart your MacBook. It starts up in Windows.
If you're prompted by New Hardware wizards, follow the on-screen prompts to work through them. Most of the time, the default selections work, so just approve all the suggested actions.
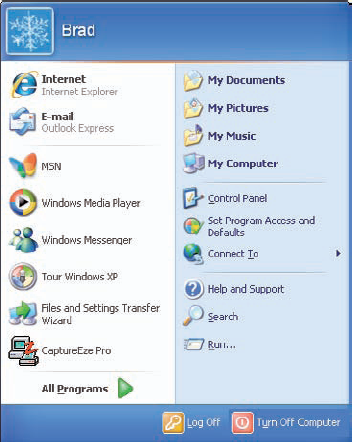
To return to the Mac OS, choose Start menu

Click Turn Off.
Restart the MacBook and hold the Option key down while it starts up.
Select the Mac OS X startup volume and press the Return key. The Mac starts up under Mac OS X again.
After you install Windows, you can transform your MacBook into a Windows PC by performing the following steps:
Open the Startup Disk pane of the System Preferences application (see Figure 15.3).
Select the Windows startup disk.
Click Restart.
Warning
Windows is constantly under attack from viruses, Trojan horses, and other nasty attempts to steal or damage data. Running Windows on a MacBook doesn't protect you from these threats when you are using the Windows environment; it's as susceptible to the same attacks that Windows running on PC hardware is. You should install and use security software under Windows as soon as you get your Windows environment running, especially if you're accessing the Internet under Windows.
At the prompt, click Restart again. The Mac restarts and the Windows Desktop or Login screen appears.
When you're ready to switch back to the Mac OS, choose Start menu
Click the Switch to Classic View link. The Control Panel folder is reorganized so that the control panels are shown together in one window instead of being organized by categories.
Double-click the Boot Camp control panel.
Select the Mac startup volume.
Click Restart.
Click OK at the prompt. Your MacBook starts up under Mac OS X.

As you learned earlier, running Windows under a virtual environment has the significant advantage that you can run Windows and the Mac OS at the same time, making it fast and easy to switch between the two environments. The general steps to get Windows running under a virtual environment are as follows:
Purchase, download, and install the virtualization software.
Configure a virtual environment and install Windows.
Run Windows in the virtual environment.
There are several virtualization applications available, but the one that works best for me is Parallels Desktop for Mac. This application is simple to install and configure, and it performs very well. It has a lot of great features, including the ability to easily share data and files between the Mac OS and Windows. You can download and try it before you purchase the application; at press time, it cost about $80 to continue using the application beyond the 15-day trial period. It also has the benefit of being able to use Windows installed under Boot Camp, in which case you don't need to install Windows again, and you retain the option of running Windows under Boot Camp any time you want to. The remainder of this section focuses on using Parallels Desktop for Mac using a Boot Camp installation of Windows; if you choose a different application or install a version of Windows directly under Parallels Desktop for Mac, your details may vary.
To download and install Parallels Desktop for Mac, perform the following steps:
Move to
www.parallels.comand click the Parallels Desktop for Mac link.Click the Download Trial link. You move to the My Account page.
Create a Parallels user account by following the on-screen instructions.
Download Parallels Desktop for Mac.
While you wait for the download to complete, click the Get trial key link.
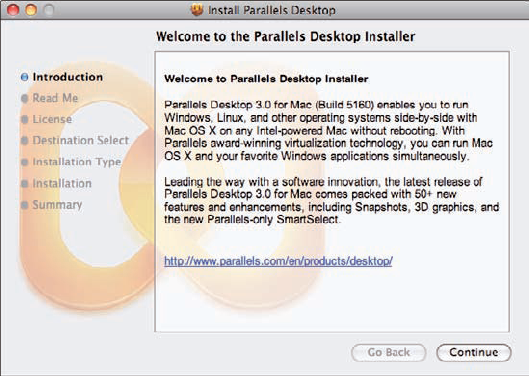
When the download process is complete, move back to the desktop and run the Install Parallels Desktop application (see figure 15.4).
Follow the on-screen instructions to complete the installation. When the process is done, you see the completion screen.
Click Close to quit the installer. You're ready to launch Parallels and configure a virtual environment.
The first time you start Parallels, you configure the Windows environment you want to run. Because you've already installed Windows under Boot Camp, all you have to do is select that version of Windows to create a virtual Windows environment. Here's how:
Launch Parallels Desktop (by default, it is installed in the Applications folder). You're prompted to type an activation code.
Click Enter Activation Key. The Enter Activation Key sheet appears.
Type the activation key and your name, and click Activate. You see the OS Installation Assistant window. This Assistant leads you through the creation of the virtual environment.
Select Custom.
Click Next.
Note
If Parallels detects your Boot Camp installation and finds no virtual machines configured on your MacBook, it selects Boot Camp automatically. Follow the on-screen instructions to complete the configuration of the virtual environments.
Leave Windows selected on the OS Type pop-up menu.
Leave Windows XP selected on the OS Version pop-up menu.
Click Next.
Choose the amount of RAM you want to allocate to the virtual machine. In most cases, the default should work. Use the slider to increase or decrease the amount of RAM available to the virtual machine.
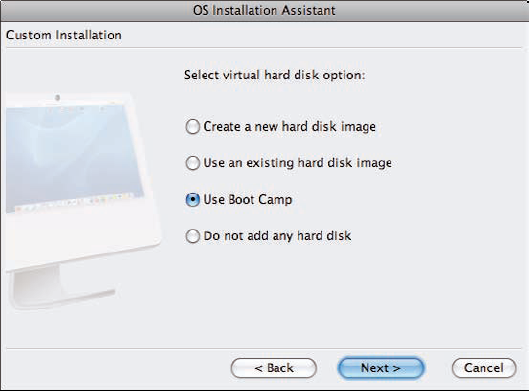
Click Next. You see the Select a virtual hard disk option screen (see figure 15.5).
Select the Use Boot Camp option.
Click Next.
Select Shared Networking.
Click Next.
Name your virtual environment.
Select the Enable file sharing check box.
Expand the More Options section.
Select the Share virtual machine with other Mac users check box.
Click Next.
Select the Virtual machine (recommended).
Click Next.
Note
One of the great things about Parallels Desktop is that the Windows environment gets its network settings from the Mac. So if the Mac on which you install Parallels is connected to a network and the Internet, the Windows environment is also connected without any additional configuration by you. Also, because the Windows environment gets its connection from the Mac, any protection from hacking through the network (such as NAT protection from an AirPort Extreme Base Station) is also applied to the Windows environment.
Click Finish. Windows starts up in the virtual environment.
When the warning prompt disappears, log in to Windows. If your Windows environment has only one user account, you log in automatically.
Choose Actions
Click OK in the prompt. The installer begins to install Parallels Tools, and you see a warning on the screen. When the process is complete, Windows restarts.
After Windows restarts, turn it off by clicking the Turn Off Computer link.
At the prompt, click Turn Off; Windows shuts down. You then see the Parallels Desktop Configuration screen (see figure 15.6).
Quit Parallels Desktop.

After you install Parallels Desktop for Mac and configure a virtual environment, running Windows is a snap. Follow these steps:
Launch Parallels Desktop. The application launches and you see information about the virtual machine in the window.
Click the Start button (the green right-pointing arrow).
If prompted to, type your Mac OS X username and password and click OK. Windows starts up in the Parallels window.
Run Windows.
There isn't much difference between running Windows in a virtual machine and running it on a Windows PC.
Here are some points of interest to consider:
You can move from Windows applications to Mac applications by pressing

As you move your pointer over the Windows window, it changes to the Windows pointer and starts controlling Windows elements. When you move it out to the Mac desktop, it becomes a Mac pointer again.
You can copy files from Windows to the Mac or vice versa by dragging them from one environment to the other.
Only one environment can be using a CD or DVD at the same time. If you've inserted a CD or DVD, but don't see it on the Mac desktop, the odds are that Windows is running and the disc is mounted there, which makes it unavailable to the Mac. Stop the Windows environment and the disc appears on the Mac desktop.
You can use the Coherence mode so that the Parallels window disappears and all you see on the Mac desktop is the Windows Start menu and any Windows applications you are running. To try this, choose View
You can also run Parallels in Full Screen mode, which is especially useful if you have two displays connected to your MacBook because you can run the Mac OS on one display and have the Windows environment fill the other. To try this, choose View