Chapter 6
Sifting Through Your Stuff
IN THIS CHAPTER
![]() Mastering basic Spotlight search skills
Mastering basic Spotlight search skills
![]() Selecting text and keywords for best results
Selecting text and keywords for best results
![]() Displaying results in the Finder search window
Displaying results in the Finder search window
![]() Customizing Spotlight within System Preferences
Customizing Spotlight within System Preferences
What would you say if I told you that you could search your entire system for all the data connected with a person — and in only the short time it takes to type that person’s name? I’m not talking just about files and folders that might include that person’s name. I mean every email message and every Calendar event that references that person — and that person’s Contacts card to boot. Heck, how about if that search could dig up every occurrence of the person’s name inside your PDF documents? What if it could search folders shared on other Macs across your network?
You’d probably say, “That makes for good future tech. I’ll bet I can do that in five or ten years. It’ll take Apple at least that long to do it — and just in time for me to buy a new MacBook! (Harrumph.)”
Don’t be so hasty. You can do all this right now! (In fact, this functionality has been part of macOS for several years.) The technology is the macOS feature named Spotlight, built into Big Sur. In this chapter, I show you how to use it like a MacBook power guru.
Doing a Basic Search
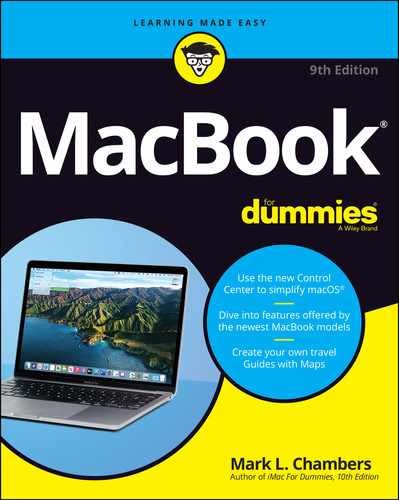
Figure 6-1 shows the Spotlight search box, which is always available from the Finder’s menu bar. Click the magnifying-glass icon once (or press ⌘ +spacebar), and the Spotlight search box appears on your Desktop, front and center.
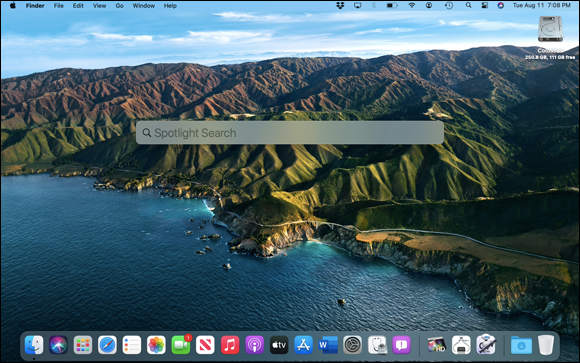
FIGURE 6-1: Lots of power purrs behind this single Spotlight search box.
To run a search, simply begin typing. (The words you type that you want to match are called keywords.) Matching items appear as soon as you type, and the search results are continually refined while you type the rest of your search keywords. You don’t need to press Return to begin the search. If Spotlight recognizes an app by name, it displays that app name instantly, and you can launch it by pressing Return. (My brothers and sisters, it just doesn’t get any easier than that. This is how I usually launch apps that aren’t on the Dock.)
But what if an immediate exact match isn’t found? Spotlight displays a list of search suggestions, including helpful web searches. Click to select the desired search.
After a second or two, the Spotlight search box expands to display the results of your search, and the list is updated automatically in real time while you continue to type. The most relevant items are grouped into categories such as Messages, Definitions, Documents, Folders, Images, News, PDFs, and Contacts, right from the Spotlight search box. Spotlight takes a guess at the item that’s most likely to match what you’re looking for (based on your Search Results list in System Preferences, which I cover later in the chapter) and presents that item first. To open the top item like a true Big Sur power user, press Return.
 Although one or two keywords are typically enough to do the job, you can also type phrases, such as emails from Mark Chambers or songs with sunshine in the title.
Click any item in the list, and shazam! — Spotlight uses the Quick Look technology built into Big Sur to display the contents (such as a thumbnail image of a document or an album cover) or information on the item! If the item is a Music playlist, you’ll see the song list in the results pane on the right, and you can click one of the songs to open Music and play it. If the item is a Mail message, click it in the list to view the contents of the message without leaving the Spotlight box. A Microsoft Word document? Why, it’s displayed just as if you had opened it.
When you click an item in the list, Spotlight indicates which application will be used to open the item by displaying the icon for that application in the top-right corner of the Spotlight box. You see the Music icon for a song, for example, and the Safari icon for a website.
Any text string is acceptable as a Spotlight search, but here’s a short list of the common search criteria I use every day:
- Names and addresses: Because Spotlight has access to the Contacts application in macOS, you can immediately display contact information by using any portion of a name or an address.
- Email message text: Need to open a specific email message, but you’d rather not launch Mail and spend time digging through the message list? Enter the person’s email address or any text string contained in the message you’re looking for.
- File and folder names: A simple item name is the classic search favorite. Spotlight searches your entire system for that one file or folder in the blink of an eye.
- Events and Reminder items: Yep, Spotlight gives you access to your Calendar events and those all-important Reminders you’ve created.
- Specific songs and playlists: Itching to hear “Rock Me Amadeus” by Falco? With the power of Spotlight and your Music library, you can satisfy your musical needs in seconds.
- System Preferences: Now things start to get really interesting. Try typing the word desktop in the Spotlight field. At least one of the results in the list will be a System Preferences pane. That’s right: Every setting in System Preferences is referenced in Spotlight. The Desktop background setting, for example, resides in the Desktop & Screen Saver pane in System Preferences.
- Weather, stocks, news and sports scores: Put Spotlight to work, and you can get instant displays of current weather and forecasts (type weather followed by a town name), stock figures (type the desired stock abbreviation), and even sports scores (type your favorite team name).
- Web pages: Whoa. Stand back, Google. You can use Spotlight to search the web — and, if necessary, the web pages you’ve recently displayed in Safari.
- Metadata: This category is pretty broad, but it fits. If you’re not familiar with the term metadata, think of the information stored by your digital camera each time you take a photo — exposure setting, time and date, and even the location where the photo was taken, also transferred to Photos when you import. Here’s another example: I like to locate Microsoft Word documents on my system by using the same metadata that’s stored in the files, such as the contents of the Comments field. Other supported applications include Adobe Photoshop images, Microsoft Excel spreadsheets, Keynote presentations, Music media, and other third-party applications that offer a Spotlight plug-in.
- Airline flight information: Type a flight number, and let Spotlight provide you information such as the flight’s status, points of departure and arrival, and even gate numbers.
To reset the Spotlight search and try another text string, press ⌘ +A to select the entire contents; then press Delete.
After you find the item you’re looking for in the list at the bottom of the Spotlight box, you can double-click the entry in the list to do any of these things:
- Launch it (if the item is an application).
- Open it in System Preferences (if it’s a setting or description on a Preferences pane).
- Open it within the associated application (if the item is a document, website, News story, or data item).
- Display it in a Finder window (if the item is a folder).
Here’s another favorite time-saver: You can display all the files of a particular type on your system by using the file type as the keyword. To provide a list of all photos with the word horse in the title on your system, for example, use images horse as your keywords. The same goes for movies and audio.
How Cool Is That? Discovering What Spotlight Can Do
Don’t get fooled into using Spotlight as another file-’n’-folder-name search tool. Sure, it can do that, but Spotlight can also search inside PDFs, Pages, Word documents, and HTML files, finding matching text that doesn’t appear in the name of the file. To wit: A search for Big Sur on my system pulls up all sorts of items not only with Big Sur in their names, but also files with Big Sur in them:
- Apple Store SF.ppt is a Microsoft PowerPoint presentation with several slides containing the text Big Sur.
- bk01ch03.doc is a rather cryptically named Word file (a chapter of this book that mentions Big Sur in several spots).
- Conference Call with Wiley is a Calendar event pointing to a conference call with my editor about upcoming Big Sur book projects.
Not one of these three examples has the word Big Sur occurring anywhere in the title or filename, yet Spotlight found them because they all contain the text Big Sur. That, dear reader, is the true power of Spotlight; you’ll never lose another piece of information that Spotlight can locate in the hundreds of thousands of files and folders on your hard drive!
Heck, suppose that all you remember about a file is the fact that you received it in your mail last week or last month. To find it, you can type time periods — such as yesterday, last week, or last month — to see every item that you saved or received within that period. (Boy howdy, I love writing about TGIs; that’s short for Truly Good Ideas.)
Be careful, however, when you’re considering a search string. Don’t forget that by default, Spotlight matches only those items that have all the words you enter in the Spotlight box. To return the highest number of possible matches, use the fewest number of words that will identify the item. Use horse rather than horse image, for example, and you’re certain to be rewarded with more hits. On the other hand, if you’re looking specifically for a picture of a knight on horseback, using a series of keywords such as horse knight image shortens your search considerably. It all depends on what you’re looking for and how widely you want to cast your Spotlight net.
To allow greater flexibility in searches, Apple includes those helpful Boolean friends that you may already be familiar with: AND, OR, and NOT. You can use them to perform Spotlight searches such as these:
- Horse AND cow: Collects all references to both those barnyard animals in one search
- Batman OR Robin: Returns all references to Batman or Robin
- Apple NOT PC: Displays all references to Apple that don’t include any information about dastardly PCs
Expanding Your Search Horizons
I can just hear the announcer’s voice now: “But wait, there’s more! If you double-click the Search in Finder menu item at the bottom of your search-results list, we’ll expand your Spotlight search box into the Finder search window!” (Fortunately, you don’t have to buy some ridiculous household doodad.)
Keyboard mavens will appreciate the Finder search window’s shortcut key, and I show you where to specify this shortcut in the final section of this chapter.
Figure 6-2 illustrates the Finder search window. To filter the search further, click one of the buttons on the search criteria bar to create your own custom filter. Click the button with the + (plus) on the search criteria bar and then click the pop-up menus to choose criteria such as type of file, text content, or location on your system (such as your hard drive, your Home folder, or a network server). You can also filter your results by the dates when the items were created or last saved. To add criteria, click the + (plus) button at the right end of the search criteria bar. To delete existing criteria, click the – (minus) button that appears. To save a custom filter that you’ve created, click the Save button.
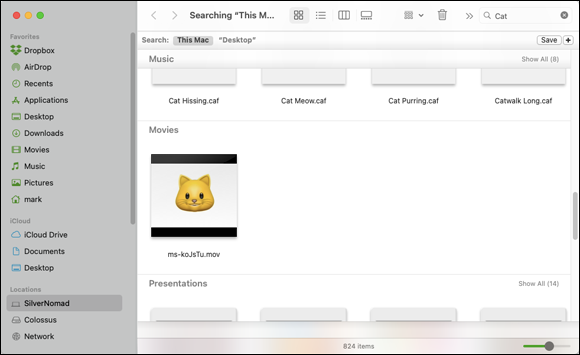
FIGURE 6-2: The spacious borders of the Finder’s search window
Images appear as thumbnail icons, so you can use that most sophisticated search tool — the human eye — to find the picture you’re looking for. (If you don’t see thumbnail images, click the Icon view button on the toolbar.) Don’t forget that you can increase or decrease the size of the icons by dragging the slider in the bottom-right section of the window.
To display the contents of an item in the list using Quick Look without leaving the comfortable confines of the Finder’s search window, click the item to select it, and press the spacebar for a better view. Note that Big Sur must recognize the format of the file, and it must be supported by at least one application.
Again, when you’re ready to open an item, just double-click it in the Finder search window.
As I mention earlier, Spotlight can look for matching items on other Macs on your network only if those remote Macs are configured correctly. To make another Mac visible to Spotlight on your system, enable File Sharing on the other Mac. Oh, and remember that you need an admin-level account on that Mac — or access to a good friend who has an admin-level account on that Mac.
Follow these steps to enable file sharing on the other Mac:
- On the Dock, click the System Preferences icon (the one with the gears).
- Click the Sharing pane.
- In the service list on the left side of the Sharing pane, select the On check box next to the File Sharing item to enable it.
- Click the Close button in the System Preferences window or (if you’re a keyboard power user) press the ⌘ +Q shortcut.
 You can search only those items that you have rights and permissions to view on the remote Mac (such as the contents of the Public folders on that computer). I discuss these limitations in the sidebar “Is Spotlight secure?” earlier in this chapter.
Customizing Spotlight to Your Taste
You might wonder whether such an awesome macOS feature has its own pane in System Preferences — and you’d be right again. Figure 6-3 shows off the Spotlight pane in System Preferences. Click the System Preferences icon on the Dock and then click the Spotlight icon to display these settings.
Click the Search Results tab to
- Determine which categories appear in the Spotlight search box. If you don’t use any presentation software on your Mac, for example, you can deselect the check box next to Presentations to disable this category (thereby making more room for other categories that you will use).
- Specify the keyboard shortcuts for the Spotlight search box and Finder search window. You can enable or disable either keyboard shortcut and choose the key combination from the pop-up menu. By default, the menu keyboard shortcut is ⌘ +spacebar, and the search window keyboard shortcut is ⌘ +Option+spacebar.
FIGURE 6-3: Fine-tune your Spotlight settings from System Preferences.
Click the Privacy tab (shown in Figure 6-4) to specify disks and folders that should never be listed as results in a Spotlight search. I know, I know — I say earlier that Spotlight respects your security, and it does. But the disks and folders that you add to this list won’t appear even if you’re the one who’s performing the search — a great idea for folders and removable drives that you use to store sensitive information such as medical records.
To add locations that you want to keep private, click the Add button (+) and navigate to the desired location. Click the location to select it and then click Choose. Alternatively, you can drag folders or disks directly from a Finder window and drop them into the pane.
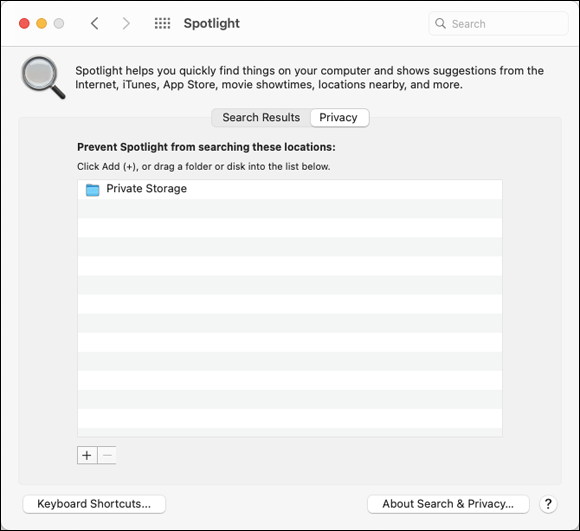
FIGURE 6-4: When certain folders and disks must remain private (even from you!), add them to this list.