

4
Designing Levels
In this chapter, we’ll continue with the Hatlight game to talk about level design, or the design of the different areas in your game. You can use level design to tell stories or let a player know what’s important. Level design helps you develop those ideas and mix them up to create the unexpected. In addition, level design can surprise the player or make them experience different feelings: smart, excited, scared, frustrated, or curious.
As a level designer, you need to consider several different concepts at the same time:
A level is a series of challenges or obstacles: How does the player get from one place to another? Do they learn about the game while they figure out how to do so?
A level is a virtual space: How does the level make the player feel? If the level was a real place, would it feel open or cramped? tidy or messy?
A level is an image: The player sees each level as an image on their screen. What does it look like? Is it mostly sharp lines or curves? What part of a level do your eyes notice first?
Considering these elements enables you to tell engaging stories using your levels.
Let’s Make Some Levels!
If you skipped programming the game in earlier chapters or just don’t want to worry about it, you can find a version of the game with the platform engine code at http://tinyurl.com/hatlightempty/.

Project page
Just click See inside and then click the File ▸ Save to your computer to save a copy of the code.

The platform engine code
Now you’re ready to make your own levels!
NOTE: Because this version shows the platform engine code, it doesn’t have the darkness and flashlight features. If you want them, try tweaking the finished Hatlight game instead. You can download it at https://nostarch.com/scratchgames/!
Drawing Levels
You can design levels for your game by drawing costumes for the Walls sprite. Each costume should match a room in the grid, as you saw in Chapter 3.
1 |
2 |
3 |
4 |
5 |
6 |
7 |
8 |
9 |
10 |
11 |
12 |
13 |
14 |
15 |
16 |
If you want your game to have light and darkness, create a second, lighter backdrop that you can use when you’re working on levels.
Drawing a Cave
You can use several drawing tools to make different kinds of terrain for your platform. For example, the Brush tool is best for making wiggly, bumpy, and curvy ground, like you would find inside a cave.

Drawing a cave level
Irregular terrain looks more natural, like the hills and ground that you would find in the real world. Things in nature are rarely flat or straight. To make a cool cave or a hill that looks real, try using the Brush tool and your mouse to draw it. (Designers call this freehand drawing.) The Line and Rectangle tools make straight lines and are great for drawing objects that look man-made.

Drawing a building
When we build our homes, we usually build them with straight walls and flat floors. In a platform game like Hatlight, if the player moves from a bumpy, hilly area into a place full of straight lines, the player will think, “I’m inside a building now.”
Note that you can hold down the shift key while drawing a line to make sure it’s totally straight. You can also copy and paste parts of a screen using the Select tool to make identical parts.
Saving Details for Later
When you’re first drawing levels, try to keep them simple. Don’t spend too much time making them look good: start by putting all the platforms in the places you want them. You can come back and add details later.

Rough first draft

Final draft after adding details
Play your levels as you’re sketching them. After you make sure they work, only then go back and make them look nicer.
Here are some tricks for adding detail to your levels:

Adjust the pen size for finer detail: Use a smaller brush to add branches to a tree.

Use the mouse to draw dots: Instead of clicking and dragging, try just clicking to place a single dot. These dots could be pebbles or fallen rubble.

Draw with the Eraser tool: Use the eraser to draw cracks and holes, and other details.
Now that you’ve explored ways to add authentic and fun details to your platforms, let’s keep going.

Things to Keep in Mind
Keep in mind that the game considers everything you draw in the Walls sprite as a solid object. So, if you’re not careful, you can create places the player can stand on that they shouldn’t be able to.

The player shouldn’t be able to stand on a wall like this!
One way around this problem is to make walls slope away from the player. Another is to use the Line ![]() or Rectangle
or Rectangle ![]() tools to make sure your walls are straight. Try making a straight wall and then adding some tiny pockmarks using the Eraser tool
tools to make sure your walls are straight. Try making a straight wall and then adding some tiny pockmarks using the Eraser tool ![]() .
.

Sloped wall
Also, check bumpy floors and sloped surfaces to make sure the player can walk across them! The player should be able to climb bumps or slopes 3 pixels tall but will get stuck if a bump is any taller.

A stuck player!
Make sure the floors and platforms line up between screens, or else the player can end up suspended in midair or stuck in the floor when moving from screen to screen. The easiest way to avoid this is to use the Select tool ![]() to highlight the edge of one screen, and then copy and paste it to the adjacent screen, like this.
to highlight the edge of one screen, and then copy and paste it to the adjacent screen, like this.

Copying and pasting one edge of the screen to the next
As mentioned earlier, anything you draw in a costume for the Walls sprite will be solid, even if you try to remove it by drawing over it with the color white. All that white you draw will still be treated as solid ground. (But if you want solid white ground, this is no big deal.)
To get rid of something, you need to use the Eraser tool ![]() .
.

Player on solid white ground
Scratch considers even a single speck of color in the Walls sprite a solid object.

Even specks count as solid ground.
If the player gets stuck somewhere or seems to float in midair, use the Zoom tool ![]() to check for tiny specks left over from erasing.
to check for tiny specks left over from erasing.
Adding Background Scenery
What if we want to add objects to our levels that aren’t solid, like a tree in the background or a small dog? No problem!

Background scenery
Let’s add a Scenery sprite to add details to the background. Like the Walls sprite, this sprite will have a costume for each room. But unlike the Walls sprite, the items we draw in the Scenery costume won’t be solid. Instead, they’ll be in the background, so the player can walk in front of them.
If you’ve uploaded the complete game from the book’s site, you should already have a Scenery sprite. Just draw background objects onto the costume that matches the screen you want them to appear on.
NOTE: The costumes have numbers on them to help you keep track of which screen is which. Feel free to erase them when you draw your own backgrounds!
Otherwise, you’ll need to program a Scenery sprite, like this.

Scenery code
Similar to the new screen event we added to the player that broadcasts whenever the screen changes, the new screen message changes its costume to match the screen we’re on after the Scenery sprite receives the message. Be sure to give the Scenery sprite 16 costumes in total!
You want the Scenery sprite to be in front of the Flashlight sprite so the light from the flashlight won’t cover it up. You can adjust the depth of sprites using the go to front layer and go backward X layers blocks in the Looks tab. Remember that you can double-click a code block to execute it immediately, even when the game isn’t running. When you double-click the go backward –1 layers block, it brings a sprite forward a single layer.
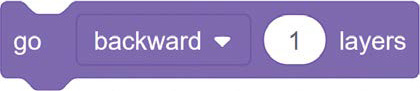
The go backwards –1 layers block
When you’re drawing background scenery, make sure the Walls sprite is set to the costume that matches the Scenery sprite. That way you can tell whether the background scenery you’re drawing lines up with walls and platforms.
Teaching the Player How to Play
Because Hatlight is an exploration game, the player chooses the parts of the game they see in the order they want. But before we give the player any big choices, let’s make sure they understand the basics.
We’ll start the game with two screens that introduce them to the most important ideas they need to know, such as how they’ll move around, how high they can jump, and whether they can see the entire level they’re in at once. (Hint: no, they can’t.)
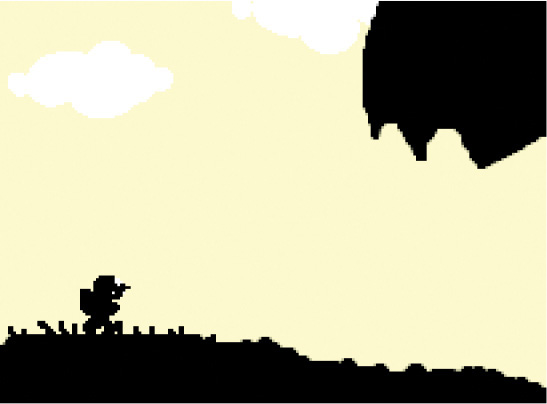
First, we want the player to understand how light and darkness work. So the game starts with an opening screen where the player begins outside the cave in full daylight, and then enters the cave where it’s dark.

Screen 1: the cave entrance
We use the Scenery sprite to provide the daylight. When the player steps out of the daylight into the darkness, the hatlight appears. This transition makes sure the player notices when the hatlight comes on.
As the player climbs down the screen into the cave, a spooky skull appears in the corner. That’s just my way of showing the player they can use their light to discover things!

Screen 1: inside the cave
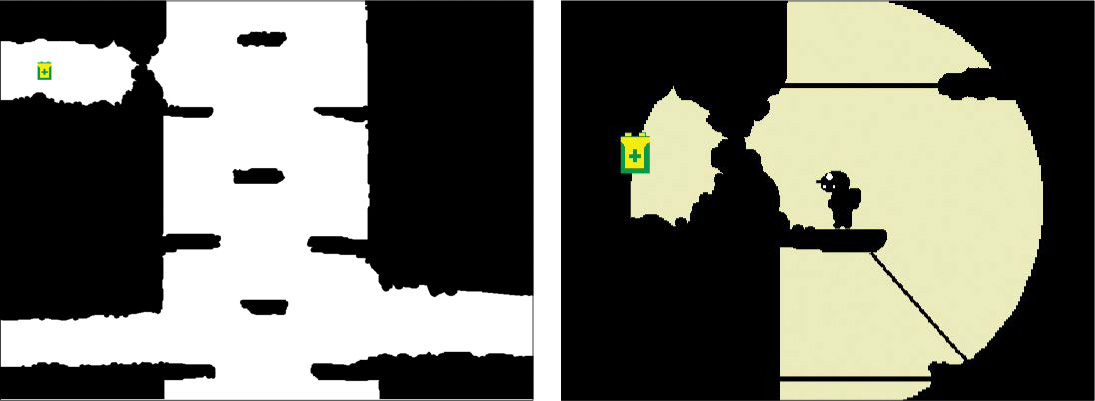
On the second screen, we introduce the next most important idea: the player sees their first battery and understands that it’s an object to collect.

Screen 2 shows a battery somewhere nearby
The player enters this screen at the bottom and sees the battery at the top. This is why it’s important that the batteries are visible in the darkness. The player can see where it is but can’t see how to get to it without exploring their environment. Batteries give them a reason to explore.
In the first screen, the player learns some valuable information about the game. Players learn there are batteries to find and what the batteries look like. Batteries are always visible but sometimes hard to reach. If your players try to reach a battery and touch it at this point, they’ll learn they can collect them. (If they skip this step, there are more opportunities to learn this lesson later.)
The simplest areas in a game can teach you a lot of information about the game. When you play other games, pay attention to what the game is sneakily teaching you.
Let’s talk about some of the ways level design teaches game play.
Showing Objects Players Can’t Reach
On screen 2, the player sees a battery and, if they explore, eventually figures out a way to reach it. That all happens on a single screen. But because our game lets the player move from screen to screen in different directions, we can create even more mysteries for the player to investigate across multiple screens.
After the first two screens, the player enters a big shaft that runs from the top of the map to the bottom, connecting lots of different areas. In the middle of the shaft, they might discover this battery.
It’s so close yet so far! The way to it is blocked by a cave-in. There’s no obvious way to get to it on this screen. To get to it, the player needs to approach it from a different direction.
A cave-in blocks the path to a battery.
They need to first go up and around through another screen, and then drop into a pit. If they can land on the ledge below, they can reach the battery. Learning the ledge is there, of course, requires either careful exploration or an accidental tumble into the pit.

Reaching the battery requires finding a way around.
When you show players something they can’t reach, you’re giving them a problem to solve. Figuring out how to get to this battery makes the player think about how different screens relate to each other, forcing the player to explore and put that information together to solve the problem. When they finally collect the battery, it feels satisfying: “I figured it out! Take that, game.”
Creating Interesting Landmarks
A good way to make your levels intriguing and help the player remember where objects are is to create distinct areas. For example, you can turn two screens into a cool crystal zone.

Crystal zone
Here, we use straight lines and sharp angles to create screens that look and feel very different from the rest of the game. Keep in mind that a level is not only a place and a series of challenges and puzzles, but it’s also a picture.
These screens look cool, but they should look like they belong together as well, which will link them in the player’s brain. When the player is trying to remember what the map looks like, it’s easier to remember where a big area made up of two screens is than a single smaller screen. For example, it’s easier to find your way to a neighborhood than to a single house.
Also, notice how the passage leading into the crystal zone from the central mine shaft has a few crystals in it, like a signpost pointing the way. “This way to the crystal zone!”

Entrance to the crystal zone
Some other distinct areas in this game are the castle zone and the big mine shaft. The mine shaft is sometimes called a “hub” area. Think of it as the center of a bicycle wheel, where all the different spokes connect to. If the player gets lost anywhere in the cave, they’ll eventually find their way back to the mine shaft.
Creating Animation
It would be a waste to build a beautiful world and leave the player looking like a running, jumping red box. Let’s create and animate a player character.
NOTE: If you’ve uploaded the complete game from the book’s site, you should see an animated player sprite. Feel free to edit, change, or redraw any of the animations.
The Hitbox sprite does the moving, jumping, and bumping into walls. All of the movement code is in that sprite. In this section, we’ll create a second sprite to handle all the animation and attach it to the same Hitbox. When we make the Hitbox invisible, the player should only see our cool animations.
Create a new sprite called Explorer, which will be the animation sprite. Its costumes will hold the character’s animation, and we’ll write code to tell it when to show each animation.
Animating the Player’s Movements
Animation communicates how the character is moving. In Hatlight, the player performs the following movements:
- Standing still
- Walking
- Jumping
- Falling
Although standing still isn’t really a movement, we need to communicate when the player is not moving, too. If the player looked the same walking as they did standing still, you wouldn’t be able to tell the difference between the two. So we want it to have its own appearance.

Standing Still
The first costume is the standing still pose. It should be centered on the + and be about the same size as the Hitbox. A good idea is to copy the Hitbox costume and paste it into this costume to use as a guide. When you’re done drawing, you can delete any remaining parts of the original Hitbox costume.

Standing costume
Mine faces toward the right. For now, let’s draw all the costumes so they face toward the right. Later, we’ll use the Select tool to flip them around and make left-facing versions.
Walking
Right-click your standing still costume and select duplicate. Using your standing pose as a starting point, change the new costume so it looks like your character is in midstride.

Walking animation
This is the simplest kind of walking animation. In one frame, the character’s legs are together, and in the next, they’re apart. When we alternate between the two costumes, it’ll look like the character is walking. In real life, walking is much more complicated, but for our game, this is fine.
NOTE: Try looking up a slow-motion video of someone walking sometime!
When you look closely at the grid lines in the walking animation frames, you’ll see that the head in the frame on the right is a bit lower. This adds a little bobble that makes the walking motion more believable. As the player walks, their head bobbles up and down with the rhythm of walking.
Jumping
For jumping, duplicate your standing costume again as a starting point.

Jumping costume
Jumping is supposed to communicate upward motion (also known as upness), so here we raise the head even higher and make the character’s eyes face upward. We also tilt their feet like they’re springing off the ground to emphasize the vertical movement of jumping.
Falling
For falling, we move the head lower and position the head super low too.

Falling costume
When the player reaches the peak of a jump, we’ll switch from the jumping costume to the falling costume, so everything about the falling pose should communicate downward motion (also known as downness). The legs and feet are bracing for a landing.
Or You Can Just Draw a Blob!
Your character can be whatever you like. If animating the human form is too tricky, try making something else. For example, a blob is super easy to animate.

Blob animation
Draw a normal-looking blob, and then make two more costumes: a taller, thinner blob and a shorter, wider blob. If you alternate between normal, tall, normal, wide, normal, tall, and so on, your blob will appear to squish around as it moves. You can use the Select tool to change your blob’s height and width more easily.
You can even make your character look like a snake (snakes are just the letter S) or a weird bug. If you make your bug move slightly up and down between costumes, it’ll look like it’s scuttling along the ground. Draw whatever you would like!
Creating a Mirror Image of a Costume
So far, you’ve made a bunch of right-facing animations. Now let’s flip them around to create the left-facing versions. That way, your character can face the direction it’s walking or jumping in.

Using the Select tool to mirror
Making left-facing costumes is easy. Duplicate a costume, and then draw a box around it using the Select tool. In the upper right of the drawing window, click the Flip Horizontal button next to the Flip Vertical button to flip the costume. Then make sure it’s centered on the + again.
Make a left- and right-facing version of each of your costumes.
Coding the Animations
Animation can be a bit intimidating to code, but it’s very simple.

Animation code
The first stack of code makes sure the Explorer sprite is always at the same place as the Hitbox sprite. As the Hitbox moves around the screen, so will our animations. The second code stack chooses the appropriate costume.
The last thing to do is make sure the Hitbox is invisible now that we have an animated character to display. We can use the ghost effect for that.

Set ghost effect to 100
This block sets the ghost effect to 100, which means 100 percent invisible.
Now the player character is animated!
You should now see just the character, not the red rectangle that handles all the numbers.
Additional Challenges
Here are some additional touches that can make your game more complete:
Intro: When the game starts, the player sees the game title before their character appears. Can you make a title screen for your game? You’ll need to hide all the game sprites until the title screen ends.
Ending: What happens when the player collects all the batteries? How does the story end? Create an ending to the game.
Sound effects: You might want to include some sound effects for important actions, like jumping or collecting a battery. You can use Scratch’s built-in sound library, or you can make your own sounds. You’ll learn more about sound effects in the next chapter!
What You Learned
In this chapter, you learned about level design and what you can do with it. Level design is about storytelling, and a good storyteller thinks of each level as a set of challenges, an imaginary place, and a picture on a screen all at the same time. You also learned how to animate your character, using motion to communicate important things about a character, like where they’re going and how they’re getting there.
In Chapter 5, we’ll talk about how to add sound and music to your games. It’ll be a lot of fun!