This chapter contains two lessons to help you get started in GarageBand.
3. Improvising melodies, variations, and accompaniments
4. Composing and arranging music within specified guidelines
7. Evaluating music and music performances
Explore the GarageBand Loop Browser
Import loops into an existing GarageBand project
Compose a B section using contrasting loops
Use copy/paste to create an AABA form
Transpose measures or phrases
Loop-dee-Loop Template file located on the companion DVD
Example recordings (see Preparations in this lesson for suggested recordings)
Listen to example recordings from a variety of genres. Count the number of measures in each phrase and notate these on the board. Most songs will have 4-, 8-, or 16-bar phrases. Consider listening to “Fly Me to the Moon” by Frank Sinatra, “She Loves You” by the Beatles, or almost any other pop, jazz, or classical tune.
Listen to the example recordings again, this time focusing on the form of the songs. Do the same melody phrases repeat over and over, or can you hear distinctly different sections in the songs? You can describe these different sections using letters: The first section is called A, the next different section is called B, and so forth. How are the A and B sections of the example recordings similar and how are they different? In most cases, the instrumentation will remain the same, but the melodic or harmonic material will change.
Drag the GarageBand file Loop-dee-Loop Template, located on the companion DVD, onto your computer’s hard drive. I suggest storing files on your desktop for easy access.
Open Loop-dee-Loop Template in GarageBand.
Before composing with loops, it is essential that you browse through the available loops in GarageBand and mark your favorites. This will allow you be creative during the composition process.
Click on the Loop Browser icon in the bottom toolbar (see Figure 5.1).
In the Loop Browser, some of the descriptors indicate a style, and some indicate a particular instrument or family of instruments. I suggest avoiding the style descriptors and focusing on the instrument descriptors. In today’s modern music, many artists create unique sounds by blending a variety of musical styles and genres to create something altogether new. This is the approach that I prefer to take when composing with loops.
Click on a single instrument, such as All Drums. The bottom portion of the Loop Browser will now display a list of hundreds of drum loops available.
Tip
Loops with green icons (see Figure 5.2) next to them are MIDI loops; loops with blue icons (see Figure 5.3) next to them are audio loops. This chapter will focus primarily on using audio, and Chapter 7, “Getting Started with MIDI in GarageBand,” will focus primarily on using MIDI. For the purpose of this project, you can use either blue audio loops or green MIDI loops.
Click on one of the loops, and it will begin playing. To audition another loop, press the down arrow on your keyboard or click the next loop with your mouse. As you find loops that you like, click the Fav column to place a check mark next to the loop (see Figure 5.4).
After auditioning the drum loops, click the Reset button, shown in Figure 5.5, and then repeat this process with other instrument categories.
After browsing other instruments, click Reset and then click Favorites, as shown in Figure 5.6. The Loop Browser will only display the loops that you marked as favorites in Step 5.
Now that you have an idea of the loops available, let’s begin composing!
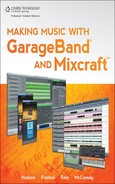
Listen to the file by pressing the spacebar or by clicking the Play button in the bottom toolbar (see Figure 5.7). This bass line is a loop from the GarageBand Loop Browser, and it will serve as the foundation of your loop-based composition.
Click the Cycle button in the bottom toolbar (see Figure 5.8). This puts GarageBand in Cycle mode (also known as Loop Playback mode). In Cycle mode, GarageBand will repeat the cycle section infinitely to save you from constantly rewinding and playing the file.
Stretch the yellow cycle bar near the top of the screen so it cycles the entire A section from Bar 1 to Bar 9, as shown in Figure 5.9.
Press Play and allow GarageBand to cycle the A section.
With Favorites still selected in the Loop Browser, click All Drums.
Click on various drum loops to audition the drum loop with the bass loop. How do the loops sound together? Does the rhythm work? Continue clicking on drum loops to find one that fits well with the bass loop.
When you have found a drum loop that sounds good with the bass loop, drag it into the main Arrange window. GarageBand will automatically create a new track.
If the drum loop is fewer than eight full measures, loop out the drum loop audio region so it lasts eight full measures and stops at Measure 9, as shown in Figure 5.10.
Click All Drums to deselect it in the Loop Browser.
Select another instrument, such as Electric Piano, and audition various electric piano loops to hear whether they work with the bass and drum loop in your composition.
When you have found an electric piano loop, drag it into your composition.
Tip
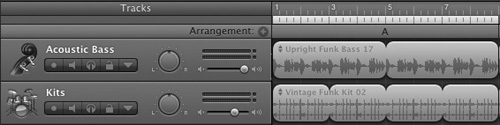
Instead of using a single loop for eight full bars, try using one loop for four bars and then a similar loop for the next four bars. This adds variety throughout the phrase. For example, try using Deep Electric Piano 01 and then Deep Electric Piano 05, as shown in Figure 5.11.
Select all of the loops in your composition by clicking outside of any loop and dragging across all of your loops. This is called a rubber-band drag.
Copy and paste the first A section into the other sections marked A (Bars 9–17 and 25–43), as shown in Figure 5.12.
Tip
To copy and paste loops, press and hold the Option key and click and drag the loop. You can also use Edit > Copy and Edit > Paste or Command+C and Command+V, but Option-dragging is the most efficient way to copy and paste in GarageBand.
You are now going to compose a B section. This new section should be similar to but different from the A section. (Think back to the A and B sections of the example recordings and how they are similar and different.) If you used Vintage Funk Kit 02 for the drum loop in your A section, try using Vintage Funk Kit 03 for your B section. It usually will sound out of place if your B-section loops are extremely different from your A-section loops. It would also be common to keep the same instrumentation for the B section as you have for the A section. This means that if you have acoustic bass, electric piano, and vintage funk drums for your A section, use those same instruments for your B section.
Tip
Click the double arrow in the upper-left corner of any region to change the selected loop to a different loop from the same category and style. For example, if you click on Upright Funk Bass 17 in the Arrange window, a pop-up window will appear that allows you to change the selected region to a different Upright Funk Bass loop.
Drag the yellow cycle bar so it stretches from Bar 17 to Bar 25.
Audition bass loops from the Loop Browser. When you have found one that you think works in the song as a contrast to the first bass loop, drag it into the gray area in the Arrange window, and GarageBand will create a new track. The bass loop for the B section should last from Bars 17 to 25.
Repeat the previous step to add a contrasting drum and electric piano loop, as shown in Figure 5.13.
Transposing regions or phrases can add a lot of interest to your composition. By transposing pitched loops, you can actually change the key center of the selected area of your composition. It is very common to transpose the key of the B section. Common transpositions would be +5 semitones (Perfect 4th interval up) or −5 (Perfect 4th interval down).
Select the pitched loops in your B section. Do not select any drum or percussion loops.
Open the Track Editor by clicking on the Scissors icon in the left of the bottom toolbar (see Figure 5.14).
Drag the Pitch slider in the Track Edit window to transpose the pitched loops (see Figure 5.15). Try various settings until you find one that works well with your song. If you change the pitch too much, your loops may sound odd, so try to keep the pitch transposition to somewhere between −5 and +5 and certainly no more than −12 or +12. See Figure 5.16.
Export the finished project by selecting Share > Send Song to iTunes or Share > Export Song to Disk.


Enhance your song by adding percussion loops to the A and B sections. The percussion family includes instruments such as shaker, tambourine, conga, and cowbell. You can also enhance your song by adding additional pitched loops. Consider adding guitar,
organ, or strings. As you add additional loops, be careful of the texture of your composition. If you have too many loops playing simultaneously, your song can start to sound too mushy, and it will be difficult to differentiate the various loops and instruments. I suggest using one drum loop, two to three percussion loops, and three to five pitched loops.
4. Composing and arranging music within specified guidelines
6. Listening to, analyzing, and describing music
8. Understanding relationships between music, the other arts, and disciplines outside the arts
Split regions, create new tracks, and drag regions
Put the mixed-up alphabet back in order
Spell out new words using the existing audio
For elementary-school students, perform the “Alphabet Song” and review the order of the alphabet.
Drag the GarageBand file Alphabet Soup Template, located on the companion DVD, onto your computer’s hard drive.
Open Alphabet Soup Template in GarageBand.
Press Play to listen to the file. You will hear someone reciting the alphabet backwards.
Press Return on your keyboard to rewind the file to the beginning.
Click on the audio region to select it, as shown in Figure 5.17.
Press Play and then press Stop immediately after hearing “Z.”
Press Command+T or select Edit > Split to insert a new region boundary.
Continue this process for each letter (see Figure 5.18).
Click somewhere in the gray area of the Arrange window to deselect the audio regions.
Open the Track Editor by clicking on the Scissors icon in the bottom toolbar.
Double-click the name of the first region. It most likely is currently named “Alphabet Backwards.1,” as shown in Figure 5.19.
Rename the first region “Z” and press Return (see Figure 5.20).
Continue naming each region appropriately (“Y” through “A”), as shown in Figure 5.21.
To put the alphabet back in order, it would be easiest to create a new track. Create a new basic track by selecting Track > New Basic Track or by using the shortcut Shift+Command+N (see Figure 5.22).
Drag region A to the start of the new Basic track, as shown in Figure 5.23.
Continue dragging the regions from the first track into the new Basic track until the alphabet is back in order, as shown in Figure 5.24.
Listen to the file and evaluate your edits. Does the speech flow smoothly? If not, you may need to drag the regions a bit closer together.
Tip
If you accidentally cut off part of a word, use the Trim tool to bring back the missing audio. Place your cursor in the lower-right or -left corner of any region to bring up the Trim tool shown in Figure 5.25 and click and drag to reveal more audio in the region.
Create another new Basic track (Track > New Basic Track or use the shortcut Shift+Command +N).
Use this new track to spell out new words. Try spelling out a word, your name, or even an entire sentence! Be sure to Option-drag to copy regions. See Figure 5.26.
Export the finished project by selecting Share > Send Song to iTunes or Share > Export Song to Disk.


Add effect plug-ins to the various tracks to modify the sound of the voice. See Chapter 3 or the lessons in Chapter 9, “Recording Your Own Audio in GarageBand,” for detailed instructions on adding effect plug-ins to an Audio track.
Create a vocabulary review activity. Students or the teacher can create a file with relevant vocabulary words (possibly from a current reading activity) spelled out in new tracks. Students can then record the definitions for the various words in the appropriate tracks. For example, the teacher may spell out “A-C-O-U-S-T-I-C-S,” and the students can record themselves reciting the definition (“the properties or qualities of a room or building that determine how sound is transmitted in it”). See Chapter 3 or the lessons in Chapter 9 for detailed instructions on recording new audio into GarageBand (see Figure 5.27).