
More often than not, you find yourself in a less than situation where you do not really want to remove a dead node; instead, you want to replace it. The reasons can be many, your cloud service provider finds that a node is sitting on degraded hardware and kills the nodes with a notification mail to you.
All versions after Cassandra Version 1.2 have simplified replacing a node to merely running one command. Here are the steps to replace a node:
- Install Cassandra on the new node. Make sure
conf/cassandra.yamlhas all the custom changes that exist in other nodes. (The best way to do this is to copycassandra.yamlfrom a live node, and change the node-specific setting.) - Make sure you have got the following variables right:
cluster_name,endpoint_snitch,listen_address,broadcast_address, andseeds. - Make sure the data directories are clean. If you are reusing a node that used to be a part of Cassandra cluster, it can possibly lead to a startup failure if the data directory has old data.
- Start Cassandra with the
cassandra.replace_addressenvironment variable set as the address of the dead node that this node is replacing. This can be done either by editingcassandra-env.shor by adding a line like this:JVM_OPTS="$JVM_OPTS -Dcassandra.replace_address=DEAD_NODE_ADDRESS"
You can also start Cassandra with this variable:
$ bin/cassandra -Dcassandra.replace_address=DEAD_NODE_ADDRESS
This is how it looks before the removal of the dead node:
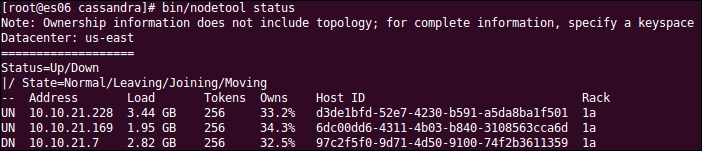
You can replace the node by running the following command:
$ bin/cassandra -Dcassandra.replace_address=10.10.21.7
If you watch the log, it states that this node is replacing the dead node mentioned in the startup variable as follows:
INFO  09:31:03 Node es07.nishantlabs.internal/10.10.21.206 state jump to normal
WARN  09:31:03 Not updating token metadata for es07.nishantlabs.internal/10.10.21.206 because I am replacing it
INFO  09:31:03 Waiting for gossip to settle before accepting client requests...
After the replacement, we get the following output:
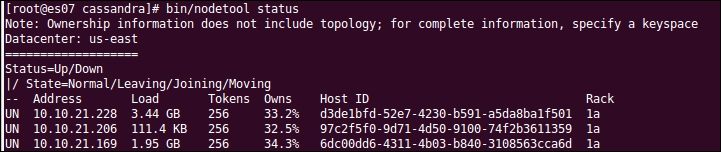
As you can see in the preceding screenshot, the host ID of the replacing node is the same as the replaced node.