You can also use Spring Initializr from the Spring Boot CLI. It offers some commands that can be used to kick-start development. The Spring Boot CLI provides an init command to create a Spring Boot application structure and acts as a client interface to the Spring Initializr. Let's see how to use the init command to create a Spring Boot project as follows:
$ spring init
Let's see the following output of the init command:

As you can see in the preceding screenshot, a demo.zip file is created and saved to the workspace. If you unzip this project, you'll find a typical project structure with a Maven pom.xml build specification. Download the project with very minimal configuration with the Maven specification, and test it.
But actually, if you want to create a web application using Spring MVC that uses JPA for data persistence, let's see the following command that includes all the required dependencies for your application:
$ spring init -dweb, jpa
The preceding command also creates the same file, named demo.zip, with same project structure, but with Spring Boot's Web and JPA Starters expressed as dependencies in pom.xml:

As shown, I didn't define any build specification; by default, it includes the Maven build specification but if you want to specify the Gradle build specification, you have to use the following command:
spring init -dweb,jpa --build gradle
We specify Gradle as the build type with the --build parameter:

Now, the demo.zip file is saved in the working directory with the Gradle build specification instead of Maven. And one more thing, by default, a demo.zip project with either Maven or Gradle build specification will produce an executable JAR file. If you want to create WAR instead of JAR, then you can specify one more parameter in the following command:
$ spring init -dweb,jpa --build gradle -p war

You can find other parameters by using the following command:
$ spring help init

You can use the following command to find out what choices are available for those parameters by using the --list parameter with the init command:
$ spring init -list
You have seen the Spring Boot CLI init command for creating your Spring project. The Spring community offers a web-based interface, Spring Tool Suite, or Spring Boot CLI to initialize your Spring Boot project.
Spring Boot CLI has no need to specify the build specification. CLI gets hits from the code and resolves dependencies accordingly and produces deployment artifacts. Spring Boot CLI produces an almost friction-free development experience and eliminates all code noise.
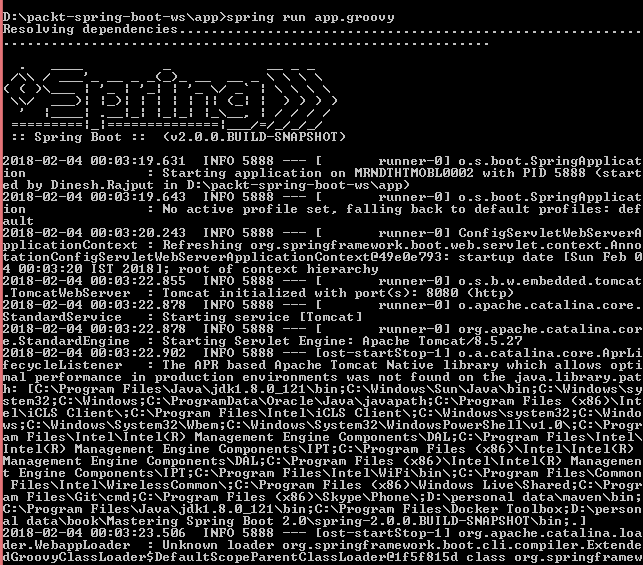
After your installation is complete, you can also run a simple application, whatever we have created in Chapter 1, Getting Started with Spring Boot 2.0. To do so, you will have to use the same web application, by the name of app.groovy, as follows:
@RestController
class HelloController {
   @GetMapping("/")
   String hello() {
         return "Hello World!!!"
   }
}
Save this file as app.groovy in a directory and let's run the application from a shell by using the following command:
$ spring run app.groovy
Open http://localhost:8080/ from the browser. If the output shows you Hello World or whatever you might have asked your application to do—the installation was successful.
Let's see the following console after running the preceding command at the Spring Boot CLI. The first line in the console is resolving dependencies, but in this application we didn't define the dependencies. Spring Boot CLI automatically resolves the dependencies based on the classes we have written for the application. But, you can define explicit library dependencies by using the @Grab annotation. Let's see the following @Grab annotation for the HSQL database in your application. Let's run this application using Spring Boot CLI as follows:
@Grab("HSQL")
Let's see the following screenshot of the output in the browser:

As you can see, the Spring Boot CLI provides the quickest way of developing without any code friction.
Let's discuss another important feature and key component of Spring Boot.