
Here is a quick look at what we'll cover in this chapter:
- How to add authentication to Azure Mobile Apps
- How to use the Xamarin.Auth component to easily perform OAuth and securely communicate with the API
- How to update the TripLog app with a sign in page
In the previous chapter, we set up a new, live backend service hosted in Microsoft Azure. The service contains a single table, Entry, which houses all log entries for our TripLog app. Currently, the Entry table is available anonymously. In this section, we are going to change the permissions on the Entry table to require each request to contain an access token associated with an authenticated user.
In order to enforce authentication to access our backend service, we need to make a simple configuration change to the Entry table.
- Select your TripLog Mobile App in the Azure portal.
- Click Settings.
- Click Easy Tables in the MOBILE section of the Settings pane and then select the Entry table, as shown in the following screenshot:

- Click the Change permission button, as shown in the following screenshot:

- Change each of the table permissions to Authenticated access only. Then, click the Save button at the top of the pane.

Now, any attempt to call the API endpoints, as we did in the previous chapter, will result in a 401 response. For example, using either a REST console or the command line, issue a GET request to the API endpoint for the Entry table using the following URL and header:
GET
https://<your-service-name>.azurewebsites.net/tables/entry
--header "zumo-api-version:2.0.0"
You should now get back the following response message, since we are not providing any valid authentication token in the request:
You must be logged in to use this application
In the next section, we will set up Facebook as an identity provider in our Azure backend service so that we can obtain a user specific access token that can be used in the request headers, allowing us to get back a successful response.
There are a couple of approaches to handle identity and authentication in Azure. You can set up the Azure Mobile App service to use Facebook, Twitter, Microsoft Account, Google, or even Azure Active Directory as a trusted identity provider. You can also create your own custom identity provider if you want to use account data stored in your database instead of one of the social providers. You can use one of these options or a combination of several of them—they will all provide an access token that can be used by your mobile app to communicate with your API on behalf of your users. In this section, we are going to use only one provider—Facebook.
In order to use a social network as an identity provider, you will need to have an app/client ID and app secret. These keys can be obtained directly from the identity provider by setting up an app for OAuth, typically in their developer portal. Once you have obtained the app/client ID and secret, you can configure the authentication settings for the backend service.
- Select your TripLog mobile app in the Azure portal.
- Select Settings.
- Select Authentication / Authorization, as shown in the following screenshot:
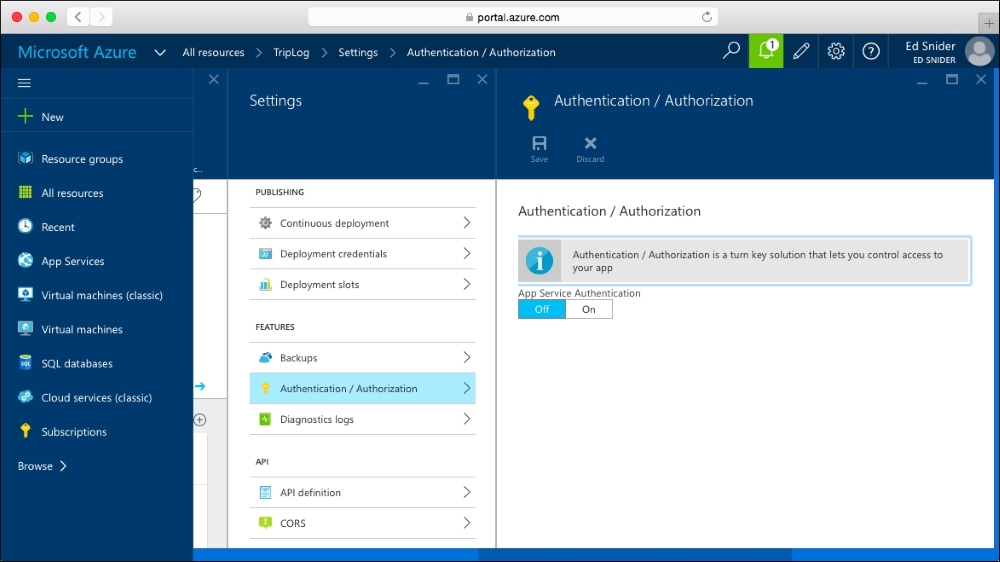
- Switch the App Service Authentication toggle to On, as shown in the following screenshot:

- Select Facebook.
- Provide your Facebook App ID and App Secret and click the OK button at the bottom of the Facebook pane, as shown in the following screenshot:

- Click the Save button at the top of the Authentication/Authorization pane.
- Next, you need to add the OAuth redirect URI (Uniform Resource Identifier) for your service within the app setting of the identity provider. The redirect URI will depend on the identity provider using the following format:
https://<your-service-name>.azurewebsites.net/.auth/login/<identity-proider>/callback. Replace<your-service-name>with the name of your Azure Mobile App, and<identity-provider>with eitherfacebook,twitter,microsoftaccount,google, oraad, depending on which identity provider you are using.Note
Setting up an app for OAuth is different for each provider, and the Azure Mobile Apps documentation has outlined the steps in detail for each, as follows:
Microsoft Account: https://azure.microsoft.com/en-us/documentation/articles/app-service-mobile-how-to-configure-microsoft-authentication/
Azure Active Directory: https://azure.microsoft.com/en-us/documentation/articles/app-service-mobile-how-to-configure-active-directory-authentication/
Once you have set everything up on the identity provider side and provided the keys in the Azure portal, you can test it out in your internet browser by going to https://<your-service-name>.azurewebsites.net/.auth/login/facebook.
If it is all set up correctly, you should see the login prompt for the identity provider. After providing your credentials, you should be prompted to give your app permission to use your account.

If you observe the URL in the browser address bar after clicking OK, you should see the redirected URL appended with a token value in the form of a URL encoded JSON object. We can then take the value of the authenticationToken key in that JSON object and use it in a request to our API to confirm that we get back a successful response.
In either a REST console or the command line, issue the same GET request that we did in the preceding section, but this time, add a new header named x-zumo-auth, and use the value from authenticationToken in the JSON object returned in the redirect URI as the x-zumo-auth header value:
GET
https://<your-service-name>.azurewebsites.net/tables/entry
--header "zumo-api-version:2.0.0"
--header "x-zumo-auth:<your-authentication-token>"
If everything has been set up correctly, you should get back a response containing all of the Entry objects in Azure backend service.
In the next section, we will update the TripLog app with a Facebook authentication page to get an access token that can be stored and used by the app to communicate with the API.