1 THE BASICS
Before the actual operation of the X100 is explored in the next chapter, here is some basic information about the camera. In addition to going over the camera’s controls, I will also introduce all of the terminology to be sure that we’re speaking the same language from the start. The battery, SD card, and firmware will also be touched on briefly. Above all, read the paragraph about firmware closely, in case you haven’t updated your camera to version 1.11 yet.
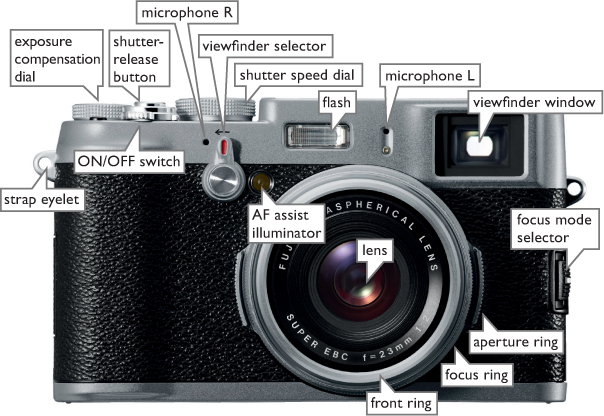
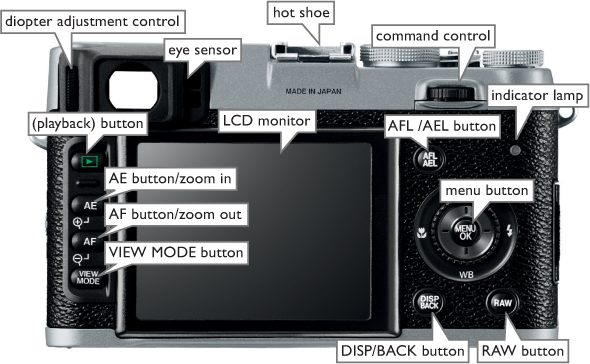
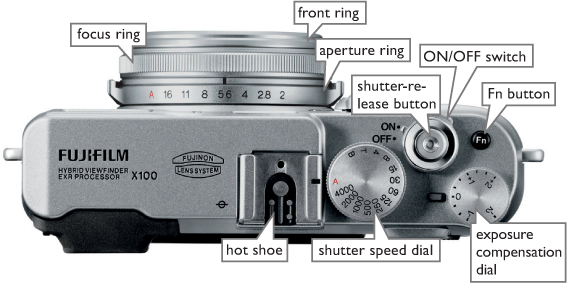
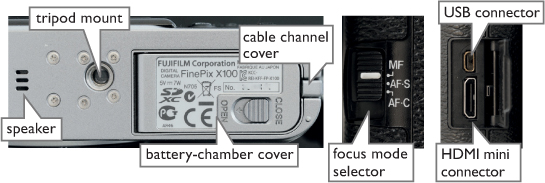
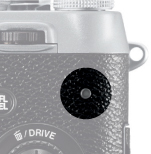
OVERVIEW OF THE CONTROLS
COLOR CODE OF THE LED

Focus is locked.

Focus, exposure or blur warning. A picture can be taken.

Images are being saved to the SD card. Additional pictures can be taken.

Images are being saved to the SD card. Additional pictures cannot be taken.

The flash is charging; the flash will not be able to fire if a picture is taken now.

Lens or memory error.
NAVIGATING THE MENUS
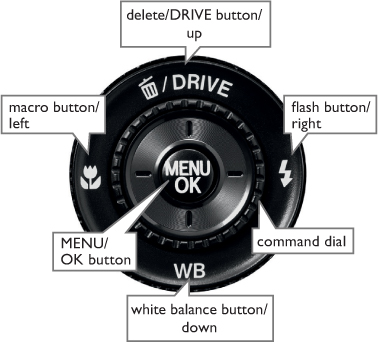
Use the respective DIRECTION KEYS to navigate through the camera’s various menus. The COMMAND DIAL may also pressed up or down (in vertical menus) or right or left (in horizontal menus). The center button of the COMMAND DIAL is the OK button, which you use to confirm your selection (figure 1.1).
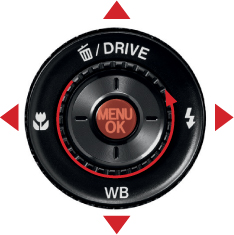
Figure 1.1 COMMAND DIAL and DIRECTION KEYS
Use the DIRECTION KEYS or the COMMAND DIAL to navigate through the camera’s menus and to control other functions that require directional movement (e.g., to move the autofocus frame around the display).
THE CAMERA’S MENUS
The X100 has three main camera menus.
- SHOOTING MENU (p. 9)
This menu allows you to choose the settings that affect the process of exposure. You can, for example, define the ISO speed within this menu.
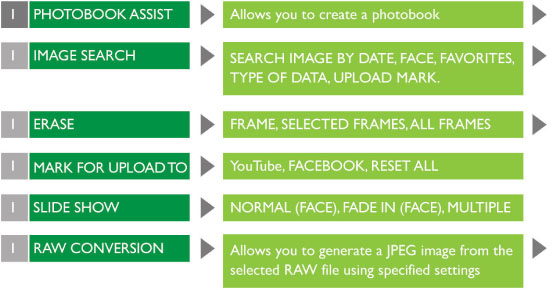
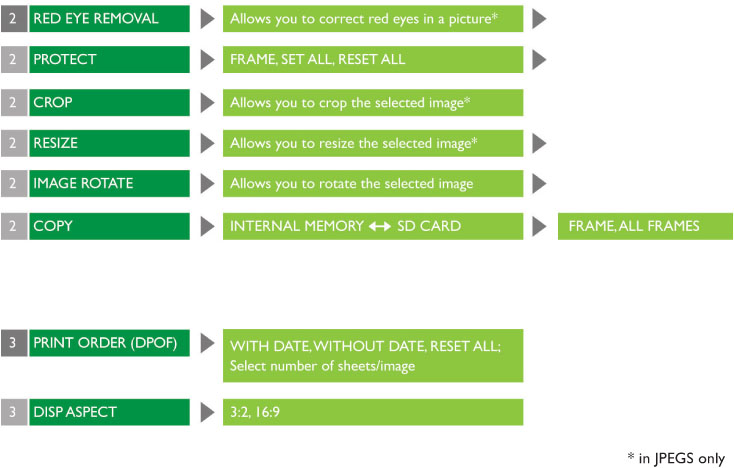
- PLAYBACK MENU (p. 10)
Here you can manage your saved images. You may want to delete an unsuccessful shot, for example, or protect one of your favorites from accidental deletion.
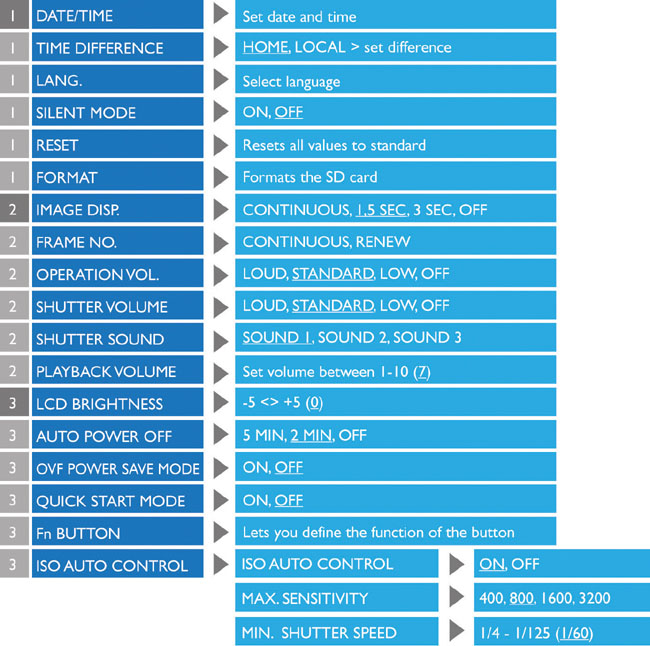
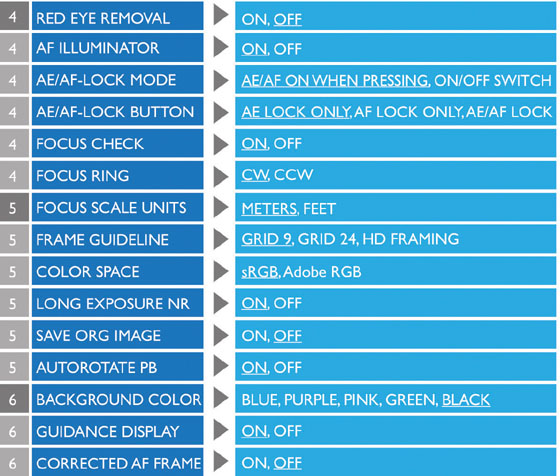
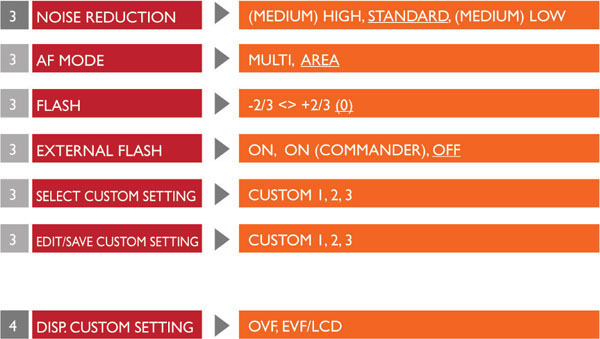
- SETUP MENU (p. 11)
You can configure the functions that control the camera itself here. This is where you set the camera’s language, for instance.
To access these camera menus, press the MENU button. If you are in shooting mode when you press the button (not playback mode), pressing the MENU button will open up the SHOOTING MENU. Once open, you can use the COMMAND DIAL and the DIRECTION KEYS to move between the different options. You also have the ability to switch into the SETUP MENU by selecting the corresponding tab on the left side of the display.
If you are in the playback mode, pressing the MENU button will bring you to the PLAYBACK MENU.
“SELECTED” MENU OPTIONS
Throughout the book, if I say to highlight a menu option or to cycle through the options, I mean that you should find the selection that I’m describing or move the selector through the options without making any actual selections or activating anything. Conversely, a selected option describes a function or feature that is already confirmed. Activated menu controls are indicated with a small dark bar (figure 1.2).
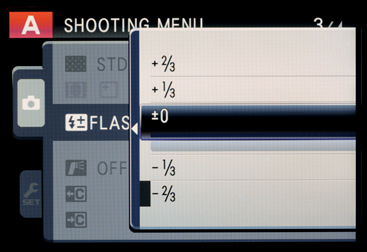
Figure 1.2 Selected or highlighted
In this figure you can see that the menu option ±0 is highlighted, but the option -2/3 is selected.
FIRMWARE
Firmware refers to the camera’s control software. Many manufacturers regularly release new firmware versions to improve their cameras or to remedy glitches. In the case of the X100, I highly recommend the newest firmware update (firmware 1.11, October 2011) because it offers some clear improvements and extends the X100’s range of functionality. It’s important that you fully charge your battery before installing the firmware update. Otherwise, you run the risk of your camera shutting off during the update process, which can lead to permanent damage. To obtain information about the currently installed firmware on your camera, turn the camera on while holding the DISP/BACK button. If you are in need of an update, download the file FPUPDATE.DAT from the following site:![]() www.fujifilm.com/support/digital_cameras/software/firmware/x/finepix_x100/index.html
www.fujifilm.com/support/digital_cameras/software/firmware/x/finepix_x100/index.html
Copy the downloaded file onto a formatted SD card and insert this card into your camera. Then turn on your camera while holding the DISP/BACK button as described above. Follow the instructions on the screen to complete the software update. Important! This book uses the firmware 1.11 as a basis, so you should install this update before moving on.
SD CARDS
You can use SD, SDHC, and SDXC memory cards with the X100. Although Fujifilm only guarantees that your camera will work with Fujifilm memory cards and those from SanDisk, you shouldn’t have any trouble using cards from other manufacturers. When you purchase your memory card, pay attention to the data transfer rate because the speed at which the X100 writes the images to the memory card is one of its weaknesses. With this in mind, memory cards such as SanDisk’s Extreme Pro UHS-I are optimal.
BATTERY
The camera uses an NP-95 rechargeable battery with a capacity of 1800 mAh. It takes about 210 minutes to charge when it is completely drained. The approximate number of pictures that you can take on one battery charge is 300, as reported by the manufacturer. In reality, though, this number depends significantly on how much you use the optical viewfinder, the digital viewfinder, and the LCD monitor when shooting. So the number of pictures you can capture on one charge differs from photographer to photographer and largely depends on your habits and preferences. If you predominantly rely on the optical viewfinder, you can quickly surpass the 300-image mark. Photographers who often find themselves on the go would do well to purchase a second battery.
FIGURES
Some figures in this book—such as those dealing with noise—can be viewed much better using a computer screen as compared to a printed version. You can therefore download a digital version of some of the figures at:![]() www.rockynook.com/X100/figures
www.rockynook.com/X100/figures
IMAGES
All images in this book were made with an X100.
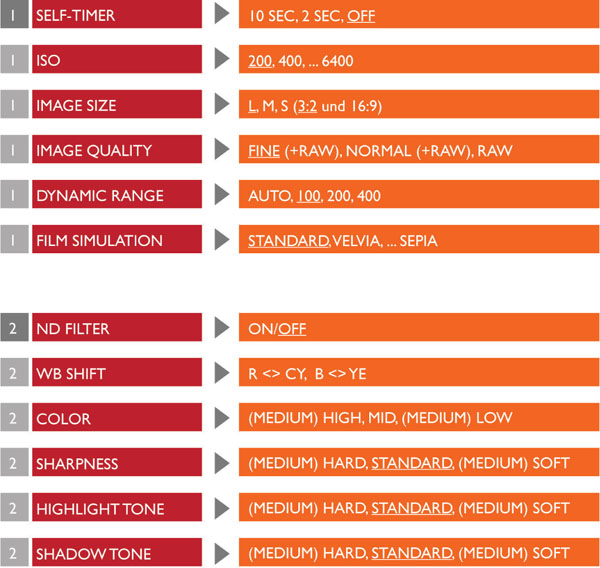
SHOOTING MENU
PLAYBACK MENU
SETUP MENU