Entities are types of records in Microsoft Dynamics CRM. Contacts, activities, cases, opportunities, campaigns, products, sales literature, and leads are all examples of entities in Microsoft Dynamics CRM. By creating your own custom entities, you can really extend the functionality of your database. Once the entities are created, you can create relationships between existing entities and your new custom entities. Almost everything covered in this chapter requires elevated security permissions in CRM.
Let’s say you run a computer training business. You hold classes on a regular basis. You want to be able to track student attendance for these classes in CRM, but there is no obvious way to do this out of the box. By creating a new custom entity for training classes, you can track information about each class, and you can then link individual contacts to the classes they attend.
Outlook 2003/2007/2010/Internet Explorer:
In the Navigation Pane, click Settings, Customization, and then Customize your solution.
Click the Entities option on the left.
On the Actions toolbar, click the New button.
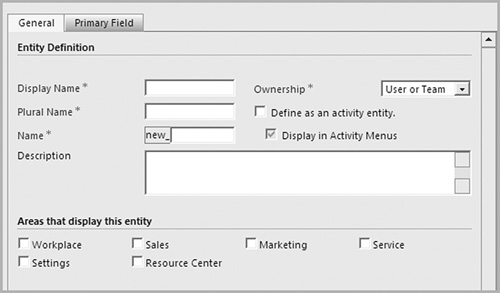
Give your entity a display name, plural name, ownership level, and table name.
Configure any other settings for the entity, like the areas (Workplace, Sales, Marketing, etc.) that will display the entity. If you want to append notes and activities to this entity, you may enable this capability at this point and this point only.
Click Save and Close.
After adding an entity to the system, your database remains unchanged. You need to publish the customizations, at which point all of your changes will appear in the live database.
Outlook 2003/2007/2010/Internet Explorer:
In the Navigation Pane, click Settings, Customization, and then Customize your solution.
Click the Entities option on the left.
Highlight the entity whose recent changes should be published to the live database.
On the toolbar, click the Publish button.
You can create new fields in either a custom entity or one of the default entities—like contacts or leads. If you wanted to add a Customer Type drop-down on the contact record, you’d add a new picklist field on the contact entity.
You can add a virtually unlimited number of fields for any entity. Need to track additional information for your opportunities? Add new fields to track that information. You can add the following types of fields:
Single Line of Text field can contain text, numbers, and symbols.
Option Set fields offer a drop-down menu of choices.
Two Options fields can have two possible choices, such as True/False or Yes/No. Two Options fields can also be configured in your form customization as check boxes or radio buttons.
Whole Number fields can only contain integers (numbers without a decimal point).
Floating Point Number fields contain numbers with a decimal point.
Decimal Number fields have a fixed number of digits after the decimal point.
Currency fields contain currency values.
Multiple Lines of Text fields are memo fields that can hold up to 100,000 characters.
Date and Time fields contain a date, time, or both.
Lookup fields point to another entity in the system and create a 1:N relationship.
Outlook 2003/2007/2010/Internet Explorer:
In the Navigation Pane, click Settings, Customization, and then Customize your solution.
Click the Entities option on the left.
Double-click the entity where you would like to create a new field.
On the left, click the Fields option.
From the Actions toolbar, click the New button.
Configure your new field.
Click Save and Close.
You can put field level security levels on fields within the database. You can then configure your system so that users can see certain fields based on a security level. Credit card and social security numbers are obvious examples of fields you would want to make security enabled.
Outlook 2003/2007/2010/Internet Explorer:
In the Navigation Pane, click Settings, Customization, and then Customize your solution.
Click the Entities option on the left.
Double-click the entity where you would like to create a new field.
On the left, click the Fields option.
Double-click a field.
In the Field Security area, choose the Enabled Option.
Now, go back to the Customize your Solution area and choose Field Security profiles.
Click the New button to create a role where you can define permissions for this field (and others).

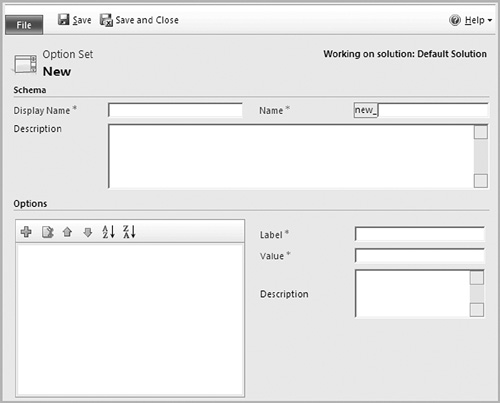
Option sets are drop-down fields. You might have a drop-down field that appears multiple times in the database, and when this happens, you can create a global option set so that changes made to one drop-down will show up in all of the fields that share that drop-down.
Outlook 2003/2007/2010/Internet Explorer:
In the Navigation Pane, click Settings, Customization, and then Customize your solution.
Click Option Sets on the left.
Click the new button on the Actions toolbar to create a new options set.
When you are adding a new field (see the previous lesson) you can now use this global options set to populate the values of your drop-down.
Click the Save and Close button.
After you have added a new field for an entity, you’ll want to make sure it displays as a field on the forms and views. When you double-click a contact, a screen appears that lets you enter information about the contact. That screen is called a form. In the Navigation Pane, when you click Sales and then Contacts, the resulting spreadsheet-like list of contacts is called a view.
The form is the screen that appears when you are editing information for an entity. Double-click a contact, and the form for that contact appears. If you add a new field for an entity, it doesn’t appear on the form until you add it manually.
Outlook 2003/2007/2010/Internet Explorer:
In the Navigation Pane, click Settings, Customization, and then Customize your solution.
Click the Entities option on the left.
Double-click the entity where you would like to add a field to the form.
On the left, click the Forms option.
Double-click the form you’d like to edit. For example, if you are adding fields to the contact entity, you could double-click the form called Form, which is the default application form.
Click the Add Fields button.
Check each of the fields you’d like to add to the form.
New fields appear at the bottom of the form. Highlight a field and click the arrow buttons to move the field to a new spot on the form.
Click Save and Close.
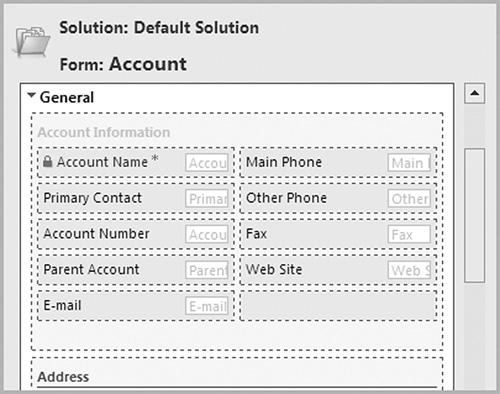
The sub-grid shows a list of records associated with the record you are viewing. So within a contact record, you might show a list of opportunities or activities. Displaying them in a sub-grid puts them on the main page and prevents the user from having to click on Activities or Opportunities on the left Navigation Pane.
Outlook 2003/2007/2010/Internet Explorer:
In the Navigation Pane, click Settings, Customization, and then Customize your solution.
Click the Entities option on the left.
Double-click the entity where you would like to add a sub-grid to the form.
On the left, click the Forms option.
Double-click the form you’d like to edit. For example, if you are adding fields to the contact entity, you could double-click the form called Form, which is the default application form.
On the Insert tab, in the Control group of the ribbon, click the Sub-Grid button.
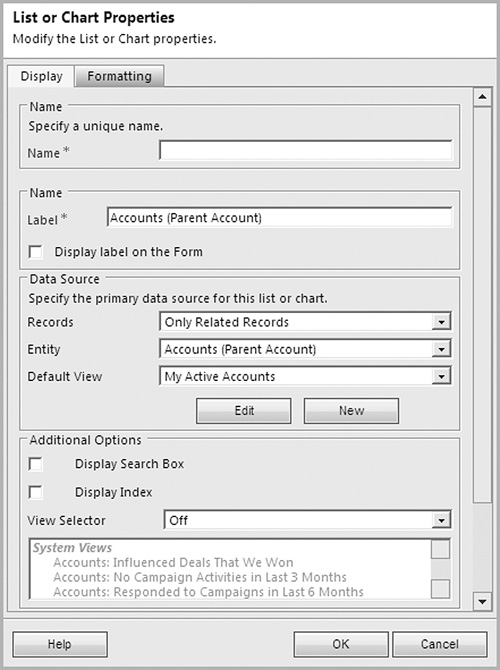
Give your sub-grid a name, configure your options, and select the type of record that should be shown.
Click the Save & Close button.
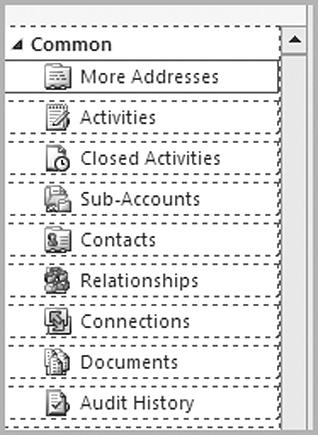
The left Navigation Pane shows related activities, opportunities, quotes, orders, invoices, etc. You may have some items on your Navigation Pane that aren’t in use. For example, if you are not using the system for invoices, you might want to remove invoices from the Navigation Pane.
Outlook 2010/Internet Explorer:
In the Navigation Pane, click Settings, Customization, and then Customize your solution.
Click the Entities option on the left.
Double-click the entity where you would like to customize the left navigation pane.
On the left, click the Forms option.
Double-click the form you’d like to edit. For example, if you are adding fields to the contact entity, you could double-click the form called Form, which is the default application form.
Double-click on the left Navigation Pane area.
Highlight an item (like Invoices) and then click the Remove button in the Edit group of the ribbon.
Click the Save & Close button.
In a previous chapter you learned how to create a personal view. In this section you’ll learn how to create a system view. A system view is like a personal view, only it is available to all users once it is created.
Outlook 2003/2007/2010/Internet Explorer:
In the Navigation Pane, click Settings, Customization, and then Customize your solution.
Click the Entities option on the left.
Double-click the entity where you would like to create a system view.
On the left, click the Views option.
Click the New button on the Actions toolbar.
Give your view a name and click OK.
Click Edit Filter Criteria to define a query that will determine which records are shown in the view. Click Add Columns to add additional fields for display in the view.
Click the Save & Close button.

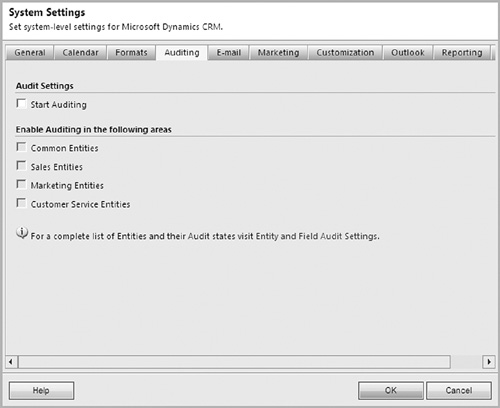
Auditing keeps track of changes made to fields within your CRM database. By default, it’s turned off. You can choose to audit an entire entity or a specific field within an entity.
Outlook 2003/2007/2010/Internet Explorer:
In the Navigation Pane, click Settings, System, and then Auditing.
Click the Global Audit Settings option to turn on auditing.
Click Entity and Field Audit Settings to enable audit tracking on entities or fields.
Click Audit Log Management to manage the amount of space taken up by your audit logs.
