You can have a million records in your database, but it won’t do you any good if you can’t find them. Using the Quick Find and Advanced Find features in Microsoft Dynamics CRM, you can easily find a single record, and you can create a sub-set of your database for inclusion in a marketing list, campaign, quick campaign, export, or more.
When you are looking at a list of records—like a list of contacts or accounts—you can easily search for specific records within the list using the search field. The search field appears at the top of every record list.
Outlook 2003/2007/2010/Internet Explorer:
In the Navigation Pane, click the type of record you’d like to find. For example, you could click Sales and then Contacts to bring up a list of contacts.
Once the list of records appears, you should see a search field at the top of the list. You may see the text “Search for records” in the field.
In this field, type a search term. For example, if you are looking for the Betty Smith contact record, you could type Smith into the field. (Use an * asterisk as a wild card in your searches.)
Click the magnifying glass icon to the right of the field to execute the search.
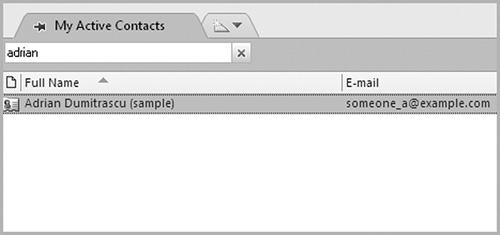
When you run a default Quick Find in CRM, only a few major fields are searched. If you want your Quick Find searches to yield more accurate results, then you can change the fields that are searched whenever you perform a Quick Find. If you have a customer number in CRM, and that customer number is a custom field that isn’t searched with the Quick Find, adding it to the list of fields that is searched may make it easier to find records.
Outlook 2010/Internet Explorer:
In the Navigation Pane, click on a record type.
A record list should appear.
On the Customize tab of the ribbon in the Customize group, click the System Views button.
Double-click the Quick Find View.
On the right, click the Add Find Columns button.
Check any fields that you want to search and click OK.
Click the Save & Close button.
Outlook 2003/2007:
In the Navigation Pane, click on a record type.
A record list should appear.
On the Customize menu, click the System Views button.
Double-click the Quick Find View.
On the right, click the Add Find Columns button.
Check any fields that you want to search and click OK.
Click the Save & Close button.
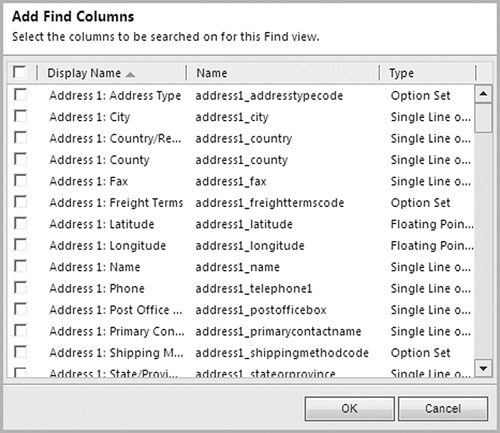
Filters in CRM are just like filtered columns in Excel. When you turn on filters for a list view, you can reduce the number of records that appear. For example, you might want to filter a list to only show records in the United States. Each column in a view can be filtered to show certain records based on your custom filter.
Outlook 2010/Internet Explorer:
In the Navigation Pane, click on a record type.
A record list should appear.
Click the Filter drop-down above the record list, then highlight Add Filter.
Select a column.
Configure your custom filter and click OK.
Outlook 2003/2007:
On the View menu, click the Filter button.
On the column header, click the Filter drop-down, then the Custom Filter button.
Configure your custom filter and click OK.
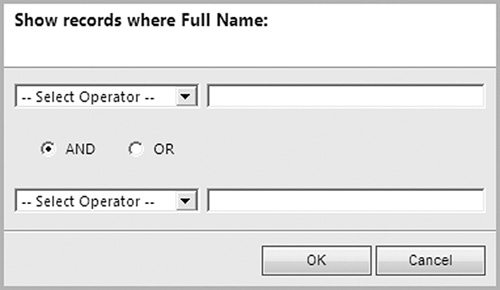
When viewing your CRM data within Outlook 2007/2010, views of records are shown as tabs at the top of the record list. If you use a particular view frequently, you can pin the view, and it will appear at the top of the list until you remove the pin. This feature is not available for Internet Explorer or Outlook 2003 users.
Outlook 2007/2010:
Go to a list of CRM records in Outlook. For example, you might go to your list of leads.
At the top of the list of records, click the tab that is furthest to the right. This will bring up a list of views.
Select a view, and that view will display as a tab.
Click the pushpin icon to the left of the view name to pin the view.

When you are looking at your Inbox in Outlook, you might group your incoming e-mails by date, sender, or priority. The same grouping feature available in your Inbox is also available on most CRM record lists in Outlook 2007 and Outlook 2010. Just group by a field, and all data shown in your view will be grouped by the values in the field.
Outlook 2007/2010:
In the Navigation Pane, click on a record type. For example, you might click on Opportunities.
At the top of your list view, right-click on the column that you’d like to group.
Choose the Group by this field option.
Your records will now be grouped by that field.
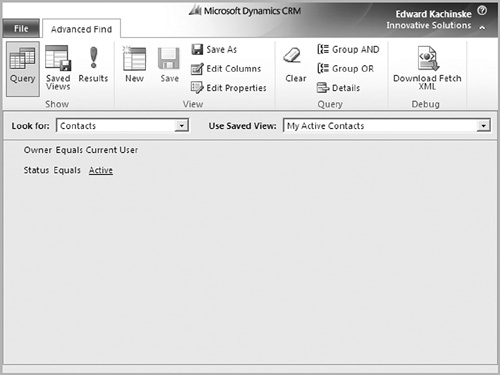
The Advanced Find feature lets you use Boolean operators to find a very specific set of data. If you run an Advanced Find often, you can save it as a view. All of the instructions in this section apply to all entities, including contacts, accounts, leads, opportunities, and more.
On the ribbon in Microsoft Dynamics CRM (or on the toolbar, if you are using Outlook 2003/2007), you’ll see an Advanced Find button. When performing an Advanced Find, you can search any entity, and you can search multiple fields at once.
Outlook 2010/Internet Explorer:
In the Data group of the ribbon, click the Advanced Find button.
In the Look for drop-down, select the entity type you’d like to find. (Contacts, leads, activities, etc.)
Hover your mouse over the underlined Select word in the details area. A field drop-down will appear. Select a field from the drop-down.
To the right of the field you selected, an operator will appear. Choose your operator.
Click the Enter Value link and type the field value you’d like to find.
Repeat this process as many times as necessary. (Each value entered connects with an implied “and,” but you can change the operator between lines to “or” before running the Advanced Find.)
Outlook 2003/2007:
On the toolbar, click the Advanced Find button.
In the Look for drop-down, select the entity type you’d like to find. (Contacts, leads, activities, etc.)
Hover your mouse over the underlined Select word in the details area. A field drop-down will appear. Select a field from the drop-down.
To the right of the field you selected, an operator will appear. Choose your operator.
Click the Enter Value link and type the field value you’d like to find.
Repeat this process as many times as necessary. (Each value entered connects with an implied “and,” but you can change the operator between lines to “or” before running the Advanced Find.)
Anytime you run an Advanced Find, the results of the Advanced Find can be easily exported to an Excel spreadsheet. Let’s say one of your outsourced marketing vendors needs a list of your active accounts in Texas for a mailer. Run an Advanced Find on the contact entity that searches for State = TX, and you’re only one click away from the exported data.
Outlook 2010/Internet Explorer:
In the Data group of the ribbon, click the Advanced Find button.
Configure your Advanced Find query. For help with this, see Task A in this section.
In the Show group of the ribbon, click the Results button.
The results of the query will appear in the Advanced Find screen.
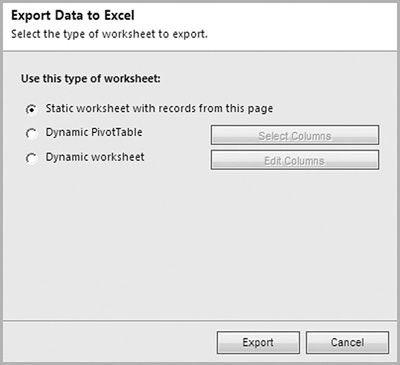
In the Date group of the ribbon, click the Export Leads button.
Select the type of worksheet to export.
Click Export.
Outlook 2003/2007:
On the toolbar, click the Advanced Find button.
Configure your Advanced Find query. For help with this, see Task A in this section.
In the Show group of the ribbon, click the Results button.
The results of the query will appear in the Advanced Find screen.
In the Date group of the ribbon, click the Export Leads button.
Select the type of worksheet to export.
Click Export.
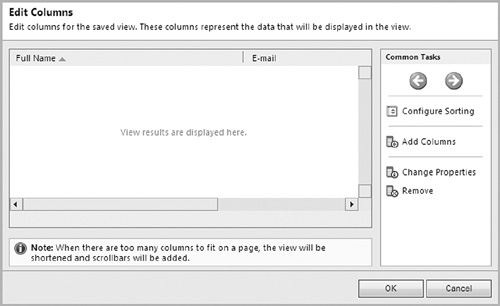
The Advanced Find view determines the default set of columns (fields) that appear when you view Advanced Find search results. With a few quick clicks, though, you can add or remove fields from your Advanced Find results. If you spend a lot of time configuring columns, you can save the Advanced Find as a personal view.
Outlook 2010/Internet Explorer:
Go to a list of CRM records. For example, you could go to the Accounts view.
In the Data group of the ribbon, click the Advanced Find button.
Configure your Advanced Find.
In the View group of the Ribbon, click the Edit Columns button.
Click the Add Columns button to add columns to the search results.
Outlook 2003/2007:
On the toolbar, click the Advanced Find button.
Configure your Advanced Find.
In the View group of the Ribbon, click the Edit Columns button.
Click the Add Columns button to add columns to your search results.
The Advanced Find feature lets you use Boolean operators to find a very specific set of data. If you run an Advanced Find often, you can save it as a view. All of the instructions in this section apply to all entities, including contacts, accounts, leads, opportunities, and more.
If you find yourself searching for the same set of records consistently, you will save a lot of time by saving the Advanced Find. You can save the Advanced Find query that defines which records will show in the view, and you can specify the columns of data that will appear in the view.
Outlook 2010/Internet Explorer:
In the Data group of the ribbon, click the Advanced Find button.
In the Look for drop-down, select the entity type you’d like to find. (Contacts, leads, activities, etc.)
Configure your query. Instructions for completing a query can be found on the previous page.
Click the Edit Columns button to specify the columns of data that will appear in the view.
In the View group of the ribbon, click the Save button.
Give your new view a name.
Outlook 2003/2007:
On the toolbar, click the Advanced Find button.
In the Look for drop-down, select the entity type you’d like to find. (Contacts, leads, activities, etc.)
Configure your query. Instructions for completing a query can be found on the previous page.
Click the Edit Columns button to specify the columns of data that will appear in the view.
In the View group of the ribbon, click the Save button.
Give your new view a name.

Whenever you click an entity in the Navigation Pane, CRM will automatically open the default view. If you would like a different view to open whenever you click an entity, then you can change your default personal view. In Outlook 2007 and 2010, you can pin a view to make it automatically appear. (Pinning is covered earlier in this chapter.) Outlook 2003 users cannot set a default personal view.
Internet Explorer:
In the Navigation Pane, click on a record type.
A record list should appear.
From the View drop-down, change your view.
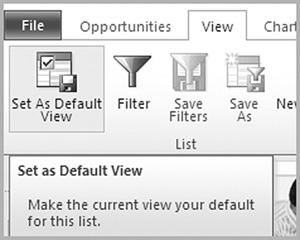
On the View tab in the List group of the ribbon, click the Set as Default View button.
Duplicates are an undesired part of any database. Within your list of contacts and accounts, duplicates can be especially menacing. If a customer exists in your database twice, it might mean that two different people from your organization are dealing with the customer. It might also mean that the customer is contacted twice each time you send out mass correspondence.
You can create a duplicate detection job that will find similar lead, account, and contact records. Once you’ve identified the duplicates, you’re only a couple of clicks away from merging them. Without running a duplicate detection job, you can highlight any duplicate customers in a list view. You’ll see a Merge button on the ribbon in Outlook 2010/Internet Explorer and on the Actions menu in Outlook 2003/2007 that will let you manually merge the duplicates that you’ve identified in the view.
Outlook 2010/Internet Explorer:
Go to a list of records. For example, you could go to a list of contacts.
In the Records group of the ribbon, click the Detect Duplicates button. You will have the option to detect duplicates for either the selected records or all records on all pages.
Give your duplicate detection job a name, start time, and frequency.
Check the option to send an e-mail when the job is completed.
Click OK.
Outlook 2003/2007:
Go to a list of records. For example, you could go to a list of contacts.
On the Record menu, highlight Detect Duplicates. You will have the option to detect duplicates for either the selected records or all records on all pages.
Give your duplicate detection job a name, start time, and frequency.
Check the option to send an e-mail when the job is completed.
Click OK.
Once the duplicate detection job has completed, the results are viewable in the My Work section of the Workplace. For small databases, it usually only takes a few minutes to complete a duplicate detection job.
Outlook 2003/2007/2010/Internet Explorer:
On the Navigation Pane, click Workplace.
In the My Work section, click Duplicate Detection.
All of your duplicate detection jobs will appear.
Double-click the duplicate detection job you’d like to view.
On the left, click the View Duplicates option.
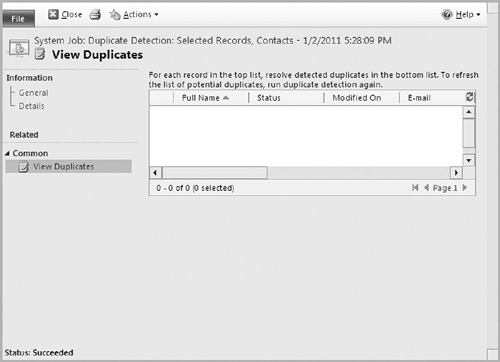
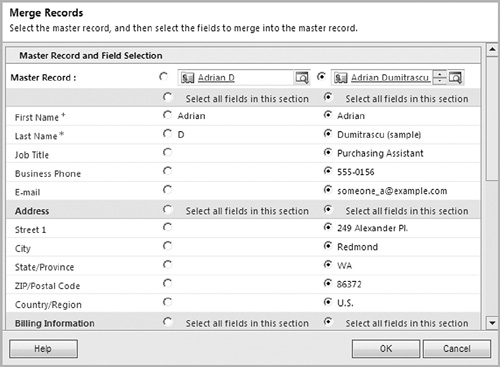
Once duplicates have been identified, you can merge them automatically. You can also merge them with a preview. Merging with a preview gives you the ability to keep specific fields from either the master or subordinate record. Once the records are merged, the subordinate record is deactivated.
Outlook 2010/Internet Explorer:
Go to an account, contact, or lead list.
Click the first duplicate record, hold the Ctrl key, and click another duplicate. This highlights the two duplicate records.
In the Records group of the ribbon, click the Merge button.
Outlook 2003/2007:
Go to an account, contact, or lead list.
Click the first duplicate record, hold the Ctrl key, and click another duplicate. This highlights the two duplicate records.
On the Record menu, click the Merge button.
