Just as you can limit the data displayed by your worksheets, you can limit the data entered into them as well. Setting validation rules for data entered into cells lets you catch many of the most common data-entry errors, such as entering values that are too small or too large or attempting to enter a word in a cell that requires a number. When you create a validation rule, you can also create a message to inform you and your colleagues what sort of data is expected for the cell.
Validate for Specific Requirements
Select the cells you want to validate.
On the Data tab, click the Data Validation button’s down arrow.
Click Data Validation.
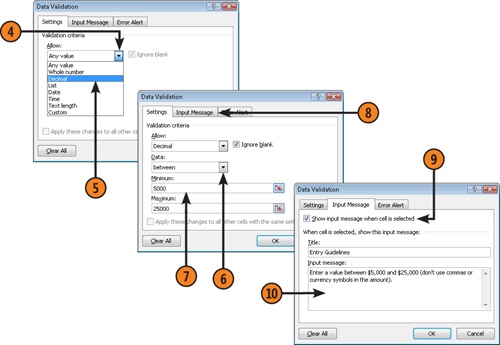
Click the Allow down arrow.
Click the type of data you want to allow.
Click the Data down arrow and click the condition for which you want to validate.
Type the appropriate values in the boxes.
Click the Input Message tab.
Select the Show Input Message When Cell Is Selected check box.
Type the message you want to appear when the cell is clicked.
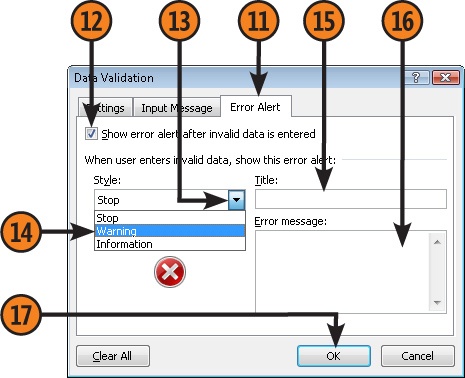
Click the Error Alert tab.
Select the Show Error Alert After Invalid Data is Entered check box.
Click the Style down arrow.
Click the icon you want to appear next to your message.
Type a title for the error message box.
Type the error message you want.
Click OK.
Tip
If you want to highlight all of the cells in your worksheet that have validation criteria, click the Home tab on the ribbon, click Find & Select, and then click Data Validation.
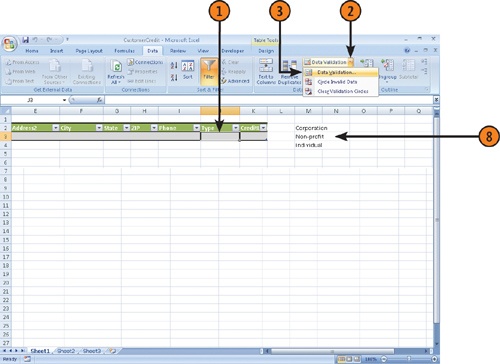
Validate Data According to a List in a Worksheet Range
Select the cells that you want to validate.
On the Data tab, click the Data Validation button’s down arrow.
Click Data Validation.
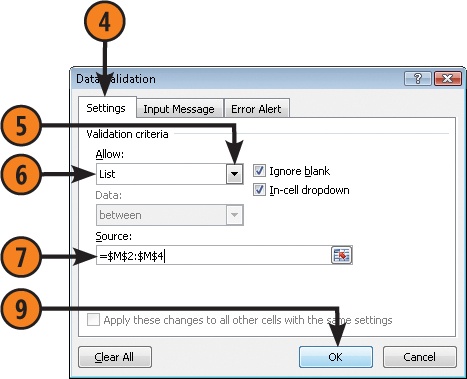
Click the Settings tab.
Click the Allow down arrow.
Click List.
Click the Source box.
Select the cells that contain the values you want in your list.
Click OK.
Tip
In the Settings tab of the Data Validation dialog box, you can clear the In-Cell drop-down button so that a drop-down arrow does not appear next to the cell with the available options.
Tip
To validate the entire workbook, hold down the Ctrl key and press the A key to select the entire workbook. Then apply the data validation criteria.
Tip
If you don’t want to display the list items in your workbook, you can type them out in the dialog box. Be sure to separate the items with commas (,).

 On the Data tab, click the Data Validation button’s down arrow.
 Click the Data down arrow and click the condition for which you want to validate.
 Select the Show Input Message When Cell Is Selected check box.
 Type the message you want to appear when the cell is clicked.
 Select the Show Error Alert After Invalid Data is Entered check box.
 Select the cells that contain the values you want in your list.